


Swagger2
入门案例
        <!-- swagger -->
        <dependency>
            <groupId>io.springfox</groupId>
            <artifactId>springfox-swagger2</artifactId>
            <version>2.9.2</version>
        </dependency>
        <dependency>
            <groupId>io.springfox</groupId>
            <artifactId>springfox-swagger-ui</artifactId>
            <version>2.9.2</version>
        </dependency>
config
import org.springframework.context.annotation.Configuration;
import springfox.documentation.swagger2.annotations.EnableSwagger2;

@Configuration
@EnableSwagger2//开启swagger
public class SwaggerConfig {

}
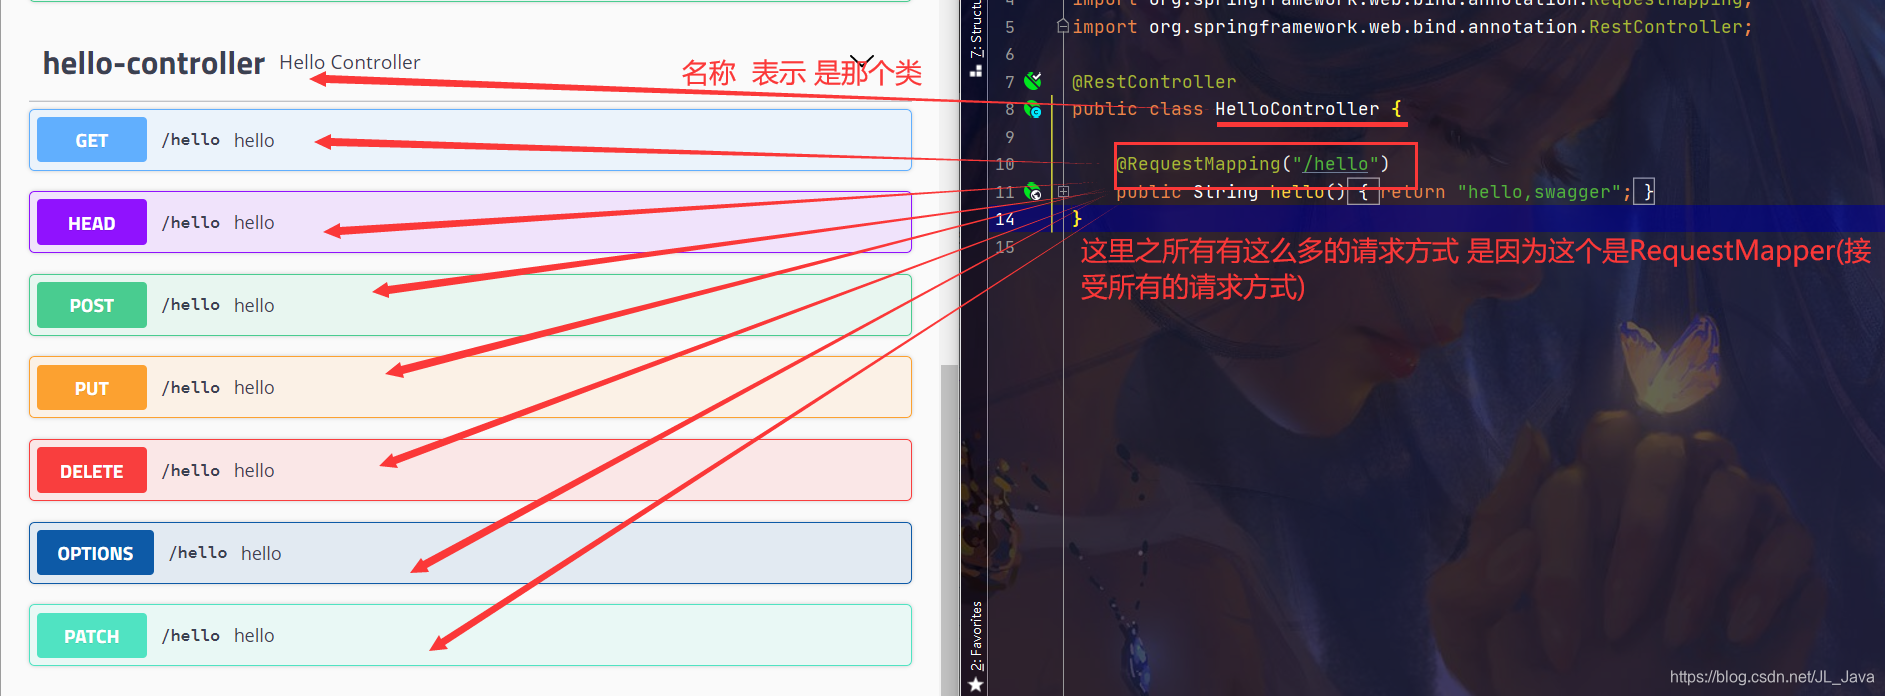
controller
@RestController
public class HelloController {

    @RequestMapping("/hello")
    public String hello(){
        return "hello,swagger";
    }
}
访问:http://localhost:8080/swagger-ui.html
添加配置
import org.springframework.context.annotation.Bean;
import org.springframework.context.annotation.Configuration;
import springfox.documentation.service.ApiInfo;
import springfox.documentation.service.Contact;
import springfox.documentation.spi.DocumentationType;
import springfox.documentation.spring.web.plugins.Docket;
import springfox.documentation.swagger2.annotations.EnableSwagger2;

import java.util.ArrayList;


@Configuration
@EnableSwagger2//开启swagger
public class SwaggerConfig {

    @Bean//配置swagger的Docket bean实例
    public Docket docket(){
        return new Docket(DocumentationType.SWAGGER_2)
                .apiInfo(apiInfo());
    }

    //配置swagger信息  apiInfo
    private ApiInfo apiInfo(){
        //作者信息
        Contact DEFAULT_CONTACT = new Contact("JL", "https://www.baidu.com/", "111111@qq.com");
        return new ApiInfo(
                " JL Swagger",//标题
                "冲冲冲",//描述
                "L1.0",//版本号
                "https://www.baidu.com/",
                DEFAULT_CONTACT,
                "Apache 2.0",
                "http://www.apache.org/licenses/LICENSE-2.0",
                new ArrayList());
    }

}

解释swagger页面
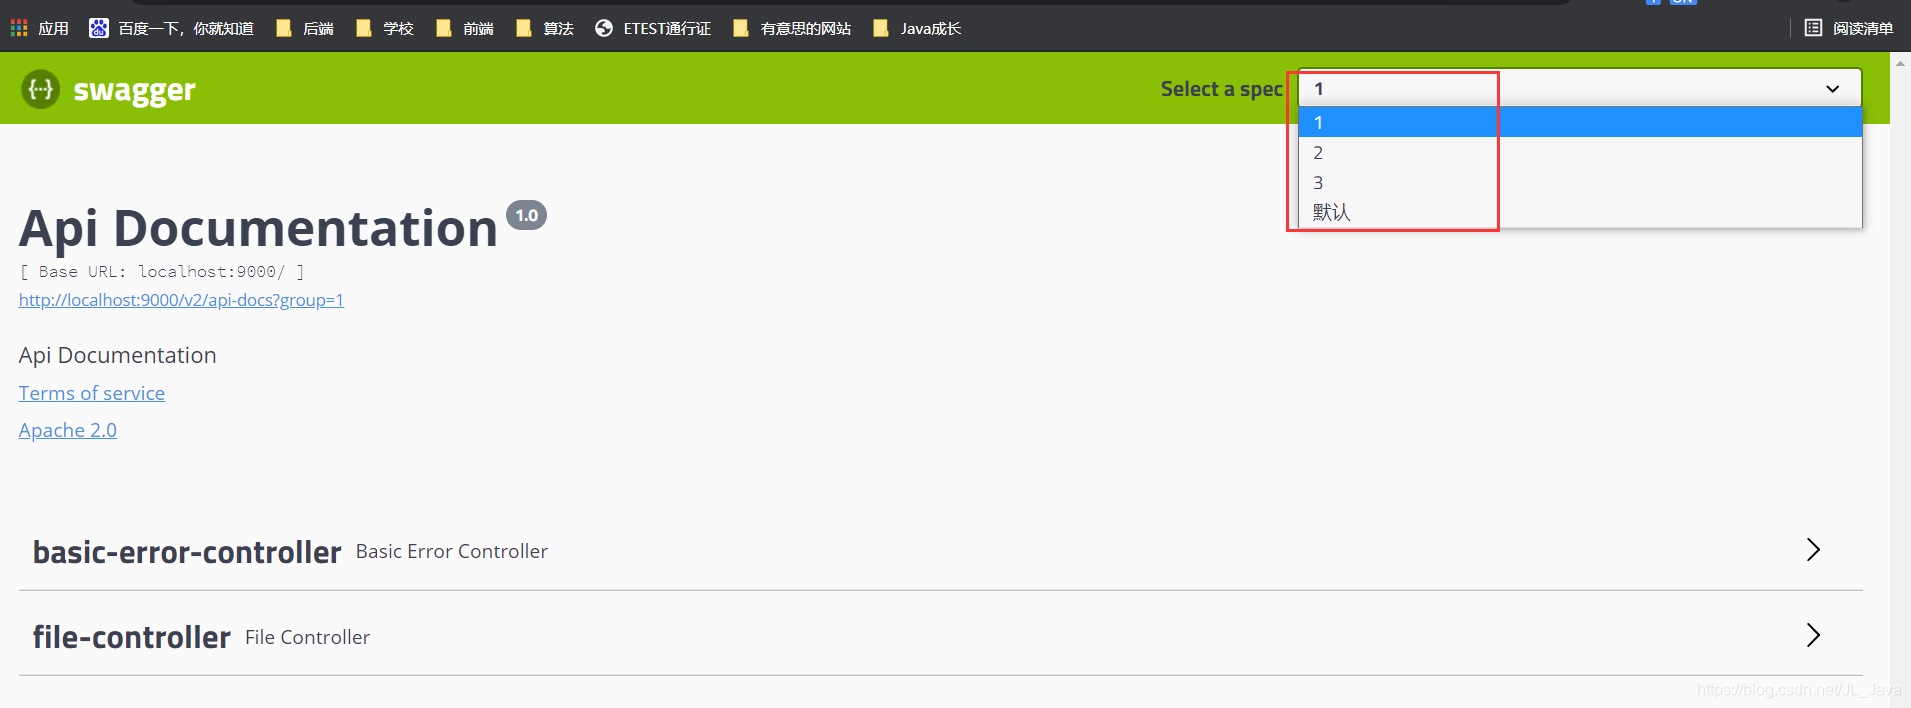
配置多个分组
这里可以看出groupName是给分组名称的

如何添加多个分组?
配置多个docket对象
@Configuration
@EnableSwagger2//开启swagger
public class SwaggerConfig {

    @Bean//配置swagger的Docket bean实例
    public Docket docket(){
        return new Docket(DocumentationType.SWAGGER_2)
                .apiInfo(apiInfo())
                .groupName("默认")
                //enable表示 是否启动swagger false:swagger不能在浏览器访问
//                .enable(false)
                .select()
                /*RequestHandlerSelectors:配置要扫描接口方式
                  basePackage:扫描指定包下面的接口
                   any:扫描全部
                   none:不扫描
                   withClassAnnotation:扫描类上的注解
                   withMethodAnnotation:扫描方法上的注解
                   */
                .apis(RequestHandlerSelectors.basePackage("com.jiang.controller"))
                //过滤
//                .paths(PathSelectors.ant("/com/jiang/**"))
                .build();
    }

    @Bean
    public Docket docket1(){
        return new Docket(DocumentationType.SWAGGER_2).groupName("1");
    }

    @Bean
    public Docket docket2(){
        return new Docket(DocumentationType.SWAGGER_2).groupName("2");
    }

    @Bean
    public Docket docket3(){
        return new Docket(DocumentationType.SWAGGER_2).groupName("3");
    }

    //配置swagger信息  apiInfo
    private ApiInfo apiInfo(){
        //作者信息
        Contact DEFAULT_CONTACT = new Contact("JL", "https://www.baidu.com/", "111111@qq.com");
        return new ApiInfo(
                " JL Swagger",//标题
                "冲冲冲",//描述
                "L1.0",//版本号
                "https://www.baidu.com/",
                DEFAULT_CONTACT,
                "Apache 2.0",
                "http://www.apache.org/licenses/LICENSE-2.0",
                new ArrayList());
    }

}
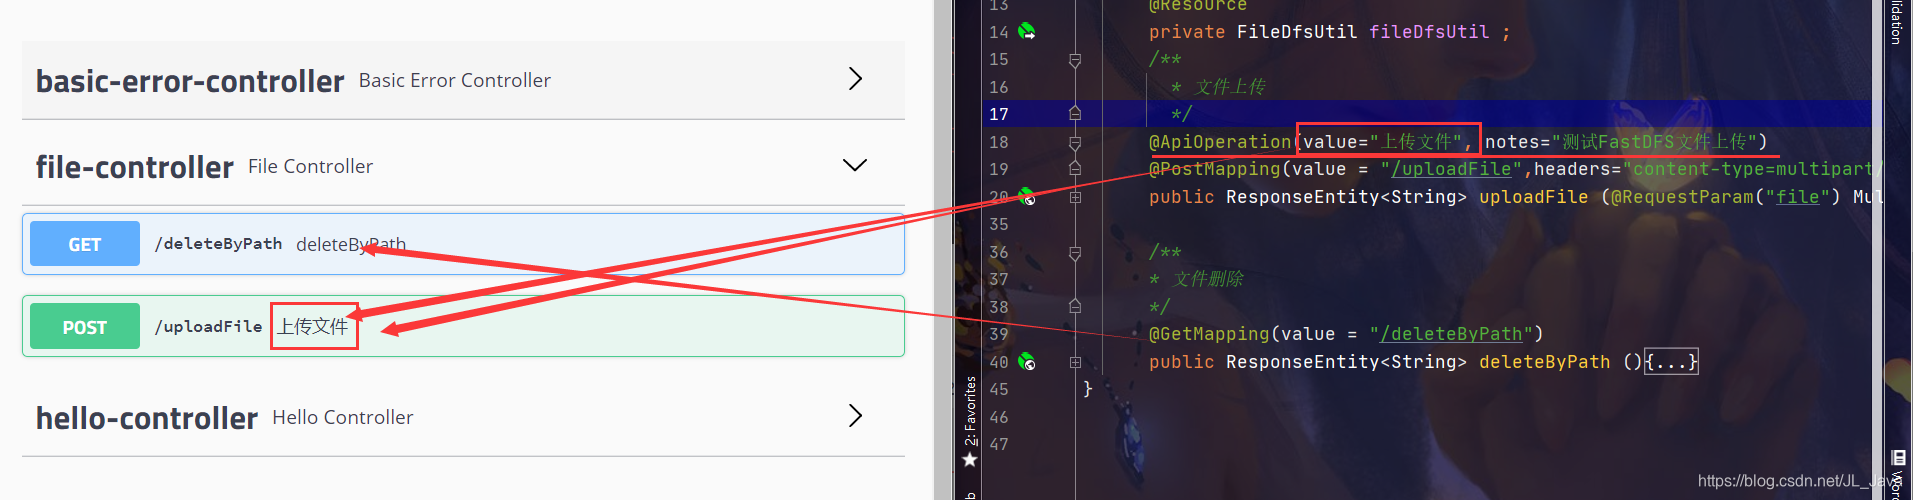
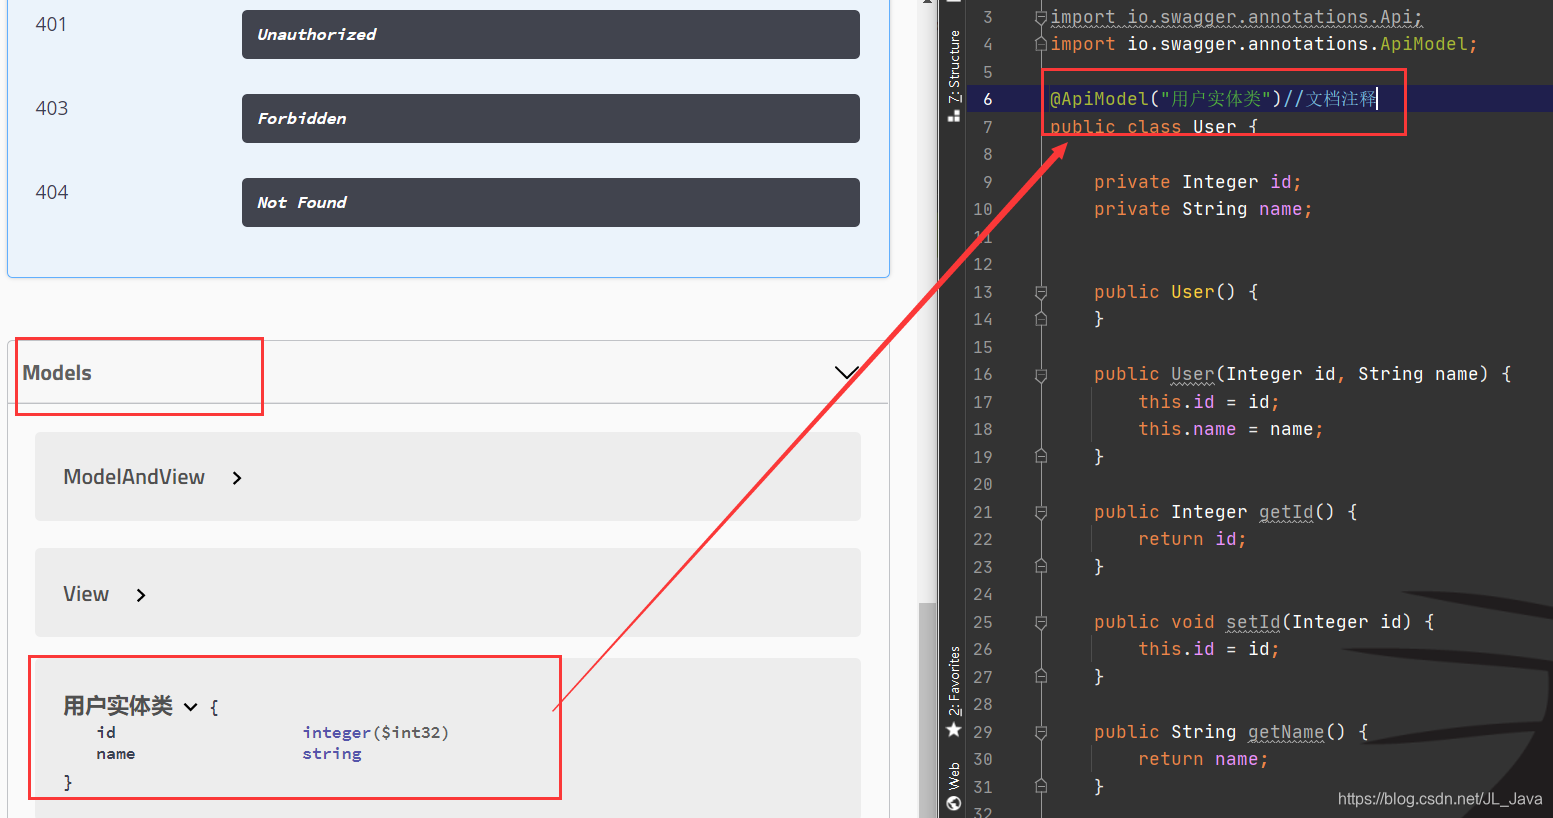
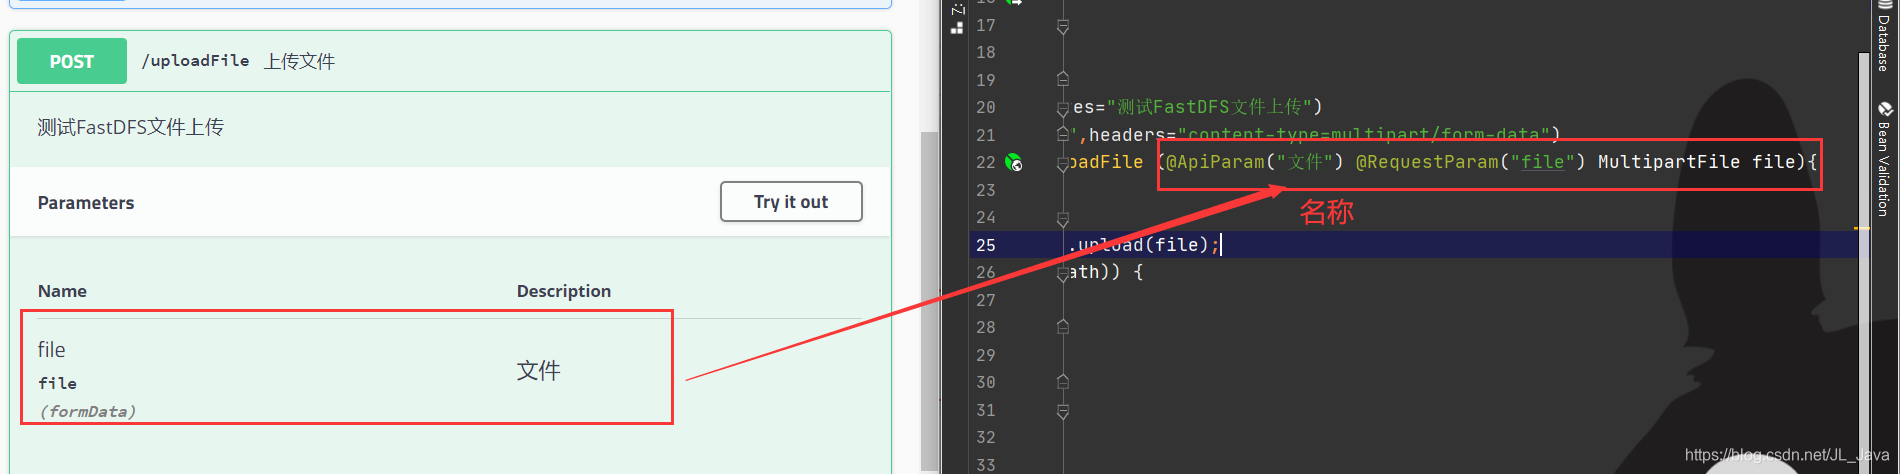
注释
@ApiModel(“用户实体类”)//文档注释
@ApiOperation(value=“上传文件”, notes=“测试FastDFS文件上传”)
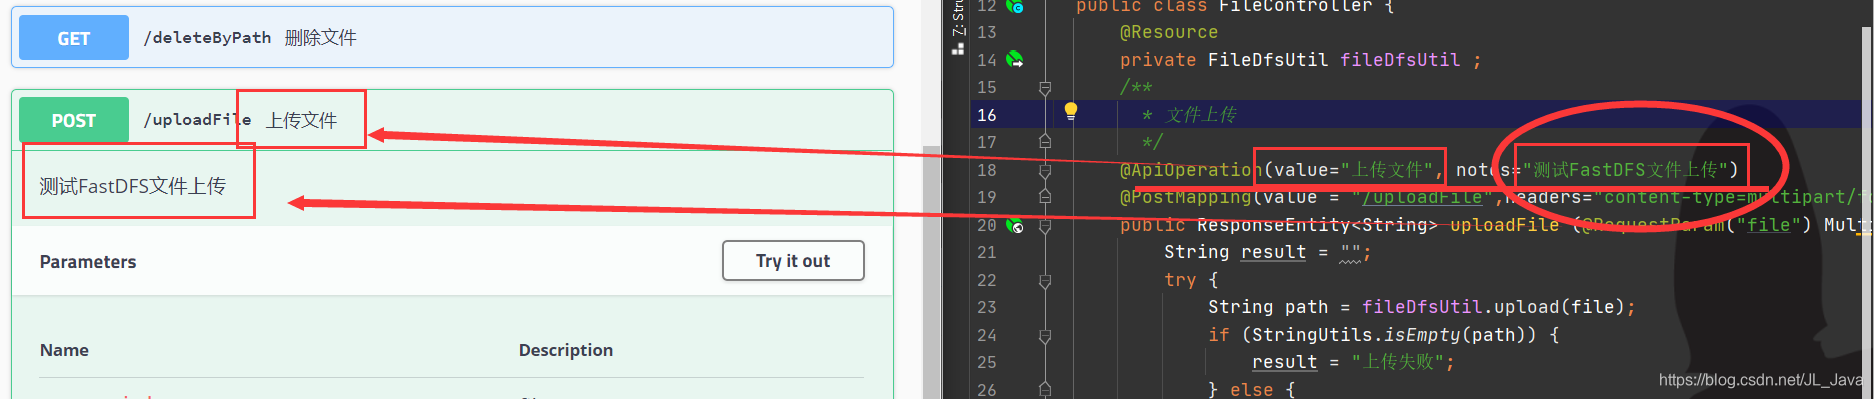
@ApiParam(“文件”)


 1144
1144

 被折叠的 条评论
为什么被折叠?
被折叠的 条评论
为什么被折叠?
 到【灌水乐园】发言


