


- 拉取镜像
docker pull registry.cn-hangzhou.aliyuncs.com/helowin/oracle_11g
- 创建容器
docker run -d -p 1521:1521 --name oracle11g registry.cn-hangzhou.aliyuncs.com/helowin/oracle_11g
- 启动容器
docker start oracle11g
进入镜像配置
docker exec -it oracle11g bash
切换到root用户下
su root;
密码:helowin
- 编辑profile文件配置ORACLE环境变量
在docker中查找并编辑profile文件 vi /etc/profile
vi /etc/profile
在最后加上
export ORACLE_HOME=/home/oracle/app/oracle/product/11.2.0/dbhome_2
export ORACLE_SID=helowin
export PATH=$ORACLE_HOME/bin:$PATH
- oracle的配置
切换到oracle 用户
su - oracle
注:中间的 - 必须要,否则软连接无效
创建软连接:
ln -s $ORACLE_HOME/bin/sqlplus /usr/bin
- oracle数据库的操作
登录sqlplus并修改sys、system用户密码
sqlplus /nolog
conn /as sysdba
接着执行下面命令:
alter user system identified by system;
alter user sys identified by sys;

或者:
创建用户  create user test identified by test;
给用户赋予权限  grant connect,resource,dba to test;
解锁demo用户(安装时若使用默认情况没有解锁和设置密码进行下列操作,要超级管理员操作)
alter user demo account unlock;

解锁demo用户的密码【也可用来重置密码】
alter user demoidentified by demo;
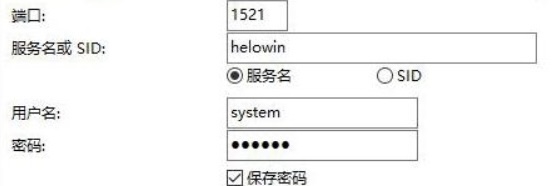
- 重启容器,使用Navicat连接
docker restart oracle11g
用户名:system
密码:system
建表及测试数据示例:
--创建表空间
create tablespace joy
datafile 'c:\table_test.dbf'
size 100m
autoextend on
next 10m;

--创建用户
create user demo
identified by demo
default tablespace joy;

--给demo赋予DBA权限
grant dba to demo

--创建业主表
CREATE TABLE T_OWNERS(
ID NUMBER PRIMARY KEY,
NAME VARCHAR2(30),
ADDRESSID NUMBER,
HOUSENUMBER VARCHAR2(30),
WATERMETER VARCHAR2(30),
ADDDATE DATE,
OWNERTYPEID NUMBER
)

--插入语句
insert into T_OWNERTYPE (ID,NAME) VALUES (1,'居民');

insert into T_OWNERS VALUES (1,'张三丰',1,'1-1','123456',sysdate,1 );
commit;

--修改语句
update T_OWNERS set adddate=adddate-3 where id=1;
commit;

--删除语句
delete from T_OWNERS where id=1;
commit;

--删除语句
truncate table T_OWNERTYPE


 943
943


 被折叠的 条评论
为什么被折叠?
被折叠的 条评论
为什么被折叠?
 到【灌水乐园】发言


