


一、建立一个总工程
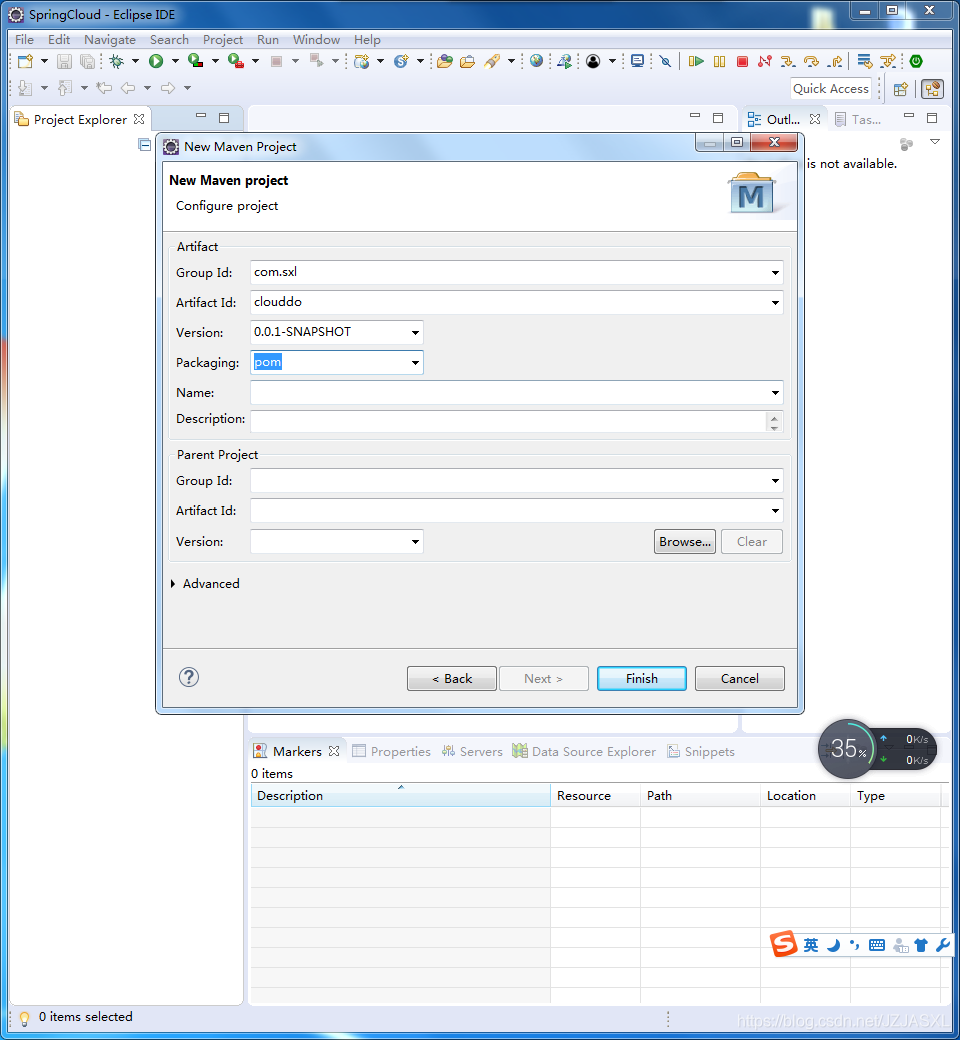
首先建立一个名为clouddo的总工程
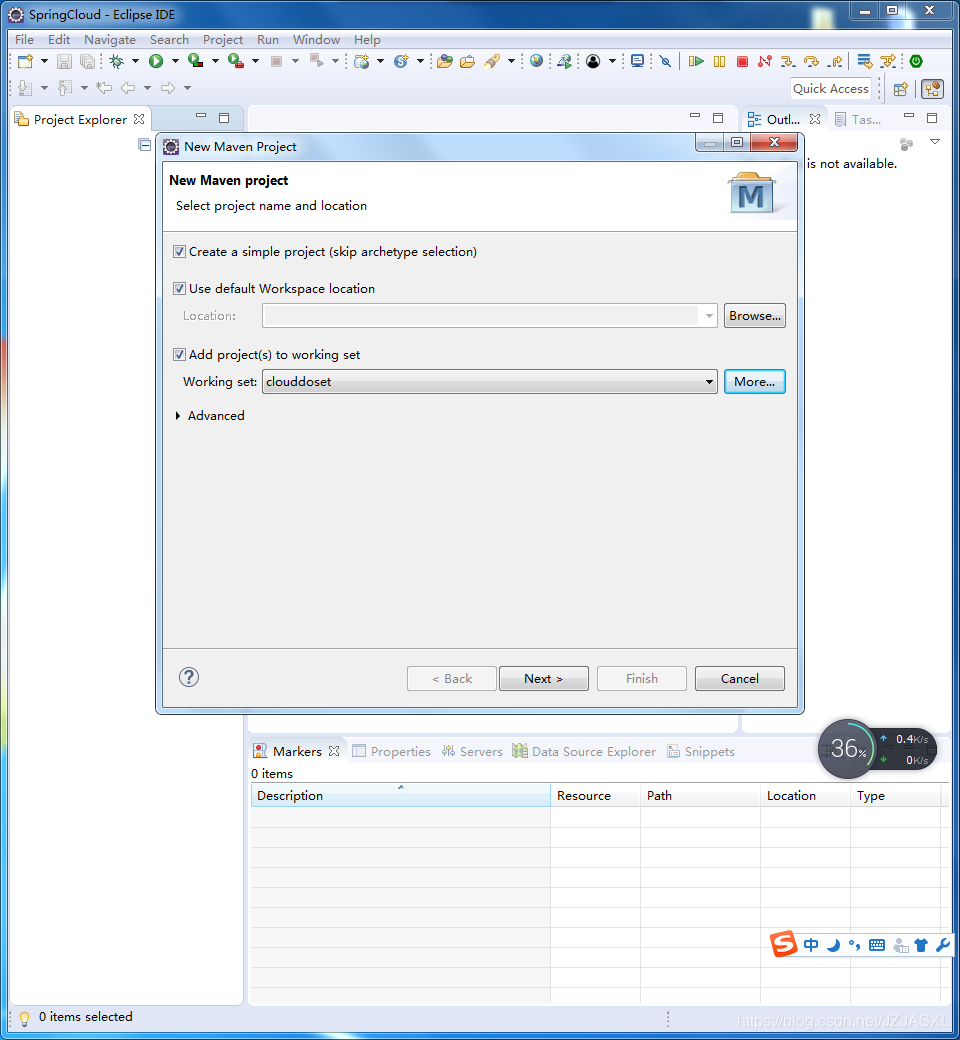
父工程的pom文件如下:
<project xmlns="http://maven.apache.org/POM/4.0.0" xmlns:xsi="http://www.w3.org/2001/XMLSchema-instance" xsi:schemaLocation="http://maven.apache.org/POM/4.0.0 http://maven.apache.org/xsd/maven-4.0.0.xsd">
  <modelVersion>4.0.0</modelVersion>
  <groupId>com.sxl</groupId>
  <artifactId>clouddo</artifactId>
  <version>0.0.1-SNAPSHOT</version>//版本号
  <packaging>pom</packaging>
  <properties>
		<project.build.sourceEncoding>UTF-8</project.build.sourceEncoding>
		<maven.compiler.source>1.8</maven.compiler.source>
		<maven.compiler.target>1.8</maven.compiler.target>
		<junit.version>4.12</junit.version>
		<log4j.version>1.2.17</log4j.version>
		<lombok.version>1.16.18</lombok.version>
	</properties>

	<dependencyManagement>
		<dependencies>
			<dependency>
				<groupId>org.springframework.cloud</groupId>
				<artifactId>spring-cloud-dependencies</artifactId>
				<version>Dalston.SR1</version>
				<type>pom</type>
				<scope>import</scope>
			</dependency>
			<dependency>
				<groupId>org.springframework.boot</groupId>
				<artifactId>spring-boot-dependencies</artifactId>
				<version>1.5.9.RELEASE</version>
				<type>pom</type>
				<scope>import</scope>
			</dependency>
			<dependency>
			    <groupId>mysql</groupId>
			    <artifactId>mysql-connector-java</artifactId>
			    <version>5.1.46</version>
			</dependency>
			<dependency>
			    <groupId>com.alibaba</groupId>
			    <artifactId>druid</artifactId>
			    <version>1.1.0</version>
			</dependency>
			<dependency>
				<groupId>org.mybatis.spring.boot</groupId>
				<artifactId>mybatis-spring-boot-starter</artifactId>
				<version>1.3.0</version>
			</dependency>
			<dependency>
				<groupId>ch.qos.logback</groupId>
				<artifactId>logback-core</artifactId>
				<version>1.2.3</version>
			</dependency>
			<dependency>
				<groupId>junit</groupId>
				<artifactId>junit</artifactId>
				<version>${junit.version}</version>
				<scope>test</scope>
			</dependency>
			<dependency>
				<groupId>log4j</groupId>
				<artifactId>log4j</artifactId>
				<version>${log4j.version}</version>
			</dependency>
		</dependencies>
	</dependencyManagement>
</project>
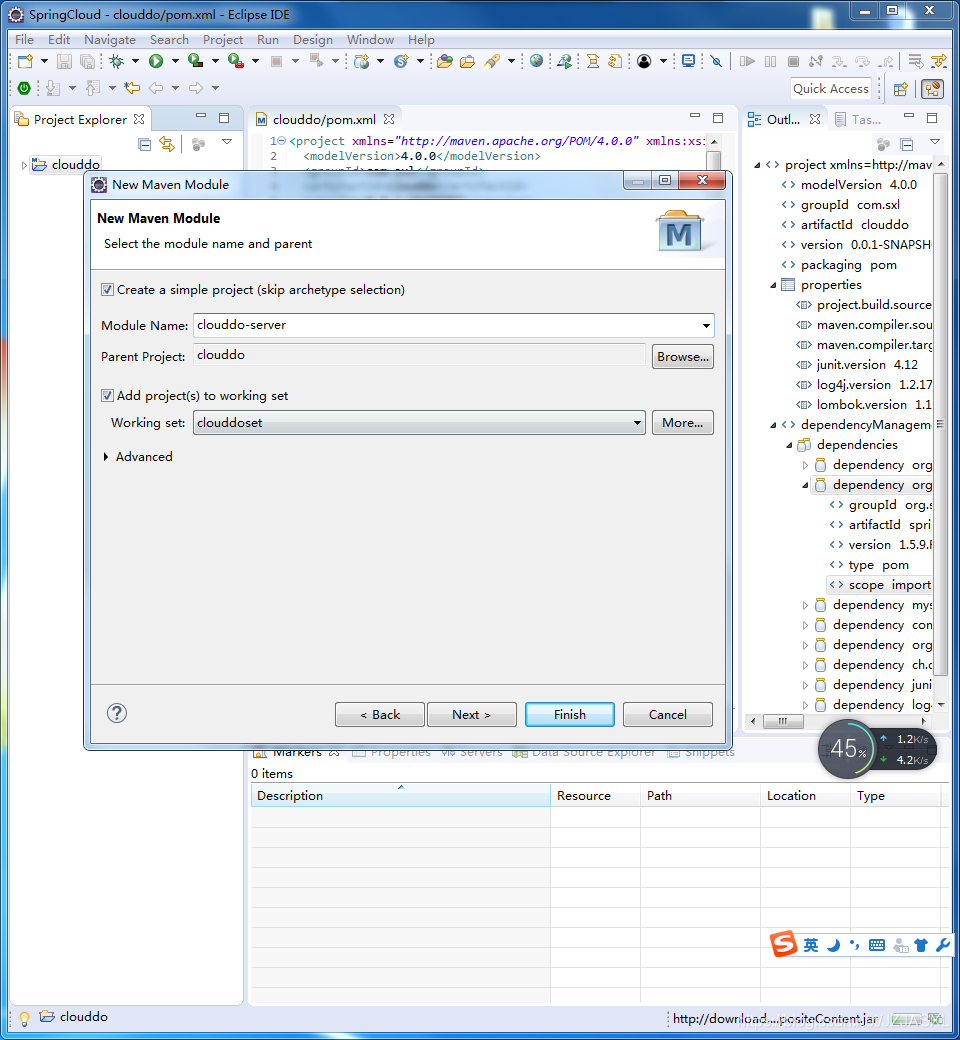
二、创建注册和服务中心子工程
然后新建一个clouddo-server注册和服务中心,用来注册和发现服务

pom文件如下:
<project xmlns="http://maven.apache.org/POM/4.0.0" xmlns:xsi="http://www.w3.org/2001/XMLSchema-instance" xsi:schemaLocation="http://maven.apache.org/POM/4.0.0 http://maven.apache.org/xsd/maven-4.0.0.xsd">
  <modelVersion>4.0.0</modelVersion>
  <parent>
    <groupId>com.sxl</groupId>
    <artifactId>clouddo</artifactId>
    <version>0.0.1-SNAPSHOT</version>
  </parent>
  <artifactId>clouddo-server</artifactId>
  <dependencies>
		<!--eureka-server服务端 -->
		<dependency>
    		<groupId>org.springframework.cloud</groupId>
    		<artifactId>spring-cloud-netflix-eureka-server</artifactId>
		</dependency>
		<!-- 修改后立即生效,热部署 -->
		<dependency>
			<groupId>org.springframework</groupId>
			<artifactId>springloaded</artifactId>
		</dependency>
		<dependency>
			<groupId>org.springframework.boot</groupId>
			<artifactId>spring-boot-devtools</artifactId>
		</dependency>
	</dependencies>
</project>
配置他的application.yml文件如下:
server:
  port: 9001


eureka:
  instance:
  #主机名称
    hostname:clouddoServer
  client:
     # 是否向eureka注册自己
    register-with-eureka: false
       # 是否检索其他服务信息
    fetch-registry: false
      # 地址
    service-url:
      defaultZone: http://${eureka.instance.hostname}:${server.port}/eureka/
  server:
      enable-self-preservation: false # 开发模式关闭服务保护机制
创建这个服务的启动类:
package com.sxl;

import org.springframework.boot.SpringApplication;
import org.springframework.boot.autoconfigure.SpringBootApplication;
import org.springframework.cloud.netflix.eureka.server.EnableEurekaServer;

@EnableEurekaServer
@SpringBootApplication
public class ClouddoServerApplication {
	public static void main(String[] args) {
		SpringApplication.run(ClouddoServerApplication.class, args);
		System.out.println("ヾ(◍°∇°◍)ノ゙    注册中心启动成功      ヾ(◍°∇°◍)ノ゙\n");
	}
}
注意:
1. @EnableEurekaServer注解的作用是通过EnableEurekaServer注解启动一个服务注册中心
2. @SpringBootApplication注解的作用是用于快捷配置启动类,他是一个组合注解
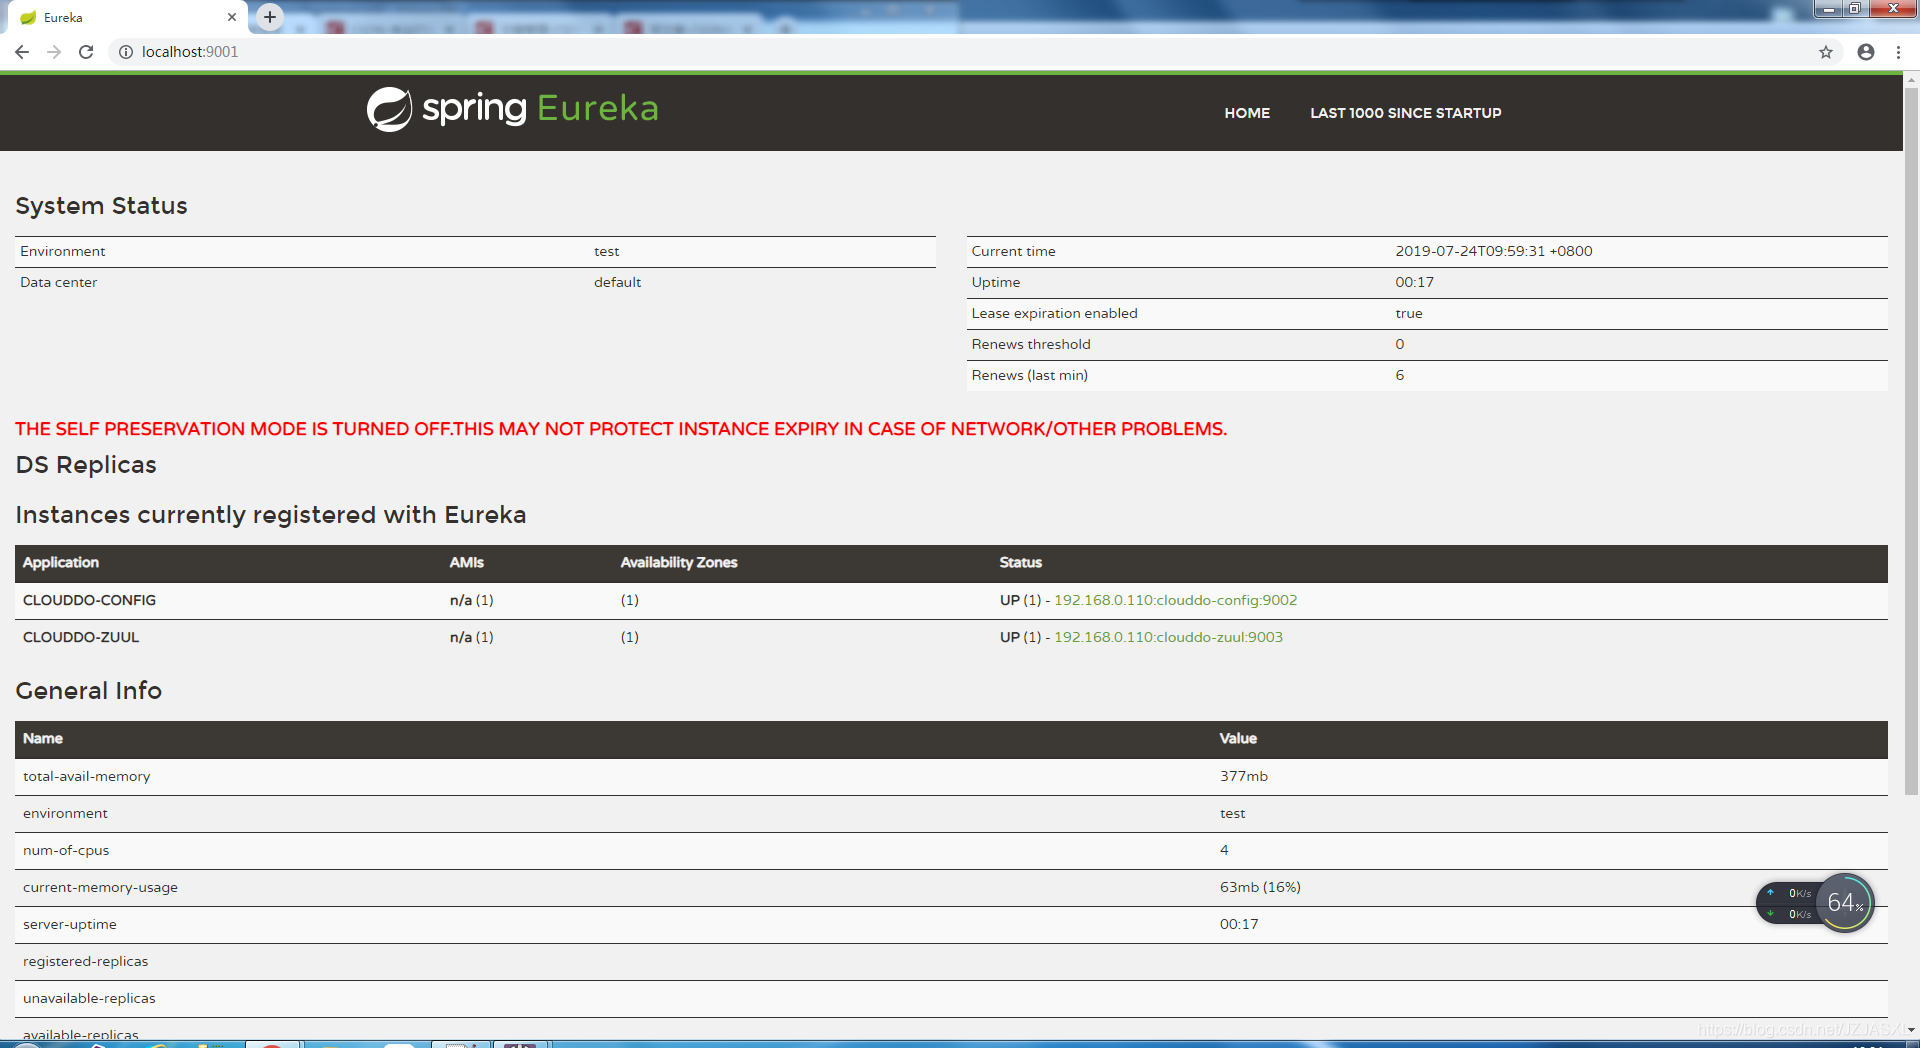
现在可以启动注册中心了!启动成功后,显示如下:

现在还没有添加任何服务,所以服务是空的。
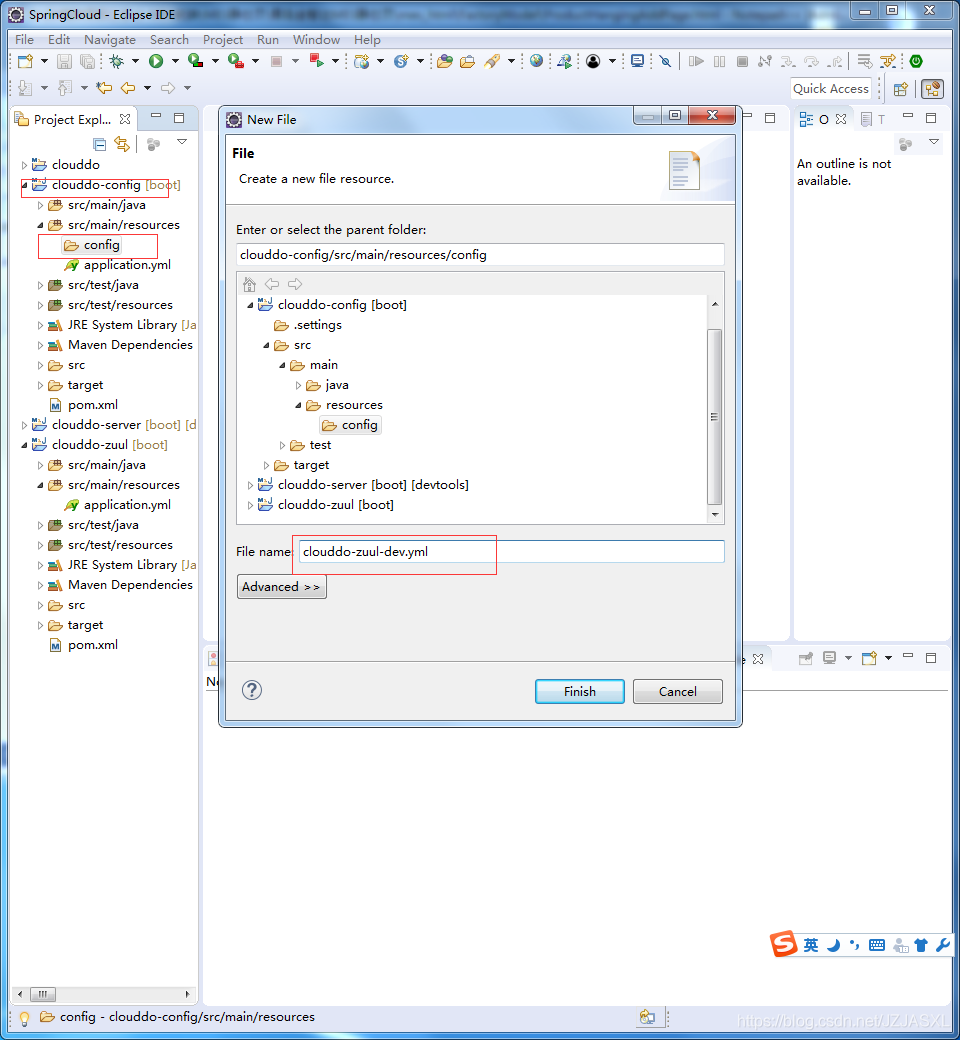
三、创建配置中心子工程
我们在开发大的系统时,由于服务较多,相同的配置(如数据库信息、缓存、开关量等)会出现在不同的服务上,如果一个配置发生变化,则可能需要修改很多的服务配置。为了解决这个问题,spring cloud提供配置中心。
首先所有的公共配置存储在相同的地址(存储的地方可以是git,svn和本地文件),然后配置中心从这些地方读取配置以restful发布出来,其它服务可以调用接口获取配置信息。
配置中心的建法和上面相同,这里就不详细创建了,下面的子工程的创建也一样,就不一一解释了。
pom文件配置如下:
<?xml version="1.0" encoding="UTF-8"?>
<project xmlns="http://maven.apache.org/POM/4.0.0" xmlns:xsi="http://www.w3.org/2001/XMLSchema-instance"
         xsi:schemaLocation="http://maven.apache.org/POM/4.0.0 http://maven.apache.org/xsd/maven-4.0.0.xsd">
    <modelVersion>4.0.0</modelVersion>

	<groupId>com.sxl</groupId>
    <artifactId>clouddo-config</artifactId>
    <version>0.0.1</version>
    <packaging>jar</packaging>

    <name>clouddo-config</name>
    <description>配置中心服务</description>

    <parent>
        <groupId>org.springframework.boot</groupId>
        <artifactId>spring-boot-starter-parent</artifactId>
        <version>2.0.4.RELEASE</version>
        <relativePath/> <!-- lookup parent from repository -->
    </parent>


    <properties>
        <project.build.sourceEncoding>UTF-8</project.build.sourceEncoding>
        <project.reporting.outputEncoding>UTF-8</project.reporting.outputEncoding>
        <java.version>1.8</java.version>
        <spring-cloud.version>Finchley.SR1</spring-cloud.version>
    </properties>


    <dependencies>
    	<!-- feign -->
	    <dependency>
            <groupId>org.springframework.cloud</groupId>
            <artifactId>spring-cloud-starter-openfeign</artifactId>
        </dependency>
<!--         <dependency>
            <groupId>org.springframework.boot</groupId>
            <artifactId>spring-boot-devtools</artifactId>
        </dependency> -->
        <dependency>
            <groupId>org.springframework.cloud</groupId>
            <artifactId>spring-cloud-starter-netflix-eureka-server</artifactId>
        </dependency>
        <dependency>
            <groupId>org.springframework.cloud</groupId>
            <artifactId>spring-cloud-config-server</artifactId>
        </dependency>

        <dependency>
            <groupId>org.springframework.cloud</groupId>
            <artifactId>spring-cloud-starter-openfeign</artifactId>
        </dependency>

        <dependency>
            <groupId>io.jsonwebtoken</groupId>
            <artifactId>jjwt</artifactId>
            <version>0.7.0</version>
        </dependency>

        <dependency>
            <groupId>org.springframework.boot</groupId>
            <artifactId>spring-boot-starter-web</artifactId>
        </dependency>

        <dependency>
            <groupId>org.springframework.boot</groupId>
            <artifactId>spring-boot-starter-test</artifactId>
            <scope>test</scope>
        </dependency>

        <dependency>
            <groupId>org.springframework.cloud</groupId>
            <artifactId>spring-cloud-starter-netflix-ribbon</artifactId>
        </dependency>
        <!--暴露各种指标   -->
        <dependency>
            <groupId>org.springframework.boot</groupId>
            <artifactId>spring-boot-starter-actuator</artifactId>
        </dependency>
    </dependencies>

    <dependencyManagement>
        <dependencies>
            <dependency>
                <groupId>org.springframework.cloud</groupId>
                <artifactId>spring-cloud-dependencies</artifactId>
                <version>${spring-cloud.version}</version>
                <type>pom</type>
                <scope>import</scope>
            </dependency>
        </dependencies>
    </dependencyManagement>

    <build>
        <plugins>
            <plugin>
                <groupId>org.springframework.boot</groupId>
                <artifactId>spring-boot-maven-plugin</artifactId>
            </plugin>
        </plugins>
    </build>
</project>
其application.yml配置如下:
server:
  port: 9002

spring:
  application:
    name: clouddo-config
  #代表本地文件
  profiles:
    active: native
  cloud:
    config:
      server:
        native:
          search-locations: classpath:/config #切记一定不要忘记冒号  不然很尬
eureka:
  instance:
#    使用IP注册
    prefer-ip-address: true
    instance-id: ${spring.cloud.client.ip-address}:${spring.application.name}:${spring.application.instance_id:${server.port}}
# 心跳检测检测与续约时间
# 测试时将值设置设置小些,保证服务关闭后注册中心能及时踢出服务
    lease-renewal-interval-in-seconds: 10
    lease-expiration-duration-in-seconds: 10
  client:
    register-with-eureka: true
    fetch-registry: false
    service-url:
      defaultZone:  http://192.168.0.118:9001/eureka/
创建其启动类,代码如下:
package com.sxl;

import org.springframework.boot.SpringApplication;
import org.springframework.boot.autoconfigure.SpringBootApplication;
import org.springframework.cloud.config.server.EnableConfigServer;
import org.springframework.cloud.netflix.eureka.EnableEurekaClient;

@SpringBootApplication
@EnableEurekaClient
@EnableConfigServer
public class ClouddoConfigApplication {
	 public static void main(String[] args) {
	        SpringApplication.run(ClouddoConfigApplication.class, args);
	        System.out.println("ヾ(◍°∇°◍)ノ゙    配置中心启动成功      ヾ(◍°∇°◍)ノ゙\n");
	    }
}
完成后,就可以启动项目了
四、创建网关子工程
新建一个名为clouddo-zuul的子工程,建法同上。Zuul路由包含了对请求的路由和过滤两个功能,所以此子工程的作用主要是负责将外部请求转发到具体的微服务实例上,是实现外部访问统一入口。
pom配置如下:
<?xml version="1.0" encoding="UTF-8"?>
<project xmlns="http://maven.apache.org/POM/4.0.0" xmlns:xsi="http://www.w3.org/2001/XMLSchema-instance"
	xsi:schemaLocation="http://maven.apache.org/POM/4.0.0 http://maven.apache.org/xsd/maven-4.0.0.xsd">
	<modelVersion>4.0.0</modelVersion>

	<groupId>com.sxl</groupId>
	<artifactId>clouddo-zuul</artifactId>
	<version>0.0.1</version>
	<packaging>jar</packaging>

	<name>clouddo-zuul</name>
	<description>网关服务</description>

	<parent>
		<groupId>org.springframework.boot</groupId>
		<artifactId>spring-boot-starter-parent</artifactId>
		<version>2.0.4.RELEASE</version>
		<relativePath/> <!-- lookup parent from repository -->
	</parent>

	<properties>
		<project.build.sourceEncoding>UTF-8</project.build.sourceEncoding>
		<project.reporting.outputEncoding>UTF-8</project.reporting.outputEncoding>
		<java.version>1.8</java.version>
		<spring-cloud.version>Finchley.SR1</spring-cloud.version>
	</properties>


	<dependencies>
		<dependency>
			<groupId>org.springframework.cloud</groupId>
			<artifactId>spring-cloud-starter-netflix-eureka-server</artifactId>
		</dependency>
		<dependency>
			<groupId>org.springframework.cloud</groupId>
			<artifactId>spring-cloud-starter-netflix-zuul</artifactId>
		</dependency>

		<dependency>
            <groupId>org.springframework.cloud</groupId>
            <artifactId>spring-cloud-starter-config</artifactId>
        </dependency>

		<dependency>
		    <groupId>org.springframework.cloud</groupId>
		    <artifactId>spring-cloud-starter-netflix-eureka-client</artifactId>
		</dependency>

	</dependencies>

	<dependencyManagement>
		<dependencies>
			<dependency>
				<groupId>org.springframework.cloud</groupId>
				<artifactId>spring-cloud-dependencies</artifactId>
				<version>${spring-cloud.version}</version>
				<type>pom</type>
				<scope>import</scope>
			</dependency>
		</dependencies>
	</dependencyManagement>

	<build>
		<plugins>
			<plugin>
				<groupId>org.springframework.boot</groupId>
				<artifactId>spring-boot-maven-plugin</artifactId>
			</plugin>
		</plugins>
	</build>


</project>
同时将网关微服务注册到注册中心上,因为我们创建了一个配置中心,所以需要在配置中心添加一个配置,在子工程中注册到注册中心即可。配置如下:
配置中心的.yml中配置:
server:
  port: 9003
eureka:
  instance:
    #    使用IP注册
    lease-renewal-interval-in-seconds: 10 # 每间隔1s,向服务端发送一次心跳,证明自己依然”存活“
    lease-expiration-duration-in-seconds: 10 # 告诉服务端,如果我2s之内没有给你发心跳,就代表我“死”了,将我踢出掉。
    prefer-ip-address: true
    instance-id: ${spring.cloud.client.ip-address}:${spring.application.name}:${spring.application.instance_id:${server.port}}
  client:
    service-url:
      defaultZone:  http://192.168.0.110:9001/eureka/
spring:
  servlet:
    multipart:
      max-file-size: 100Mb
      max-request-size: 100Mb
zuul:
  host:
      connections: 500
      connect-timeout-millis: 60000
      socket-timeout-millis: 60000
#----------------------超时配置-------------------
ribbon:
  ReadTimeout: 3500
  ConnectTimeout: 1000
  MaxAutoRetries: 0
  MaxAutoRetriesNextServer: 0
  eureka:
  #是否开启超时熔断
    enabled: true
hystrix:
  command:
    default:
      execution:
        timeout:
          enabled: true
        isolation:
          thread:
            timeoutInMilliseconds: 50000
子工程中bootstrap.yml的配置如下:
spring:
  application:
    name: cloud-zuul #服务名称
  cloud:
    config:
      uri: http://192.168.0.110:9002 #配置中心的地址
      enabled: true #开启配置
      profile: dev  #版本
      name: clouddo-zuul #配置中心的配置文件名称
      label: master  #分支名称
在配置这个的过程中,发现一个很坑人的事情,eclipse读取配置的时候是先去找bootstrap.yml文件,然后在去读取application.yml文件,我一开始配置的是application.yml文件,启动的时候一直报错,原因就是:他先读取bootstrap的时候没有找到,但是已经算读取完配置了,就不再读取application中的配置了,导致一直报错。所以这里创建的文档名字是bootstrap
添加其启动类代码如下:
package com.sxl;

import org.springframework.boot.SpringApplication;
import org.springframework.boot.autoconfigure.SpringBootApplication;
import org.springframework.cloud.netflix.eureka.EnableEurekaClient;
import org.springframework.cloud.netflix.eureka.server.EnableEurekaServer;
import org.springframework.cloud.netflix.zuul.EnableZuulProxy;
import org.springframework.context.annotation.Bean;
import org.springframework.web.cors.CorsConfiguration;
import org.springframework.web.cors.UrlBasedCorsConfigurationSource;
import org.springframework.web.filter.CorsFilter;

@EnableZuulProxy
@EnableEurekaClient
@SpringBootApplication
public class ZuulApplication {
	public static void main(String[] args) {
		SpringApplication.run(ZuulApplication.class, args);
		System.out.println("ヾ(◍°∇°◍)ノ゙   ZUUL网关启动成功      ヾ(◍°∇°◍)ノ゙\n");
	}

//	@Bean
//	public AccessFilter accessFilter(){
//		return new AccessFilter();
//	}

	@Bean
	public CorsFilter corsFilter() {
		final UrlBasedCorsConfigurationSource source = new UrlBasedCorsConfigurationSource();
		final CorsConfiguration config = new CorsConfiguration();
		config.setAllowCredentials(true); // 允许cookies跨域
		config.addAllowedOrigin("*");// #允许向该服务器提交请求的URI,*表示全部允许,在SpringMVC中,如果设成*,会自动转成当前请求头中的Origin
		config.addAllowedHeader("*");// #允许访问的头信息,*表示全部
		config.setMaxAge(18000L);// 预检请求的缓存时间(秒),即在这个时间段里,对于相同的跨域请求不会再预检了
		config.addAllowedMethod("OPTIONS");// 允许提交请求的方法,*表示全部允许
		config.addAllowedMethod("HEAD");
		config.addAllowedMethod("GET");// 允许Get的请求方法
		config.addAllowedMethod("PUT");
		config.addAllowedMethod("POST");
		config.addAllowedMethod("DELETE");
		config.addAllowedMethod("PATCH");
		source.registerCorsConfiguration("/**", config);
		return new CorsFilter(source);
	}
}
配置完成后就可以启动了,启动后注册中心应显示出启动的服务:
五、我们前面配置了一个认证中心用来存放所有的配置,为了方便起见,我们在创建一个公共类微服务,用来存放公共的类和方法。
创建名为clouddo-common的微服务
pom配置如下:
<?xml version="1.0"?>
<project xsi:schemaLocation="http://maven.apache.org/POM/4.0.0 http://maven.apache.org/xsd/maven-4.0.0.xsd" xmlns="http://maven.apache.org/POM/4.0.0"
    xmlns:xsi="http://www.w3.org/2001/XMLSchema-instance">
  <modelVersion>4.0.0</modelVersion>
    <parent>
        <groupId>org.springframework.boot</groupId>
        <artifactId>spring-boot-starter-parent</artifactId>
        <version>2.0.4.RELEASE</version>
        <relativePath/> <!-- lookup parent from repository -->
    </parent>

    <groupId>com.sxl</groupId>
    <artifactId>clouddo-common</artifactId>
    <version>0.0.1-SNAPSHOT</version>
    <packaging>jar</packaging>

    <name>clouddo-common</name>
  	<description>公用工具类</description>

    <properties>
        <project.build.sourceEncoding>UTF-8</project.build.sourceEncoding>
        <project.reporting.outputEncoding>UTF-8</project.reporting.outputEncoding>
        <java.version>1.8</java.version>
        <spring-cloud.version>Finchley.SR1</spring-cloud.version>
        <org.mapstruct.version>1.2.0.Final</org.mapstruct.version>
    </properties>


  <dependencies>
 	<dependency>
        <groupId>org.springframework.boot</groupId>
        <artifactId>spring-boot-starter-web</artifactId>
    </dependency>
    <dependency>
	<groupId>commons-beanutils</groupId>
	<artifactId>commons-beanutils</artifactId>
	<version>1.9.3</version>
	</dependency>
	<dependency>
	<groupId>commons-collections</groupId>
	<artifactId>commons-collections</artifactId>
	<version>3.2.1</version>
	</dependency>
	<dependency>
	<groupId>commons-lang</groupId>
	<artifactId>commons-lang</artifactId>
	<version>2.6</version>
	</dependency>
	<dependency>
	<groupId>commons-logging</groupId>
	<artifactId>commons-logging</artifactId>
	<version>1.1.1</version>
	</dependency>
	<dependency>
	<groupId>net.sf.ezmorph</groupId>
	<artifactId>ezmorph</artifactId>
	<version>1.0.6</version>
	</dependency>
	<dependency>
	<groupId>net.sf.json-lib</groupId>
	<artifactId>json-lib</artifactId>
	<version>2.2.3</version>
	<classifier>jdk15</classifier><!-- jdk版本 -->
	</dependency>
    <dependency>
      <groupId>junit</groupId>
      <artifactId>junit</artifactId>
      <scope>test</scope>
    </dependency>
  </dependencies>

      <dependencyManagement>
        <dependencies>
            <dependency>
                <groupId>org.springframework.cloud</groupId>
                <artifactId>spring-cloud-dependencies</artifactId>
                <version>${spring-cloud.version}</version>
                <type>pom</type>
                <scope>import</scope>
            </dependency>
        </dependencies>
    </dependencyManagement>
</project>
创建com.sxl.config和com.sxl.dto的包包下分别创建ResponseCodeClass.java和BaseDto.java,作用分别是统一规定一些返回码和返回格式
代码如下:
package com.sxl.config;

/**
 * 常用返回码整理
 * 2017年10月12日15:33:32
 * @author lin
 *
 */
public enum ResponseCode {

	/**
	 * 执行成功
	 */
	SUCCESS(200,"执行成功"),

	/**
	 * 参数错误
	 */
	BAD_REQUEST(400, "参数错误"),

	/**
	 * 未登录
	 */
    UNAUTHORIZED(401, "未登录"),

    /**
     * 没有权限
     */
    FORBIDDEN(403, "没有权限"),

    /**
     * 操作失败
     */
    EXPECTATION_FAILED(417, "操作失败"),

    /**
     * 系统异常
     */
	SERVER_ERROR(500, "系统异常"),

	/**
	 * 用户名或密码错误
	 */
	BAD_CREDENTIALS(1002,"用户名或密码错误"),

	/**
	 * 用户被锁定
	 */
	USER_LOCKED(1003, "用户被锁定"),

	/**
	 * 用户登录过期
	 */
	REDENTIALS_Expired(1005, "您的账户登录过期,请重新登录"),
	;
	public int code;

	public String reasonPhrase;

	ResponseCode(int code, String reasonPhrase){
		this.code = code;
		this.reasonPhrase = reasonPhrase;
	}

	public int code() {
		return code;
	}

	public String reasonPhrase() {
		return reasonPhrase;
	}

}
package com.sxl.dto;

import java.io.Serializable;
import java.util.Map;
/**
 * 接口返回体
 * @author lin
 * 2017年8月19日15:54:08
 */
public class BaseDto  implements Serializable{
	private static final long serialVersionUID = 1L;
	/**
	 * 返回消息代码
	 */
	private Integer returnCode;
	/**
	 * 返回消息
	 */
	private String msg;
	/**
	 * 返回数据
	 */

	private Map<String, Object> returnData;

	public BaseDto() {
		super();
	}


	public BaseDto(Integer returnCode, String msg) {
		super();
		this.returnCode = returnCode;
		this.msg = msg;
	}
	public BaseDto(Integer returnCode, String msg, Map<String, Object> returnData) {
		this.returnCode = returnCode;
		this.msg = msg;
		this.returnData = returnData;
	}


	public Integer getReturnCode() {
		return returnCode;
	}


	public void setReturnCode(Integer returnCode) {
		this.returnCode = returnCode;
	}


	public String getMsg() {
		return msg;
	}


	public void setMsg(String msg) {
		this.msg = msg;
	}


	public Map<String, Object> getReturnData() {
		return returnData;
	}


	public void setReturnData(Map<String, Object> returnData) {
		this.returnData = returnData;
	}


	@Override
	public String toString() {
		return "{\"code\":" + returnCode + ",\"message\":\"" + msg + "\",\"returnData\":[]}";
	}


}
这样,前期的配置基本上就完成了,在实际应用过程中,为了加强系统的安全,我们配置一个认证中心服务,让用户都带着token访问页面,这也可以叫做单点登录。
六、配置认证中心-实现单点登录(此模块是参考别人的写的)
首先,先创建一个微服务,创建过程和上面步骤相同。
添加pom配置:
<?xml version="1.0"?>
<project xsi:schemaLocation="http://maven.apache.org/POM/4.0.0 http://maven.apache.org/xsd/maven-4.0.0.xsd" xmlns="http://maven.apache.org/POM/4.0.0"
    xmlns:xsi="http://www.w3.org/2001/XMLSchema-instance">
  <modelVersion>4.0.0</modelVersion>
    <parent>
        <groupId>org.springframework.boot</groupId>
        <artifactId>spring-boot-starter-parent</artifactId>
        <version>2.0.4.RELEASE</version>
        <relativePath/> <!-- lookup parent from repository -->
    </parent>
    <groupId>clouddo</groupId>
    <artifactId>clouddo-auth</artifactId>
    <version>0.0.1-SNAPSHOT</version>

    <name>clouddo-auth</name>
    <description>认证微服务</description>

	<properties>
		<project.build.sourceEncoding>UTF-8</project.build.sourceEncoding>
		<project.reporting.outputEncoding>UTF-8</project.reporting.outputEncoding>
		<java.version>1.8</java.version>
		<spring-cloud.version>Finchley.SR1</spring-cloud.version>
	</properties>
  <dependencies>
  <!-- 导入web相关的依赖 -->
          <dependency>
            <groupId>org.springframework.boot</groupId>
            <artifactId>spring-boot-starter-web</artifactId>
        </dependency>
        <!-- 为了启动和发现功能 -->
          <dependency>
            <groupId>org.springframework.cloud</groupId>
            <artifactId>spring-cloud-starter-netflix-eureka-client</artifactId>
        </dependency>
        <!--监控接口 -->
          <dependency>
            <groupId>org.springframework.boot</groupId>
            <artifactId>spring-boot-starter-actuator</artifactId>
        </dependency>
        <!-- redis -->
         <dependency>
            <groupId>org.springframework.boot</groupId>
            <artifactId>spring-boot-starter-data-redis</artifactId>
        </dependency>
       	 <dependency>
	        <groupId>redis.clients</groupId>
	        <artifactId>jedis</artifactId>
			</dependency>
			<dependency>
			    <groupId>org.springframework.data</groupId>
			    <artifactId>spring-data-commons</artifactId>
			</dependency>
			<!-- oauth2认证-->
          <dependency>
            <groupId>org.springframework.cloud</groupId>
            <artifactId>spring-cloud-starter-oauth2</artifactId>
        </dependency>
                <dependency>
            <groupId>org.springframework.cloud</groupId>
            <artifactId>spring-cloud-starter-security</artifactId>
        </dependency>
          <dependency>
            <groupId>org.springframework.security</groupId>
            <artifactId>spring-security-data</artifactId>
        </dependency>
        <!-- log日志打印 -->
        <dependency>
            <groupId>log4j</groupId>
            <artifactId>log4j</artifactId>
            <version>1.2.16</version>
            <scope>compile</scope>
        </dependency>
         <dependency>
            <groupId>org.springframework.boot</groupId>
            <artifactId>spring-boot-starter-test</artifactId>
            <scope>test</scope>
        </dependency>
         <dependency>
            <groupId>com.alibaba</groupId>
            <artifactId>druid</artifactId>
            <version>1.1.10</version>
        </dependency>
        <!-- 通过简单的注解的形式来帮助我们简化消除一些必须有但显得很臃肿的 Java 代码的工具 -->
         <dependency>
            <groupId>org.projectlombok</groupId>
            <artifactId>lombok</artifactId>
            <version>1.16.20</version>
            <scope>provided</scope>
        </dependency>
 		<dependency>
            <groupId>com.alibaba</groupId>
            <artifactId>fastjson</artifactId>
            <version>1.2.47</version>
        </dependency>
         <dependency>
            <groupId>commons-lang</groupId>
            <artifactId>commons-lang</artifactId>
            <version>2.6</version>
        </dependency>
         <dependency>
            <groupId>org.mybatis.spring.boot</groupId>
            <artifactId>mybatis-spring-boot-starter</artifactId>
            <version>1.3.2</version>
        </dependency>
       	<!-- config client端需依赖 -->
        <dependency>
            <groupId>org.springframework.cloud</groupId>
            <artifactId>spring-cloud-starter-config</artifactId>
        </dependency>
        <dependency>
            <groupId>org.springframework.boot</groupId>
            <artifactId>spring-boot-starter-actuator</artifactId>
        </dependency>
        <!-- 引用公共类common -->
         <dependency>
        	<groupId>com.sxl</groupId>
        	<artifactId>clouddo-common</artifactId>
        	<version>0.0.1-SNAPSHOT</version>
        </dependency>
  </dependencies>

      <dependencyManagement>
        <dependencies>
            <dependency>
                <groupId>org.springframework.cloud</groupId>
                <artifactId>spring-cloud-dependencies</artifactId>
                <version>${spring-cloud.version}</version>
                <type>pom</type>
                <scope>import</scope>
            </dependency>
        </dependencies>
    </dependencyManagement>

    <build>
        <plugins>
            <plugin>
                <groupId>org.springframework.boot</groupId>
                <artifactId>spring-boot-maven-plugin</artifactId>
            </plugin>
        </plugins>
    </build>

</project>
然后在java目录下创建一个名为com.sxl.entity的包,在包中添加数据库中用户表的类,字段自己定义,我们这里起名为Member.java,代码如下:
package com.sxl.config.entity;


public class Member{

	private String UserID;
	private String UserAccount;
	private String Password;
	private String UserName;
	public String getUserID() {
		return UserID;
	}
	public void setUserID(String userID) {
		UserID = userID;
	}
	public String getUserAccount() {
		return UserAccount;
	}
	public void setUserAccount(String userAccount) {
		UserAccount = userAccount;
	}
	public String getPassword() {
		return Password;
	}
	public void setPassword(String password) {
		Password = password;
	}
	public String getUserName() {
		return UserName;
	}
	public void setUserName(String userName) {
		UserName = userName;
	}


}
然后在resources下创建新包mapper、dao,在里面创建一个名为MemberMapper.xml、MemberDao.java
mapper代码如下:
<?xml version="1.0" encoding="UTF-8" ?>
<!DOCTYPE mapper PUBLIC "-//mybatis.org//DTD Mapper 3.0//EN" "http://mybatis.org/dtd/mybatis-3-mapper.dtd" >
<mapper namespace="com.sxl.dao.MemberDao">

    <resultMap id="baseResultMap" type="com.sxl.config.entity.Member">
        <id property="UserID" column="UserID" jdbcType="VARCHAR" />
        <id property="UserAccount" column="UserAccount" jdbcType="VARCHAR" />
        <id property="Password" column="Password" jdbcType="VARCHAR" />
        <id property="UserName" column="UserName" jdbcType="VARCHAR" />
    </resultMap>

    <sql id="normalItems">
        id,member_name
    </sql>

    <select id="findByMemberName" parameterType="java.lang.String" resultType="com.sxl.config.entity.Member">
        select * from TB_UserInfo where UserAccount = #{memberName,jdbcType=VARCHAR}
    </select>


</mapper>
dao层代码如下:
package com.sxl.config.dao;

import org.apache.ibatis.annotations.Mapper;

import com.sxl.config.entity.Member;

@Mapper
public interface MemberDao {
	 Member findByMemberName(String memberName);
}
然后创建service层,创建MyUserDetialService.java,代码如下:
package com.sxl.config.service;
import java.util.HashSet;
import java.util.Set;

import org.springframework.beans.factory.annotation.Autowired;
import org.springframework.security.core.GrantedAuthority;
import org.springframework.security.core.userdetails.User;
import org.springframework.security.core.userdetails.UserDetails;
import org.springframework.security.core.userdetails.UserDetailsService;
import org.springframework.security.core.userdetails.UsernameNotFoundException;
import org.springframework.stereotype.Service;

import com.sxl.config.dao.MemberDao;
import com.sxl.config.entity.Member;

/**
 * 〈自定义UserDetailService〉
 * 自定义认证逻辑
 */
@Service
public class MyUserDetailService implements UserDetailsService{

	  @Autowired
	    private MemberDao memberDao;

	    @Override
	    public UserDetails loadUserByUsername(String memberName) throws UsernameNotFoundException {
	        Member member = memberDao.findByMemberName(memberName);
	        if (member == null) {
	            throw new UsernameNotFoundException(memberName);
	        }
	        Set<GrantedAuthority> grantedAuthorities = new HashSet<>();
	        // 可用性 :true:可用 false:不可用
	        boolean enabled = true;
	        // 过期性 :true:没过期 false:过期
	        boolean accountNonExpired = true;
	        // 有效性 :true:凭证有效 false:凭证无效
	        boolean credentialsNonExpired = true;
	        // 锁定性 :true:未锁定 false:已锁定
	        boolean accountNonLocked = true;
	/*        for (Role role : member.getRoles()) {
	            //角色必须是ROLE_开头,可以在数据库中设置
	            GrantedAuthority grantedAuthority = new SimpleGrantedAuthority(role.getRoleName());
	            grantedAuthorities.add(grantedAuthority);
	            //获取权限
	            for (Permission permission : role.getPermissions()) {
	                GrantedAuthority authority = new SimpleGrantedAuthority(permission.getUri());
	                grantedAuthorities.add(authority);
	            }
	        }*/
	        User user = new User(member.getUserAccount(), member.getPassword(),
	                enabled, accountNonExpired, credentialsNonExpired, accountNonLocked, grantedAuthorities);
	        return user;
	    }
}
注意这里所有的引用都是引用的org.springframework.security.core.userdetails里的。
然后创建controller层,添加MemberController类,代码如下:
package com.sxl.config.controller;

import java.security.Principal;
import java.util.HashMap;
import java.util.Map;

import org.springframework.beans.factory.annotation.Autowired;
import org.springframework.security.oauth2.provider.token.ConsumerTokenServices;
import org.springframework.web.bind.annotation.PostMapping;
import org.springframework.web.bind.annotation.RequestMapping;

import com.sxl.config.ResponseCode;
import com.sxl.config.service.MyUserDetailService;
import com.sxl.dto.BaseDto;

public class MemberController {
	 @Autowired
	    private MyUserDetailService userDetailService;

	    @Autowired
	    private ConsumerTokenServices consumerTokenServices;

	    @RequestMapping("/member")
	    public Principal user(Principal member) {
	        //获取当前用户信息
	        return member;
	    }

	    @PostMapping(value = "/exit")
	    public BaseDto revokeToken(String access_token) {
	        //注销当前用户
	        Map<String, Object> map = new HashMap<>();
	        //返回默认值
	        map.put("result", "0");
	        if (consumerTokenServices.revokeToken(access_token)) {
	            return new BaseDto(ResponseCode.SUCCESS.code,"注销成功",map);
	        } else {
	            return new BaseDto(ResponseCode.EXPECTATION_FAILED.code,"注销失败",map);
	        }
	    }
}
添加一个名为error的包,创建MssWebResponseExceptionTranslator.java模块,此模块的作用是对异常进行捕捉、翻译,代码如下:
package com.sxl.config.error;


import org.springframework.http.HttpHeaders;
import org.springframework.http.HttpStatus;
import org.springframework.http.ResponseEntity;
import org.springframework.security.access.AccessDeniedException;
import org.springframework.security.core.AuthenticationException;
import org.springframework.security.oauth2.common.DefaultThrowableAnalyzer;
import org.springframework.security.oauth2.common.OAuth2AccessToken;
import org.springframework.security.oauth2.common.exceptions.InsufficientScopeException;
import org.springframework.security.oauth2.common.exceptions.OAuth2Exception;
import org.springframework.security.oauth2.provider.error.WebResponseExceptionTranslator;
import org.springframework.security.web.util.ThrowableAnalyzer;
import org.springframework.web.HttpRequestMethodNotSupportedException;

import java.io.IOException;

/**
 * 〈异常翻译〉
 */
public class MssWebResponseExceptionTranslator implements WebResponseExceptionTranslator {
    private ThrowableAnalyzer throwableAnalyzer = new DefaultThrowableAnalyzer();

    @Override
    public ResponseEntity<OAuth2Exception> translate(Exception e) throws Exception {

        // Try to extract a SpringSecurityException from the stacktrace
        Throwable[] causeChain = throwableAnalyzer.determineCauseChain(e);
        Exception ase = (OAuth2Exception) throwableAnalyzer.getFirstThrowableOfType(OAuth2Exception.class, causeChain);

        if (ase != null) {
            return handleOAuth2Exception((OAuth2Exception) ase);
        }

        ase = (AuthenticationException) throwableAnalyzer.getFirstThrowableOfType(AuthenticationException.class,
                causeChain);
        if (ase != null) {
            return handleOAuth2Exception(new MssWebResponseExceptionTranslator.UnauthorizedException(e.getMessage(), e));
        }

        ase = (AccessDeniedException) throwableAnalyzer
                .getFirstThrowableOfType(AccessDeniedException.class, causeChain);
        if (ase instanceof AccessDeniedException) {
            return handleOAuth2Exception(new MssWebResponseExceptionTranslator.ForbiddenException(ase.getMessage(), ase));
        }

        ase = (HttpRequestMethodNotSupportedException) throwableAnalyzer.getFirstThrowableOfType(
                HttpRequestMethodNotSupportedException.class, causeChain);
        if (ase instanceof HttpRequestMethodNotSupportedException) {
            return handleOAuth2Exception(new MssWebResponseExceptionTranslator.MethodNotAllowed(ase.getMessage(), ase));
        }

        return handleOAuth2Exception(new MssWebResponseExceptionTranslator.ServerErrorException(HttpStatus.INTERNAL_SERVER_ERROR.getReasonPhrase(), e));

    }

    private ResponseEntity<OAuth2Exception> handleOAuth2Exception(OAuth2Exception e) throws IOException {

        int status = e.getHttpErrorCode();
        String error = e.getOAuth2ErrorCode();
        String summary = e.getSummary();
        HttpHeaders headers = new HttpHeaders();
        headers.set("Cache-Control", "no-store");
        headers.set("Pragma", "no-cache");
        if (status == HttpStatus.UNAUTHORIZED.value() || (e instanceof InsufficientScopeException)) {
            headers.set("WWW-Authenticate", String.format("%s %s", OAuth2AccessToken.BEARER_TYPE, e.getSummary()));
        }

        ResponseEntity<OAuth2Exception> response = new ResponseEntity<OAuth2Exception>(e, headers, HttpStatus.valueOf(status));
        return response;

    }

    public void setThrowableAnalyzer(ThrowableAnalyzer throwableAnalyzer) {
        this.throwableAnalyzer = throwableAnalyzer;
    }

    @SuppressWarnings("serial")
    private static class ForbiddenException extends OAuth2Exception {

        public ForbiddenException(String msg, Throwable t) {
            super(msg, t);
        }

        @Override
        public String getOAuth2ErrorCode() {
            return "access_denied";
        }

        @Override
        public int getHttpErrorCode() {
            return 403;
        }

    }

    @SuppressWarnings("serial")
    private static class ServerErrorException extends OAuth2Exception {

        public ServerErrorException(String msg, Throwable t) {
            super(msg, t);
        }

        @Override
        public String getOAuth2ErrorCode() {
            return "server_error";
        }

        @Override
        public int getHttpErrorCode() {
            return 500;
        }

    }

    @SuppressWarnings("serial")
    private static class UnauthorizedException extends OAuth2Exception {

        public UnauthorizedException(String msg, Throwable t) {
            super(msg, t);
        }

        @Override
        public String getOAuth2ErrorCode() {
            return "unauthorized";
        }

        @Override
        public int getHttpErrorCode() {
            return 401;
        }

    }

    @SuppressWarnings("serial")
    private static class MethodNotAllowed extends OAuth2Exception {

        public MethodNotAllowed(String msg, Throwable t) {
            super(msg, t);
        }

        @Override
        public String getOAuth2ErrorCode() {
            return "method_not_allowed";
        }

        @Override
        public int getHttpErrorCode() {
            return 405;
        }

    }
}
创建名为AuthorizationServerConfig的类,配置各种认证服务,代码如下:
package com.sxl.config.oauth;

import org.springframework.beans.factory.annotation.Autowired;
import org.springframework.context.annotation.Bean;
import org.springframework.context.annotation.Configuration;
import org.springframework.context.annotation.Primary;
import org.springframework.data.redis.connection.RedisConnectionFactory;
import org.springframework.security.authentication.AuthenticationManager;
import org.springframework.security.oauth2.config.annotation.configurers.ClientDetailsServiceConfigurer;
import org.springframework.security.oauth2.config.annotation.web.configuration.AuthorizationServerConfigurerAdapter;
import org.springframework.security.oauth2.config.annotation.web.configuration.EnableAuthorizationServer;
import org.springframework.security.oauth2.config.annotation.web.configurers.AuthorizationServerEndpointsConfigurer;
import org.springframework.security.oauth2.config.annotation.web.configurers.AuthorizationServerSecurityConfigurer;
import org.springframework.security.oauth2.provider.ClientDetailsService;
import org.springframework.security.oauth2.provider.client.JdbcClientDetailsService;
import org.springframework.security.oauth2.provider.error.WebResponseExceptionTranslator;
import org.springframework.security.oauth2.provider.token.DefaultTokenServices;
import org.springframework.security.oauth2.provider.token.TokenStore;
import org.springframework.security.oauth2.provider.token.store.redis.RedisTokenStore;

import com.sxl.config.error.MssWebResponseExceptionTranslator;
import com.sxl.config.service.MyUserDetailService;

import javax.sql.DataSource;

/**
 * 〈OAuth2认证服务器〉
 *  认证服务
 */
@Configuration
@EnableAuthorizationServer
public class AuthorizationServerConfig extends AuthorizationServerConfigurerAdapter {

    @Autowired
    private AuthenticationManager authenticationManager;

    @Autowired
    private DataSource dataSource;

    @Autowired
    private RedisConnectionFactory redisConnectionFactory;

    @Autowired
    private MyUserDetailService userDetailService;

    @Bean
    public TokenStore tokenStore() {
        return new RedisTokenStore(redisConnectionFactory);
    }

    @Override
    public void configure(AuthorizationServerSecurityConfigurer security) throws Exception {
        security
                .allowFormAuthenticationForClients()
                .tokenKeyAccess("permitAll()")
                .checkTokenAccess("isAuthenticated()");
    }

    /**
     * 配置 oauth_client_details【client_id和client_secret等】信息的认证【检查ClientDetails的合法性】服务
     * 设置 认证信息的来源:数据库 (可选项:数据库和内存,使用内存一般用来作测试)
     * 自动注入:ClientDetailsService的实现类 JdbcClientDetailsService (检查 ClientDetails 对象)
     * 这个方法主要是用于校验注册的第三方客户端的信息,可以存储在数据库中,默认方式是存储在内存中,如下所示,注释掉的代码即为内存中存储的方式
     */
    @Override
    public void configure(ClientDetailsServiceConfigurer clients) throws Exception {
       // clients.withClientDetails(clientDetails());
        //配置在内存中,也可以从数据库中获取
        clients.inMemory() // 使用in-memory存储
                .withClient("superadmin") // client_id   android
                .scopes("read")
                .secret("jzd")  // client_secret   android
                .authorizedGrantTypes("password", "authorization_code", "refresh_token") // 该client允许的授权类型
                .and()
                .withClient("webapp") // client_id
                .scopes("read")
                //.secret("webapp")  // client_secret
                .authorizedGrantTypes("implicit")// 该client允许的授权类型
                .and()
                .withClient("browser")
                .authorizedGrantTypes("refresh_token", "password")
                .scopes("read");


    }
    @Bean
    public ClientDetailsService clientDetails() {
        return new JdbcClientDetailsService(dataSource);
    }

    @Bean
    public WebResponseExceptionTranslator webResponseExceptionTranslator(){
        return new MssWebResponseExceptionTranslator();
    }

    @Override
    public void configure(AuthorizationServerEndpointsConfigurer endpoints) throws Exception {
        endpoints.tokenStore(tokenStore())
                .userDetailsService(userDetailService)
                .authenticationManager(authenticationManager);
        endpoints.tokenServices(defaultTokenServices());
        //认证异常翻译
       // endpoints.exceptionTranslator(webResponseExceptionTranslator());
    }

    /**
     * <p>注意,自定义TokenServices的时候,需要设置@Primary,否则报错,</p>
     * 自定义的token
     * 认证的token是存到redis里的
     * @return
     */
    @Primary
    @Bean
    public DefaultTokenServices defaultTokenServices(){
        DefaultTokenServices tokenServices = new DefaultTokenServices();
        tokenServices.setTokenStore(tokenStore());
        tokenServices.setSupportRefreshToken(true);
        //tokenServices.setClientDetailsService(clientDetails());
        // token有效期自定义设置,默认12小时
        tokenServices.setAccessTokenValiditySeconds(60*60*12);
        // refresh_token默认30天
        tokenServices.setRefreshTokenValiditySeconds(60 * 60 * 24 * 7);
        return tokenServices;
    }
}
创建名为RedisTokenStore的类,重写RedisTokenStore,原因是spring5.0修改了一些方法,导致不兼容,需要重写全部的set()为stringCommands().set(),代码如下:
import org.springframework.data.redis.connection.RedisConnection;
import org.springframework.data.redis.connection.RedisConnectionFactory;
import org.springframework.security.oauth2.common.ExpiringOAuth2RefreshToken;
import org.springframework.security.oauth2.common.OAuth2AccessToken;
import org.springframework.security.oauth2.common.OAuth2RefreshToken;
import org.springframework.security.oauth2.provider.OAuth2Authentication;
import org.springframework.security.oauth2.provider.token.AuthenticationKeyGenerator;
import org.springframework.security.oauth2.provider.token.DefaultAuthenticationKeyGenerator;
import org.springframework.security.oauth2.provider.token.TokenStore;
import org.springframework.security.oauth2.provider.token.store.redis.JdkSerializationStrategy;
import org.springframework.security.oauth2.provider.token.store.redis.RedisTokenStoreSerializationStrategy;
import java.util.*;

/**
 * 〈重写RedisTokenStore〉
 *  spring5.0修改了一些方法,导致不兼容,需要重写全部的set()为stringCommands().set()
 */
public class RedisTokenStore implements TokenStore {

    private static final String ACCESS = "access:";
    private static final String AUTH_TO_ACCESS = "auth_to_access:";
    private static final String AUTH = "auth:";
    private static final String REFRESH_AUTH = "refresh_auth:";
    private static final String ACCESS_TO_REFRESH = "access_to_refresh:";
    private static final String REFRESH = "refresh:";
    private static final String REFRESH_TO_ACCESS = "refresh_to_access:";
    private static final String CLIENT_ID_TO_ACCESS = "client_id_to_access:";
    private static final String UNAME_TO_ACCESS = "uname_to_access:";
    private final RedisConnectionFactory connectionFactory;
    private AuthenticationKeyGenerator authenticationKeyGenerator = new DefaultAuthenticationKeyGenerator();
    private RedisTokenStoreSerializationStrategy serializationStrategy = new JdkSerializationStrategy();
    private String prefix = "";

    public RedisTokenStore(RedisConnectionFactory connectionFactory) {
        this.connectionFactory = connectionFactory;
    }

    public void setAuthenticationKeyGenerator(AuthenticationKeyGenerator authenticationKeyGenerator) {
        this.authenticationKeyGenerator = authenticationKeyGenerator;
    }

    public void setSerializationStrategy(RedisTokenStoreSerializationStrategy serializationStrategy) {
        this.serializationStrategy = serializationStrategy;
    }

    public void setPrefix(String prefix) {
        this.prefix = prefix;
    }

    private RedisConnection getConnection() {
        return this.connectionFactory.getConnection();
    }

    private byte[] serialize(Object object) {
        return this.serializationStrategy.serialize(object);
    }

    private byte[] serializeKey(String object) {
        return this.serialize(this.prefix + object);
    }

    private OAuth2AccessToken deserializeAccessToken(byte[] bytes) {
        return (OAuth2AccessToken)this.serializationStrategy.deserialize(bytes, OAuth2AccessToken.class);
    }

    private OAuth2Authentication deserializeAuthentication(byte[] bytes) {
        return (OAuth2Authentication)this.serializationStrategy.deserialize(bytes, OAuth2Authentication.class);
    }

    private OAuth2RefreshToken deserializeRefreshToken(byte[] bytes) {
        return (OAuth2RefreshToken)this.serializationStrategy.deserialize(bytes, OAuth2RefreshToken.class);
    }

    private byte[] serialize(String string) {
        return this.serializationStrategy.serialize(string);
    }

    private String deserializeString(byte[] bytes) {
        return this.serializationStrategy.deserializeString(bytes);
    }

    @Override
    public OAuth2AccessToken getAccessToken(OAuth2Authentication authentication) {
        String key = this.authenticationKeyGenerator.extractKey(authentication);
        byte[] serializedKey = this.serializeKey(AUTH_TO_ACCESS + key);
        byte[] bytes = null;
        RedisConnection conn = this.getConnection();
        try {
            bytes = conn.get(serializedKey);
        } finally {
            conn.close();
        }
        OAuth2AccessToken accessToken = this.deserializeAccessToken(bytes);
        if (accessToken != null) {
            OAuth2Authentication storedAuthentication = this.readAuthentication(accessToken.getValue());
            if (storedAuthentication == null || !key.equals(this.authenticationKeyGenerator.extractKey(storedAuthentication))) {
                this.storeAccessToken(accessToken, authentication);
            }
        }
        return accessToken;
    }

    @Override
    public OAuth2Authentication readAuthentication(OAuth2AccessToken token) {
        return this.readAuthentication(token.getValue());
    }

    @Override
    public OAuth2Authentication readAuthentication(String token) {
        byte[] bytes = null;
        RedisConnection conn = this.getConnection();
        try {
            bytes = conn.get(this.serializeKey("auth:" + token));
        } finally {
            conn.close();
        }
        OAuth2Authentication auth = this.deserializeAuthentication(bytes);
        return auth;
    }

    @Override
    public OAuth2Authentication readAuthenticationForRefreshToken(OAuth2RefreshToken token) {
        return this.readAuthenticationForRefreshToken(token.getValue());
    }

    public OAuth2Authentication readAuthenticationForRefreshToken(String token) {
        RedisConnection conn = getConnection();
        try {
            byte[] bytes = conn.get(serializeKey(REFRESH_AUTH + token));
            OAuth2Authentication auth = deserializeAuthentication(bytes);
            return auth;
        } finally {
            conn.close();
        }
    }

    @Override
    public void storeAccessToken(OAuth2AccessToken token, OAuth2Authentication authentication) {
        byte[] serializedAccessToken = serialize(token);
        byte[] serializedAuth = serialize(authentication);
        byte[] accessKey = serializeKey(ACCESS + token.getValue());
        byte[] authKey = serializeKey(AUTH + token.getValue());
        byte[] authToAccessKey = serializeKey(AUTH_TO_ACCESS + authenticationKeyGenerator.extractKey(authentication));
        byte[] approvalKey = serializeKey(UNAME_TO_ACCESS + getApprovalKey(authentication));
        byte[] clientId = serializeKey(CLIENT_ID_TO_ACCESS + authentication.getOAuth2Request().getClientId());

        RedisConnection conn = getConnection();
        try {
            conn.openPipeline();
            conn.stringCommands().set(accessKey, serializedAccessToken);
            conn.stringCommands().set(authKey, serializedAuth);
            conn.stringCommands().set(authToAccessKey, serializedAccessToken);
            if (!authentication.isClientOnly()) {
                conn.rPush(approvalKey, serializedAccessToken);
            }
            conn.rPush(clientId, serializedAccessToken);
            if (token.getExpiration() != null) {
                int seconds = token.getExpiresIn();
                conn.expire(accessKey, seconds);
                conn.expire(authKey, seconds);
                conn.expire(authToAccessKey, seconds);
                conn.expire(clientId, seconds);
                conn.expire(approvalKey, seconds);
            }
            OAuth2RefreshToken refreshToken = token.getRefreshToken();
            if (refreshToken != null && refreshToken.getValue() != null) {
                byte[] refresh = serialize(token.getRefreshToken().getValue());
                byte[] auth = serialize(token.getValue());
                byte[] refreshToAccessKey = serializeKey(REFRESH_TO_ACCESS + token.getRefreshToken().getValue());
                conn.stringCommands().set(refreshToAccessKey, auth);
                byte[] accessToRefreshKey = serializeKey(ACCESS_TO_REFRESH + token.getValue());
                conn.stringCommands().set(accessToRefreshKey, refresh);
                if (refreshToken instanceof ExpiringOAuth2RefreshToken) {
                    ExpiringOAuth2RefreshToken expiringRefreshToken = (ExpiringOAuth2RefreshToken) refreshToken;
                    Date expiration = expiringRefreshToken.getExpiration();
                    if (expiration != null) {
                        int seconds = Long.valueOf((expiration.getTime() - System.currentTimeMillis()) / 1000L)
                                .intValue();
                        conn.expire(refreshToAccessKey, seconds);
                        conn.expire(accessToRefreshKey, seconds);
                    }
                }
            }
            conn.closePipeline();
        } finally {
            conn.close();
        }
    }

    private static String getApprovalKey(OAuth2Authentication authentication) {
        String userName = authentication.getUserAuthentication() == null ? "": authentication.getUserAuthentication().getName();
        return getApprovalKey(authentication.getOAuth2Request().getClientId(), userName);
    }

    private static String getApprovalKey(String clientId, String userName) {
        return clientId + (userName == null ? "" : ":" + userName);
    }

    @Override
    public void removeAccessToken(OAuth2AccessToken accessToken) {
        this.removeAccessToken(accessToken.getValue());
    }

    @Override
    public OAuth2AccessToken readAccessToken(String tokenValue) {
        byte[] key = serializeKey(ACCESS + tokenValue);
        byte[] bytes = null;
        RedisConnection conn = getConnection();
        try {
            bytes = conn.get(key);
        } finally {
            conn.close();
        }
        OAuth2AccessToken accessToken = deserializeAccessToken(bytes);
        return accessToken;
    }

    public void removeAccessToken(String tokenValue) {
        byte[] accessKey = serializeKey(ACCESS + tokenValue);
        byte[] authKey = serializeKey(AUTH + tokenValue);
        byte[] accessToRefreshKey = serializeKey(ACCESS_TO_REFRESH + tokenValue);
        RedisConnection conn = getConnection();
        try {
            conn.openPipeline();
            conn.get(accessKey);
            conn.get(authKey);
            conn.del(accessKey);
            conn.del(accessToRefreshKey);
            // Don't remove the refresh token - it's up to the caller to do that
            conn.del(authKey);
            List<Object> results = conn.closePipeline();
            byte[] access = (byte[]) results.get(0);
            byte[] auth = (byte[]) results.get(1);

            OAuth2Authentication authentication = deserializeAuthentication(auth);
            if (authentication != null) {
                String key = authenticationKeyGenerator.extractKey(authentication);
                byte[] authToAccessKey = serializeKey(AUTH_TO_ACCESS + key);
                byte[] unameKey = serializeKey(UNAME_TO_ACCESS + getApprovalKey(authentication));
                byte[] clientId = serializeKey(CLIENT_ID_TO_ACCESS + authentication.getOAuth2Request().getClientId());
                conn.openPipeline();
                conn.del(authToAccessKey);
                conn.lRem(unameKey, 1, access);
                conn.lRem(clientId, 1, access);
                conn.del(serialize(ACCESS + key));
                conn.closePipeline();
            }
        } finally {
            conn.close();
        }
    }

    @Override
    public void storeRefreshToken(OAuth2RefreshToken refreshToken, OAuth2Authentication authentication) {
        byte[] refreshKey = serializeKey(REFRESH + refreshToken.getValue());
        byte[] refreshAuthKey = serializeKey(REFRESH_AUTH + refreshToken.getValue());
        byte[] serializedRefreshToken = serialize(refreshToken);
        RedisConnection conn = getConnection();
        try {
            conn.openPipeline();
            conn.stringCommands().set(refreshKey, serializedRefreshToken);
            conn.stringCommands().set(refreshAuthKey, serialize(authentication));
            if (refreshToken instanceof ExpiringOAuth2RefreshToken) {
                ExpiringOAuth2RefreshToken expiringRefreshToken = (ExpiringOAuth2RefreshToken) refreshToken;
                Date expiration = expiringRefreshToken.getExpiration();
                if (expiration != null) {
                    int seconds = Long.valueOf((expiration.getTime() - System.currentTimeMillis()) / 1000L)
                            .intValue();
                    conn.expire(refreshKey, seconds);
                    conn.expire(refreshAuthKey, seconds);
                }
            }
            conn.closePipeline();
        } finally {
            conn.close();
        }
    }

    @Override
    public OAuth2RefreshToken readRefreshToken(String tokenValue) {
        byte[] key = serializeKey(REFRESH + tokenValue);
        byte[] bytes = null;
        RedisConnection conn = getConnection();
        try {
            bytes = conn.get(key);
        } finally {
            conn.close();
        }
        OAuth2RefreshToken refreshToken = deserializeRefreshToken(bytes);
        return refreshToken;
    }

    @Override
    public void removeRefreshToken(OAuth2RefreshToken refreshToken) {
        this.removeRefreshToken(refreshToken.getValue());
    }

    public void removeRefreshToken(String tokenValue) {
        byte[] refreshKey = serializeKey(REFRESH + tokenValue);
        byte[] refreshAuthKey = serializeKey(REFRESH_AUTH + tokenValue);
        byte[] refresh2AccessKey = serializeKey(REFRESH_TO_ACCESS + tokenValue);
        byte[] access2RefreshKey = serializeKey(ACCESS_TO_REFRESH + tokenValue);
        RedisConnection conn = getConnection();
        try {
            conn.openPipeline();
            conn.del(refreshKey);
            conn.del(refreshAuthKey);
            conn.del(refresh2AccessKey);
            conn.del(access2RefreshKey);
            conn.closePipeline();
        } finally {
            conn.close();
        }
    }

    @Override
    public void removeAccessTokenUsingRefreshToken(OAuth2RefreshToken refreshToken) {
        this.removeAccessTokenUsingRefreshToken(refreshToken.getValue());
    }

    private void removeAccessTokenUsingRefreshToken(String refreshToken) {
        byte[] key = serializeKey(REFRESH_TO_ACCESS + refreshToken);
        List<Object> results = null;
        RedisConnection conn = getConnection();
        try {
            conn.openPipeline();
            conn.get(key);
            conn.del(key);
            results = conn.closePipeline();
        } finally {
            conn.close();
        }
        if (results == null) {
            return;
        }
        byte[] bytes = (byte[]) results.get(0);
        String accessToken = deserializeString(bytes);
        if (accessToken != null) {
            removeAccessToken(accessToken);
        }
    }

    @Override
    public Collection<OAuth2AccessToken> findTokensByClientIdAndUserName(String clientId, String userName) {
        byte[] approvalKey = serializeKey(UNAME_TO_ACCESS + getApprovalKey(clientId, userName));
        List<byte[]> byteList = null;
        RedisConnection conn = getConnection();
        try {
            byteList = conn.lRange(approvalKey, 0, -1);
        } finally {
            conn.close();
        }
        if (byteList == null || byteList.size() == 0) {
            return Collections.<OAuth2AccessToken> emptySet();
        }
        List<OAuth2AccessToken> accessTokens = new ArrayList<OAuth2AccessToken>(byteList.size());
        for (byte[] bytes : byteList) {
            OAuth2AccessToken accessToken = deserializeAccessToken(bytes);
            accessTokens.add(accessToken);
        }
        return Collections.<OAuth2AccessToken> unmodifiableCollection(accessTokens);
    }

    @Override
    public Collection<OAuth2AccessToken> findTokensByClientId(String clientId) {
        byte[] key = serializeKey(CLIENT_ID_TO_ACCESS + clientId);
        List<byte[]> byteList = null;
        RedisConnection conn = getConnection();
        try {
            byteList = conn.lRange(key, 0, -1);
        } finally {
            conn.close();
        }
        if (byteList == null || byteList.size() == 0) {
            return Collections.<OAuth2AccessToken> emptySet();
        }
        List<OAuth2AccessToken> accessTokens = new ArrayList<OAuth2AccessToken>(byteList.size());
        for (byte[] bytes : byteList) {
            OAuth2AccessToken accessToken = deserializeAccessToken(bytes);
            accessTokens.add(accessToken);
        }
        return Collections.<OAuth2AccessToken> unmodifiableCollection(accessTokens);
    }
}
创建名为ResourceServerConfig的类,目的是配置资源服务器,代码如下:
import org.springframework.context.annotation.Configuration;
import org.springframework.core.annotation.Order;
import org.springframework.security.config.annotation.web.builders.HttpSecurity;
import org.springframework.security.oauth2.config.annotation.web.configuration.EnableResourceServer;
import org.springframework.security.oauth2.config.annotation.web.configuration.ResourceServerConfigurerAdapter;

import javax.servlet.http.HttpServletResponse;

/**
 * 〈资源认证服务器〉
 *  配置资源服务器
 */
@Configuration
@EnableResourceServer
@Order(3)
public class ResourceServerConfig extends ResourceServerConfigurerAdapter {
    @Override
    public void configure(HttpSecurity http) throws Exception {
        http
                .csrf().disable()
                .exceptionHandling()
                .authenticationEntryPoint((request, response, authException) -> response.sendError(HttpServletResponse.SC_UNAUTHORIZED))
                .and()
                .requestMatchers().antMatchers("/api/**")
                .and()
                .authorizeRequests()
                .antMatchers("/api/**").authenticated()
                .and()
                .httpBasic();
    }
}
接下来进行security配置
创建名为NoEncryptPasswordEncoder的类,目的是自定义无加密密码验证,重写PasswordEncoder,密码是不加密的,加密的话 使用 BCryptPasswordEncoder。
代码如下:
package com.sxl.config.security;

import org.springframework.security.crypto.password.PasswordEncoder;

/**
 * 〈自定义无加密密码验证〉
 * 重写了PasswordEncoder  密码是不加密的
 * 加密的话 使用 BCryptPasswordEncoder
 */
public class NoEncryptPasswordEncoder implements PasswordEncoder {

    @Override
    public String encode(CharSequence charSequence) {
        return (String) charSequence;
    }

    @Override
    public boolean matches(CharSequence charSequence, String s) {
        //密码对比 密码对 true 反之 false
        //CharSequence 数据库中的密码
        //s 前台传入的密码
        return s.equals((String) charSequence);
    }
}
创建名为SecurityConfig的类,目的是配置Spring Security,代码如下:
package com.sxl.config.security;

import org.springframework.beans.factory.annotation.Autowired;
import org.springframework.context.annotation.Bean;
import org.springframework.context.annotation.Configuration;
import org.springframework.core.annotation.Order;
import org.springframework.security.authentication.AuthenticationManager;
import org.springframework.security.config.annotation.authentication.builders.AuthenticationManagerBuilder;
import org.springframework.security.config.annotation.web.builders.HttpSecurity;
import org.springframework.security.config.annotation.web.configuration.EnableWebSecurity;
import org.springframework.security.config.annotation.web.configuration.WebSecurityConfigurerAdapter;
import org.springframework.security.crypto.password.PasswordEncoder;

import com.sxl.config.service.MyUserDetailService;

/**
 * 〈security配置〉
 * 配置Spring Security
 * ResourceServerConfig 是比SecurityConfig 的优先级低的
 */
@Configuration
@EnableWebSecurity
@Order(2)
public class SecurityConfig extends WebSecurityConfigurerAdapter {
    @Autowired
    private MyUserDetailService userDetailService;

    @Bean
    public PasswordEncoder passwordEncoder() {
        //return new BCryptPasswordEncoder();
        return new NoEncryptPasswordEncoder();
    }

    @Override
    protected void configure(HttpSecurity http) throws Exception {
        http.requestMatchers().antMatchers("/oauth/**")
                .and()
                .authorizeRequests()
                .antMatchers("/oauth/**").authenticated()
                .and()
                .csrf().disable();
    }

    @Override
    protected void configure(AuthenticationManagerBuilder auth) throws Exception {
        auth.userDetailsService(userDetailService).passwordEncoder(passwordEncoder());
    }

    /**
     * 不定义没有password grant_type,密码模式需要AuthenticationManager支持
     *
     * @return
     * @throws Exception
     */
    @Override
    @Bean
    public AuthenticationManager authenticationManagerBean() throws Exception {
        return super.authenticationManagerBean();
    }
}
接下来,创建一个启动类ClouddoAuthApplication.java,用来启动这个微服务,代码如下:
package com.sxl;

import org.springframework.boot.SpringApplication;
import org.springframework.boot.autoconfigure.SpringBootApplication;
import org.springframework.cloud.netflix.eureka.EnableEurekaClient;
import org.springframework.security.config.annotation.method.configuration.EnableGlobalMethodSecurity;

@SpringBootApplication
@EnableEurekaClient
@EnableGlobalMethodSecurity(prePostEnabled = true)
public class ClouddoAuthApplication {

    public static void main(String[] args) {
        SpringApplication.run(ClouddoAuthApplication.class, args);
        System.out.println("ヾ(◍°∇°◍)ノ゙    认证中心启动成功      ヾ(◍°∇°◍)ノ゙");
    }

}
这样,微服务的类就写好了,下面来写微服务的配置。
在resources中新建一个config包,添加名为mybatis-config.xml的配置文件,代码如下:
<!DOCTYPE configuration
    PUBLIC "-//mybatis.org//DTD Config 3.0//EN"
    "http://mybatis.org/dtd/mybatis-3-config.dtd">
<configuration>
    <typeAliases>
        <typeAlias alias="Integer" type="java.lang.Integer" />
        <typeAlias alias="Long" type="java.lang.Long" />
        <typeAlias alias="HashMap" type="java.util.HashMap" />
        <typeAlias alias="LinkedHashMap" type="java.util.LinkedHashMap" />
        <typeAlias alias="ArrayList" type="java.util.ArrayList" />
        <typeAlias alias="LinkedList" type="java.util.LinkedList" />
        <typeAlias alias="Member" type="com.sxl.config.entity.Member" />
    </typeAliases>
</configuration>
创建一个lib包,引入sqljdbc的jar包,这个可以在网上自己下载。

然后右键这个微服务Build Path-Config Build Path-Add JARs-选择这个项目下的这个sqljdbc jar包。
添加bootstrap.yml文档,代码如下:
spring:
  application:
    name: clouddo-auth #服务名称
  cloud:
    config:
      uri: http://192.168.0.110:9002 #配置中心的地址
      enabled: true #开启配置
      profile: dev  #版本
      name: clouddo-auth #配置中心的配置文件名称
      label: master  #分支名称
同时不要忘了在配置中心里,添加上这个微服务的配置,创建名为clouddo-auth-dev.yml的文档,代码如下:
server:
  port: 9004
spring:
  application:
    name: clouddo-auth
  redis:
    database: 0
    host: 127.0.0.1
    port: 6379
    password:
    timeout: 5000
    jedis:
      pool:
        max-active: 8
        max-idle: 8
        min-idle: 0
        max-wait: -1
  datasource:
    url: jdbc:sqlserver://115.28.107.219:1433;database=EnterpriseManufacturingSystem;
    type: com.alibaba.druid.pool.DruidDataSource
    driver-class-name: com.microsoft.sqlserver.jdbc.SQLServerDriver
    username: sa
    password: 89883365aA
    initial-size: 2
    min-idle: 1
    max-active: 2
    max-wait: 60000
    time-between-eviction-runs-millis: 6000
    min-evictable-idle-time-millis: 300000
    validation-query: SELECT 1 FROM DUAL
    test-while-idle: true
    test-on-borrow: false
    test-on-return: false
    pool-prepared-statements: false
    max-pool-prepared-statement-per-connection-size: 20
    filters: stat


eureka:
  instance:
    lease-renewal-interval-in-seconds: 10
    lease-expiration-duration-in-seconds: 10
    prefer-ip-address: true
    instance-id: ${spring.cloud.client.ip-address}:${spring.application.name}:${spring.application.instance_id:${server.port}}
  client:
    service-url:
      defaultZone:  http://192.168.0.110:9001/eureka/

mybatis:
  config-location: classpath:config/mybatis-config.xml
  mapper-locations: classpath:mapper/*.xml
logging:
  level:
    com.sxl.mapper: debug
这样,认证中心就配置完成了,别的服务想要使用认证中心,需要做以下几个修改(以zuul网关微服务为例):
- 添加相关jar的引入
  <!-- oauth2 -->
         <dependency>
            <groupId>org.springframework.cloud</groupId>
            <artifactId>spring-cloud-starter-oauth2</artifactId>
        </dependency>
        <dependency>
            <groupId>org.springframework.cloud</groupId>
            <artifactId>spring-cloud-starter-security</artifactId>
        </dependency>
- 在java下创建config包,新建SecurityConfig.java,代码如下:
package com.sxl.config;

import org.springframework.context.annotation.Configuration;
import org.springframework.core.annotation.Order;
import org.springframework.security.config.annotation.web.builders.HttpSecurity;
import org.springframework.security.config.annotation.web.configuration.EnableWebSecurity;
import org.springframework.security.config.annotation.web.configuration.WebSecurityConfigurerAdapter;

@Configuration
@EnableWebSecurity
@Order(99)
public class SecurityConfig extends WebSecurityConfigurerAdapter {
    @Override
    protected void configure(HttpSecurity http) throws Exception {
        http.csrf().disable();
    }
}
同时给zuul网关添加一个拦截器,对访问进行过滤拦截,新建包AccessFilter,添加一个AccessFilter类,代码如下:
package com.sxl.filter;

import com.netflix.zuul.ZuulFilter;
import com.netflix.zuul.context.RequestContext;
import java.util.Set;

/**
 * @version V1.0
 * @Author bootdo 1992lcg@163.com
 */
public class AccessFilter extends ZuulFilter {


    @Override
    public String filterType() {
        return "pre";
    }

    @Override
    public int filterOrder() {
        return 10000;
    }

    @Override
    public boolean shouldFilter() {
        return true;
    }


    @Override
    public Object run() {
        RequestContext ctx = RequestContext.getCurrentContext();
        Set<String> headers = (Set<String>) ctx.get("ignoredHeaders");
        headers.remove("authorization");
        return null;
    }


}
- 在配置中心微服务中对网关的配置进行修改,代码如下:
server:
  port: 9003
eureka:
  instance:
    #    使用IP注册
    lease-renewal-interval-in-seconds: 10 # 每间隔1s,向服务端发送一次心跳,证明自己依然”存活“
    lease-expiration-duration-in-seconds: 10 # 告诉服务端,如果我2s之内没有给你发心跳,就代表我“死”了,将我踢出掉。
    prefer-ip-address: true
    instance-id: ${spring.cloud.client.ip-address}:${spring.application.name}:${spring.application.instance_id:${server.port}}
  client:
    service-url:
      defaultZone:  http://192.168.0.110:9001/eureka/
spring:
  servlet:
    multipart:
      max-file-size: 100Mb
      max-request-size: 100Mb
zuul:
  host:
      connections: 500
      connect-timeout-millis: 60000
      socket-timeout-millis: 60000
  routes:
 # 认证中心微服务
    clouddo-auth:
      service-id: clouddo-auth
      path: /auth/**
#---------------------OAuth2---------------------
security:
  oauth2:
    client:
      access-token-uri: http://192.168.0.110:${server.port}/auth/oauth/token
      user-authorization-uri: http://192.168.0.110:${server.port}/auth/oauth/authorize
      client-id: web
    resource:
      user-info-uri:  http://192.168.0.110:${server.port}/auth/api/member
      prefer-token-info: false
#----------------------超时配置-------------------
ribbon:
  ReadTimeout: 3500
  ConnectTimeout: 1000
  MaxAutoRetries: 0
  MaxAutoRetriesNextServer: 0
  eureka:
  #是否开启超时熔断
    enabled: true
hystrix:
  command:
    default:
      execution:
        timeout:
          enabled: true
        isolation:
          thread:
            timeoutInMilliseconds: 50000
因为这些token是临时存在redis中的,所以还要下载一个redis,然后启动。
@echo off
title redis-server
set ENV_HOME="C:\redis"
C:
color 0a
cd %ENV_HOME%
redis-server redis.windows.conf
exit

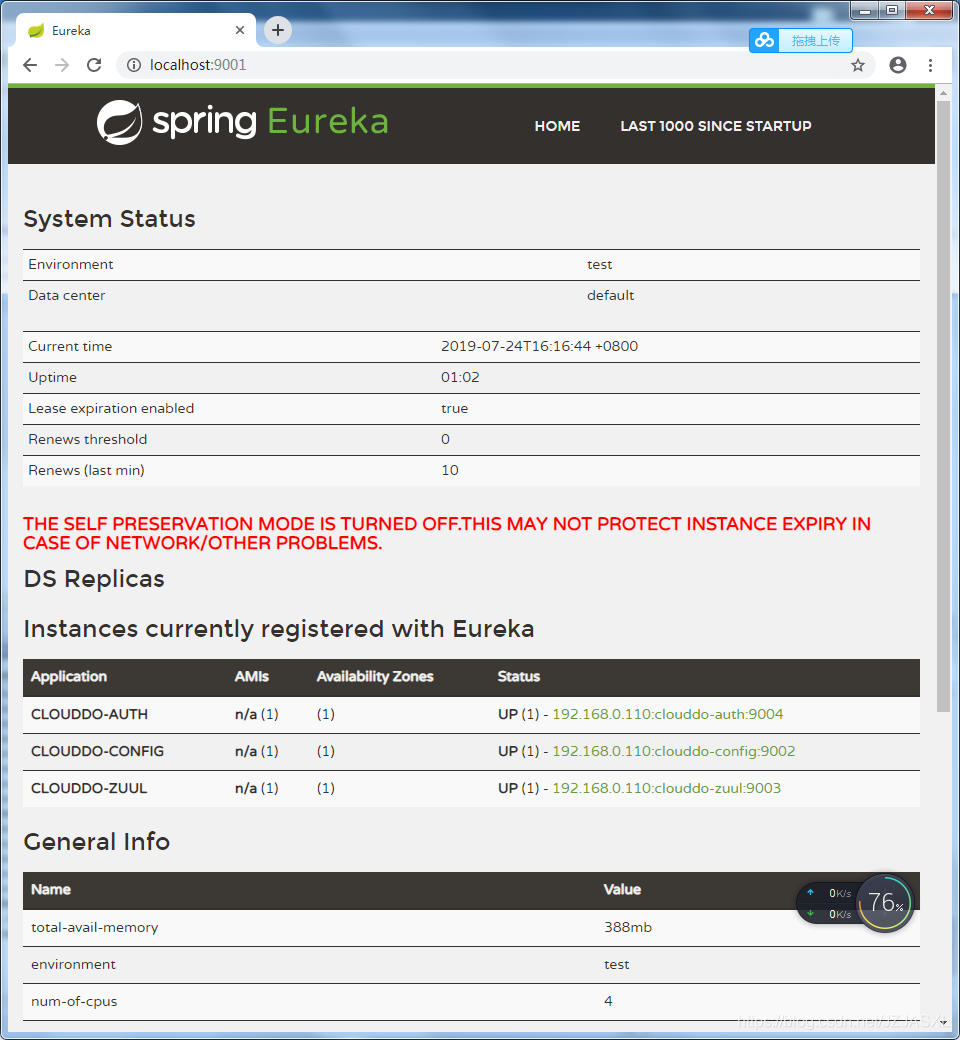
这样,认证中心的所有配置就配置完成了,服务启动后,显示如下:


 1万+
1万+


 被折叠的 条评论
为什么被折叠?
被折叠的 条评论
为什么被折叠?
 到【灌水乐园】发言


