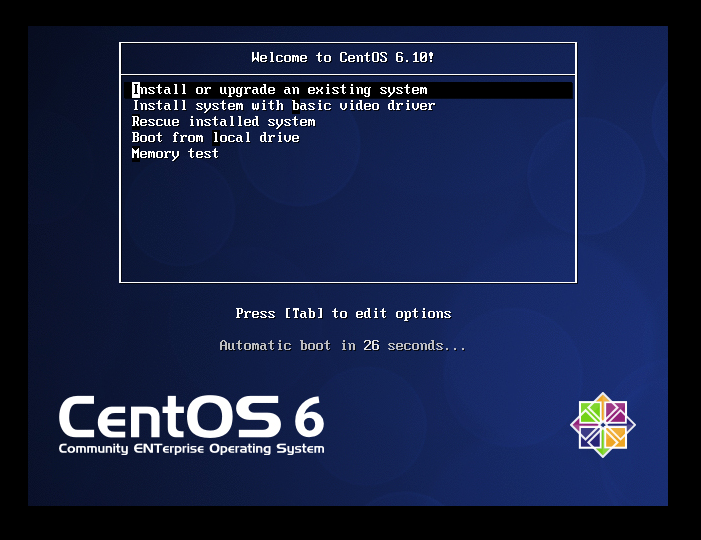
第一步 点击"Install or upgrade an existing system"
![](https://img-blog.csdnimg.cn/img_convert/914672c1c90b09650ca0706392722ee1.png)
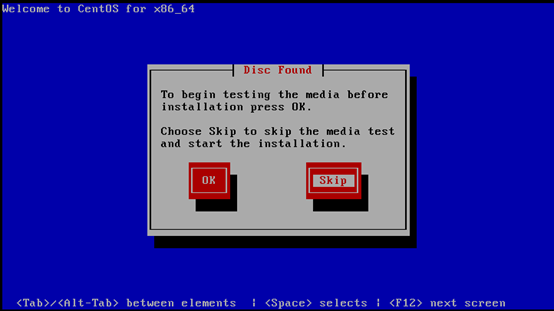
第二步 磁盘硬件检测界面,一般都正常,不需检测,选择"skip",没必要在这一步浪费几分钟时间
![](https://img-blog.csdnimg.cn/img_convert/8992e122d74e74fc21c19bc1cba15890.png)
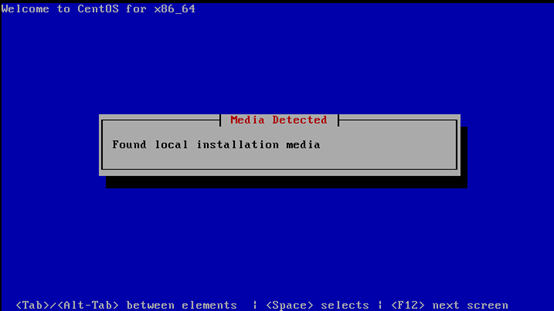
第三步 发现当地安装媒介界面,Enter
![](https://img-blog.csdnimg.cn/img_convert/2d4441bcacaddd3d2bd9a40e8a6d7384.png)
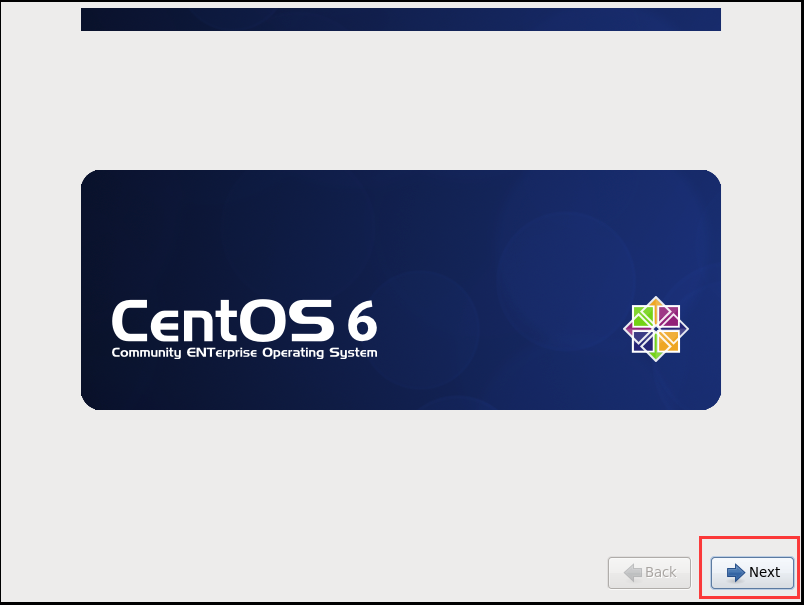
第四步 进入CentOS6.5引导界面,点击“Next”
![](https://img-blog.csdnimg.cn/img_convert/3687ee982ec66fc2c4a51f77352c1492.png)
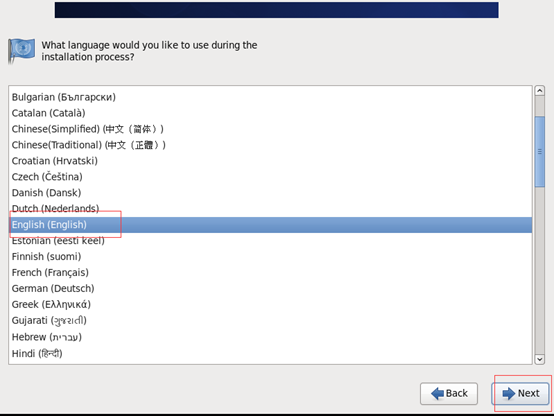
第五步 安装语言选择界面,最好是选择"English(English)",点击“Next”。当然你也可以选择中文,但是,博主我,强烈建议你选英文,既然你搞大数据,就要顺应大众
![](https://img-blog.csdnimg.cn/img_convert/52ebe274faf6c456000283956528ce99.png)
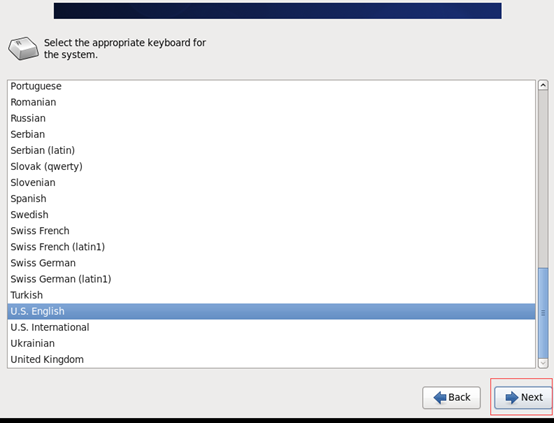
第六步 键盘语言选择界面,选择“U.S English”,点击“Next”
![](https://img-blog.csdnimg.cn/img_convert/d71a9a45b5a7c1a18306a15daca4dd1c.png)
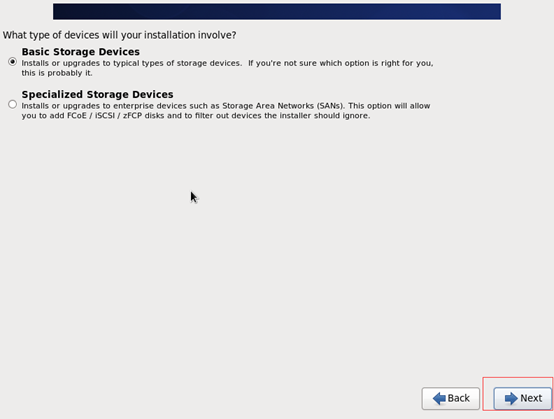
第七步 安装哪种设备类型选择界面,选择“Basic Storage Devices”,点击“Next”
![](https://img-blog.csdnimg.cn/img_convert/b12b8c27e33db2f6996f0fa219ea57e2.png)
第八步 存储设备警告界面,选择“Yes,discard any data”,点击"Next"。这个好比我们在安装windows一样,安装系统把C盘给格式化。
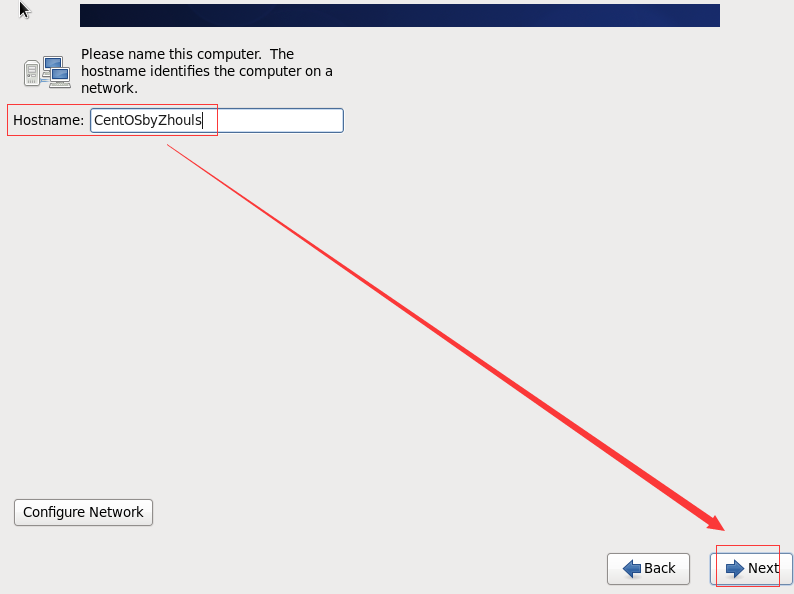
![](https://img-blog.csdnimg.cn/img_convert/0ef4ea3c9ea2f1aadca7826d72265ddb.png)
第九步
![](https://img-blog.csdnimg.cn/img_convert/9a69039e546f49aa610ae05487034126.png)
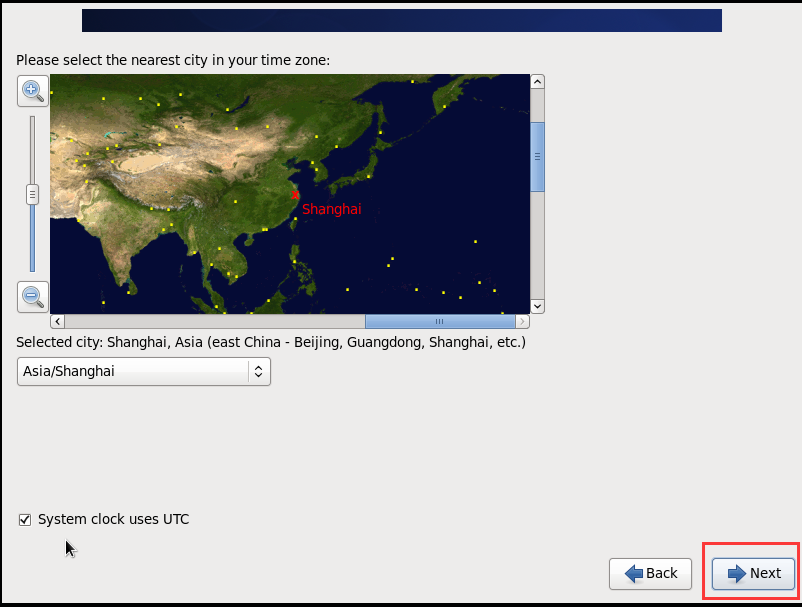
第十步 选择对应的时区,这里我们选择上海,系统时间选择UTC
![](https://img-blog.csdnimg.cn/img_convert/f2a371ea63e917c33eb2a36f3b6936cb.png)
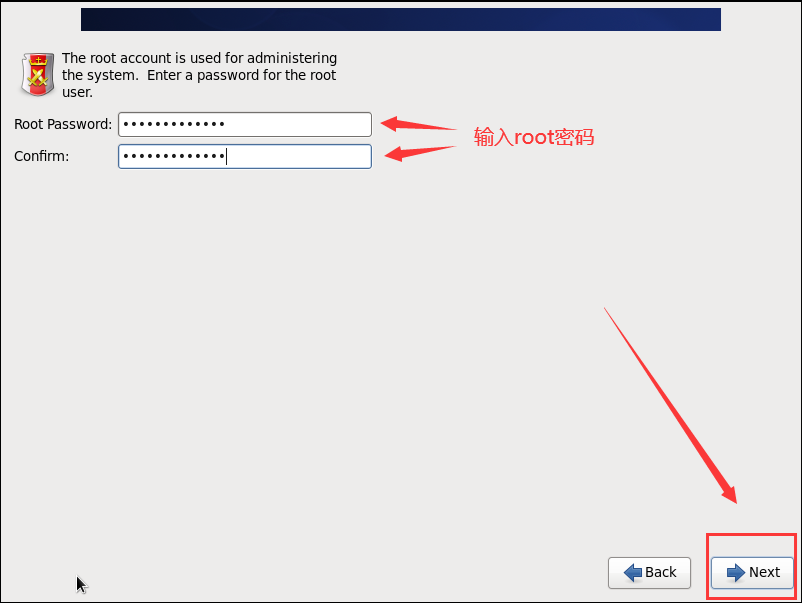
第十一步 输入root密码,两次一样,然后next下一步
![](https://img-blog.csdnimg.cn/img_convert/ce8f153d717013c0b20a5c79d1f15207.png)
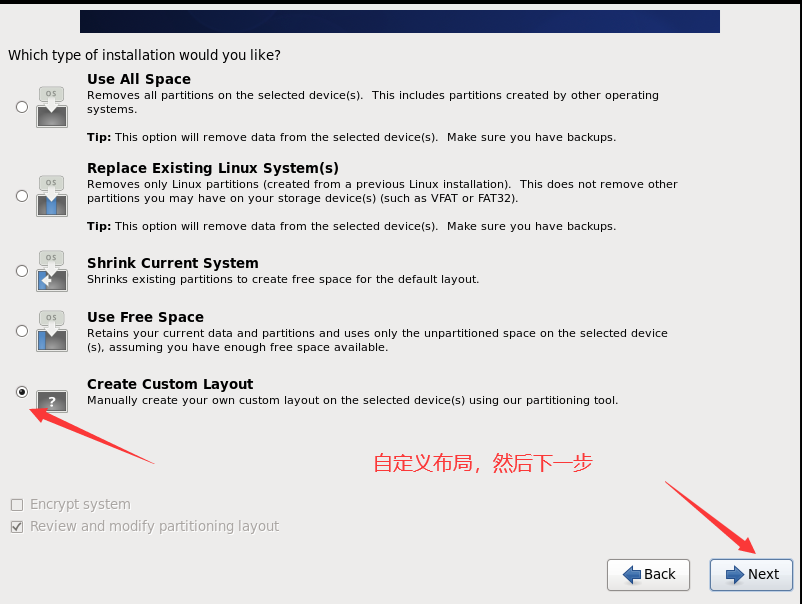
第十二步 选择创建自定义布局,你也可以使用所有空间,这个看需求
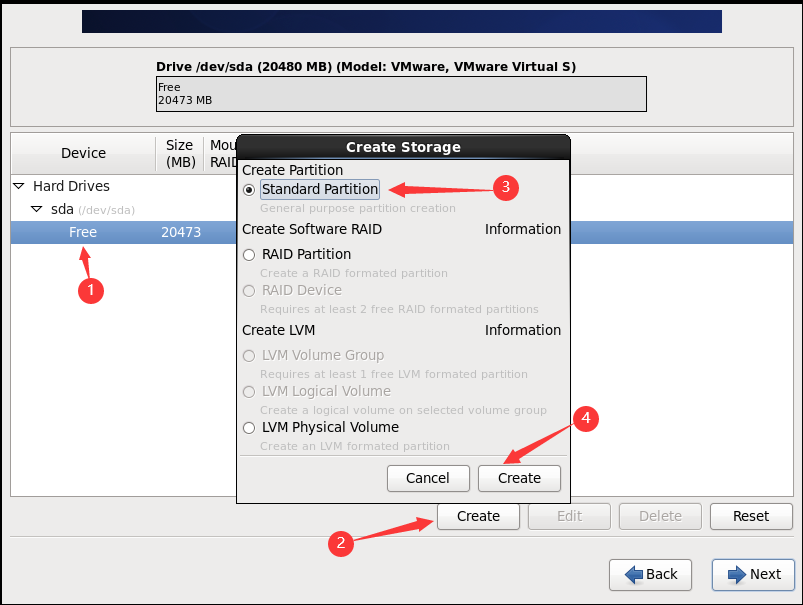
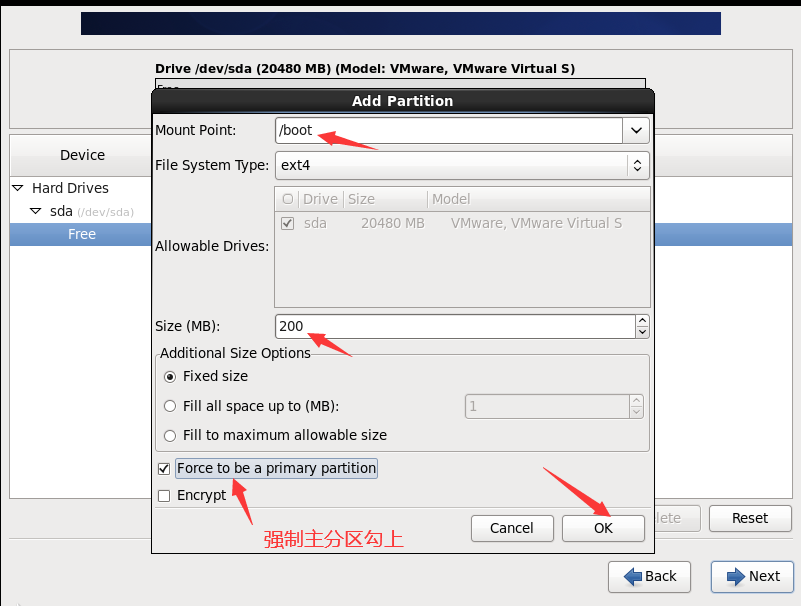
![](https://img-blog.csdnimg.cn/img_convert/654a8aa09cff124c1608c6c758274caf.png)
然后创建分区
![](https://img-blog.csdnimg.cn/img_convert/c8e99baea7ca25edc425cfda0b9127fc.png)
![](https://img-blog.csdnimg.cn/img_convert/39b265eb56fdb55ded4e9aa53bc9af58.png)
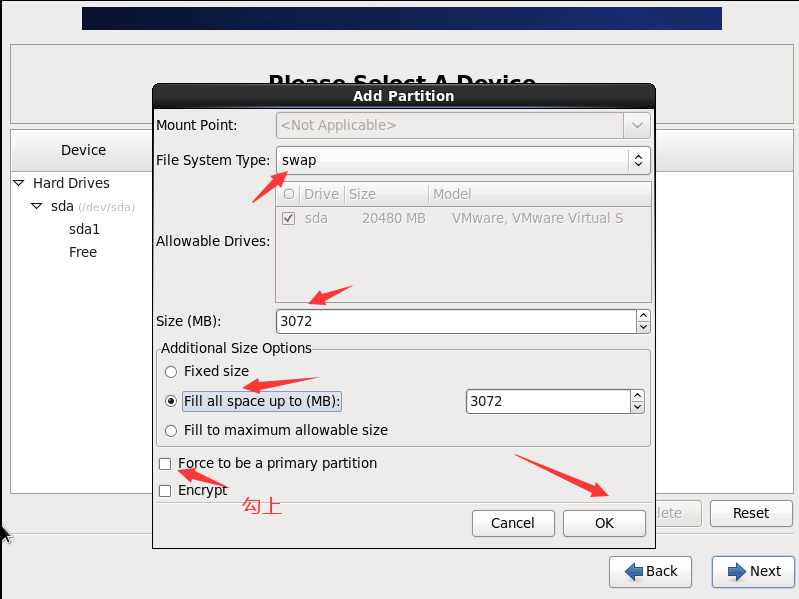
再建立一个swap分区,建议大小是你主机内存1.5倍,然后OK,next
![](https://img-blog.csdnimg.cn/img_convert/3b3ab70525ae3af3715a20afaaefce99.png)
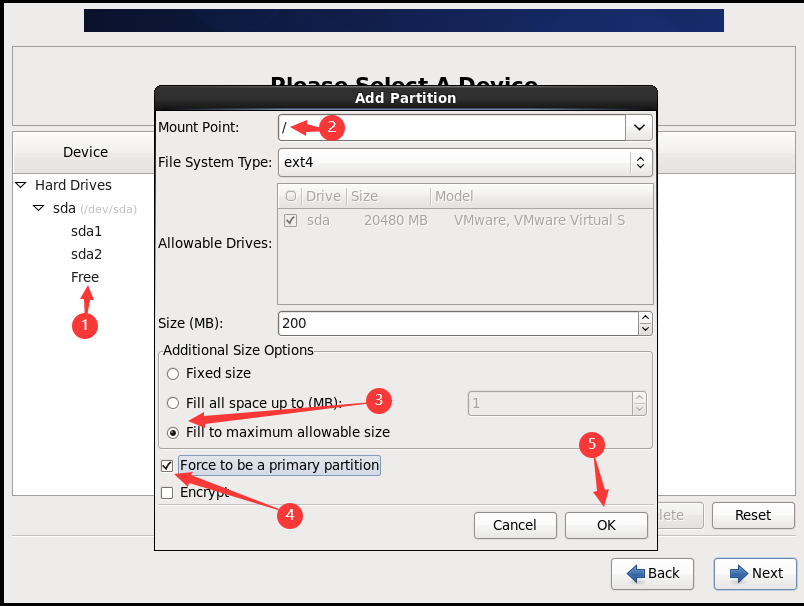
最后建立根分区 / 使用磁盘剩余所有空间
![](https://img-blog.csdnimg.cn/img_convert/157c8c22613714ac134d580dd6e76a8b.png)
分区完毕后,检查看下是否按我们的要求分配,选择next
![](https://img-blog.csdnimg.cn/img_convert/ebd2470e559fee94e6577c01aacdf806.png)
将要对分区进行格式化操作,选择格式化
![](https://img-blog.csdnimg.cn/img_convert/334a47ea387c0feb996c7d276b8c8682.png)
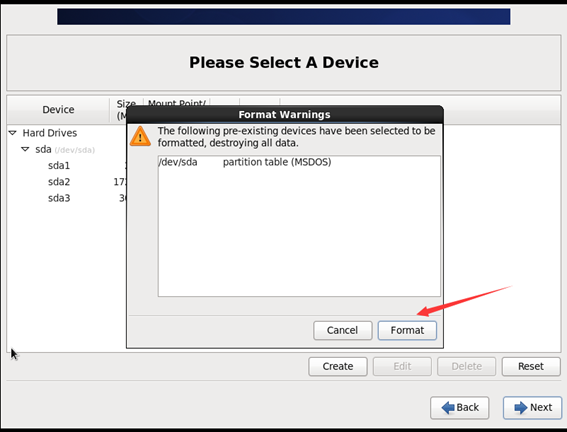
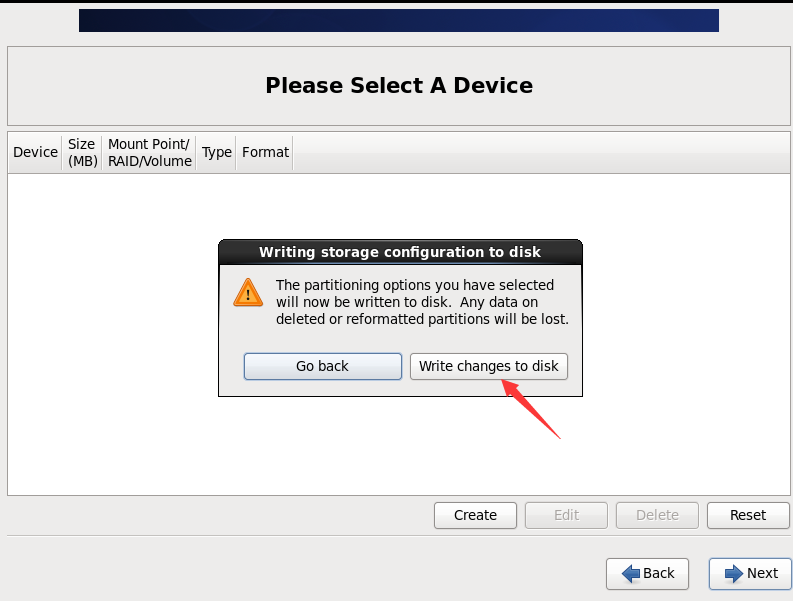
警告我们所有数据将会丢失,选择将改写写入磁盘
![](https://img-blog.csdnimg.cn/img_convert/9114ad2e8d71ad0948d2ab1952a2b48c.png)
![](https://img-blog.csdnimg.cn/img_convert/6b2c4e93577b575bcf59b9d2c308dc19.png)
![](https://img-blog.csdnimg.cn/img_convert/6616a875d5f67fdd9420b5ed3e6fcbee.png)
![](https://img-blog.csdnimg.cn/img_convert/824711eaf568480187fd72d1f277d9e2.png)
开始安装系统
![](https://img-blog.csdnimg.cn/img_convert/59f6eb62a33c39ab4a4def188eadbc3a.png)
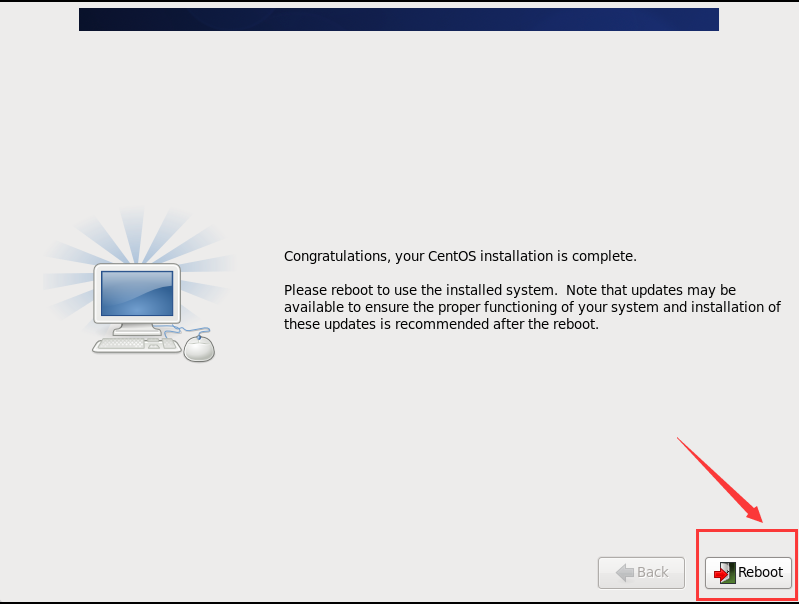
最后,系统安装结束,reboot重启,登录系统
![](https://img-blog.csdnimg.cn/img_convert/5ecef4f1d48ab10d30f79042abad819c.png)