


最近做的项目有个需求是在手机端打开页面,登录之后能在手机上扫描二维码并根据扫描的结果去查询班级情况。别的功能就不说了,移动端扫描二维码这个以前没做过,所以在这里记录一下。
项目用到的技术栈: Vue 3 + TypeScript + Vite + jsQr,UI组件库是 arco Design,可以根据自己的项目改为需要的,这个很好改
git 地址: github地址-拿来即用
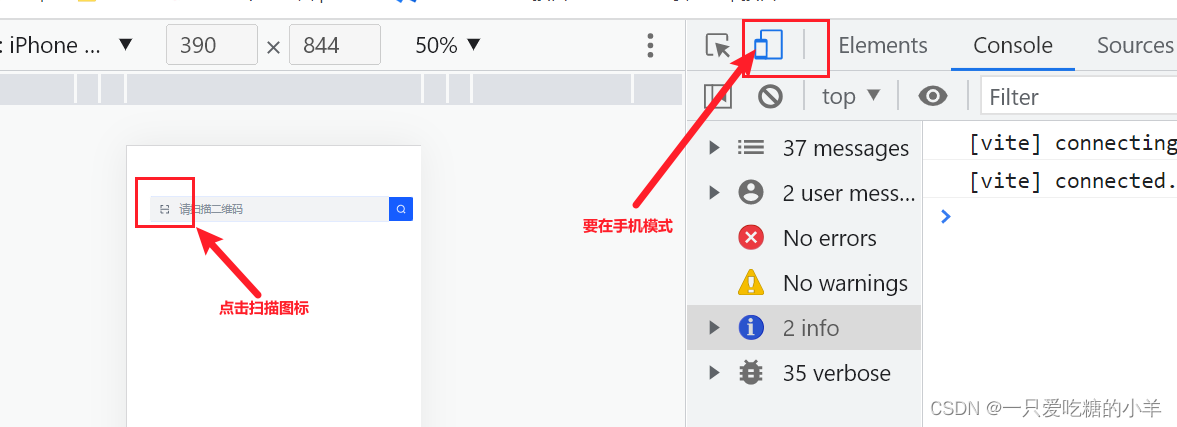
这个项目下载下来就能用直接跑通,需要注意的就是在本地开发用浏览器测试的话,需要用浏览器手机模式,并且把子组件 GetQrcode.vue 的52行注释一下(此处代码中也有说明),大家可以去github上下载整个项目在自己电脑上运行测试,也可以在这篇文章中看两个主要组件的代码,可以直接复制使用,大家自行取用。多有不成熟之处,也欢迎大佬指点!
其实是下载了木木大神的项目,然后把自己遇到的问题改了一下,然后结合自己的需求,稍微修改的项目,项目的 README中也写得比较详细,木木大神的项目地址:https://ext.dcloud.net.cn/plugin?id=7007 https://ask.dcloud.net.cn/article/35409
废话不多说,这里核心的住要是两个组件,子组件GetQrcode.vue 和父组件 HelloWorld.vue
父组件 HelloWorld.vue 的代码:
<template>
  <div class="container">
    <div class="input-container">
      <a-input-search
        ref="qrInput"
        v-model="data.qrCode"
        autofocus
        placeholder="请扫描二维码"
        search-button
        class="w-p-90"
        @change="searchInfo"
        @press-enter="searchInfo"
        @search="searchInfo"
      >
        <template #prefix>
          <icon-scan @click="handleScan" />
        </template>
      </a-input-search>
    </div>
    <GetQrcode
      v-if="data.isQrCodeShown"
      @success="gotQrCode"
      @closeScan="closeScan"
    />
    <a-alert v-if="data.isQrAlert" closable>{{ data.qrCOdeData }}</a-alert>
  </div>
</template>

<script lang="ts" setup>
import { ref, reactive, onMounted } from "vue";
import { FormInstance } from "@arco-design/web-vue/es/form";
import GetQrcode from "./GetQrcode.vue";

const qrInput: any = ref<FormInstance>();

// 全局控制的数据
const data = reactive({
  qrCode: "",
  isQrCodeShown: false,
  isQrAlert: false,
  qrCOdeData: "",
});

// 输入框的search事件
const searchInfo = (val: any) => {
  console.log("查询");
  console.log(data.qrCode);
  if (qrInput.value) {
    qrInput.value.focus();
  }
};

// 点击扫描图标---打开扫码功能
const handleScan = () => {
  const isMobile = checkDevice();
  if (isMobile === true) {
    data.isQrCodeShown = true;
  }
};

// 检查当前登录设备类型
const checkDevice = () => {
  // 获取浏览器navigator对象的userAgent属性(浏览器用于HTTP请求的用户代理头的值)
  const info = navigator.userAgent;
  // 通过正则表达式的test方法判断是否包含“Mobile”字符串
  const isMobile = /mobile/i.test(info);
  // 如果包含“Mobile”(是手机设备)则返回true
  return isMobile;
};
// 扫码成功
const gotQrCode = (params: any) => {
  // 这里params就是二维码的内容,这里可以根据自己项目的需求处理内容
  if (params) {
    data.isQrAlert = true;
    data.qrCOdeData = params;  // 我这里拿到二维码的内容是弹出框弹出,为了测试
    data.isQrCodeShown = false;
  }
};

const closeScan = () => {
  // 开发的 时候为了方便,加了这个关闭按钮,正常项目可以去掉
  data.isQrCodeShown = false;
};
</script>

<script lang="ts">
export default {
  name: "Scan",
  data() {
    return {};
  },
};
</script>

<style lang="less" scoped>
.top-tip-txt,
.no-data {
  color: rgb(var(--gray-6));
}
.input-container {
  padding: 8px 0 16px;
}

@media (min-width: 992px) {
  .detail-info {
    display: flex;
    .device-img {
      flex: 0 0 100px;
    }
    .txt-info {
      flex: 1;
    }
  }
}
@media (max-width: 992px) {
  .detail-info {
    // display: flex;
    .device-img {
      margin-bottom: 16px;
    }
    .txt-info {
      // flex: 1;
    }
  }
}

.detail-info {
  // display: flex;
  .device-img {
    // flex: 0 0 100px;
    height: 100px;
    background-color: #eee;
  }
  .txt-info {
    // flex: 1;
    padding: 0 16px;
    .uuid-name {
      color: var(--base);
    }
    .desc {
    }
  }
}

.w-p-90 {
  width: 90%;
  margin-left: 5%;
}
</style>

<style lang="less" scoped>
// responsive
.mobile {
  .container {
    display: block;
  }
}
</style>
子组件GetQrcode.vue 的代码:
<template>
  <div>
    <div class="canvasBox">
      <div class="box">
        <div class="line"></div>
        <div class="angle"></div>
      </div>
      <div v-if="isUseTorch" class="box2">
        <div class="track" @click="openTrack">
          <svg
            t="1653920715959"
            class="icon"
            viewBox="0 0 1024 1024"
            version="1.1"
            xmlns="http://www.w3.org/2000/svg"
            p-id="1351"
            width="32"
            height="32"
          >
            <path
              d="M651.353043 550.479503H378.752795L240.862609 364.315031c-3.688944-4.897391-5.660621-10.876025-5.660621-17.045466v-60.040745c0-15.773416 12.847702-28.621118 28.621118-28.621118h502.459627c15.773416 0 28.621118 12.847702 28.621118 28.621118v59.977143c0 6.105839-1.971677 12.084472-5.660621 17.045466l-137.890187 186.228074zM378.752795 598.308571v398.024348c0 15.328199 12.402484 27.667081 27.667081 27.667081h217.266087c15.328199 0 27.667081-12.402484 27.66708-27.667081V598.308571H378.752795z m136.300124 176.942112c-14.564969 0-26.331429-11.76646-26.331428-26.331428v-81.283975c0-14.564969 11.76646-26.331429 26.331428-26.331429 14.564969 0 26.331429 11.76646 26.331429 26.331429v81.283975c0 14.564969-11.76646 26.331429-26.331429 26.331428zM512 222.608696c-17.554286 0-31.801242-14.246957-31.801242-31.801243V31.801242c0-17.554286 14.246957-31.801242 31.801242-31.801242s31.801242 14.246957 31.801242 31.801242v159.006211c0 17.554286-14.246957 31.801242-31.801242 31.801243zM280.932174 205.881242c-9.47677 0-18.889938-4.197764-25.122981-12.275279L158.242981 67.991056a31.864845 31.864845 0 0 1 5.597019-44.648944 31.864845 31.864845 0 0 1 44.648944 5.597018l97.502609 125.551305a31.864845 31.864845 0 0 1-5.597019 44.648944c-5.787826 4.579379-12.656894 6.741863-19.46236 6.741863zM723.987081 205.881242c-6.805466 0-13.674534-2.162484-19.462361-6.678261a31.794882 31.794882 0 0 1-5.597018-44.648944l97.566211-125.551304a31.794882 31.794882 0 0 1 44.648944-5.597019 31.794882 31.794882 0 0 1 5.597019 44.648944l-97.566211 125.551305c-6.360248 8.077516-15.709814 12.27528-25.186584 12.275279z"
              fill="#ffffff"
              p-id="1352"
            ></path>
          </svg>
          {{ trackStatus ? "关闭闪光灯" : "打开闪光灯" }}
        </div>
      </div>
    </div>
    <!--  开发的 时候为了方便,加了这个关闭按钮,正常项目可以去掉 -->
    <a-button
      style="position: fixed; bottom: 180px; z-index: 1000"
      @click="closeScan"
      >关闭扫码</a-button
    >
  </div>
</template>

<script>
import jsQR from "jsqr";
import { Message } from "@arco-design/web-vue";

export default {
  name: "GetQrcode",
  props: {
    continue: {
      type: Boolean,
      default: false, // false 监听一次   true 持续监听
    },
    exact: {
      type: String,
      // default: "environment", // environment 后摄像头  user 前摄像头  //  P.S. 如果要在PC端测试,把这一行注释掉,因为PC没有后置摄像头
    },
    size: {
      type: String,
      default: "whole", // whole 全屏  balf 半屏
    },
    definition: {
      type: Boolean,
      default: false, // fasle 正常  true 高清
    },
  },
  data() {
    return {
      video: undefined,

      canvas2d: undefined,
      canvasWidth: 520,
      canvasHeight: 500,

      c: undefined,

      track: null,
      isUseTorch: false,
      trackStatus: false,
    };
  },
  mounted() {
    if (origin.indexOf("https") === -1) {
      Message.warning("请在 https 环境中使用本插件。");
    }

    const windowWidth = window.screen.availWidth;
    const windowHeight = window.screen.availHeight;

    this.canvasWidth = windowWidth;
    this.canvasHeight = windowHeight;

    this.$nextTick(() => {
      this.video = document.createElement("video");
      this.c = document.createElement("canvas");
      this.c.id = "c";
      this.c.width = this.canvasWidth;
      this.c.height = this.canvasHeight;
      this.c.style.width = "100%";
      document.querySelector(".canvasBox").append(this.c);
      this.openScan();
    });
  },
  unmounted() {
    this.closeCamera();
  },
  methods: {
    closeScan() {
      this.$emit("closeScan");
    },
    openScan() {
      let width = this.canvasHeight;
      width = this.size === "whole" ? width : width * 0.5;
      width = this.definition ? width * 1.6 : width;
      let height = this.canvasWidth;
      height = this.definition ? height * 1.6 : height;
      const videoParam = {
        audio: false,
        video: {
          facingMode: { exact: this.exact },
          width,
          height,
        },
      };
      navigator.mediaDevices
        .getUserMedia(videoParam)
        .then((stream) => {
          this.video.srcObject = stream;
          this.video.setAttribute("playsinline", true);
          this.video.play();
          requestAnimationFrame(this.tick);

          // 下面这 4 行这么麻烦的写,是因为我项目中严格的语法检测,嫌麻烦可以试试下面注释掉的一行
          // let a = [];
          // a = stream.getVideoTracks();
          // const t = a[0];
          // this.track = t;

          [this.track] = stream.getVideoTracks();

          setTimeout(() => {
            this.isUseTorch = this.track.getCapabilities().torch || null;
          }, 500);
        })
        .catch((err) => {
          Message.warning("设备不支持,请检查是否允许摄像头权限");
          console.log("获取本地设备(摄像头)---失败-------err");
          console.log(err);
        });
    },

    closeCamera() {
      if (this.video.srcObject) {
        this.video.srcObject.getTracks().forEach((track) => {
          track.stop();
        });
      }
    },
    tick() {
      if (this.video.readyState === this.video.HAVE_ENOUGH_DATA) {
        this.canvasHeight = this.video.videoHeight;
        this.canvasWidth = this.video.videoWidth;
        this.c.width = this.canvasWidth;
        this.c.height = this.canvasHeight;
        if (this.canvas2d === undefined) {
          this.canvas2d = this.c.getContext("2d");
        }

        this.canvas2d.drawImage(
          this.video,
          0,
          0,
          this.canvasWidth,
          this.canvasHeight
        );

        const imageData = this.canvas2d.getImageData(
          0,
          0,
          this.canvasWidth,
          this.canvasHeight
        );

        const code = jsQR(imageData.data, imageData.width, imageData.height, {
          inversionAttempts: "dontInvert",
        });

        if (code) {
          this.drawLine(
            code.location.topLeftCorner,
            code.location.topRightCorner,
            "#FF3B58"
          );
          this.drawLine(
            code.location.topRightCorner,
            code.location.bottomRightCorner,
            "#FF3B58"
          );
          this.drawLine(
            code.location.bottomRightCorner,
            code.location.bottomLeftCorner,
            "#FF3B58"
          );
          this.drawLine(
            code.location.bottomLeftCorner,
            code.location.topLeftCorner,
            "#FF3B58"
          );
          if (code.data) {
            this.getData(code.data);
          }
        }
      }
      requestAnimationFrame(this.tick);
    },
    drawLine(begin, end, color) {
      this.canvas2d.beginPath();
      this.canvas2d.moveTo(begin.x, begin.y);
      this.canvas2d.lineTo(end.x, end.y);
      this.canvas2d.lineWidth = 4;
      this.canvas2d.strokeStyle = color;
      this.canvas2d.stroke();
    },

    getData(data) {
      this.$emit("success", data);
      if (!this.continue) {
        this.closeCamera();
      }
    },

    openTrack() {
      this.trackStatus = !this.trackStatus;
      this.track.applyConstraints({
        advanced: [{ torch: this.trackStatus }],
      });
    },
  },
};
</script>

<style scoped>
page {
  background-color: #333333;
}

.canvasBox {
  width: 100vw;
  /* position: relative; */
  position: fixed;
  top: 0;
  bottom: 0;
  left: 0;
  right: 0;
  /* background-color: rgba(0,0,0,0.1); */

  background-image: linear-gradient(
      0deg,
      transparent 24%,
      rgba(32, 255, 77, 0.1) 25%,
      rgba(32, 255, 77, 0.1) 26%,
      transparent 27%,
      transparent 74%,
      rgba(32, 255, 77, 0.1) 75%,
      rgba(32, 255, 77, 0.1) 76%,
      transparent 77%,
      transparent
    ),
    linear-gradient(
      90deg,
      transparent 24%,
      rgba(32, 255, 77, 0.1) 25%,
      rgba(32, 255, 77, 0.1) 26%,
      transparent 27%,
      transparent 74%,
      rgba(32, 255, 77, 0.1) 75%,
      rgba(32, 255, 77, 0.1) 76%,
      transparent 77%,
      transparent
    );
  background-size: 3rem 3rem;
  background-position: -1rem -1rem;
  z-index: 10;
  background-color: #1110;
}

.box {
  width: 191px;
  height: 191px;
  position: absolute;
  left: 50%;
  top: 50%;
  transform: translate(-50%, -50%);
  overflow: hidden;
  border: 0.1rem solid rgba(0, 255, 51, 0.2);
  z-index: 11;
}

.line {
  height: calc(100% - 2px);
  width: 100%;
  background: linear-gradient(180deg, rgba(0, 255, 51, 0) 43%, #00ff33 211%);
  border-bottom: 3px solid #00ff33;
  transform: translateY(-100%);
  animation: radar-beam 2s infinite alternate;
  animation-timing-function: cubic-bezier(0.53, 0, 0.43, 0.99);
  animation-delay: 1.4s;
}

.box:after,
.box:before,
.angle:after,
.angle:before {
  content: "";
  display: block;
  position: absolute;
  width: 3vw;
  height: 3vw;
  z-index: 12;
  border: 0.2rem solid transparent;
}

.box:after,
.box:before {
  top: 0;
  border-top-color: #00ff33;
}

.angle:after,
.angle:before {
  bottom: 0;
  border-bottom-color: #00ff33;
}

.box:before,
.angle:before {
  left: 0;
  border-left-color: #00ff33;
}

.box:after,
.angle:after {
  right: 0;
  border-right-color: #00ff33;
}

@keyframes radar-beam {
  0% {
    transform: translateY(-100%);
  }

  100% {
    transform: translateY(0);
  }
}

.msg {
  text-align: center;
  padding: 20rpx 0;
}

.box2 {
  width: 300px;
  height: 200px;
  position: absolute;
  left: 50%;
  top: 50%;
  transform: translate(-50%, -50%);
  z-index: 20;
}

.track {
  position: absolute;
  bottom: -100px;
  left: 50%;
  transform: translateX(-50%);
  z-index: 20;
  color: #fff;
  display: flex;
  flex-direction: column;
  align-items: center;
}
</style>
如果这个项目对您有所帮助,欢迎赏一颗星星哦~
也请大佬不吝赐教!


 4901
4901


 被折叠的 条评论
为什么被折叠?
被折叠的 条评论
为什么被折叠?
 到【灌水乐园】发言


