


1.依赖管理特性
父项目做依赖管理
依赖管理
<parent>
	<groupId>org.springframework.boot</groupId>
	<artifactId>spring-boot-starter-parent</artifactId>
	<version>2.3.4.RELEASE</version>
</parent>

上面项目的父项目如下:
<parent>
	<groupId>org.springframework.boot</groupId>
	<artifactId>spring-boot-dependencies</artifactId>
	<version>2.3.4.RELEASE</version>
</parent>

它几乎声明了所有开发中常用的依赖的版本号,自动版本仲裁机制
开发导入starter场景启动器
- 见到很多 spring-boot-starter-* : *就某种场景
- 只要引入starter,这个场景的所有常规需要的依赖我们都自动引入
- 更多SpringBoot所有支持的场景 见到的
- *-spring-boot-starter: 第三方为我们提供的简化开发的场景启动器。
所有场景启动器最底层的依赖
<dependency>
	<groupId>org.springframework.boot</groupId>
	<artifactId>spring-boot-starter</artifactId>
	<version>2.3.4.RELEASE</version>
	<scope>compile</scope>
</dependency>
无需关注版本号,自动版本仲裁
- 引入依赖默认都可以不写版本
- 引入非版本仲裁的jar,要写版本号。
可以修改默认版本号
- 查看spring-boot-dependencies里面规定当前依赖的版本 用的 key。
- 在当前项目里面重写配置,如下面的代码。
<properties>
	<mysql.version>5.1.43</mysql.version>
</properties>
2.自动配置特性
自动配好Tomcat
- 引入Tomcat依赖。
- 配置Tomcat
<dependency>
   <groupId>org.springframework.boot</groupId>
   <artifactId>spring-boot-starter-tomcat</artifactId>
   <version>2.3.4.RELEASE</version>
   <scope>compile</scope>
</dependency>
自动配好SpringMVC
引入SpringMVC全套组件
自动配好SpringMVC常用组件(功能)
自动配好Web常见功能,如:字符编码问题
SpringBoot帮我们配置好了所有web开发的常见场景
public static void main(String[] args) {
    //返回我们IOC容器
    ConfigurableApplicationContext run = SpringApplication.run(MainApplication.class, args);

    //查看容器里面所有组件的函数
    String[] names = run.getBeanDefinitionNames();
    for (String name : names) {
        System.out.println(name);
    }
}
默认的包结构
主程序所在包及其下面的所有子包里面的组件都会被默认扫描进来
无需以前的包扫描配置
想要改变扫描路径:
@SpringBootApplication(scanBasePackages=“com.lun”)
@ComponentScan 指定扫描路径
@SpringBootApplication
等同于
@SpringBootConfiguration
@EnableAutoConfiguration
@ComponentScan("com.lun")
各种配置拥有默认值
- 默认配置最终都是映射到某个类上,如:MultipartProperties
- 配置文件的值最终会绑定每个类上,这个类会在容器中创建对象
按需加载所有自动配置项
- 非常多的starter
- 引入了哪些场景这个场景的自动配置才会开启
- SpringBoot所有的自动配置功能都在 spring-boot-autoconfigure 包里面
在config包中新建一个MyConfig.class
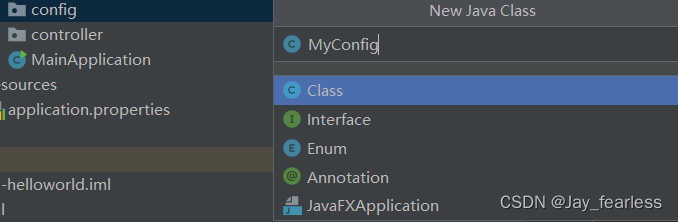
MyConfig.class
@Configuration(proxyBeanMethods = true) //告诉SpringBoot这是一个配置类 == 配置文件
public class MyConfig {

    /**
     * Full:外部无论对配置类中的这个组件注册方法调用多少次获取的都是之前注册容器中的单实例对象
     * @return
     */
    @Bean //给容器中添加组件。以方法名作为组件的id。返回类型就是组件类型。返回的值,就是组件在容器中的实例
    public User user01(){
        User joy = new User("joy187", 18);
        //user组件依赖了Pet组件
        joy.setPet(tomcatPet());
        return joy;
    }

    @Bean("tom")
    public Pet tomcatPet(){
        return new Pet("tomcat");
    }

}
为了进行测试,要创建一个User.class
package com.atgg.boot.bean;

public class User {
    private String name;
    private Integer age;

    private Pet pet;

    public Pet getPet(){
        return pet;
    }

    public void setPet(Pet pet) {
        this.pet = pet;
    }

    public User() { }
    public User (String name,Integer age) {
        this.name = name;
        this.age = age;
    }
    public String getName () { return name; }
    public void setName(String name) { this.name = name; }
    public Integer getAge( ) { return age; }
    public void setAge( Integer age) { this.age = age; }

    @Override
    public String toString( ) {
        return "User{" +
                "name='" + name + '\''+
                ", age='" + age + '\''+
                ", pet='" + pet + '\''+
                '}';
    }


}
创建一个Pet类:
package com.atgg.boot.bean;

public class Pet {
    private String name;

    public Pet() {}
    public Pet(String name) {
        this.name=name;
    }
    public String getName() { return name; }
    public void setName (String name) { this.name = name; }

    @Override
    public String toString( ) {
        return "Pet{" + "name='" + name + '\''+ '}';
    }
}
自动生成
对着需要生成getter,setter的变量按下“Alt”+“Enter”键,就可以自动生成方法。
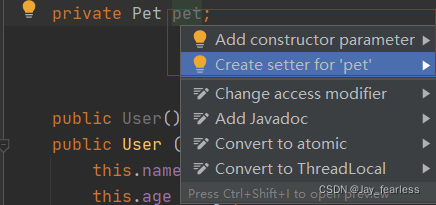
也可以对着变量右键然后点击Generate…进行自动生成:

当proxyBeanMethods = true时,在MainApplication.java中进行测试:
package com.atgg.boot;

import com.atgg.boot.bean.Pet;
import com.atgg.boot.bean.User;
import com.atgg.boot.config.MyConfig;
import org.springframework.boot.SpringApplication;
import org.springframework.boot.autoconfigure.SpringBootApplication;
import org.springframework.context.ConfigurableApplicationContext;

@SpringBootApplication
public class MainApplication {
    public static void main(String[] args) {
//        SpringApplication.run(MainApplication.class,args);

        ConfigurableApplicationContext run = SpringApplication.run(MainApplication.class, args);

        MyConfig bean = run.getBean(MyConfig.class);
        System.out.println(bean);

        //如果@Configuration(proxyBeanMethods = true)代理对象调用方法。SpringBoot总会检查这个组件是否在容器中有。
        //保持组件单实例
        User user = bean.user01();
        User user1 = bean.user01();
        System.out.println(user == user1);

        User user01 = run.getBean("user01", User.class);
        Pet tom = run.getBean("tom", Pet.class);

        System.out.println("用户的宠物:"+(user01.getPet() == tom));
    }

}
此时显示的为一个单例实体,返回true:

最佳实战
- 配置 类组件之间无依赖关系用Lite模式(proxyBeanMethods = false)加速容器启动过程,减少判断
- 配置 类组件之间有依赖关系,方法会被调用得到之前单实例组件,用Full模式(默认)(proxyBeanMethods = true)


 9441
9441


 被折叠的 条评论
为什么被折叠?
被折叠的 条评论
为什么被折叠?
 到【灌水乐园】发言


