


今天看视频复习了一下Spring AOP的使用,顺便写个笔记。
1、AOP的定义
这是百度百科对AOP的解释:

2、在Spring中使用AOP
2.1、引入jar包
<dependency>
    <groupId>org.aspectj</groupId>
    <artifactId>aspectjweaver</artifactId>
    <version>1.8.6</version>
</dependency>
2.2、项目结构与具体代码
这是小编我的项目结构
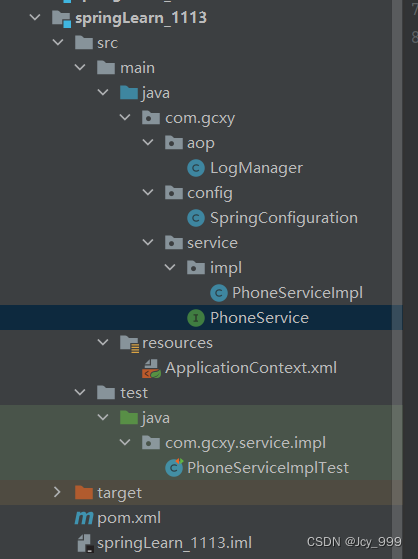
①先写一些业务逻辑,我在service包下PhoneService接口中定义了以下两个方法
package com.gcxy.service;

public interface PhoneService {
    void select();
    void add();
}
②然后在service包下的impl包中的PhoneServiceImpl类中实现了这两个方法
package com.gcxy.service.impl;

import com.gcxy.service.PhoneService;
import org.springframework.stereotype.Service;

@Service
public class PhoneServiceImpl implements PhoneService {
    @Override
    public void select() {
        int a = 3;
        String b = "";
        System.out.println("大家都在使用**手机");
        System.out.println(a+b);
    }

    @Override
    public void add() {
        int a = 10;
        String b = "";
        System.out.println(a+b);
    }
}
③在aop包下logManager类中写入日志
package com.gcxy.aop;

import org.aspectj.lang.JoinPoint;
import org.aspectj.lang.ProceedingJoinPoint;
import org.aspectj.lang.Signature;
import org.aspectj.lang.annotation.*;
import org.springframework.stereotype.Component;

import java.time.LocalDate;

@Component
@Aspect
public class LogManager {

    //增强功能
    //环绕
    @Around("execution(* com.gcxy.service..*.*(..))")
    public Object printLog(ProceedingJoinPoint pjp) throws Throwable{
        Signature signature = pjp.getSignature();
        System.out.println(LocalDate.now() + "============>" + signature +"=============》表示开始执行");
        Object proceed = pjp.proceed();
        System.out.println(LocalDate.now() + "============>" + signature +"=============》表示结束执行");
        return proceed;
    }

    //前置
    @Before("execution(* com.gcxy.service..*.*(..))")
    public void printBofore(JoinPoint joinPoint){
        Signature signature = joinPoint.getSignature();
        System.out.println(LocalDate.now() + "============>" + signature +"=============》前置通知");
    }

    //后置
    @AfterReturning("execution(* com.gcxy.service..*.*(..))")
    public void printAfterReturning(JoinPoint joinPoint){
        Signature signature = joinPoint.getSignature();
        System.out.println(LocalDate.now() + "============>" + signature +"=============》后置通知");
    }

    //异常
    @AfterThrowing("execution(* com.gcxy.service..*.*(..))")
    public void printAfterThrowing(JoinPoint joinPoint){
        Signature signature = joinPoint.getSignature();
        System.out.println(LocalDate.now() + "============>" + signature +"=============》异常通知");
    }

    //最后
    @After("execution(* com.gcxy.service..*.*(..))")
    public void printAfter(JoinPoint joinPoint){
        Signature signature = joinPoint.getSignature();
        System.out.println(LocalDate.now() + "============>" + signature +"=============》最后通知");
    }
}
④在ApplicationContext.xml中注册bean
<?xml version="1.0" encoding="UTF-8"?>
<beans xmlns="http://www.springframework.org/schema/beans"
       xmlns:xsi="http://www.w3.org/2001/XMLSchema-instance" xmlns:aop="http://www.springframework.org/schema/c"
       xsi:schemaLocation="http://www.springframework.org/schema/beans http://www.springframework.org/schema/beans/spring-beans.xsd">

    <bean id="logManager" class="com.gcxy.aop.LogManager"></bean>
    <bean id="phoneService" class="com.gcxy.service.impl.PhoneServiceImpl"></bean>
</beans>
⑤配置aop,小编我是用注解的方式配置的,在config包下的SpringConfiguration类中写入如下代码
package com.gcxy.config;

import org.springframework.context.annotation.ComponentScan;
import org.springframework.context.annotation.Configuration;
import org.springframework.context.annotation.EnableAspectJAutoProxy;

@Configuration
@ComponentScan("com.gcxy")
@EnableAspectJAutoProxy
public class SpringConfiguration {
}
在测试类中测试之前写好的select方法和add方法
package com.gcxy.service.impl;

import com.gcxy.config.SpringConfiguration;
import com.gcxy.service.PhoneService;
import org.junit.Test;
import org.junit.runner.RunWith;
import org.springframework.beans.factory.annotation.Autowired;
import org.springframework.test.context.ContextConfiguration;
import org.springframework.test.context.junit4.SpringJUnit4ClassRunner;

import static org.junit.Assert.*;

@RunWith(SpringJUnit4ClassRunner.class)
@ContextConfiguration(classes = {SpringConfiguration.class})
public class PhoneServiceImplTest {

    @Autowired
    private PhoneService phoneService;

    @Test
    public void select() {
        phoneService.select();
    }

    @Test
    public void add(){
        phoneService.add();
    }
}
3、AOP的五种常见通知
环绕、前置、后置、异常、返回
下面是具体测试类中select方法的运行结果
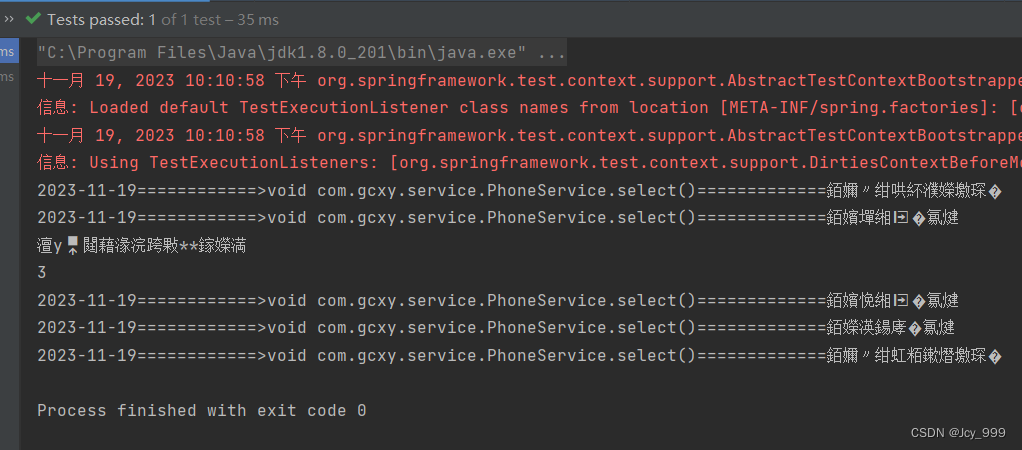
这里小编的运行结果出现了乱码。顺便记录一下我是怎么解决这次乱码的
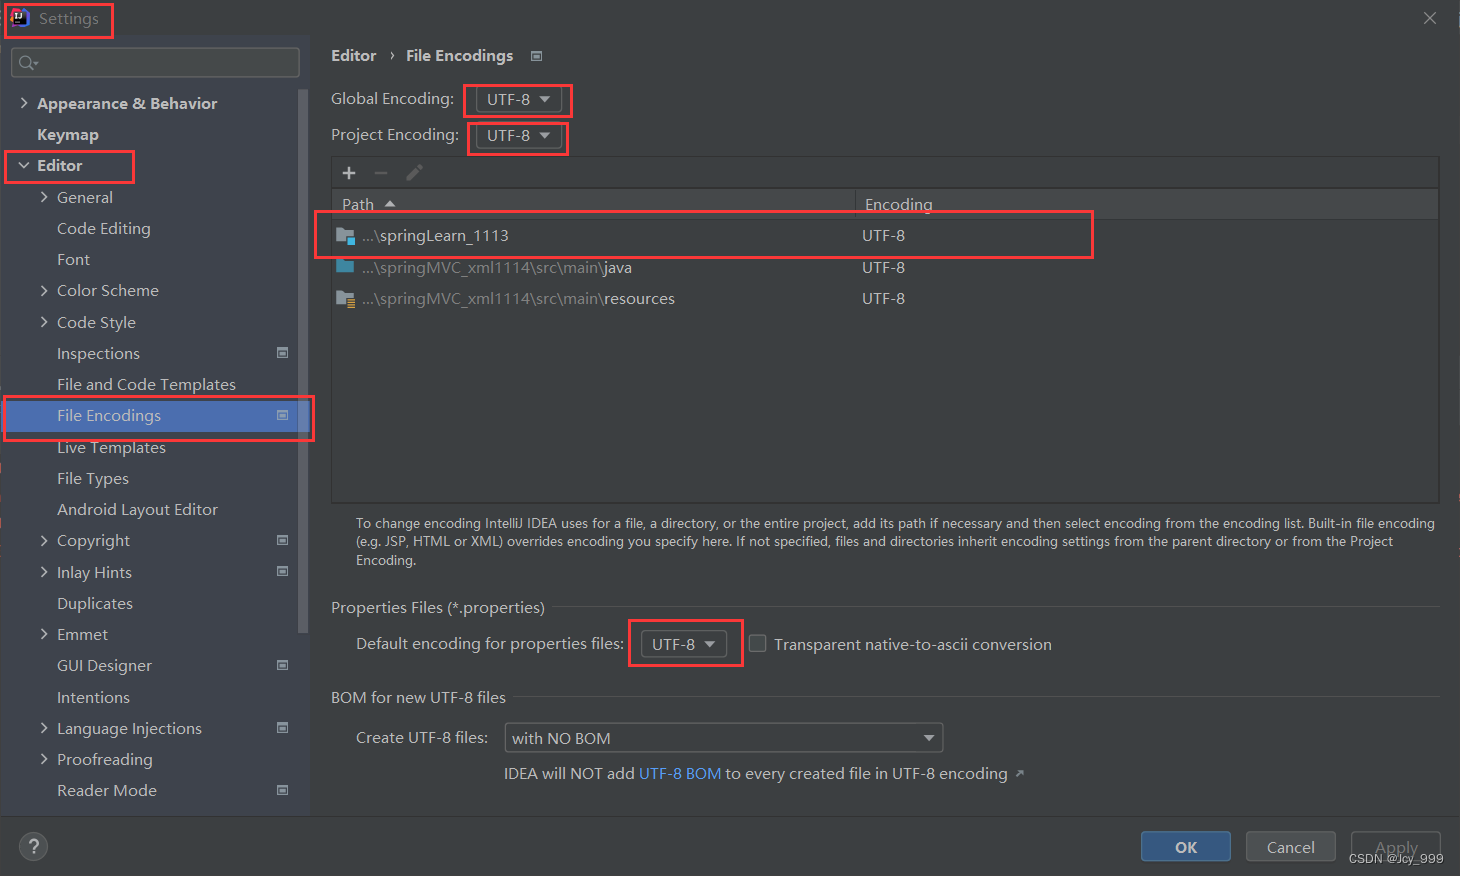 小编把这些全都改成了UTF-8,然后就解决了/滑稽

好嘞,今天的笔记就记到这里了!


 513
513


 被折叠的 条评论
为什么被折叠?
被折叠的 条评论
为什么被折叠?
 到【灌水乐园】发言


