目标 :在受管主机上创建,安装,编辑,和删除文件,以及赋予文件权限,所有权,SElinux上下文和其他特征
该类任务常用文件模块
![](https://img-blog.csdnimg.cn/img_convert/1cecf7ed880d29313ff9e927b4e358aa.png)
这里讲一下file模块
file模块
1.确保受管主机上存在文件 并且可以设置拥有用户,组和权限
- name: Touch a file and set permissions
file:
path: /path/to/file
owner: user1
group: group1
mode: 0640
state: touch
2.修改文件属性,使用file模块确保新的或现有的文件具有正确的权限和SELinux类型
![](https://img-blog.csdnimg.cn/img_convert/dbed3c981ca494931bb03554c6e5149d.png)
- name: SELinux type is set to samba_share_t
file:
path: /path/to/samba_file
setype: samba_share_t
![](https://img-blog.csdnimg.cn/img_convert/84a73ba2a7df7809b06b403918ae00c4.png)
同步控制节点和受管主机之间的文件
让我们再了解一个重要的模块——synchronize
该模块围绕rsync工具的打包程序 简化了playbook中常见的文件管理任务
注意:rsync工具必须同时安装在本地和远程主机上
默认情况下本地主机就是源自的主机(大部分情况是控制节点)
目标主机就是synchronize连接到的主机
实验
![](https://img-blog.csdnimg.cn/img_convert/272650931eca30bd2bcc4c5d2297bdee.png)
实验开始 : lab file-manage start
去往文件夹 : cd ~/file-manage
创建playbook:vim secure_log_bakcups.yml
![](https://img-blog.csdnimg.cn/img_convert/ea4f9ee423d963717e8cc911ac9107b3.png)
![](https://img-blog.csdnimg.cn/img_convert/40028ff43ffd0eae661fd9e24367dc25.png)
![](https://img-blog.csdnimg.cn/img_convert/5288d7c61d8fb320d8ba52cbf9ea8314.png)
完成之后可以简单的使用 --syntax-check检查一下语法
执行playbook
![](https://img-blog.csdnimg.cn/img_convert/db425d4da79dc8709db7a4396599e0ba.png)
验证playbook的结果 —— tree -F secure-backups
![](https://img-blog.csdnimg.cn/img_convert/fa943f654fe55e4f3453b5594abaf874.png)
![](https://img-blog.csdnimg.cn/img_convert/f323c76fb509c79ad5809f52b24a8e96.png)
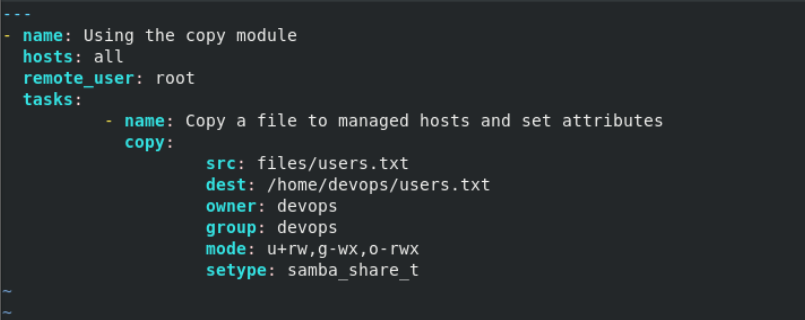
创建playbook : vim copy_file.yml
![](https://img-blog.csdnimg.cn/img_convert/f6888775ed8dd48c7d10f45a7c6d8f17.png)
![](https://img-blog.csdnimg.cn/img_convert/c15715b6e4d3be9415f2d31710b3442f.png)
运行Playbook
![](https://img-blog.csdnimg.cn/img_convert/eed2ddefd2c8b727558c68d17850c45a.png)
再次以用户devops的身份使用临时命令 执行ls -Z命令 验证受管主机上的users.txt文件及其属性
![](https://img-blog.csdnimg.cn/img_convert/68ef82b105b35324868bab14f9399081.png)
![](https://img-blog.csdnimg.cn/img_convert/4ed6611b81e711711d4c0c2588b70cf8.png)
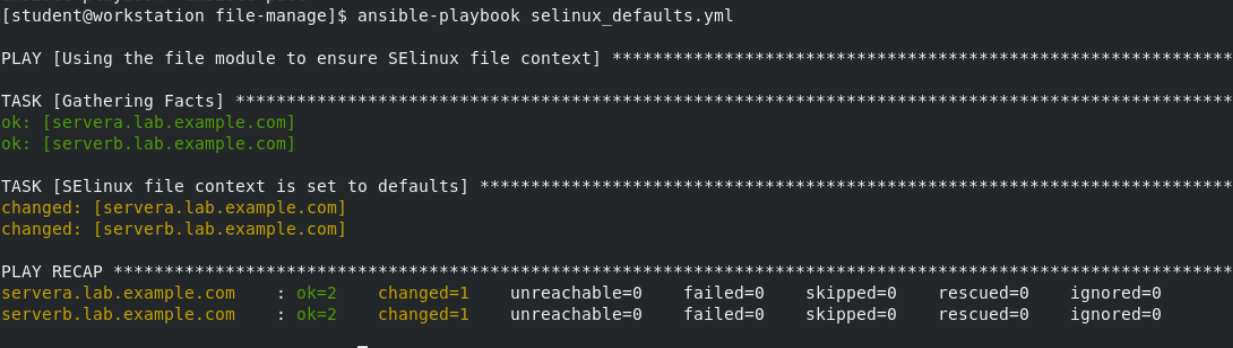
创建playbook: selinux_defaults.yml
![](https://img-blog.csdnimg.cn/img_convert/8b2228b170d3b4d2f89256bab8f3d125.png)
检查语法并且运行
![](https://img-blog.csdnimg.cn/img_convert/c73a22eed61ff517c0c83b4cd0f328c1.png)
再次以用户devops的身份使用临时命令 执行ls -Z命令 查看其文件属性
![](https://img-blog.csdnimg.cn/img_convert/2b989fee87e2fd28704bfb6fda6305aa.png)
4.创建playbook: vim add_line.yml
![](https://img-blog.csdnimg.cn/img_convert/47e8c5857716dfb79b82e5aecb217f0b.png)
检查语法并执行
![](https://img-blog.csdnimg.cn/img_convert/6b59ad3bb1a70befd47912f3d41d1fd4.png)
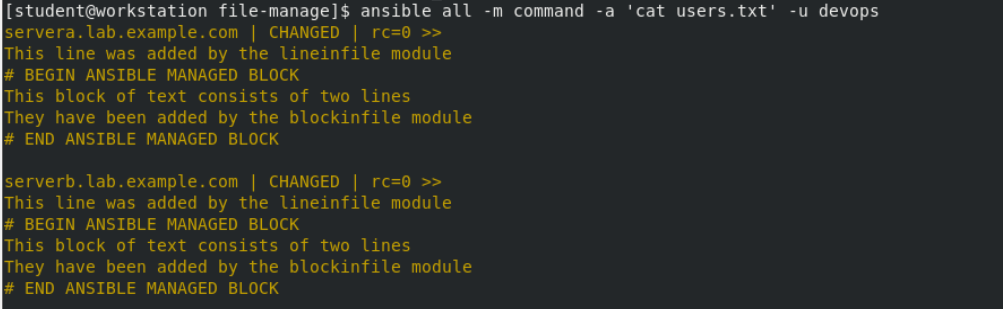
以devops用户身份使用command模块和cat选项 验证受管主机上users.txt的内容
![](https://img-blog.csdnimg.cn/img_convert/5a2e2c6b15f63e2045d16a9ba23513af.png)
![](https://img-blog.csdnimg.cn/img_convert/6e10b4dc2198331b8a666cb7ca066db6.png)
创建playbook——vim add_block.yml
![](https://img-blog.csdnimg.cn/img_convert/0dce7bcc32c551a7cd21dbae78e842e2.png)
检查语法并执行playbook
![](https://img-blog.csdnimg.cn/img_convert/2a059bb500b14389c9297ecb7bfae49d.png)
使用command模块和cat命令 查看users.txt文件的内容
![](https://img-blog.csdnimg.cn/img_convert/873229806303ab75730f2f4482b9d58d.png)
![](https://img-blog.csdnimg.cn/img_convert/29d3fca73e211ee37875bcb3f57ae40c.png)
创建playbook : remove_file.yml
![](https://img-blog.csdnimg.cn/img_convert/055b76f2a727c31d75efc199d8a1dbe8.png)
检查语法并执行
![](https://img-blog.csdnimg.cn/img_convert/9915f6acea95355ec48af759887cd084.png)
![](https://img-blog.csdnimg.cn/img_convert/7f8bcfe24b59e620792e72d0c9ea86b7.png)
![](https://img-blog.csdnimg.cn/img_convert/2ad121e86b55683477d4f542ddc2d60e.png)
完成实验 lab file-manage finish