


1、自定义MySQL主从监控和声音报警
1.1 部署MySQL主从
| 主机名 | 作用 | IP |
|---|---|---|
| JLin | zabbix-server | 192.168.23.116 |
| sql-master | mysql-master | 192.168.23.117 |
| sql-slave | mysql-slave | 192.168.23.118 |
主数据库从服务器上安装MySQL、关闭防火墙、修改配置文件、授权用户、查看状态、安装zabbix
数据库主服务器
[root@sql-master ~]# curl -o /etc/yum.repos.d/CentOS-Base.repo https://mirrors.aliyun.com/repo/Centos-8.repo
[root@sql-master ~]# sed -i -e '/mirrors.cloud.aliyuncs.com/d' -e '/mirrors.aliyuncs.com/d' /etc/yum.repos.d/CentOS-Base.repo
[root@sql-master ~]# yum -y install mariadb mariadb-server
[root@sql-master ~]# systemctl start mariadb.service
[root@sql-master ~]# systemctl enable mariadb.service
[root@sql-master ~]# mysql_secure_installation
[root@sql-master ~]# systemctl stop firewalld.service
[root@sql-master ~]# systemctl disable firewalld.service
[root@sql-master ~]# sed -i s/SELINUX=enforing/SELINUX=disabled/g /etc/selinux/config
[root@sql-master ~]# setenforce 0
数据库从服务器
[root@sql-slave ~]# curl -o /etc/yum.repos.d/CentOS-Base.repo https://mirrors.aliyun.com/repo/Centos-8.repo
[root@sql-slave ~]# sed -i -e '/mirrors.cloud.aliyuncs.com/d' -e '/mirrors.aliyuncs.com/d' /etc/yum.repos.d/CentOS-Base.repo
[root@sql-slave ~]# yum -y install mariadb mariadb-server
[root@sql-slave ~]# systemctl start mariadb.service
[root@sql-slave ~]# systemctl enable mariadb.service
[root@sql-slave ~]# mysql_secure_installation
[root@sql-slave ~]# systemctl stop firewalld.service
[root@sql-slave ~]# systemctl disable firewalld.service
[root@sql-slave ~]# sed -i s/SELINUX=enforing/SELINUX=disabled/g /etc/selinux/config
[root@sql-slave ~]# setenforce 0
修改配置文件
数据库主服务器
[root@sql-master ~]# vim /etc/my.cnf.d/mariadb-server.cnf

// 添加内容
[mysqld]
log_bin=mysql-bin     //开启二进制日志
server_id=1           //服务id号,不可从复,值为0时则表示拒绝服务器连接

[root@sql-master ~]# systemctl restart mariadb.service
数据库从服务器:
[root@sql-slave ~]# vim /etc/my.cnf.d/mariadb-server.cnf

// 添加内容
[mysqld]
server_id=2			//服务id号,不可重复,为0则拒绝从服务器连接
relay_log=myrelay  //开启中继日志

[root@sql-slave ~]# systemctl restart mariadb.service
创建用户并授权,让从服务可以登陆主服务器
数据库主服务器
[root@sql-master ~]# mysql -uroot -p123456
// 创建用户
MariaDB [(none)]> GRANT REPLICATION SLAVE ON *.* TO 'jlin'@'%' IDENTIFIED BY 'jlin123!';
Query OK, 0 rows affected (0.000 sec)

// 刷新权限
MariaDB [(none)]> FLUSH PRIVILEGES;
Query OK, 0 rows affected (0.001 sec)

MariaDB [(none)]> show master status;
+------------------+----------+--------------+------------------+
| File             | Position | Binlog_Do_DB | Binlog_Ignore_DB |
+------------------+----------+--------------+------------------+
| mysql-bin.000001 |      639 |              |                  |
+------------------+----------+--------------+------------------+
1 row in set (0.000 sec)
登陆到从服务器的数据库,在数据库中配置主服务器的信息
[root@sql-slave ~]# mysql -uroot -p123456

MariaDB [(none)]> CHANGE MASTER TO MASTER_HOST='192.168.23.117',MASTER_PORT=3306,MASTER_USER='jlin',MASTER_PASSWORD='jlin123';
Query OK, 0 rows affected (0.005 sec)

MariaDB [(none)]> START SLAVE;
Query OK, 0 rows affected (0.000 sec)

MariaDB [(none)]> SHOW SLAVE STATUS \G
*************************** 1. row ***************************
                Slave_IO_State: Waiting for master to send event
                   Master_Host: 192.168.23.117
                   Master_User: jlin
                   Master_Port: 3306
                 Connect_Retry: 60
               Master_Log_File: mysql-bin.000001
           Read_Master_Log_Pos: 759
                Relay_Log_File: mariadb-relay-bin.000002
                 Relay_Log_Pos: 1058
         Relay_Master_Log_File: mysql-bin.000001
              Slave_IO_Running: Yes
             Slave_SQL_Running: Yes
从服务器安装zabbix
下载zabbix软件包、解压、创建zabbix用户、安装依赖包、编译安装
[root@sql-slave ~]# cd /usr/src/
[root@sql-slave src]# wget https://cdn.zabbix.com/zabbix/sources/stable/5.4/zabbix-5.4.4.tar.gz
[root@sql-slave src]# ll
total 23700
drwxr-xr-x. 2 root root        6 Aug 12  2018 debug
drwxr-xr-x. 2 root root        6 Aug 12  2018 kernels
-rw-r--r--. 1 root root 24266079 Aug 30 16:23 zabbix-5.4.4.tar.gz
[root@sql-slave src]# tar xf zabbix-5.4.4.tar.gz
[root@sql-slave src]# useradd -r -M -s /sbin/nologin zabbix
[root@sql-slave src]# yum -y install net-snmp-devel libevent-devel make gcc gcc-c++

// 编译安装
[root@sql-slave src]# cd zabbix-5.4.4/
[root@sql-slave zabbix-5.4.4]# ./configure --enable-agent
[root@sql-slave zabbix-5.4.4]# make install

// 更改zabbix配置文件
[root@sql-slave ~]# vim /etc/zabbix_agentd.conf
Server=192.168.23.116
ServerActive=192.168.23.116
Hostname=192.168.23.118
1.2 编写脚本文件
指定key和脚本位置
//修改配置文件,让key可以执行脚本识别MySQL状态
[root@slave scripts]# vim /etc/zabbix_agentd.conf
...
UnsafeUserParameters=1
...
//在文件末尾添加
UserParameter=check_replication,/scripts/check_replication.sh

// 杀死进程重新启动
[root@sql-slave scripts]# pkill zabbix_agentd
[root@sql-slave scripts]# zabbix_agentd
[root@sql-slave ~]# mysql -uroot -p123456
//创建一个zabbix的用户,并设置权限只读和密码
MariaDB [(none)]> grant select on *.* to 'zabbix'@'localhost' identified by 'zabbix';
Query OK, 0 rows affected (0.001 sec)

MariaDB [(none)]> grant SUPER, REPLICATION CLIENT on *.* to 'zabbix'@'localhost' identified by 'zabbix';
Query OK, 0 rows affected (0.001 sec)

//刷新权限
MariaDB [(none)]> flush privileges;
Query OK, 0 rows affected (0.000 sec)
[root@sql-slave ~]# mkdir /scripts
[root@sql-slave ~]# cd /scripts
[root@sql-slave scripts]# vim check_replication.sh
#!/bin/bash
count=$(mysql -uzabbix -pzabbix -e 'show slave status\G' | grep '_Running' | grep -c 'Yes')
if [ $count -ne 2 ];then
echo '1'
else
echo '0'
fi
[root@sql-slave scripts]# chmod +x check_replication.sh
// 测试脚本
[root@sql-slave scripts]# ./check_replication.sh
0
// 在到zabbix服务端测试
[root@JLin ~]# zabbix_get -s 192.168.23.118 -k check_replication
01.4 web界面配置监控和触发器
添加监控主机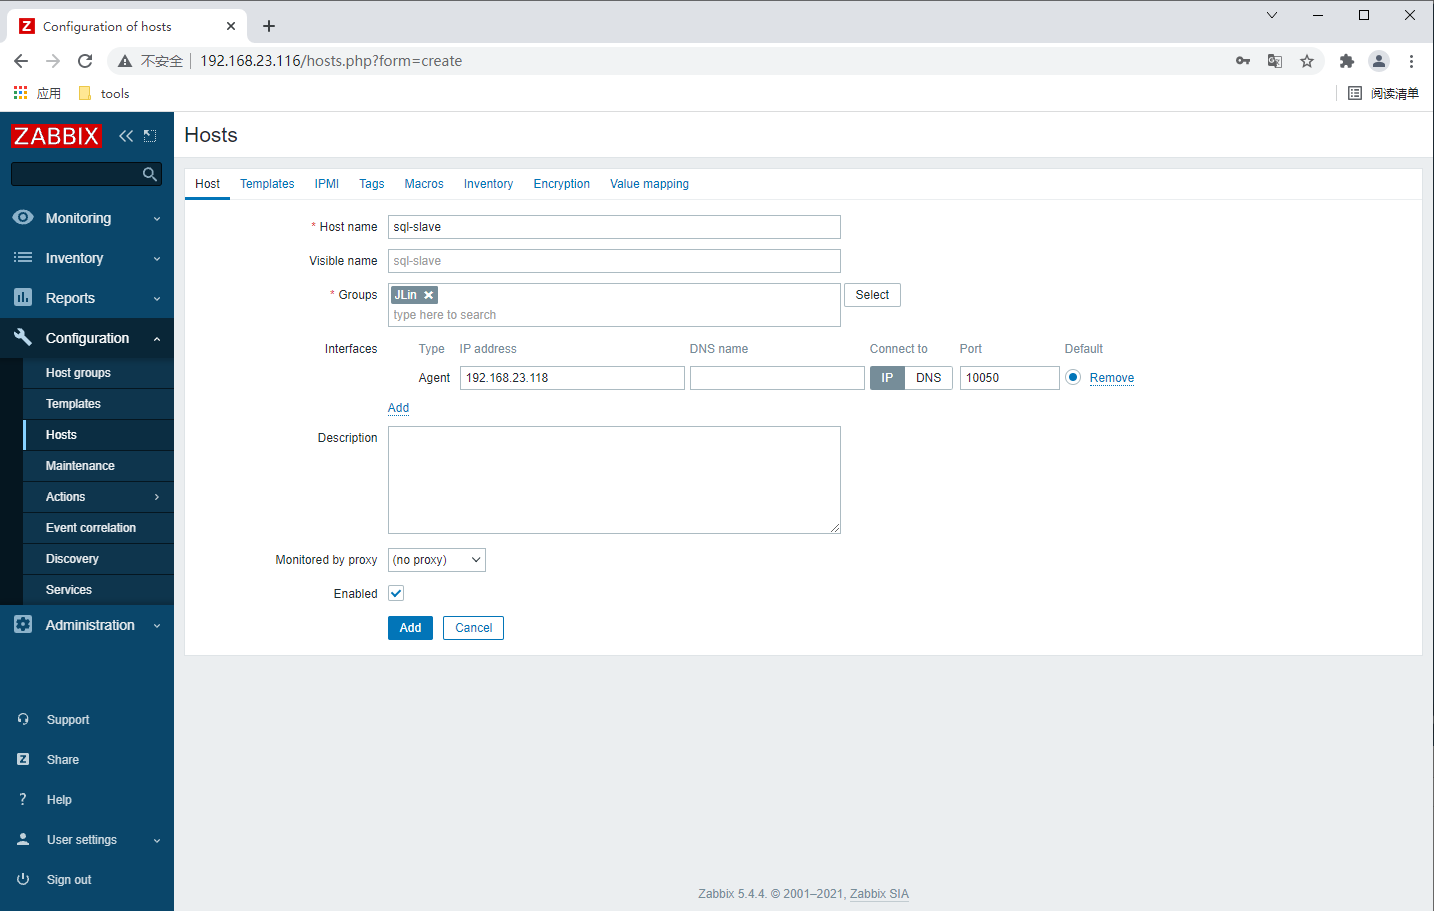
 添加监控项
添加监控项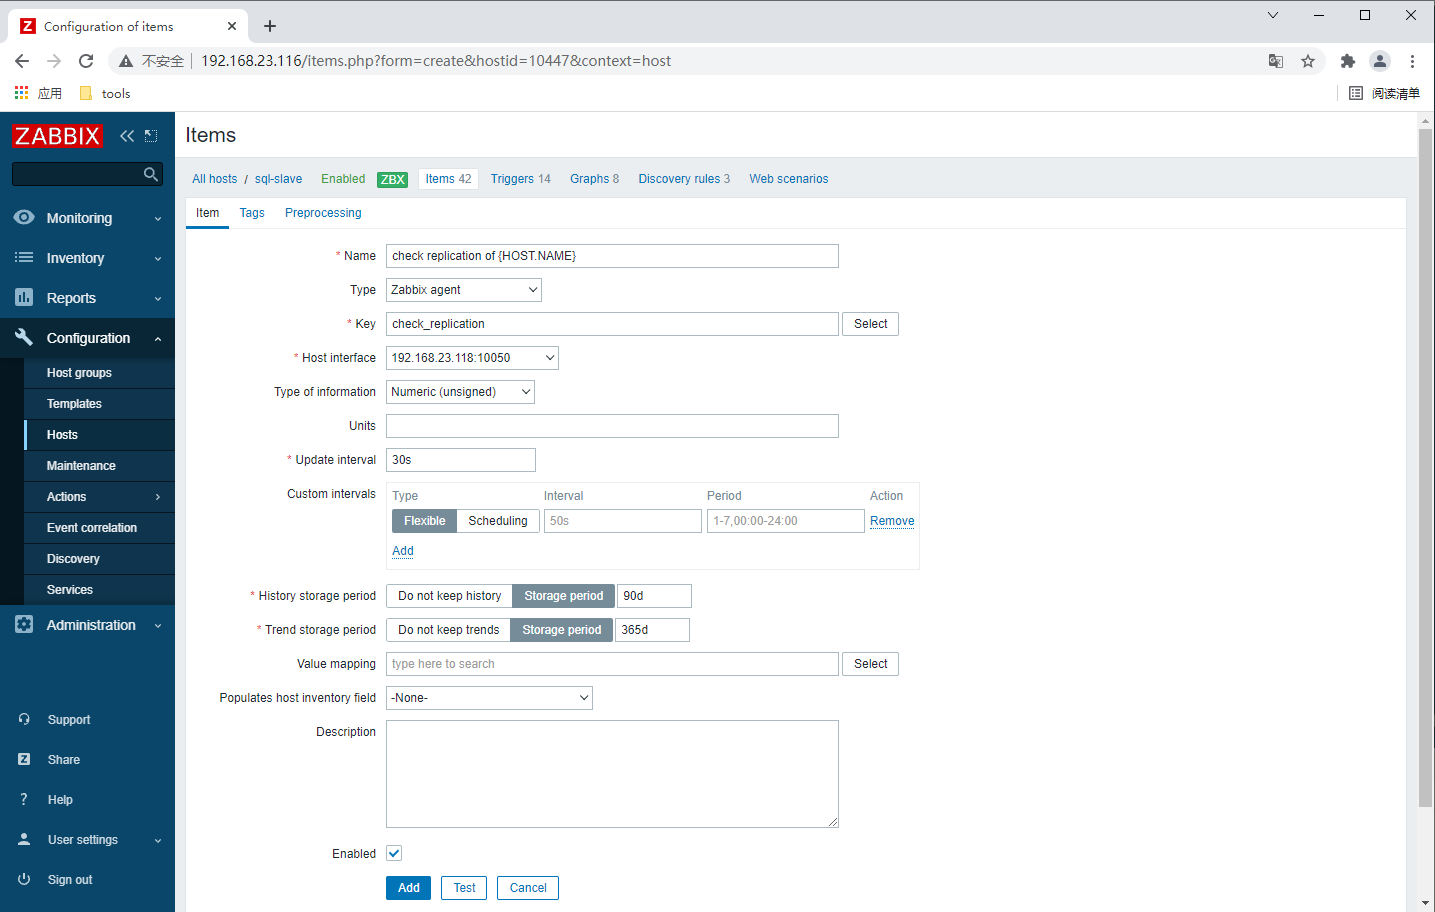 添加触发器
添加触发器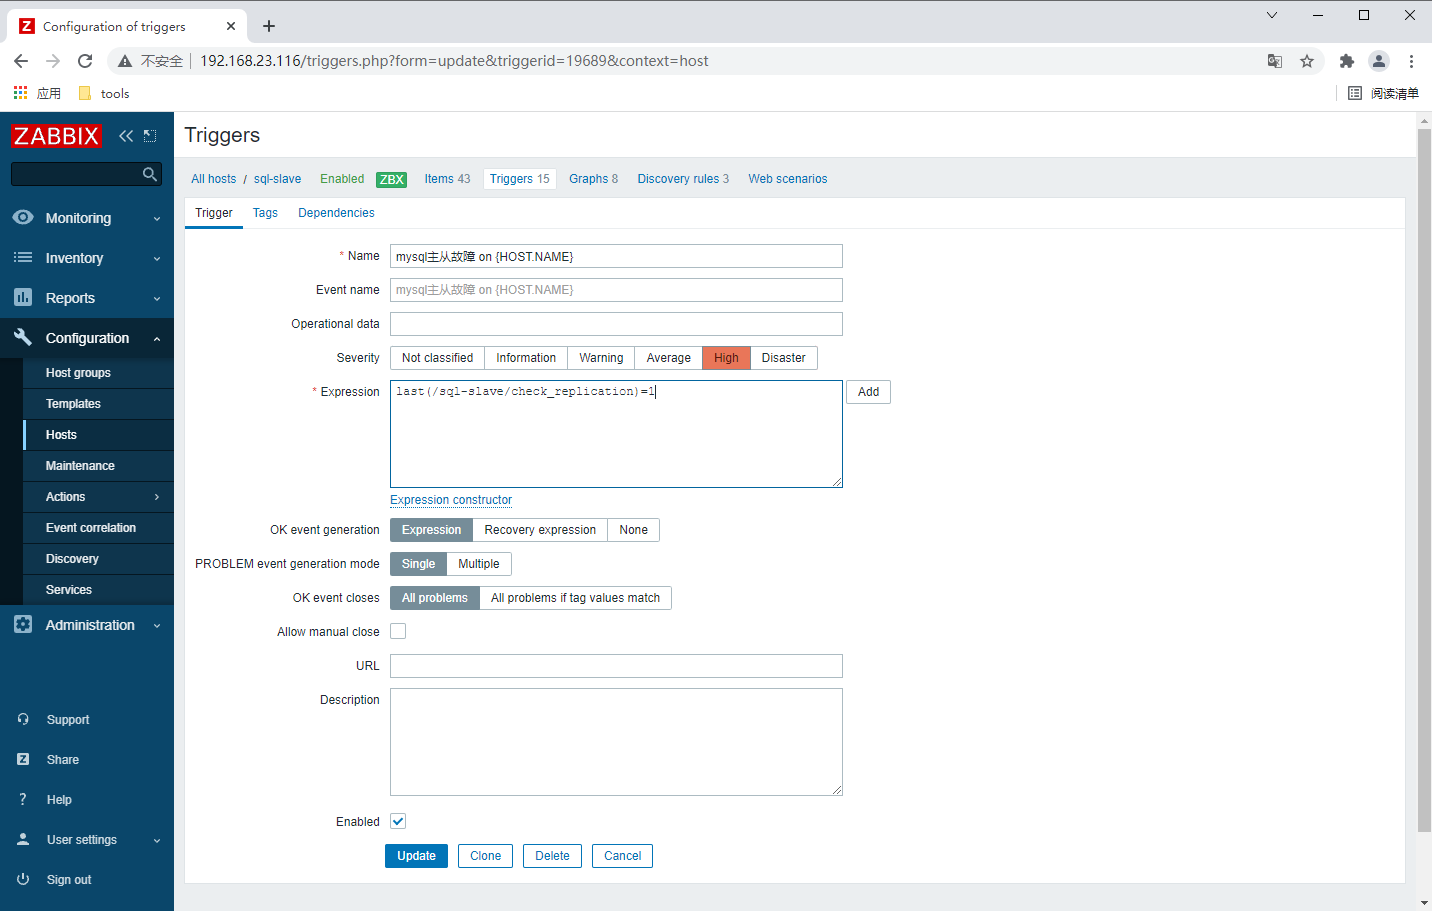 手动触发报警
// 从服务器上关闭主从复制
[root@sql-slave ~]# mysql -uroot -p123456
MariaDB [(none)]> stop slave;
Query OK, 0 rows affected (0.001 sec)

MariaDB [(none)]> SHOW SLAVE STATUS \G
*************************** 1. row ***************************
                Slave_IO_State:
                   Master_Host: 192.168.23.117
                   Master_User: jlin
                   Master_Port: 3306
                 Connect_Retry: 60
               Master_Log_File: mysql-bin.000001
           Read_Master_Log_Pos: 759
                Relay_Log_File: mariadb-relay-bin.000002
                 Relay_Log_Pos: 1058
         Relay_Master_Log_File: mysql-bin.000001
              Slave_IO_Running: No
             Slave_SQL_Running: No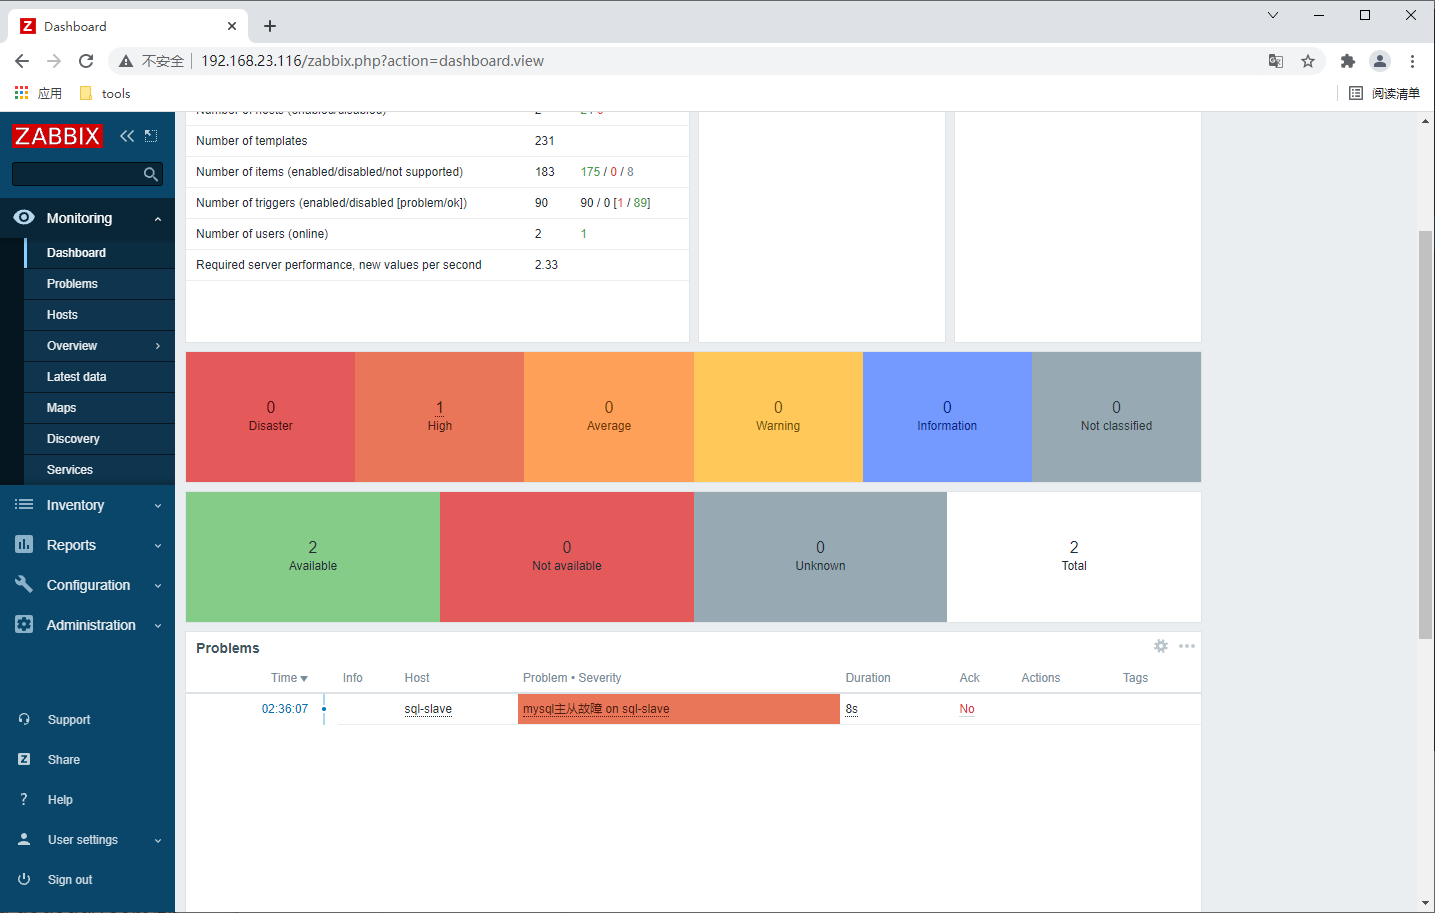
3.5 声音报警
这里不同的报警等级声音也是不一样的 可以根据自己的喜好来更改声音和报警次数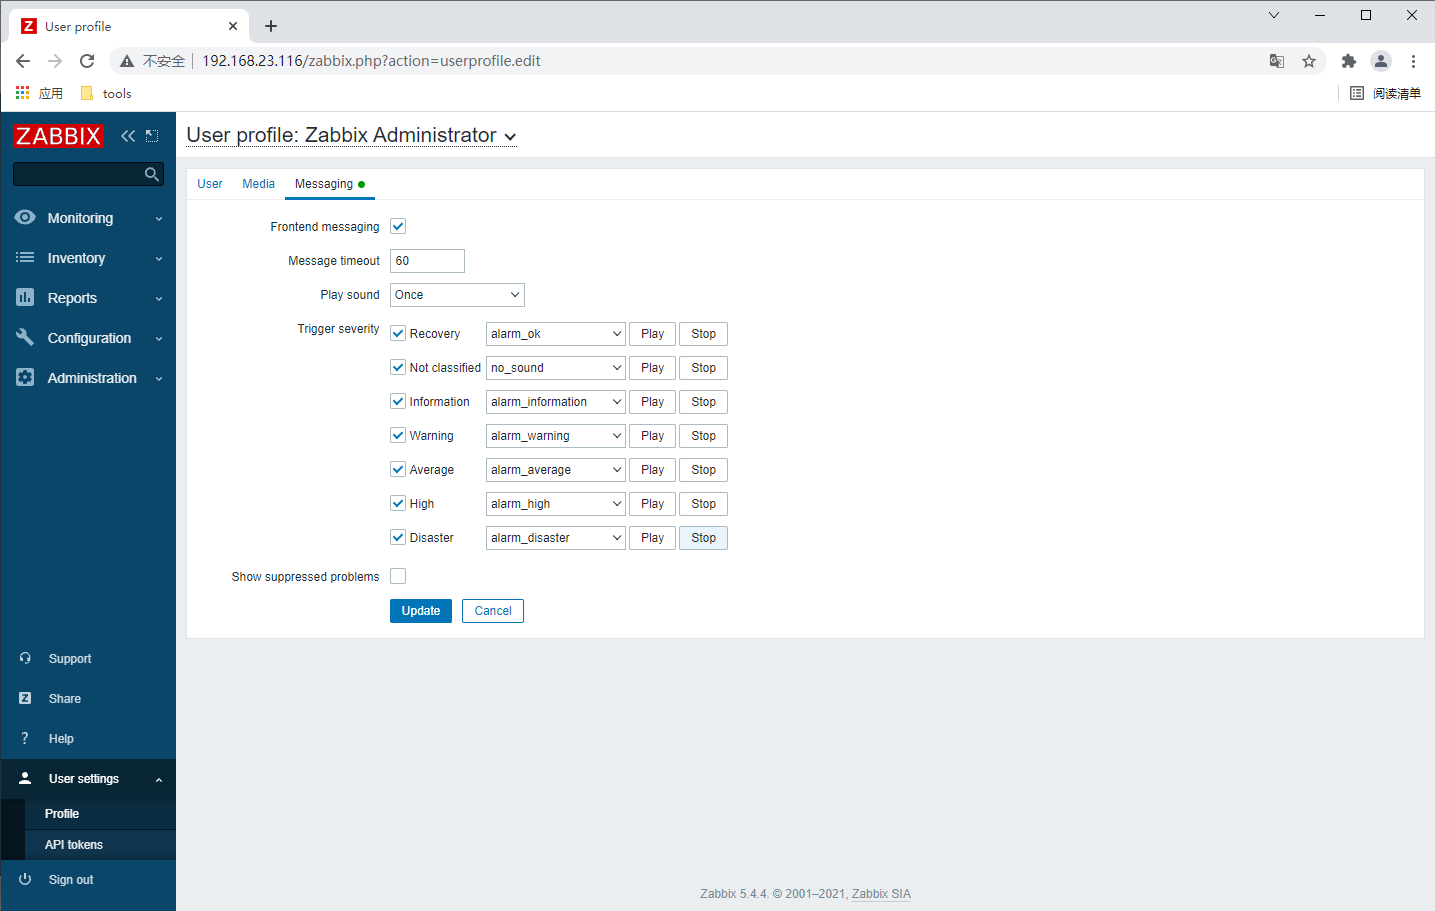
2、自定义MySQL主从延迟
2.1 编写脚本
[root@sql-slave scripts]# vim check_replication_delay.sh
#!/bin/bash

delay=$( mysql -uzabbix -pzabbix -e 'show slave status\G' | grep 'Behind'| awk '{print $2}' )
if [ $delay != NULL ];then

        echo '$delay'
else
        echo '0'
fi
[root@sql-slave scripts]# chmod +x check_replication_delay.sh
[root@sql-slave scripts]# ./check_replication_delay.sh
$delay
2.2 修改配置文件
[root@sql-slave scripts]# vim /etc/zabbix_agentd.conf

UserParameter=check_replication_delay,/scripts/check_replication_delay.sh

[root@sql-slave scripts]# pkill zabbix_agentd
[root@sql-slave scripts]# zabbix_agentd

[root@JLin ~]# zabbix_get -s 192.168.23.118 -k check_replication_delay
$delay
2.3 web界面配置监控项和触发器
添加监控项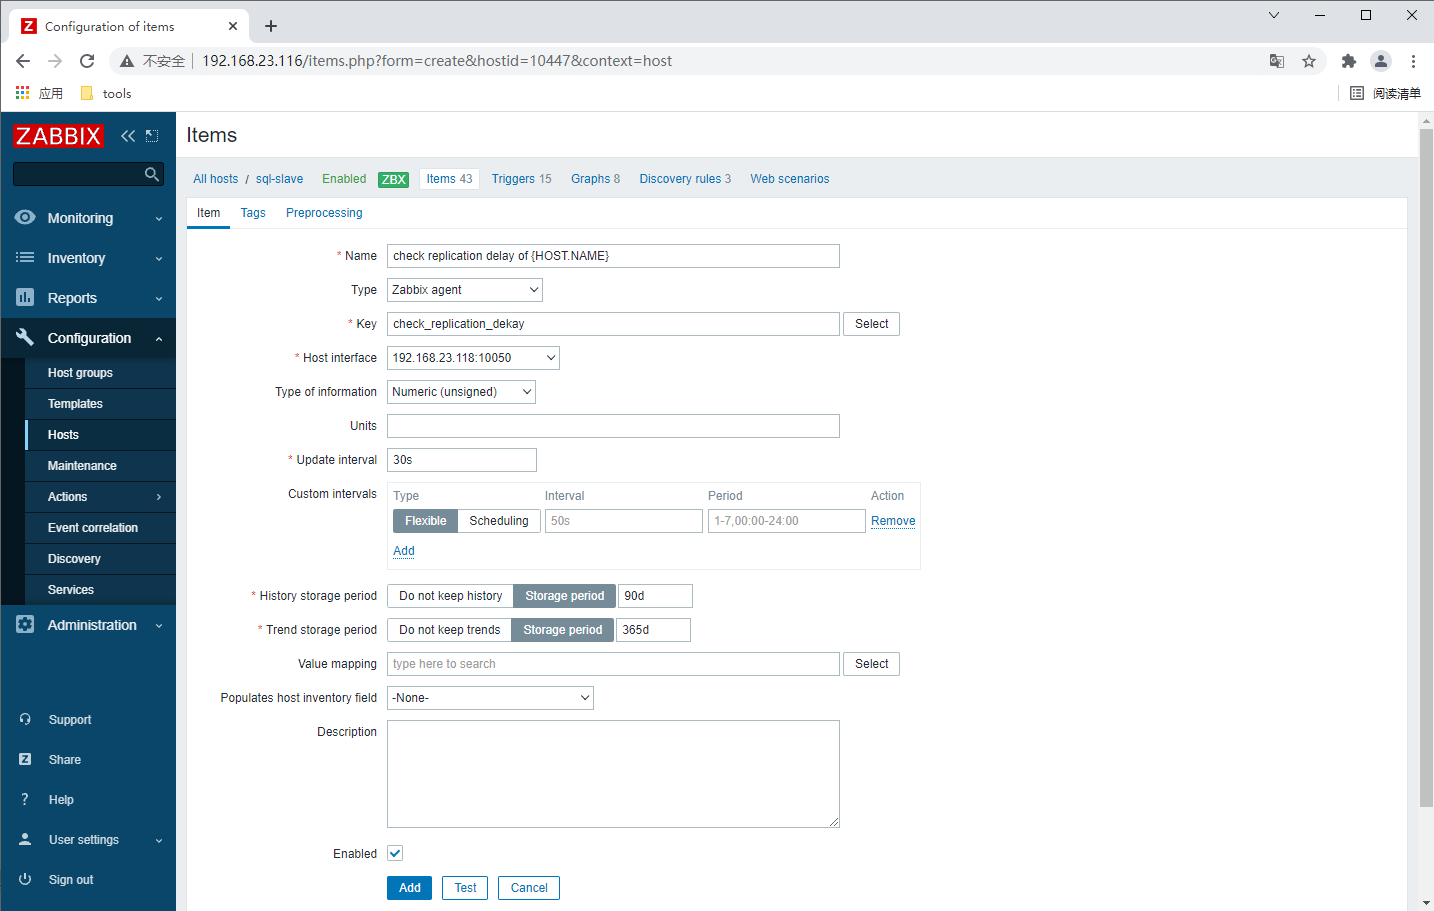
添加触发器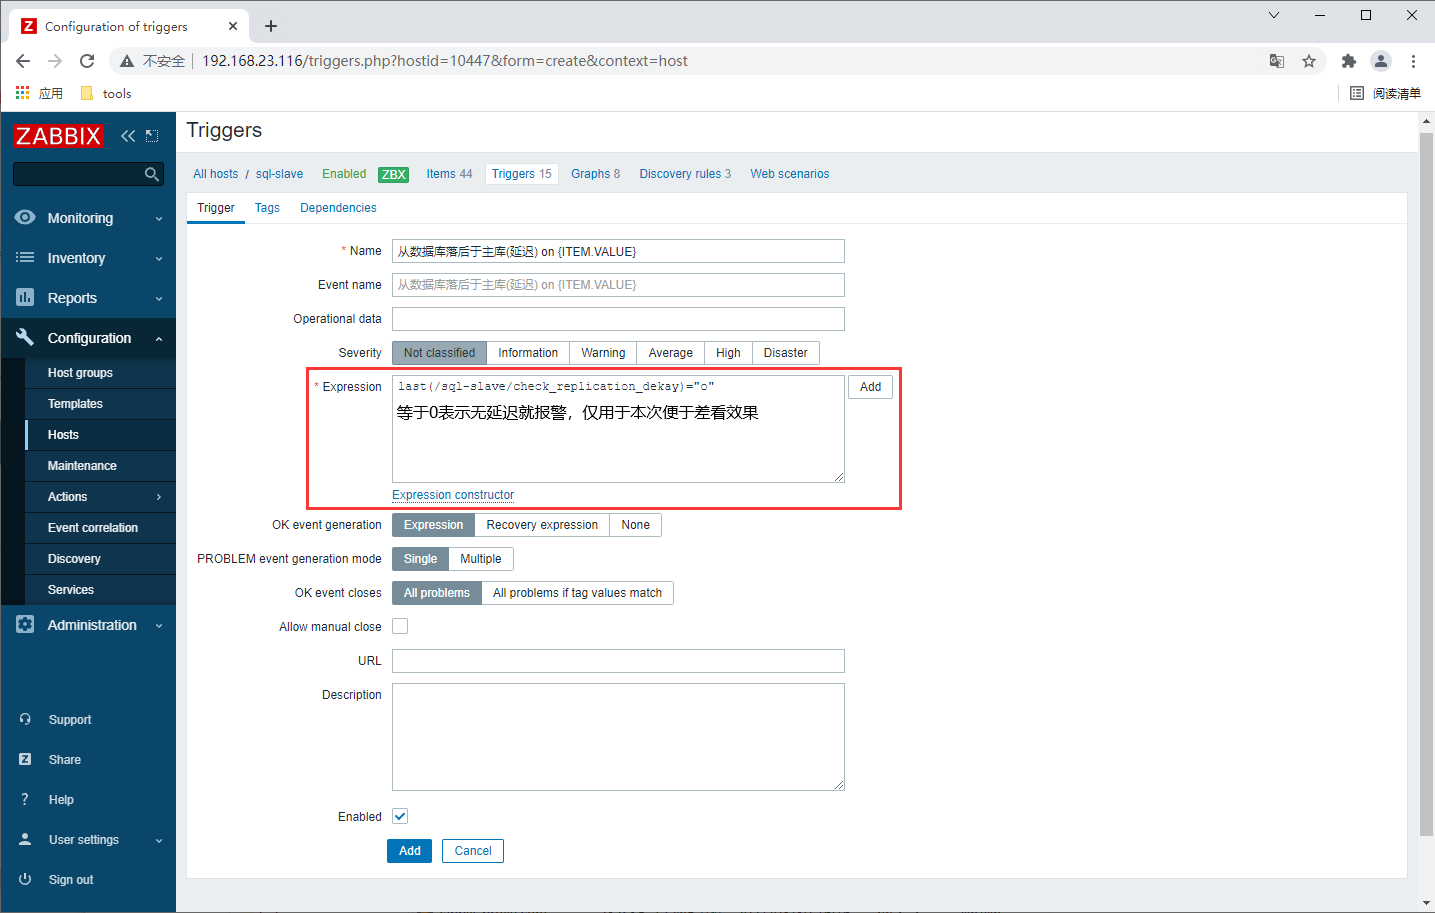
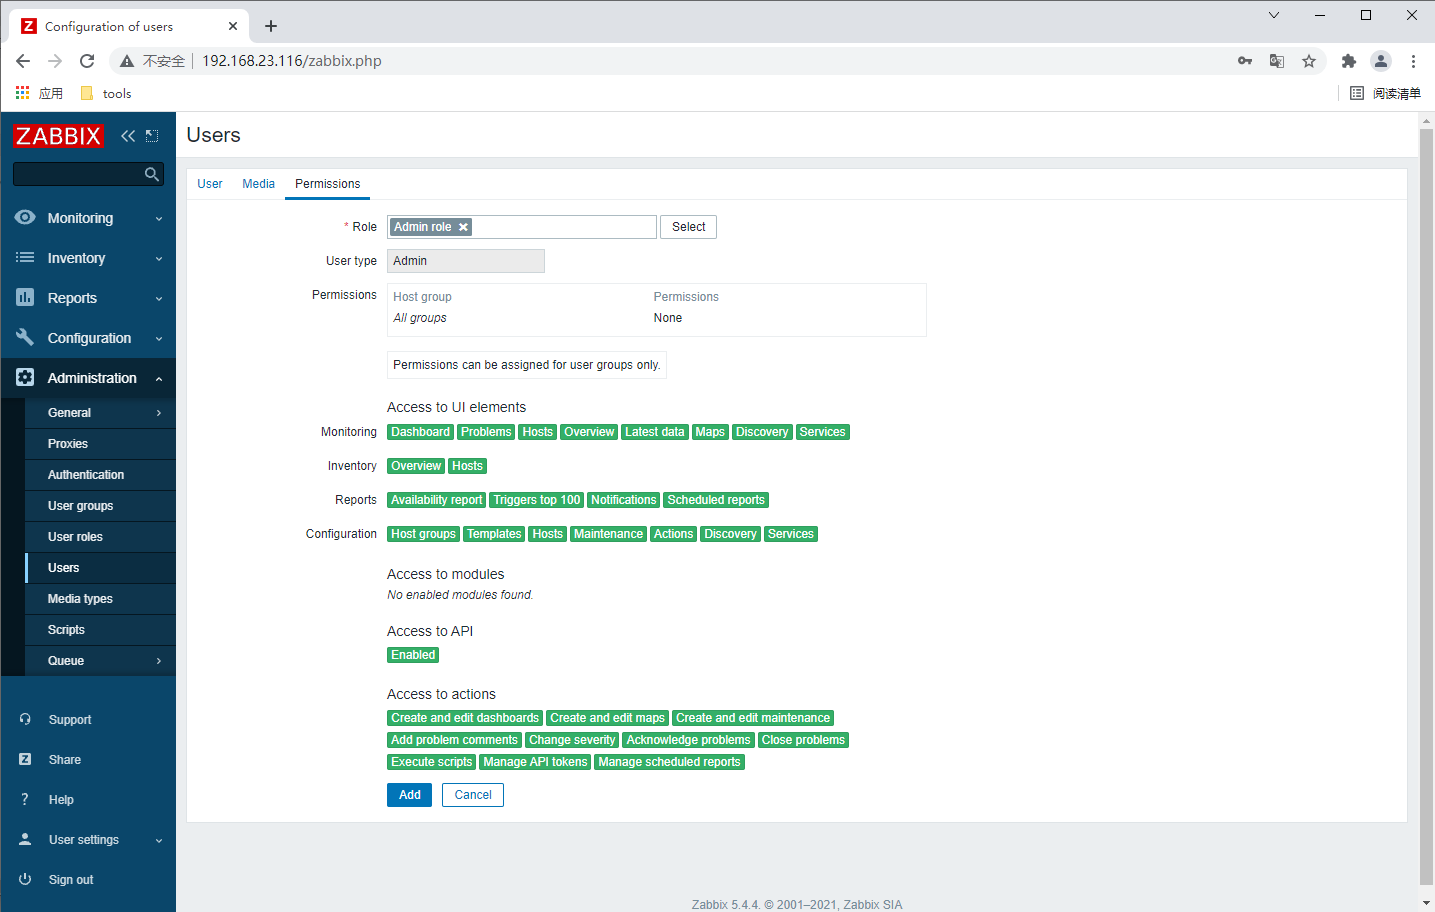
3、用户和组权限
这里所显示的用户都是来自zabbix数据库中的表,如果你想添加新的用户有两种方法一种是直接在web界面添加新的用户,或者到数据库中插入数据,然后就可以在web界面中看到所添加的用户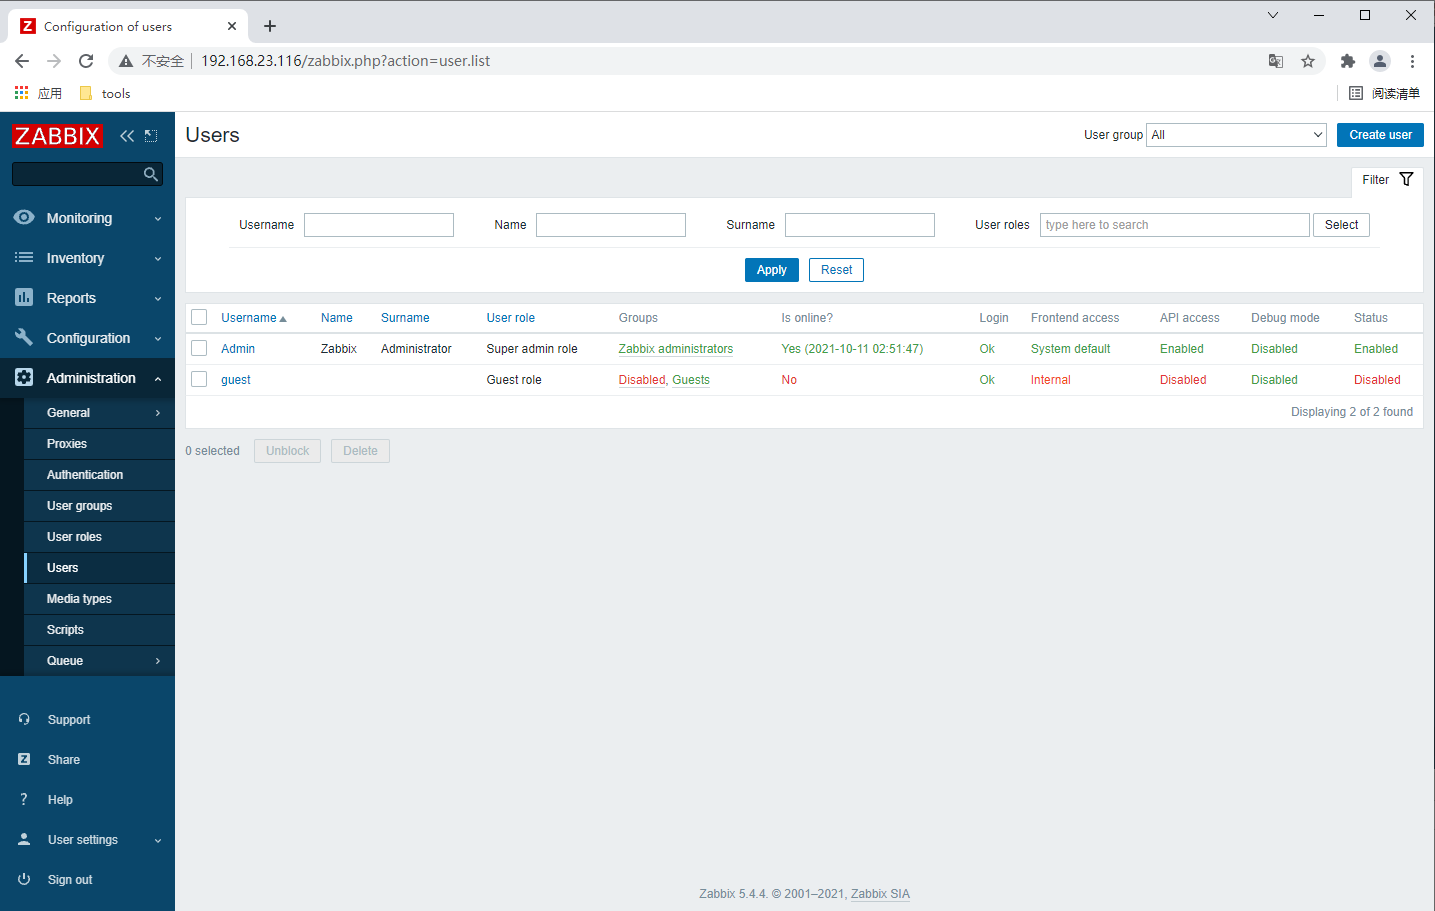
添加用户到管理员组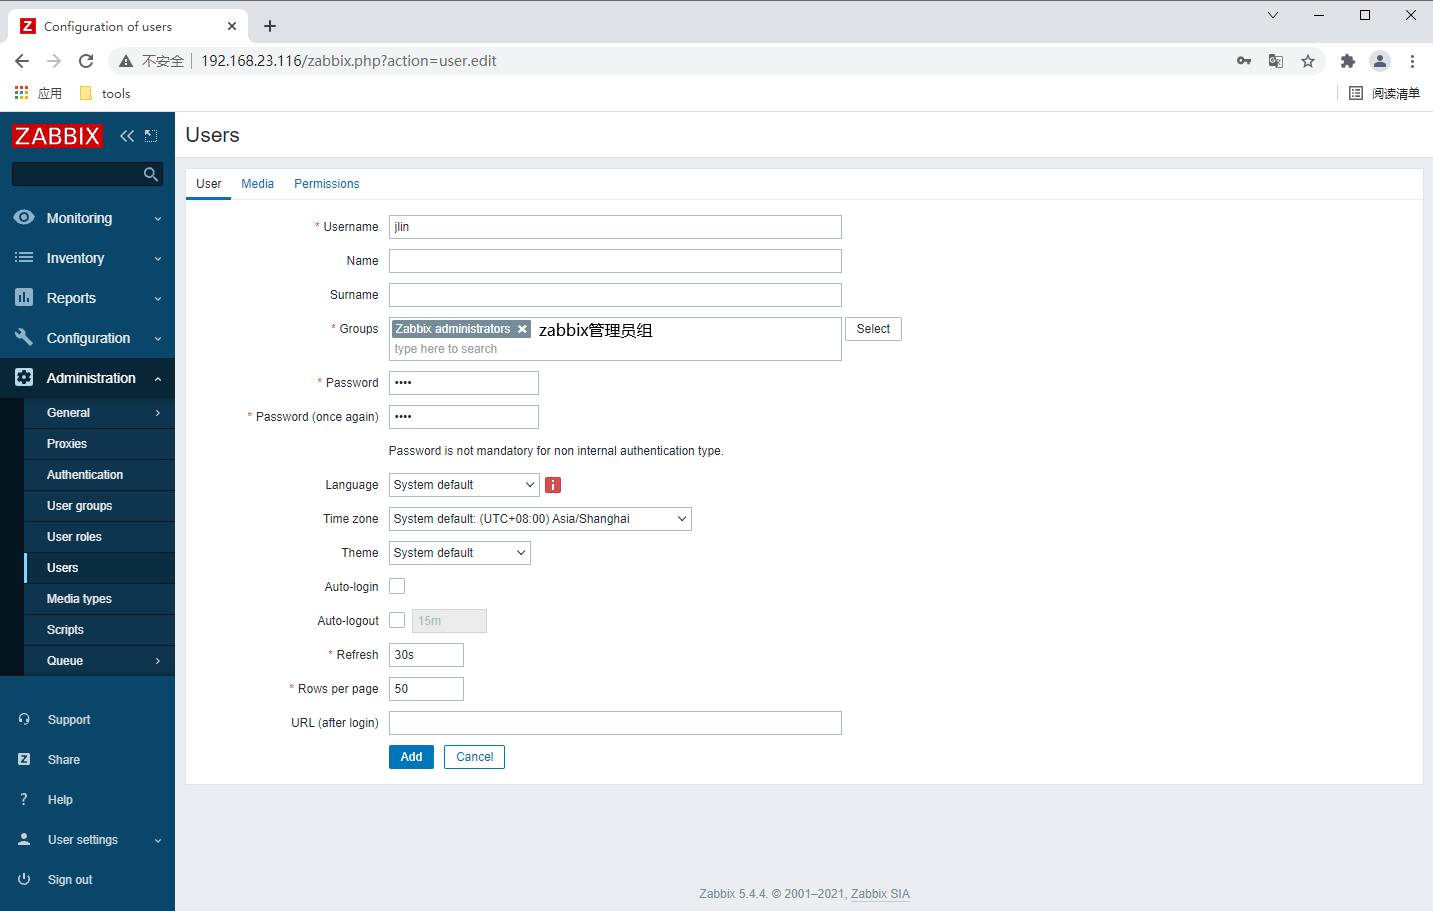
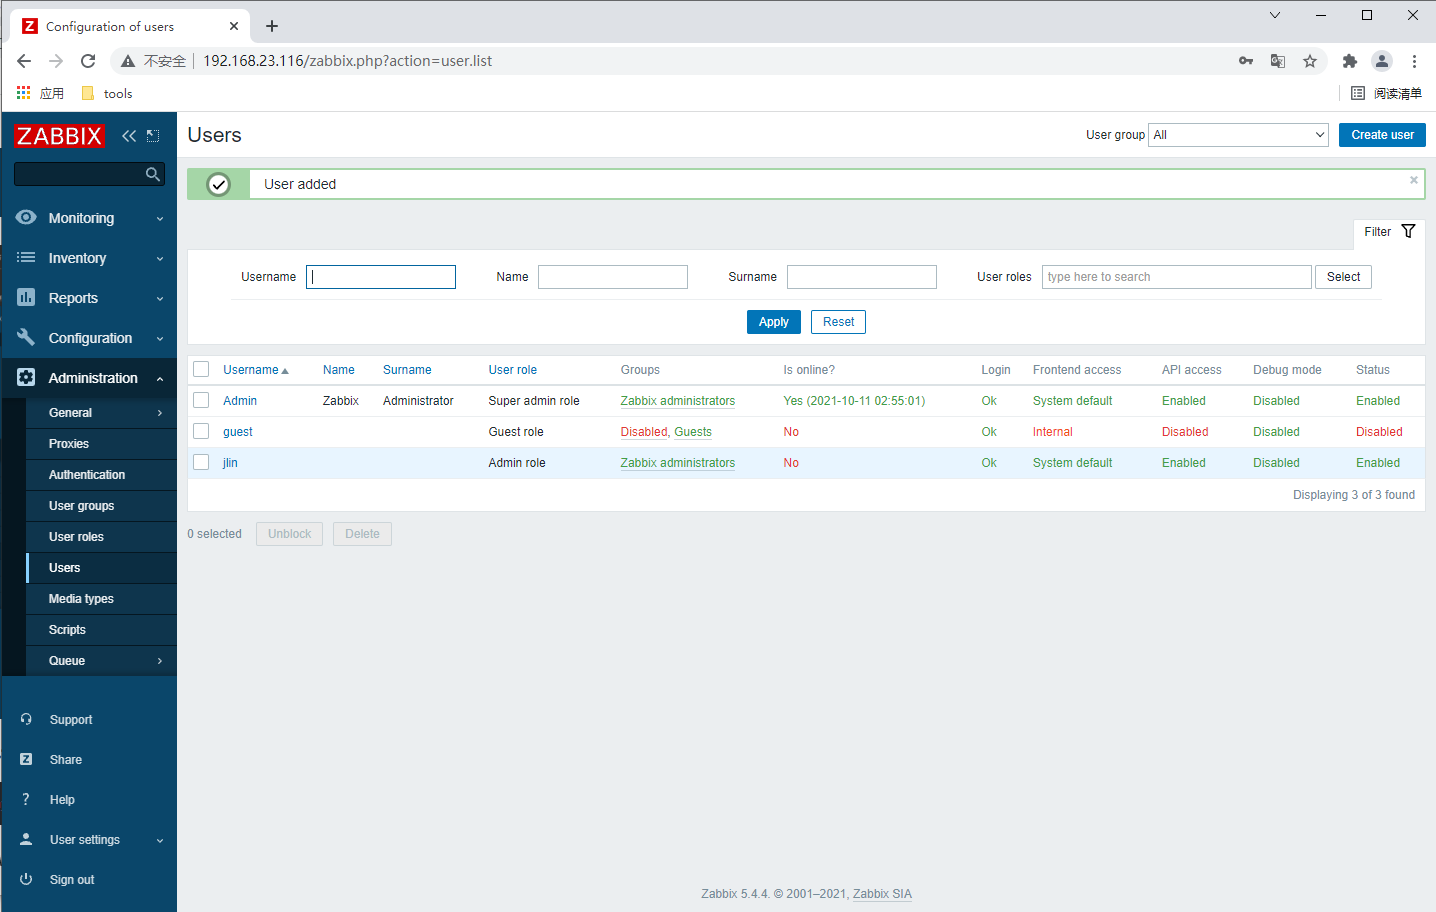
此时可以去数据库中查看是否添加用户成功
[root@JLin ~]# mysql -uroot -pabc123
mysql> show databases;
+--------------------+
| Database           |
+--------------------+
| information_schema |
| mysql              |
| performance_schema |
| sys                |
| zabbix             |
+--------------------+
5 rows in set (0.00 sec)

mysql> use zabbix;
Reading table information for completion of table and column names
You can turn off this feature to get a quicker startup with -A

Database changed
mysql> show tables;
+----------------------------+
| Tables_in_zabbix           |
+----------------------------+
| users                      |
+----------------------------+
166 rows in set (0.00 sec)

mysql> select * from users\G;

*************************** 3. row ***************************
        userid: 3
      username: jlin
          name:
       surname:
        passwd: $2y$10$IM1y4KP2RBzvWMekXYq.7.oT7KAQ/D6qWQsJxZwGr3Z0F9CC0Qip2
           url:
     autologin: 0
    autologout: 0
          lang: default
       refresh: 30s
         theme: default
attempt_failed: 0
    attempt_ip:
 attempt_clock: 0
 rows_per_page: 50
      timezone: default
        roleid: 2
3 rows in set (0.00 sec)
修改用户密码
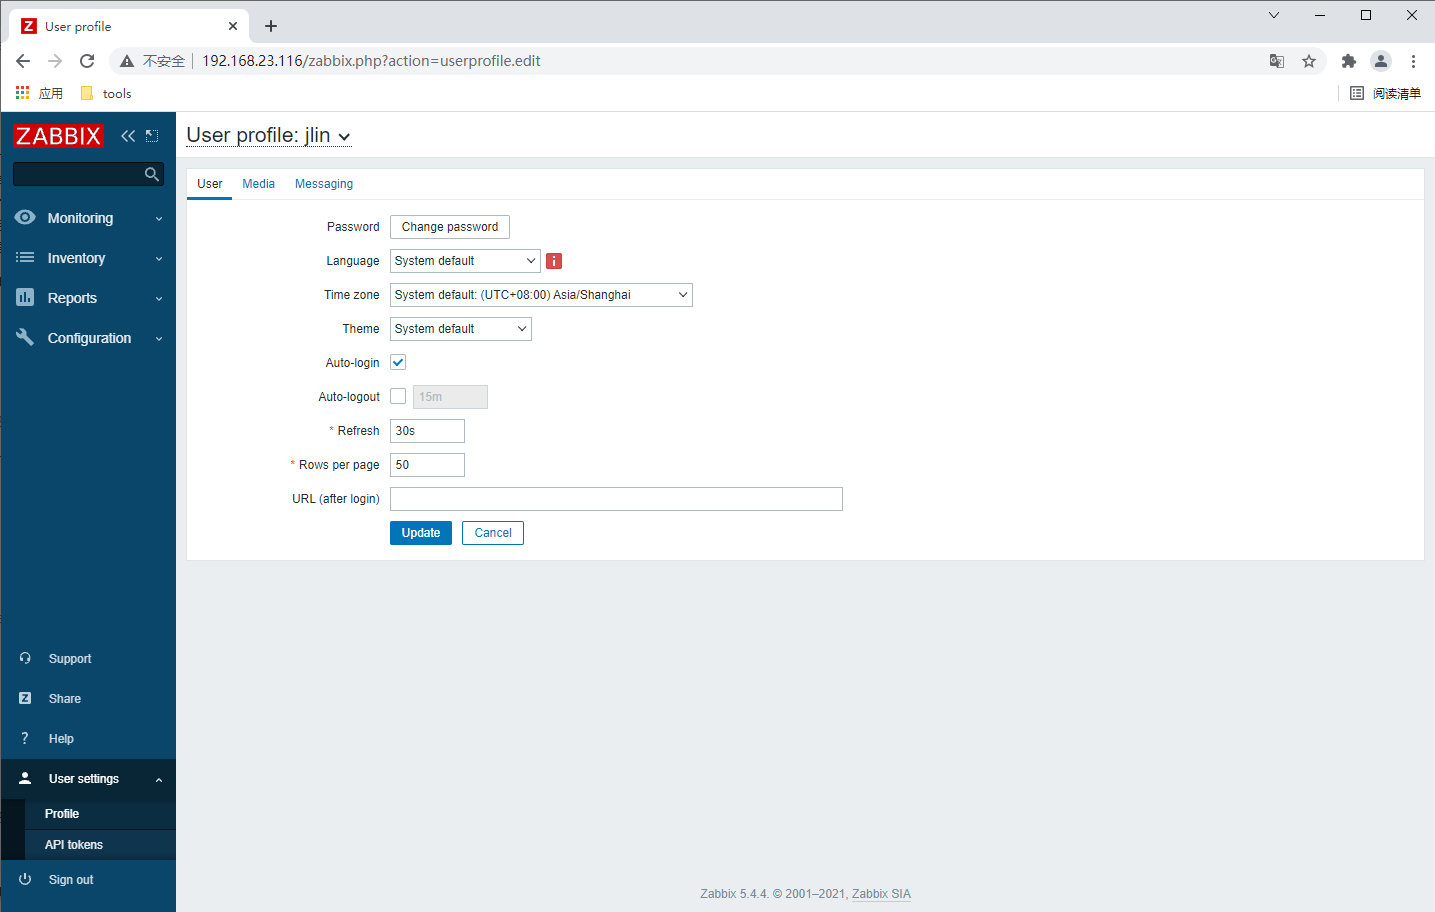
如果你已经登陆到了web界面,却忘记了用户密码可以直接点击用户名到里面修改密码。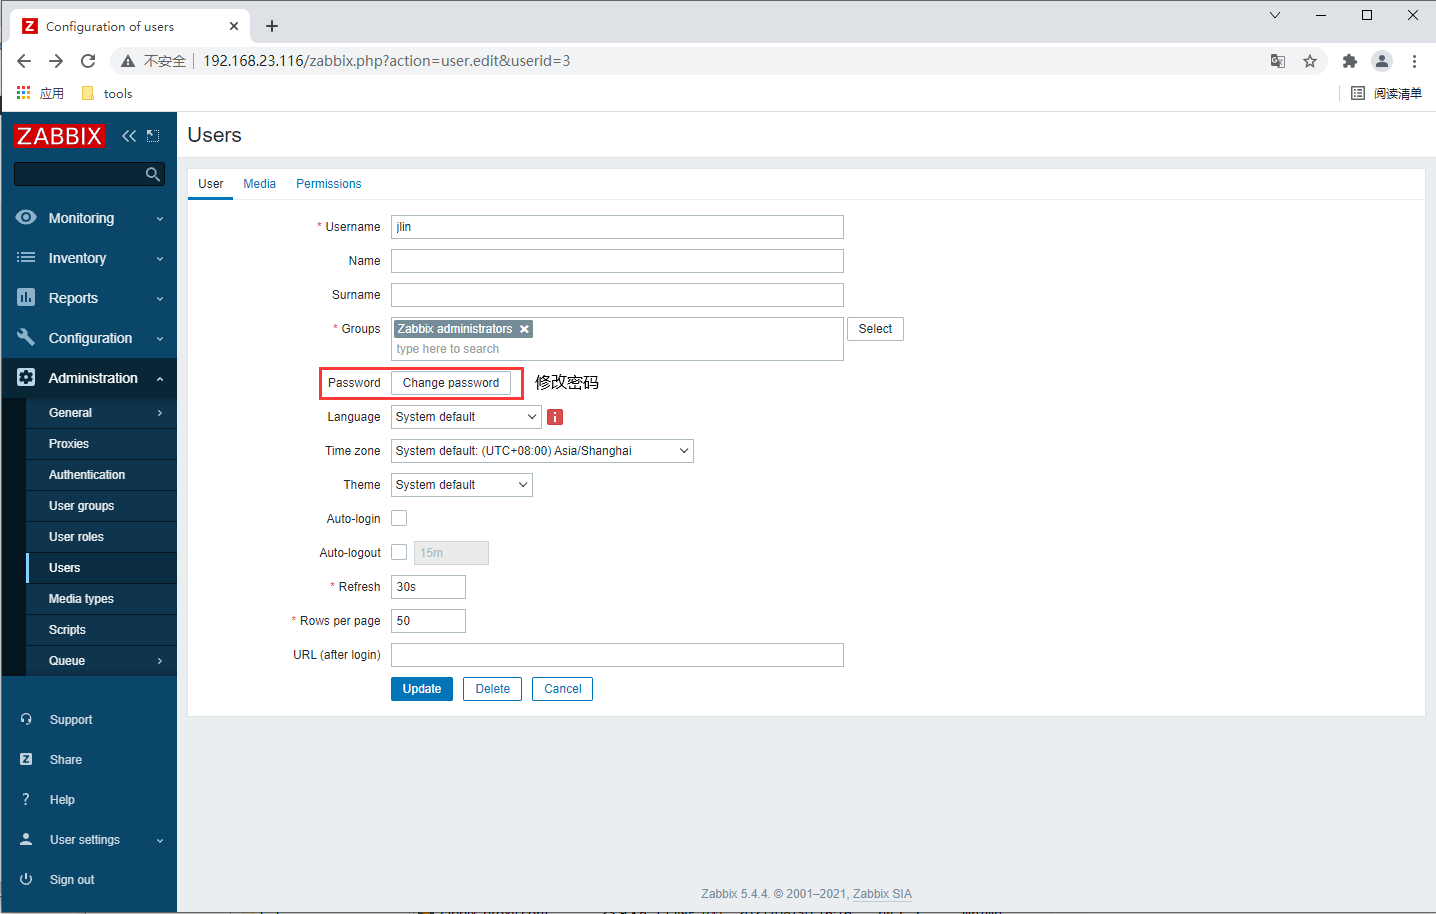
而如果忘记密码而登陆不上zabbix web页面时,可以到zabbix服务器系统上进行更改密码
zabbix用户的密码是使用MD5加密方式,所有只需要生成一个MD5加密的密码 替换即可
//生成一个新的MD5密码,密码是wjm 加密后是下面的字符串
[root@zabbix ~]# echo -n wjm |openssl md5
(stdin)= db945bee77209348db6c1921ae537aa0

//进入到数据库中更新密码
[root@JLin ~]# echo -n jlin |openssl md5
(stdin)= 4a9c940e9f4128afeafefc6b75ab68a6
[root@JLin ~]# mysql -uroot -pabc123
mysql> use zabbix;
Reading table information for completion of table and column names
You can turn off this feature to get a quicker startup with -A

Database changed
mysql> update users set passwd='4a9c940e9f4128afeafefc6b75ab68a6' where userid = '3';
Query OK, 1 row affected (0.00 sec)
Rows matched: 1  Changed: 1  Warnings: 0

mysql> FLUSH PRIVILEGES;
Query OK, 0 rows affected (0.01 sec)


 1073
1073


 被折叠的 条评论
为什么被折叠?
被折叠的 条评论
为什么被折叠?
 到【灌水乐园】发言


