


1.登录腾讯地图位置服务进入控制台
- 申请腾讯地图开发者
- 进入控制台申请自己的key

2.进入vue项目的public文件下的index.html
引入腾讯资源包,并把申请的key填入
<script src="https://map.qq.com/api/js?v=2.exp&key=你的key"></script>

3.创建地图容器
<div id="map" style="width:450px;height:200px;"></div>
4.初始化地图、设置标记点并开启拖拽监听
import { reactive, toRefs, getCurrentInstance, Transition, watch } from 'vue';
export default {
    setup() {
        const {proxy} = getCurrentInstance(); // proxy想当于vue2的this
        let data = reactive({
            lng: 116.40396298757886,
            lat: 39.91511908708907,
            map: null,
            searchResults: [], // 存储搜索结果
            marker: [],
            locations: "",
            drapClik: true,
            showDrap: false,
        });
        const methods = {
            // 初始化地图
            initMap: function () {
                //定义地图中心点坐标
                let center = new qq.maps.LatLng(data.lat, data.lng);
                var myOptions = {
                    zoom: 17,
                    center: center,
                    mapTypeId: qq.maps.MapTypeId.ROADMAP,
                };
                data.map = new qq.maps.Map(document.getElementById("map"), myOptions);

                // 设置标记点
                data.marker = new qq.maps.Marker({
                    position: center,
                    map: data.map,
                });
                // 监听标记点拖拽事件
                data.marker.setDraggable(true);
                qq.maps.event.addListener(data.marker, "dragend", function (e) {
                    // 监听标记拖动
                    var latLng = data.marker.getPosition();
                    data.map.setCenter(latLng);
                    let lats = latLng.lat.toFixed(6);
                    let lng = latLng.lng.toFixed(6);
                    data.locations = `${lats},${lng}`;
                    methods.filteredResults();
                });
            },
        }
        proxy.$nextTick(()=>{
            methods.initMap();
        })
    }
}
5.拖拽标记点获取点位信息,进行逆地址解析
-
前提:为解决跨域需要使用vue-jsonp来联调腾讯地图服务端接口
- WebService API官网:WebService API | 腾讯位置服务
- 安装vue-jsonp
npm安装: npm i vue-jsonp -S
yarn安装: yarn add vue-jsonp
6.引入入vue-jsonp并联调逆地址解析
import { jsonp } from "vue-jsonp";
            // 逆地址解析
            filteredResults: function () {
                jsonp("https://apis.map.qq.com/ws/geocoder/v1", {
                key: "",
                location: '',
                output: "jsonp", // output必须jsonp   不然会超时
                })
                .then((res) => {
                    if (res.status == 0) {
                        // 通过地址得到经纬度
                        data.warehouseForm.search_address = res.result.address;
                        let center = new qq.maps.LatLng(
                            res.result.location.lat,
                            res.result.location.lng
                        );
                        data.map.panTo(center); // 重新设置地图中心点
                        data.lng = res.result.location.lng;
                        data.lat = res.result.location.lat;
                        data.warehouseForm.longitude = data.lng;
                        data.warehouseForm.latitude = data.lat;
                        methods.focus();
                        methods.suggestion();
                    } else {
                        proxy.$messages.error(res.message);
                        data.searchResults = [];
                    }
                })
                .catch(() => {
                    // search_btn.value = false
                    data.searchResults = [];
                });
            },
7.关键词搜索
            // 关键词搜索
            suggestion: function () {
                jsonp("https://apis.map.qq.com/ws/place/v1/suggestion", {
                key: "",
                keyword: '',
                output: "jsonp", // output必须jsonp   不然会超时
                })
                .then((res) => {
                    if (res.status == 0) {
                        data.searchResults = res.data.map(item => ({value: item.location ,label: `${item.title} ${item.address}`}));
                    } else {
                        data.searchResults = [];
                        proxy.$messages.error(res.message);
                    }
                })
                .catch(() => {
                    data.searchResults = [];
                });
            },
8.封装AutoComplete
由于使用ant-design的AutoComplete自动完成组件出现报错并不知原因选择自己简单封装
<template>
    <div class='auto-complete' @mouseenter="mouseenter" @mouseleave="mouseleave">
        <PerfectScrollbar class="scrollbar">

                <ul v-show="list.length > 0">
                    <li v-for="(item,index) in list" :key="index" @click="onSelect(item)">
                        <a-tooltip>
                            <template #title>
                                <span>{{item.label}}</span>
                            </template>
                            <span>
                                {{ item.label }}
                            </span>
                        </a-tooltip>
                    </li>
                </ul>
        </PerfectScrollbar>
    </div>
</template>

<script>
export default {
    props: {
        list: {
            type: Array,
            required: true
        }
    },
    setup(props, context) {
        const methods = {
            onSelect : function(item) {
                context.emit('onSelect',item)
            },
            mouseenter () {
                context.emit('mouseenter')
            },
            mouseleave () {
                context.emit('mouseleave')
            }
        }
        return {
            ...methods
        }
    }
 };
</script>

<style lang='less'>
    .auto-complete {
        width: 100%;
        position: absolute;
        top: 32px;
        left: 0;
        background: #fff;
        max-height: 200px;
        z-index: 10;
        .scrollbar {
            width: 100%;
            max-height: 200px;
        }
        ul,li {
            padding: 0;
            margin: 0;
            box-sizing: border-box;
        }
        li {
            width: 100%;
            height: 30px;
            line-height: 30px;
            list-style: none;
            padding: 0 10px;
            cursor: pointer;
            overflow: hidden;//(文字长度超出限定宽度,则隐藏超出的内容)
            white-space: nowrap;//(设置文字在一行显示,不能换行)
            text-overflow: ellipsis;//(规定当文本溢出时,显示省略符号来代表被修剪的文本)
        }
        li:hover {
           background: #e9e9e9;
        }
    }
</style>
完整代码 :
<template>
  <div class="home">
    <div class="search">
      <input
        type="text"
        v-model="keyword"
        @focus="focus"
        @blur="blur"
        placeholder="搜索"
        @keydown.enter="suggestion"
        style="width: 400px; height: 30px"
      />
      <auto-complete
        class="auto-complete"
        v-show="showDrap"
        :list="searchResults"
        @onSelect="onSelect"
        @mouseenter="enter"
        @mouseleave="leave"
      ></auto-complete>
    </div>
    <div id="map" style="width: 750px; height: 400px; background: pink"></div>
  </div>
</template>
<script>
import { reactive, toRefs, getCurrentInstance, Transition, watch } from 'vue';
import { jsonp } from "vue-jsonp"; // npm i vue-jsonp -S
import autoComplete from "@/components/autoComplete.vue";
export default {
    setup() {
        const {proxy} = getCurrentInstance(); // proxy想当于vue2的this
        let data = reactive({
            lng: 116.40396298757886,
            lat: 39.91511908708907,
            map: null,
            searchResults: [], // 存储搜索结果
            marker: [],
            locations: "",
            drapClik: true,
            showDrap: false,
        });
        const methods = {
            // 初始化地图
            initMap: function () {
                //定义地图中心点坐标
                let center = new qq.maps.LatLng(data.lat, data.lng);
                var myOptions = {
                    zoom: 17,
                    center: center,
                    mapTypeId: qq.maps.MapTypeId.ROADMAP,
                };
                data.map = new qq.maps.Map(document.getElementById("map"), myOptions);

                // 设置标记点
                data.marker = new qq.maps.Marker({
                    position: center,
                    map: data.map,
                });
                // 监听标记点拖拽事件
                data.marker.setDraggable(true);
                qq.maps.event.addListener(data.marker, "dragend", function (e) {
                    // 监听标记拖动
                    var latLng = data.marker.getPosition();
                    data.map.setCenter(latLng);
                    let lats = latLng.lat.toFixed(6);
                    let lng = latLng.lng.toFixed(6);
                    data.locations = `${lats},${lng}`;
                    methods.filteredResults();
                });
              },
        // 逆地址解析
        filteredResults: function () {
        jsonp("https://apis.map.qq.com/ws/geocoder/v1", {
          key: "YVOBZ-GIFEX-I3A4E-74VU3-DM7MJ-DQFLX",
          location: data.locations,
          output: "jsonp", // output必须jsonp   不然会超时
        })
          .then((res) => {
            console.log(res);
            if (res.status == 0) {
              // 通过地址得到经纬度
              data.keyword = res.result.address;
              let center = new qq.maps.LatLng(
                res.result.location.lat,
                res.result.location.lng
              );
              data.map.panTo(center); // 重新设置地图中心点
              data.lng = res.result.location.lng;
              data.lat = res.result.location.lat;
              data.longitude = data.lng;
              data.latitude = data.lat;
              methods.focus();
              methods.suggestion();
            } else {
              proxy.$messages.error(res.message);
              data.searchResults = [];
            }
          })
          .catch(() => {
            // search_btn.value = false
            data.searchResults = [];
          });
      },
      // 关键词搜索
      suggestion: function () {
        console.log(1111);
        jsonp("https://apis.map.qq.com/ws/place/v1/suggestion", {
          key: "YVOBZ-GIFEX-I3A4E-74VU3-DM7MJ-DQFLX",
          keyword: data.keyword,
          output: "jsonp", // output必须jsonp   不然会超时
        })
          .then((res) => {
            console.log(res);
            if (res.status == 0) {
              data.searchResults = res.data.map((item) => ({
                value: item.location,
                label: `${item.title} ${item.address}`,
              }));
            } else {
              data.searchResults = [];
              proxy.$messages.error(res.message);
            }
          })
          .catch(() => {
            data.searchResults = [];
          });
      },
      onSearch: debounceInput(() => {
        data.searchResults = [];
        methods.suggestion();
      }, 500),
      onSelect: function (item) {
        data.drapClik = true;
        data.showDrap = false;
        data.keyword = item.label;
        methods.setOptions(item);
        data.lng = item.value.lng;
        data.lat = item.value.lat;
        data.longitude = data.lng;
        data.latitude = data.lat;
      },
      setOptions(item) {
        // 通过地址得到经纬度
        let center = new qq.maps.LatLng(item.value.lat, item.value.lng);
        data.map.panTo(center); // 重新设置地图中心点
        // 更新标记的位置
        data.marker.setPosition(
          new qq.maps.LatLng(item.value.lat, item.value.lng)
        );
      },
      focus() {
        data.showDrap = true;
      },
      enter() {
        data.drapClik = false;
      },
      leave() {
        data.drapClik = true;
      },
      blur() {
        let timer = setInterval(() => {
          if (data.drapClik) {
            data.showDrap = false;
            clearInterval(timer);
            data.drapClik = true;
          }
        }, 80);
      },
        }
        proxy.$nextTick(()=>{
            methods.initMap();
        })
    },
    components: {
        autoComplete,
    },
}
</script>
效果: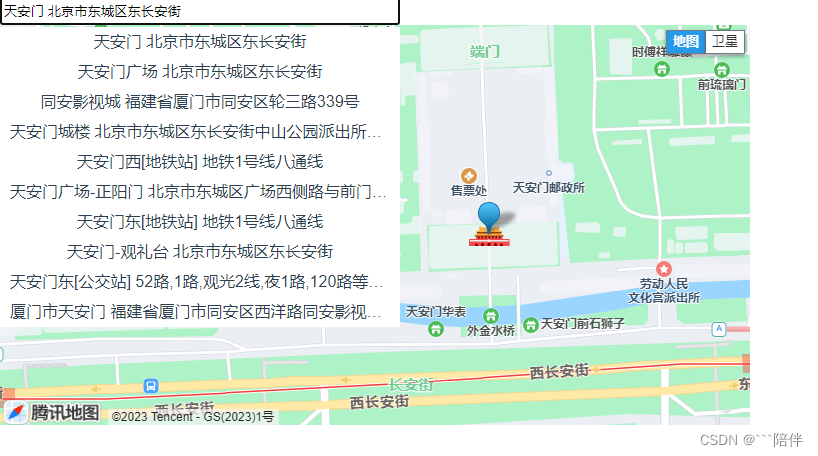


 2441
2441


 被折叠的 条评论
为什么被折叠?
被折叠的 条评论
为什么被折叠?
 到【灌水乐园】发言


