


说到自定义view就不得提到LayoutInflater,虽然我们在代码中可以直接用new方法构造出各种View,然后再添加各种属性去控制View的大小和位置等布局,但是这是很复杂繁琐的,细节优化更麻烦困难,面对复杂布局,用代码构造更显得无力。这时我们必须借助于LayoutInflater这个神器了。
LayoutInflater的作用就是能够将value/layout目录下的xml布局文件,实例化成相应的View。它的好处是显而易见的,xml布局文件我们可以可视化构造。要使用LayoutInflater,首先要得到LayoutInflater的实例对象,有下面三种方法:
方法一:
在activity里调用:
LayoutInflater inflater = getLayoutInflater();
方法二:
LayoutInflater inflater = LayoutInflater.from(mContext);
方法三:
LayoutInflater inflater = (LayoutInflater)mContext.getSystemService(Context.LAYOUT_INFLATER_SERVICE);
如果查看android源码可以知道前面两个方法最后都是调用到第三个方法。有了LayoutInflater对象就可以调用它
的inflate方法把xml布局文件变成view了。
下面我们就通过一个非常简单的小例子,来更加直观地看一下LayoutInflater的用法。比如说当前项目MainActivity对应的布局文件叫做activity_main.xml,代码如下所示:
<?xml version="1.0" encoding="utf-8"?>
<RelativeLayout xmlns:android="http://schemas.android.com/apk/res/android"
    android:id="@+id/root_layout"
    android:layout_width="match_parent"
    android:layout_height="match_parent"/>
代码很简单,就只有一个RelativeLayout,里面什么控件都不放,我们再建一个layout_textview.xml,代码如下:代码也很简单,就一个TextView,现在我们看看用layoutInflater把这个textview加载到MainActivity的布局里,代码如下:<?xml version="1.0" encoding="utf-8"?> <TextView xmlns:android="http://schemas.android.com/apk/res/android" android:layout_width="wrap_content" android:layout_height="wrap_content" android:text="Hello World!!!" android:textSize="18sp" android:padding="10dp" android:gravity="center" android:textColor="@color/white" android:background="@color/colorAccent"/></span>
  @Override
    protected void onCreate(Bundle savedInstanceState) {
        super.onCreate(savedInstanceState);
        setContentView(R.layout.activity_main);
        mContext = this;
        RelativeLayout mainLayout = (RelativeLayout) findViewById(R.id.root_layout);
        LayoutInflater inflater = (LayoutInflater)mContext.getSystemService(Context.LAYOUT_INFLATER_SERVICE);
        TextView textView = (TextView) inflater.inflate(R.layout.layout_textview,null);
        mainLayout.addView(textView);
    }
    public View inflate(@LayoutRes int resource, @Nullable ViewGroup root) {
        return inflate(resource, root, root != null);
    }

    public View inflate(@LayoutRes int resource, @Nullable ViewGroup root, boolean attachToRoot) {
        final Resources res = getContext().getResources();
        if (DEBUG) {
            Log.d(TAG, "INFLATING from resource: \"" + res.getResourceName(resource) + "\" ("
                    + Integer.toHexString(resource) + ")");
        }

        final XmlResourceParser parser = res.getLayout(resource);
        try {
            return inflate(parser, root, attachToRoot);
        } finally {
            parser.close();
        }
}resource : int型,将被实例化的布局文件
root : ViewGroup型,根布局或父布局,如果这个参数不为空,则传入的viewgroup是将被实例化的View的根布局。
attachToRoot : boolean型,是否依附到传入的根布局上
先不多说,我们先看看上面的代码的效果:
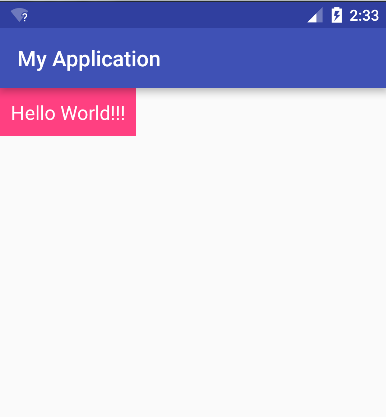
通过inflater.inflate(R.layout.layout_textview,null)方法,说明确实把TextView实例化出来了,当想我们修改下TextView的大小,布局文件做如下修改:
<?xml version="1.0" encoding="utf-8"?>
<TextView xmlns:android="http://schemas.android.com/apk/res/android"
    android:layout_width="match_parent"
    android:layout_height="150dp"
    android:text="Hello World!!!"
    android:textSize="18sp"
    android:padding="10dp"
    android:gravity="center"
    android:textColor="@color/white"
    android:background="@color/colorAccent"/>
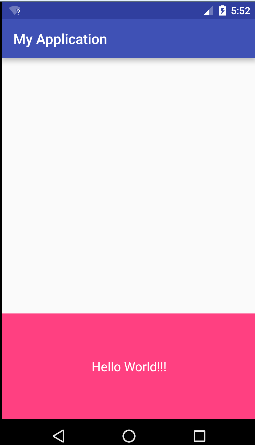
OH,NO!竟然没有变化,不是我们设想的宽度会充满全屏,我们设置的layout_width和layout_height没有起到一点作用。回到上面inflate方法,它有三个参数,前面root参数我们传进去的是null,我们修改下这个参数,看看是不是它的问题,我们将activity代码里的inflater.inflate(R.layout.layout_textview,null)改成:inflater.inflate(R.layout.layout_textview,mainLayout,false); 再运行,效果如下:

哈哈,终于达到了我们想要的效果,这说明使用inflate时,传入的布局文件“最外层”的layout_height和layout_width是要有root布局才能生效,这样也说明其实layout_height和layout_width是跟父布局有关,xml布局里也并没有设置view的height和width两个属性。
再回来看看inflate的第三个参数attachToRoot,它其实代表实例化view后,是否将这个view依附添加到传入的第二个参数的root父布局里。即如果为true,省去了我们手动再调用addView()方法了。
下面我们分析下inflate的源码:
    public View inflate(@LayoutRes int resource, @Nullable ViewGroup root, boolean attachToRoot) {
        final Resources res = getContext().getResources();
        //生成xml解析器
        final XmlResourceParser parser = res.getLayout(resource);
        try {
            return inflate(parser, root, attachToRoot);
        } finally {
            parser.close();
        }
    }

 public View inflate(XmlPullParser parser, @Nullable ViewGroup root, boolean attachToRoot) {

         final Context inflaterContext = mContext;
         final AttributeSet attrs = Xml.asAttributeSet(parser);//获取xml里面属性
         View result = root;

         final String name = parser.getName(); //得到布局xml里的根布局的名称,这里是textview

         if (TAG_MERGE.equals(name)) {//如果是merge布局文件
              if (root == null || !attachToRoot) { //这里attachToRoot必须为true
                        throw new InflateException("<merge /> can be used only with a valid "
                                + "ViewGroup root and attachToRoot=true");
              }
              rInflate(parser, root, inflaterContext, attrs, false);
         } else {
              //这里先生成上面传入的布局文件里的根View,我们上面只传入了一个TextView
              // Temp is the root view that was found in the xml
              final View temp = createViewFromTag(root, name, inflaterContext, attrs);

              ViewGroup.LayoutParams params = null;
              if (root != null) {
                  //如果root不为空,这里会根据root生成layoutParams
                  params = root.generateLayoutParams(attrs);
                  if (!attachToRoot) {
                        //如果attachToRoot为false,将上面生成的params赋值给生成的View
                        temp.setLayoutParams(params);
                  }
               }
               //上面生成了根View,再生成它的子View
               rInflateChildren(parser, temp, attrs, true);

               if (root != null && attachToRoot) {
                   root.addView(temp, params); //加入的传入的root布局里
               }

               if (root == null || !attachToRoot) {
                    result = temp;
               }
            return result;
        }
    }
<?xml version="1.0" encoding="utf-8"?>
<TextView xmlns:android="http://schemas.android.com/apk/res/android"
    android:layout_width="match_parent"
    android:layout_height="150dp"
    android:text="Hello World!!!"
    android:textSize="18sp"
    android:padding="10dp"
    android:gravity="center"
    android:layout_alignParentBottom="true"
    android:textColor="@color/white"
    android:background="@color/colorAccent"/>
这里起到了作用,说明确实是根据父控件生成了相应的LayoutParams。顺便提下我们在activity里面setContentView设置布局文件,最终也是调用到了LayoutInflater类的inflate方法。
下面总结下:
inflate方法有三个参数:
resource : int型, 传入将被实例化的布局文件
root : ViewGroup型,根布局或父布局,如果这个参数不为空,则会为生成的view加上root相应的layoutParams参数
attachToRoot : boolean型,是否依附到传入的root根布局上


 8239
8239

 被折叠的 条评论
为什么被折叠?
被折叠的 条评论
为什么被折叠?
 到【灌水乐园】发言


