


“不积跬步,无以至千里”。
接着聊上一篇文章中遗留的两个重要问题:
- 如何往Spring环境变量中添加自定义的环境变量?工作原理是什么?
- PropertyPlaceholderConfigurer这个类是怎么完成bean属性填充时“$”符号解析工作的?
这篇文章,我们分析一下第一个问题:怎么向Spring环境变量中添加自定义的环境变量?源码是怎么一步步实现的?
我的示例代码是这样的:
public class MainTest {
  public static void main(String[] args) throws IOException {
    GenericXmlApplicationContext context = new GenericXmlApplicationContext();
    // 新建一个ResourcePropertySource,读取自定义的配置文件
    ResourcePropertySource resourcePropertySource = new ResourcePropertySource("beans-env.properties");
    // 调用容器的Api添加PropertySource,即添加自定义的配置到Spring的上下文环境中
    context.getEnvironment().getPropertySources().addLast(resourcePropertySource);
    context.load("beans.xml");
    context.refresh();
    context.registerShutdownHook();
    context.start();
    System.out.println(context.getBean(People.class));
  }
}
看一下GenericXmlApplicationContext对象的初始化
GenericXmlApplicationContext context = new GenericXmlApplicationContext();
里面的私有变量XmlBeanDefinitionReader的初始化
private final XmlBeanDefinitionReader reader = new XmlBeanDefinitionReader(this);
public XmlBeanDefinitionReader(BeanDefinitionRegistry registry) {
  super(registry);
}
protected AbstractBeanDefinitionReader(BeanDefinitionRegistry registry) {
  Assert.notNull(registry, "BeanDefinitionRegistry must not be null");
  this.registry = registry;

  // Determine ResourceLoader to use.
  if (this.registry instanceof ResourceLoader) {
    this.resourceLoader = (ResourceLoader) this.registry;
  }
  else {
    this.resourceLoader = new PathMatchingResourcePatternResolver();
  }

  // Inherit Environment if possible
  if (this.registry instanceof EnvironmentCapable) {
    this.environment = ((EnvironmentCapable) this.registry).getEnvironment();
  }
  else {
    this.environment = new StandardEnvironment();
  }
}
因为GenericXmlApplicationContext 这个对象它的接口 ApplicationContext 继承了EnvironmentCapable,所以会走下面的逻辑
this.environment = ((EnvironmentCapable) this.registry).getEnvironment();
而这个getEnvironment() 方法也会调用到父类的getEnvironment() 中去,即使是我们熟悉的AnnotationConfigApplicationConfig容器在这里也是一样,因为他们的父类是相同的,都是AbstractApplicationContext
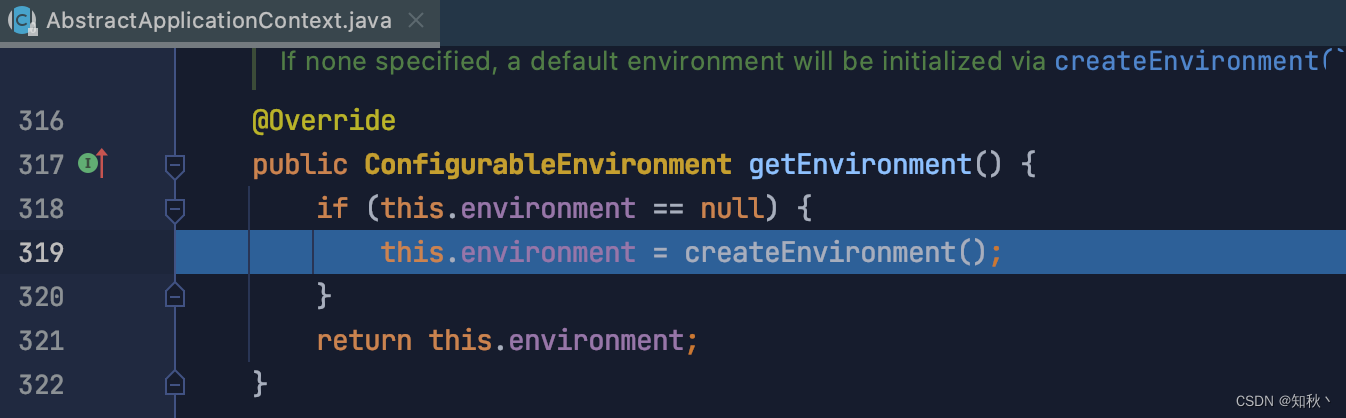
进入 createEnvironment() 方法一看究竟
protected ConfigurableEnvironment createEnvironment() {
  return new StandardEnvironment();
}
这里会初始化一个StandardEnvironment对象,不过这个类的默认构造器似乎没有做什么操作,接着会调用它的父类的无参构造器
public AbstractEnvironment() {
  customizePropertySources(this.propertySources);
}
protected void customizePropertySources(MutablePropertySources propertySources) {
}
可以发现,在父类的无参构造器中调用了 customizePropertySources() 方法,而实现是在子类StandardEnvironment中
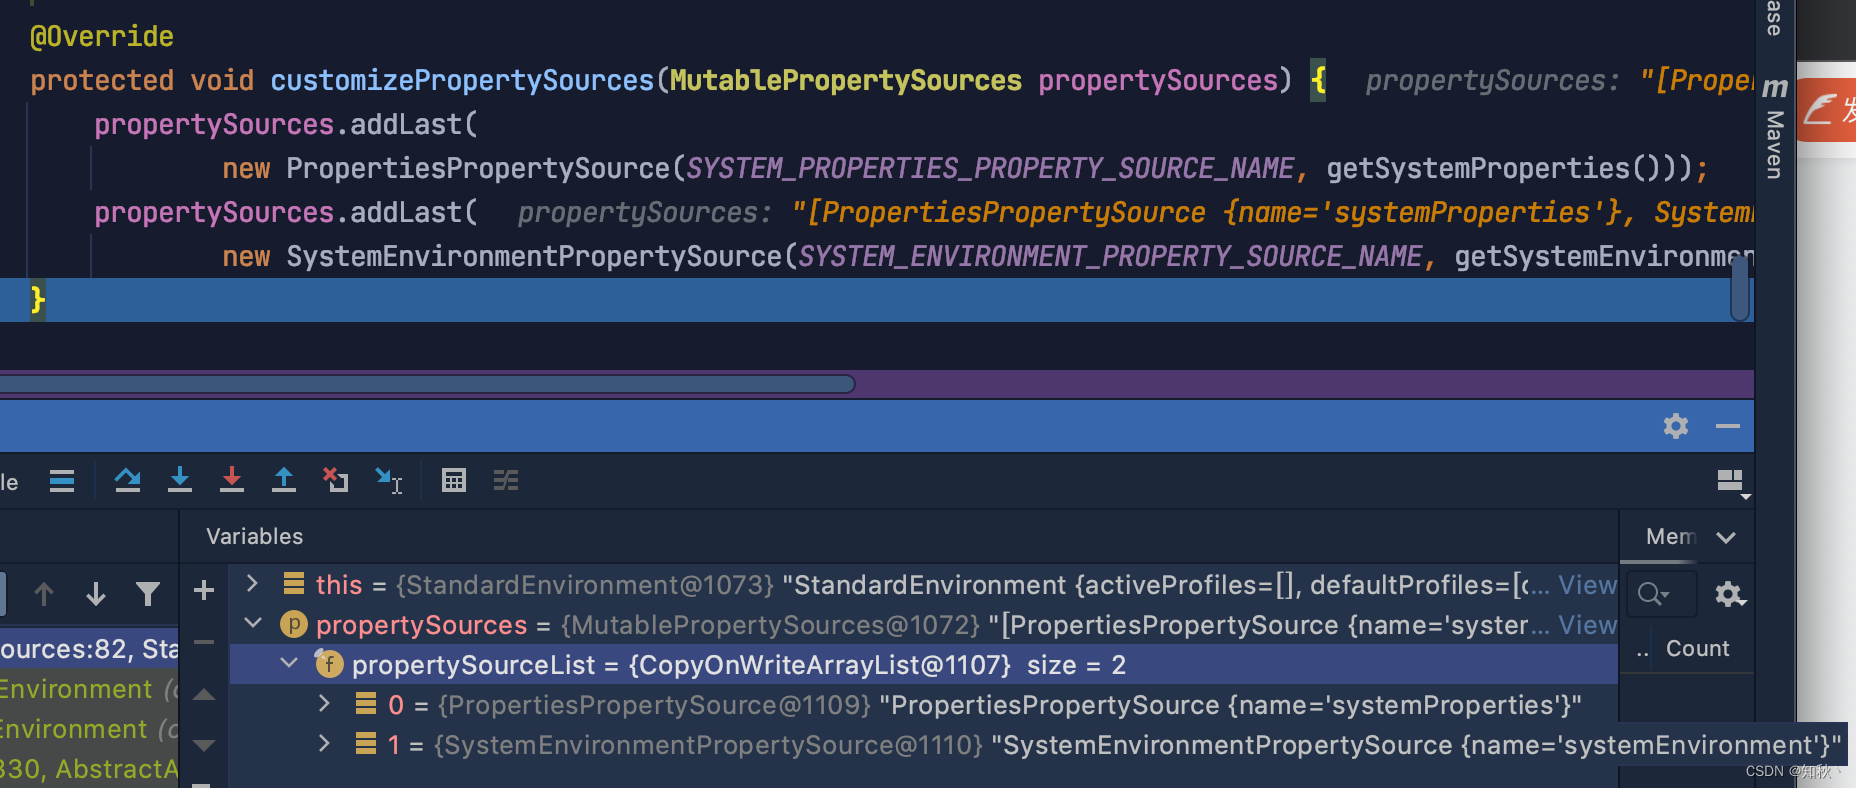
@Override
protected void customizePropertySources(MutablePropertySources propertySources) {
  propertySources.addLast(
    new PropertiesPropertySource(SYSTEM_PROPERTIES_PROPERTY_SOURCE_NAME, getSystemProperties()));
  propertySources.addLast(
    new SystemEnvironmentPropertySource(SYSTEM_ENVIRONMENT_PROPERTY_SOURCE_NAME, getSystemEnvironment()));
}
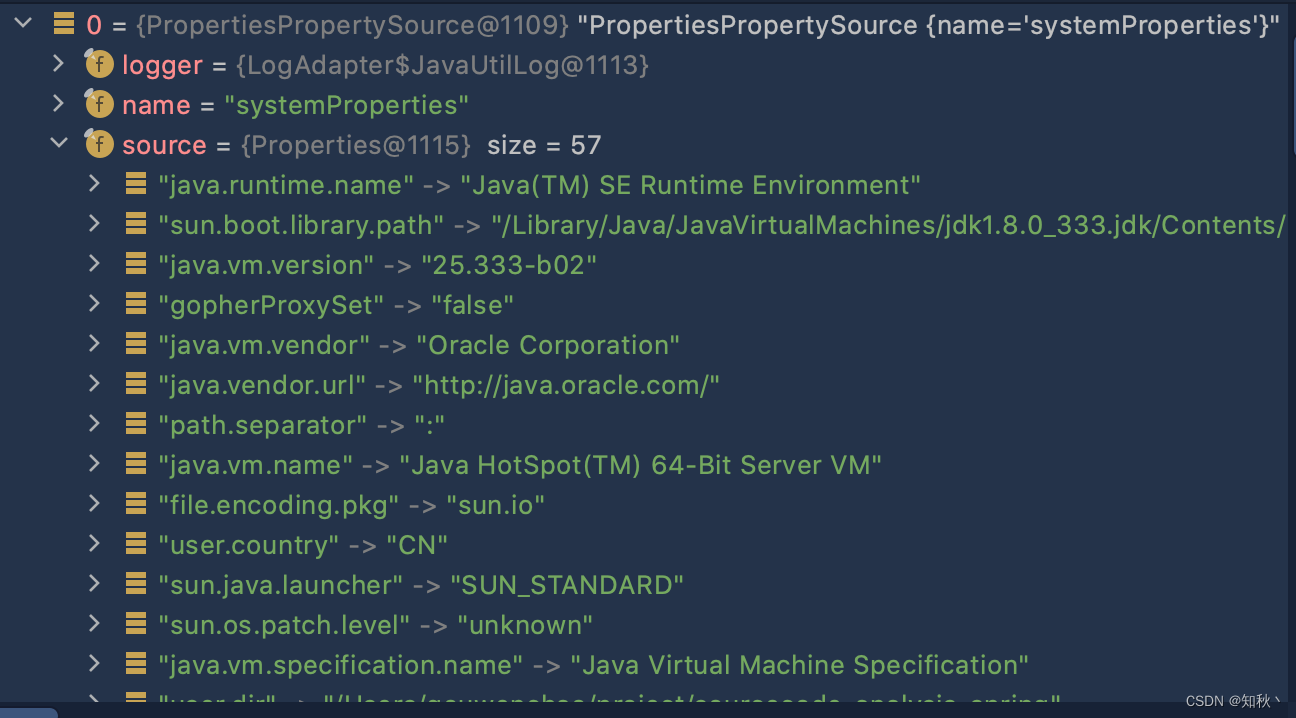
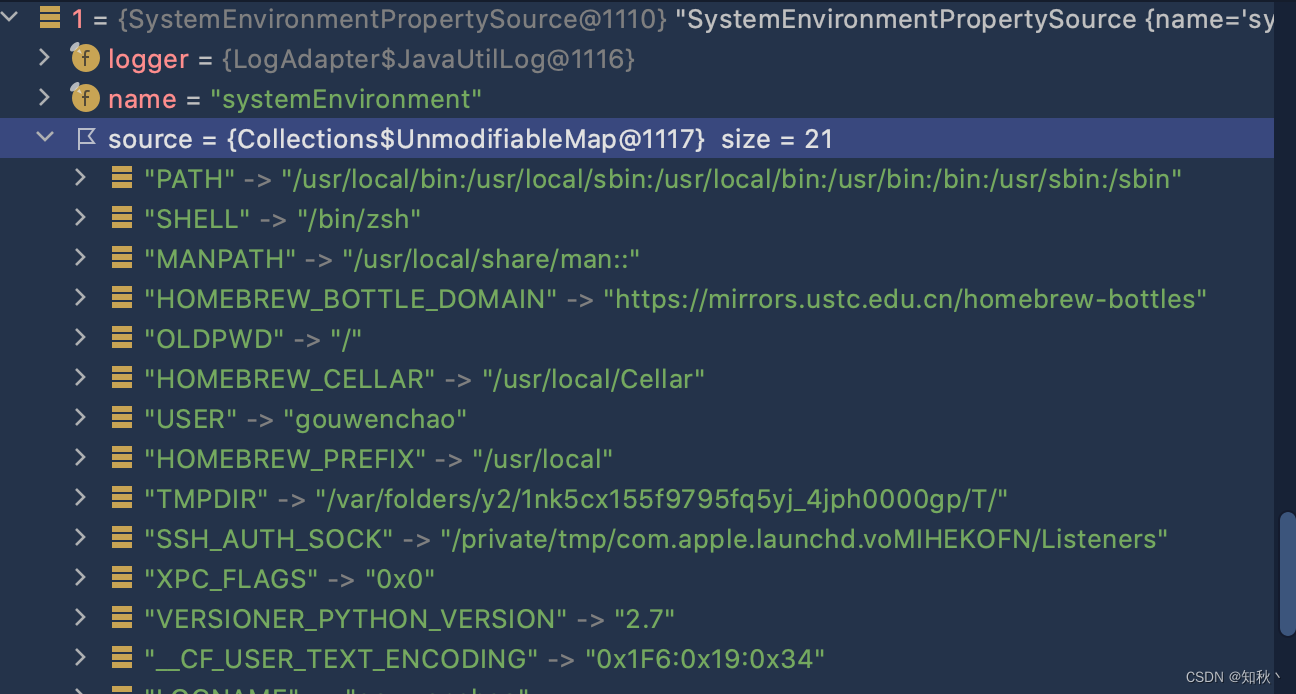
最终调用了 addLast() 方法添加了两个PropertySource类型的对象到propertySources中,一个是系统的环境变量,一个是JDK的环境变量,而这个propertySources正是AbstractEnvironment中的this.propertySources
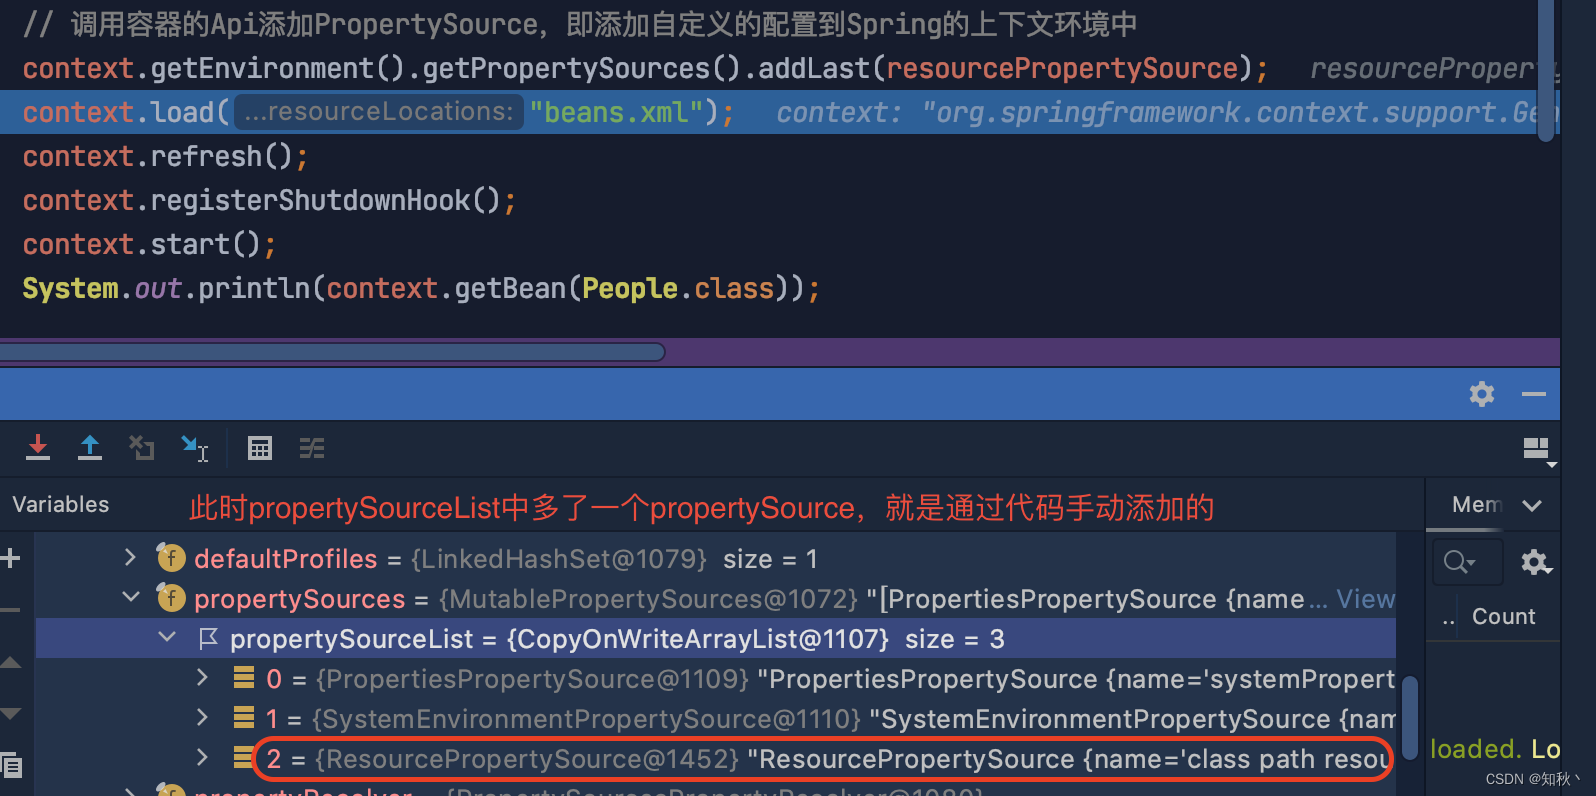
我们看一下添加完之后的propertySource,跟我们分析的预期是一致的
到这里第一个问题就很明朗了,在看看我怎么添加环境变量的
ResourcePropertySource resourcePropertySource = new ResourcePropertySource("beans-env.properties");
// 调用容器的Api添加PropertySource,即添加自定义的配置到Spring的上下文环境中
context.getEnvironment().getPropertySources().addLast(resourcePropertySource);
关键是这一行代码:
context.getEnvironment().getPropertySources()
这里拿到的就是刚刚创建的环境变量,进而拿到AbstractEnvironment中的propertySources,调用 addLast() 即可完成环境变量的添加


 735
735


 被折叠的 条评论
为什么被折叠?
被折叠的 条评论
为什么被折叠?
 到【灌水乐园】发言


