


配置文件(Properties类):资源文件(以.properties作为拓展名的文件)/属性文件:
做项目开发,为何要使用配置文件?
把所有的数据存储在代码中,写死了,这叫硬编码!
比如:Java中需要连接数据库,必须拥有数据库的账号和密码;
此时我们就得在Java代码中编写,类似代码:
String username = "root";
String password = "admin";
但是,以后我们把项目部署在别人电脑/或者服务器中,别人电脑中的数据库的账号和密码可以不再是root和admin,此时部署我们就得去项目中到处去找使用了账号和密码的地方。部署项目的可能是实施人员,为了安全操作,不能让其直接修改代码。
此时,我们专门为数据库提供一个配置文件,里面专门存储数据库连接相关的信息。
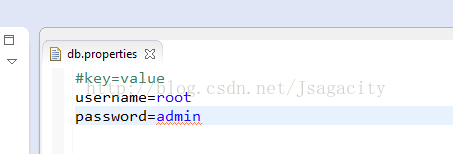
db.properties
#key=value
username=root
password=admin
......
现在数据库的连接信息在db.properties文件中,而Java代码需要获取该文件中的信息:
重心转移:Java代码如何加载properties文件,如何获取该文件中的数据。
必须使用Properties类(Hashtable的子类,Map接口的实现类)。
运行结果:
数据流:(提供了可以读/写任意数据类型的方法)
DataOutputStream:提供了writeXxx(Xxx value)方法;
DataInputStream:提供了readXxx()方法。
运行结果:
随机访问文件(RandomAccessFile类):表示可以在该文件的任何位置写出和读取数据:
运行结果:
管道流:实现两个线程之间的数据交互
PipedInputStream:管道字节输入流
PipedOutputStream:管道字节输出流
PipedReder:管道字符输入流
PipedWriter:管道字符输出流
运行结果:
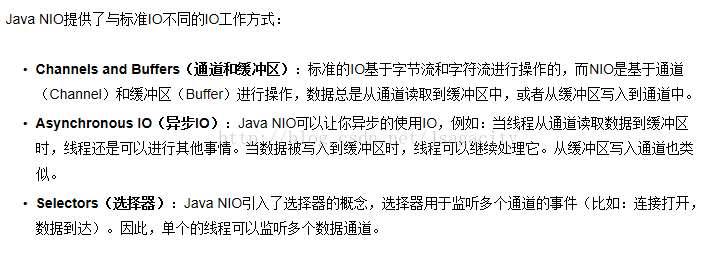
nio:新的IO流(new IO)
在JDK1.4开始提出的新的IO,可以吧一块磁盘文件映射到内存中,我们再去读取内存中的数据。(在java.nio包中)
其实我们可以查看一下底层代码的实现:
做项目开发,为何要使用配置文件?
把所有的数据存储在代码中,写死了,这叫硬编码!
比如:Java中需要连接数据库,必须拥有数据库的账号和密码;
此时我们就得在Java代码中编写,类似代码:
String username = "root";
String password = "admin";
但是,以后我们把项目部署在别人电脑/或者服务器中,别人电脑中的数据库的账号和密码可以不再是root和admin,此时部署我们就得去项目中到处去找使用了账号和密码的地方。部署项目的可能是实施人员,为了安全操作,不能让其直接修改代码。
此时,我们专门为数据库提供一个配置文件,里面专门存储数据库连接相关的信息。
db.properties
#key=value
username=root
password=admin
......
现在数据库的连接信息在db.properties文件中,而Java代码需要获取该文件中的信息:
重心转移:Java代码如何加载properties文件,如何获取该文件中的数据。
必须使用Properties类(Hashtable的子类,Map接口的实现类)。
事先准备一个文件:
读取配置文件的操作:
/**
* Created by Layne_Yao on 2017-8-1 上午10:31:18.
* CSDN:http://blog.csdn.net/Jsagacity
*/
public class LoadResourceDemo {
public static void main(String[] args) throws Exception {
//创建Properties对象
Properties p = new Properties();
//在真正开发中不宜用绝对路径:D:/Eclipse/workspace/IO/src/db.properties
InputStream in = new FileInputStream("D:/Eclipse/workspace/IO/src/db.properties");
//加载输入流中的数据,架在你之后,数据都在p中对象中
p.load(in);
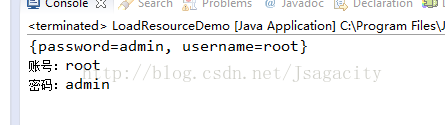
System.out.println(p);
System.out.println("账号:"+p.getProperty("username"));
System.out.println("密码:"+p.getProperty("password"));
}
}运行结果:
加载资源文件路径:(db.properties)
注意:加载properties文件,只能使用Properties类的load方法。
方式1:使用绝对路径的方法加载,该方式不可行。
方式2:使用相对路径-相对于classpath的根路径(字节码输出目录)(建议使用方式2)
此时得使用ClassLoader(类加载器),类加载器默认就是从classpath根路径去寻找文件的。
方式3:使用相对路径-相对于当前加载文件的字节码路径去寻找db.properties文件(注意:方式3需要把db.properties文件放在跟LoadResourceDemo.java放在一起,就是同一个目录下)
代码演示:
/**
 * Created by Layne_Yao on 2017-8-3 下午2:32:40.
 * CSDN:http://blog.csdn.net/Jsagacity
 */
public class LoadResourceDemo {

	public static void main(String[] args) throws Exception {
		test1();
		test2();
		test3();
	}

	//方式3:使用相对路径-相对于当前加载资源文件的字节路径
	private static void test3() throws Exception {
		Properties p = new Properties();
		InputStream inStream = LoadResourceDemo.class.getResourceAsStream("db.properties");
		p.load(inStream);
		System.out.println(p);
		System.out.println("账号:"+p.getProperty("username"));
        System.out.println("密码:"+p.getProperty("password"));
	}

	//方式2:使用相对路径-相对于classpath的根路径(字节码输出目录)
	private static void test2() throws Exception {
		Properties p = new Properties();
//		ClassLoader loader = LoadResourceDemo.class.getClassLoader();
		ClassLoader loader = Thread.currentThread().getContextClassLoader();
		InputStream inStream = loader.getResourceAsStream("db.properties");
		p.load(inStream);
		System.out.println(p);
		System.out.println("账号:"+p.getProperty("username"));
        System.out.println("密码:"+p.getProperty("password"));
	}

	//方式1:使用绝对路径的方式加载
	private static void test1() throws Exception {
		Properties p = new Properties();
		InputStream inStream = new FileInputStream("D:/Eclipse/workspace/反射机制/resources/db.properties");
		p.load(inStream);
		System.out.println(p);
		System.out.println("账号:"+p.getProperty("username"));
        System.out.println("密码:"+p.getProperty("password"));
	}

}
数据流:(提供了可以读/写任意数据类型的方法)
DataOutputStream:提供了writeXxx(Xxx value)方法;
DataInputStream:提供了readXxx()方法。
注意:writeXxx和readXxx必须要对应起来,比如writeByte写出的数据,此时只能使用readByte读取出来。
简单的操作:
/**
* Created by Layne_Yao on 2017-8-1 上午10:48:10.
* CSDN:http://blog.csdn.net/Jsagacity
*/
public class DataStreamDemo {
public static void main(String[] args) throws Exception {
File file = new File("file/out");
// write(file);
read(file);
}
//数据的输入
private static void read(File file) throws Exception {
DataInputStream in = new DataInputStream(new FileInputStream(file));
System.out.println(in.readByte());
System.out.println(in.readChar());
System.out.println(in.readUTF());
in.close();
}
// 数据流的输出
private static void write(File file) throws Exception {
DataOutputStream out = new DataOutputStream(new FileOutputStream(file));
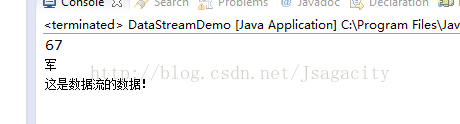
out.writeByte(67);
out.writeChar('军');
out.writeUTF("这是数据流的数据!");
out.close();
}
}运行结果:
随机访问文件(RandomAccessFile类):表示可以在该文件的任何位置写出和读取数据:
简单的操作:
/**
* Created by Layne_Yao on 2017-8-1 下午1:42:17.
* CSDN:http://blog.csdn.net/Jsagacity
*/
public class RandomAccessFileDemo {
public static void main(String[] args) throws Exception {
File file = new File("file/raf.txt");
// write(file);//先写后读
read(file);
}
private static void read(File file) throws Exception {
RandomAccessFile raf = new RandomAccessFile(file, "r");
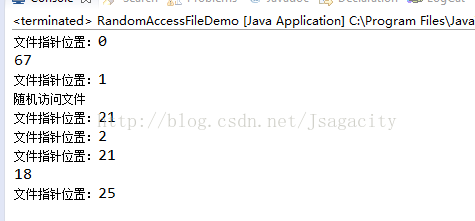
System.out.println("文件指针位置:"+raf.getFilePointer());
byte b = raf.readByte();
System.out.println(b);
System.out.println("文件指针位置:"+raf.getFilePointer());
String str = raf.readUTF();
System.out.println(str);
System.out.println("文件指针位置:"+raf.getFilePointer());
raf.seek(2);//设置文件指针为2个字节
System.out.println("文件指针位置:"+raf.getFilePointer());
raf.skipBytes(19);//设置文件指针跳过19个字节
System.out.println("文件指针位置:"+raf.getFilePointer());
int i = raf.readInt();
System.out.println(i);
System.out.println("文件指针位置:"+raf.getFilePointer());
raf.close();
}
private static void write(File file) throws Exception {
RandomAccessFile raf = new RandomAccessFile(file, "rw");
raf.writeByte(67);
raf.writeUTF("随机访问文件");
raf.writeInt(18);
raf.close();
}
}运行结果:
管道流:实现两个线程之间的数据交互
PipedInputStream:管道字节输入流
PipedOutputStream:管道字节输出流
PipedReder:管道字符输入流
PipedWriter:管道字符输出流
只演示字节流的代码:
/**
* Created by Layne_Yao on 2017-8-1 下午2:07:59.
* CSDN:http://blog.csdn.net/Jsagacity
*/
//A线程发送数据给B线程
class AThread extends Thread {
private PipedOutputStream out = new PipedOutputStream();
public PipedOutputStream getOut() {
return out;
}
@Override
public void run() {
try {
for (int i = 65; i < 91; i++) {
out.write(i);
}
out.close();
} catch (IOException e) {
e.printStackTrace();
}
}
}
//B线程接收A线程发送的数据
class BThread extends Thread{
PipedInputStream in = null;
public BThread(AThread aThread) throws Exception{
in = new PipedInputStream(aThread.getOut());
}
@Override
public void run() {
int len = -1;
try {
while((len = in.read())!=-1){
System.out.print((char)len);
}
in.close();
} catch (IOException e) {
// TODO Auto-generated catch block
e.printStackTrace();
}
}
}
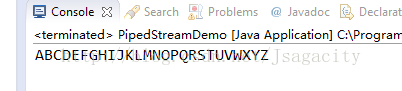
public class PipedStreamDemo {
public static void main(String[] args) throws Exception {
AThread a = new AThread();
BThread b = new BThread(a);
a.start();
b.start();
}
}运行结果:
nio:新的IO流(new IO)
在JDK1.4开始提出的新的IO,可以吧一块磁盘文件映射到内存中,我们再去读取内存中的数据。(在java.nio包中)
Java NIO是Java1.4版本开始引入一个新的IO API,可以替代标准的Java IO API,现在主要运用于服务器中,对于我们写代码依然使用传统的IO就够了。
在JDK1.7中提取出更新的IO,叫NIO2.0!!!-->Files(文件工具类)比较常用
简单的代码演示:
/**
 * Created by Layne_Yao on 2017-8-1 下午2:43:59.
 * CSDN:http://blog.csdn.net/Jsagacity
 */
public class FilesDemo {

	public static void main(String[] args) throws Exception {
//		Files.copy(Paths.get("file/stream.txt"), new FileOutputStream("out.txt"));
		Files.copy(new FileInputStream("file/stream.txt"), Paths.get("in.txt"));
	}

}
其实我们可以查看一下底层代码的实现:
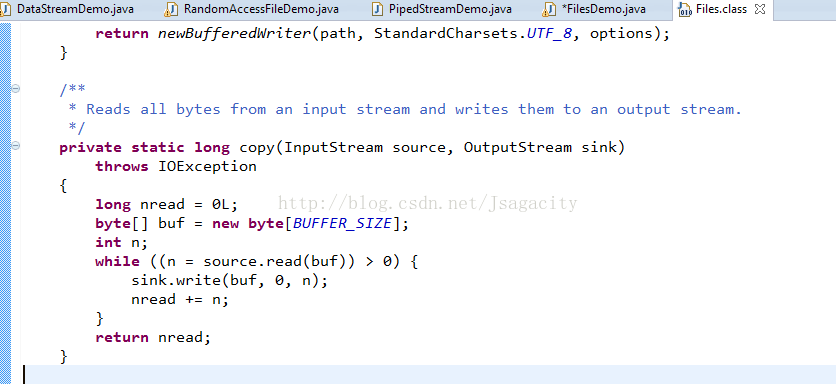
其实就是把输入流和输出流封装好给我们使用而已!!!


 269
269

 被折叠的 条评论
为什么被折叠?
被折叠的 条评论
为什么被折叠?
 到【灌水乐园】发言


