


sqlite事务的使用:
SQLite 事务(Transaction)
事务(Transaction)是一个对数据库执行工作单元。事务(Transaction)是以逻辑顺序完成的工作单位或序列,可以是由用户手动操作完成,也可以是由某种数据库程序自动完成。事务(Transaction)是指一个或多个更改数据库的扩展。例如,如果您正在创建一个记录或者更新一个记录或者从表中删除一个记录,那么您正在该表上执行事务。重要的是要控制事务以确保数据的完整性和处理数据库错误。实际上,您可以把许多的 SQLite 查询联合成一组,把所有这些放在一起作为事务的一部分进行执行。
事务的属性:
事务(Transaction)具有以下四个标准属性,通常根据首字母缩写为 ACID:
原子性(Atomicity):确保工作单位内的所有操作都成功完成,否则,事务会在出现故障时终止,之前的操作也会 回滚到以前的状态。
一致性(Consistency):确保数据库在成功提交的事务上正确地改变状态。
隔离性(Isolation):使事务操作相互独立和透明。
持久性(Durability):确保已提交事务的结果或效果在系统发生故障的情况下仍然存在。
事务控制:
使用下面的命令来控制事务:
BEGIN TRANSACTION:开始事务处理。
COMMIT:保存更改,或者可以使用 END TRANSACTION 命令。
ROLLBACK:回滚所做的更改。
事务控制命令只与 DML 命令 INSERT、UPDATE 和 DELETE 一起使用。他们不能在创建表或删除表时使用,因为这些操作在数据库中是自动提交的。
beginTransaction()开启事务
setTransactionSuccessful() 设置提交事务
SqliteOpenHelper的继承类:
同样创建一个bean的person类:
数据库的操作类DbManager:
主页布局activity_main.xml:
activity_simple_cursor_adapter.xml:
show_item.xml:
准备的差不多了,接着是SimpleCursorAdapter的简单使用:
CursorAdapter的简单使用:
最后一个知识点分页显示,先准备一个适配器:
分页显示的Java文件:
最后是主页面的代码:
别忘了在配置文件里面注册其他的activity。运行结果:(运行成功之后,先批量添加数据,点击一次就好,因为主键Id也是主动添加的)
SQLite 事务(Transaction)
事务(Transaction)是一个对数据库执行工作单元。事务(Transaction)是以逻辑顺序完成的工作单位或序列,可以是由用户手动操作完成,也可以是由某种数据库程序自动完成。事务(Transaction)是指一个或多个更改数据库的扩展。例如,如果您正在创建一个记录或者更新一个记录或者从表中删除一个记录,那么您正在该表上执行事务。重要的是要控制事务以确保数据的完整性和处理数据库错误。实际上,您可以把许多的 SQLite 查询联合成一组,把所有这些放在一起作为事务的一部分进行执行。
事务的属性:
事务(Transaction)具有以下四个标准属性,通常根据首字母缩写为 ACID:
原子性(Atomicity):确保工作单位内的所有操作都成功完成,否则,事务会在出现故障时终止,之前的操作也会 回滚到以前的状态。
一致性(Consistency):确保数据库在成功提交的事务上正确地改变状态。
隔离性(Isolation):使事务操作相互独立和透明。
持久性(Durability):确保已提交事务的结果或效果在系统发生故障的情况下仍然存在。
事务控制:
使用下面的命令来控制事务:
BEGIN TRANSACTION:开始事务处理。
COMMIT:保存更改,或者可以使用 END TRANSACTION 命令。
ROLLBACK:回滚所做的更改。
事务控制命令只与 DML 命令 INSERT、UPDATE 和 DELETE 一起使用。他们不能在创建表或删除表时使用,因为这些操作在数据库中是自动提交的。
beginTransaction()开启事务
setTransactionSuccessful() 设置提交事务
endTransaction()关闭事务
其实就是三步走:(总体代码在后面演示)
	SQLiteDatabase db = helper.getWritableDatabase();
			// 1.数据库显示开启事务
			db.beginTransaction();
			for (int i = 0; i <= 100; i++) {
				String sql = "insert into " + Constant.TABLE_NAME + " values("
						+ i + ",'Layne" + i + "',20)";
				db.execSQL(sql);
			}
			// 2.提交当前事务
			db.setTransactionSuccessful();
			// 3.关闭当前事务
			db.endTransaction();
			db.close();
sqlite适配器的使用:
如果只是简单的从sqlite中查询数据,并展示出来,没有其他的操作,那么可以直接使用sqlite的适配器,这样可以减少很多代码和数据的处理。
sqlite的适配器有:
1、SimpleCursorAdapter
2、CursorAdapter
这两个适配器没有很大的区别,只是加载方法不一样而已。
SimpleCursorAdapter的加载方式:
/*
         * SimpleCursorAdapter(Context context, int layout, Cursor c, String[] from,
         *  int[] to, int flags)
         *  Context context  	上下文对象
         *  int layout 		表示适配器控件中每项item的布局id
         *  Cursor c 	表示Cursor数据源
         *  String[] from	表示Cursor中数据表字段的数组
         *  int[] to 	表示展示字段对应值的控件资源id
         *  int flags	 设置适配器的标记
         */
        SimpleCursorAdapter adapter = new SimpleCursorAdapter(this,R.layout.show_item, cursor,
        		new String[]{Constant._ID,Constant.NAME,Constant.AGE} , new int[]{R.id.tv_id,R.id.tv_name,R.id.tv_age},
        		SimpleCursorAdapter.FLAG_REGISTER_CONTENT_OBSERVER);
CursorAdapter的加载方式:
/**
	 * 以内部类的形式定义适配器
	 */
	public class MyCursorAdapter extends CursorAdapter {
		// 必须定义的构造函数
		public MyCursorAdapter(Context context, Cursor c, int flags) {
			super(context, c, flags);
			// TODO Auto-generated constructor stub
		}

		/**
		 * 表示创建适配器控件中每个item对应的view对象 Context arg0 上下文 Cursor arg1 数据源cursor对象
		 * ViewGroup arg2 当前item的父布局 返回没想item的view对象
		 */
		@Override
		public View newView(Context arg0, Cursor arg1, ViewGroup arg2) {
			View view = LayoutInflater.from(CursorAdapterActivity.this)
					.inflate(R.layout.show_item, null);
			return view;
		}

		/**
		 * 通过newView()方法确定了每个item展示的view对象,在bindView()中对布局中的控件进行填充 View arg0
		 * 由newView()返回的每项view对象 Context arg1 上下文 Cursor arg2 数据源cursor对象
		 */
		@Override
		public void bindView(View arg0, Context arg1, Cursor arg2) {
			TextView tv_id = (TextView) arg0.findViewById(R.id.tv_id);
			TextView tv_name = (TextView) arg0.findViewById(R.id.tv_name);
			TextView tv_age = (TextView) arg0.findViewById(R.id.tv_age);

			tv_id.setText(arg2.getInt(arg2.getColumnIndex(Constant._ID)) + "");
			tv_name.setText(arg2.getString(arg2.getColumnIndex(Constant.NAME)));
			tv_age.setText(arg2.getInt(arg2.getColumnIndex(Constant.AGE)) + "");

		}

	}
sqlite数据库分页显示:
当APP的数据量大的时候,我们手机就要想办法各种优化数据的操作,当数据库的数据量很大的时候,我们就要想办法优化数据的显示了。这里就简单的演示sqlite数据库分页:
sqlite数据库分页(利用limit关键字)
select * from person limit ?,?;当前页码第一条数据的下标,每页显示的数据
结合上面的例子一起把代码演示一下:
常量类:
/**
 * Created by Layne_Yao on 2017-8-16 上午10:53:17.
 * CSDN:http://blog.csdn.net/Jsagacity
 */
public class Constant {
	public static final String DATABASE_NAME = "info.db";// 数据库名称
	public static final int DATABASE_VERSION = 1;// 数据库的版本号
	public static final String TABLE_NAME = "person";// 表名
	public static final String _ID = "_id";
	public static final String NAME = "name";
	public static final String AGE = "age";
}
SqliteOpenHelper的继承类:
/**
 * Created by Layne_Yao on 2017-8-16 上午10:39:55.
 * CSDN:http://blog.csdn.net/Jsagacity
 */
// 提供了获取数据库对象的函数
public class MySqliteHelper extends SQLiteOpenHelper {
	private static final String TAG = "MySqliteHelper";

	/**
	 * 构造函数
	 * context 上下文对象
	 * name 表示创建数据库的名称
	 *  factory 游标工厂
	 *  version 表示创建数据库数据的版本 >=1
	 */
	public MySqliteHelper(Context context, String name, CursorFactory factory,
			int version) {
		super(context, name, factory, version);

	}

	public MySqliteHelper(Context context) {
		super(context, Constant.DATABASE_NAME, null, Constant.DATABASE_VERSION);
	}

	/**
	 * 当数据库创建时回调的函数
	 * db 数据库对象
	 */
	@Override
	public void onCreate(SQLiteDatabase db) {
//		// TODO Auto-generated method stub
		Log.e(TAG, "----------onCreate---------");
		String sql = "create table " + Constant.TABLE_NAME + "(" + Constant._ID
				+ " Integer primary key," + Constant.NAME + " varchar(10),"
				+ Constant.AGE + " Integer not null)";
		db.execSQL(sql);// 执行sql语句


	}

	/**
	 * 当数据库版本更新时回调的函数
	 *  db 数据库对象
	 *  oldVersion 数据库旧版本
	 *  newVersion 数据库新版本
	 */
	@Override
	public void onUpgrade(SQLiteDatabase db, int oldVersion, int newVersion) {
		// TODO Auto-generated method stub
		Log.e(TAG, "----------onUpgrade---------");
	}

	/**
	 * 当数据库打开是回调的函数
	 *  db 数据库对象
	 */
	@Override
	public void onOpen(SQLiteDatabase db) {
		// TODO Auto-generated method stub
		super.onOpen(db);
		Log.e(TAG, "----------onOpen---------");
	}

}
同样创建一个bean的person类:
/**
 * Created by Layne_Yao on 2017-8-17 上午11:39:59.
 * CSDN:http://blog.csdn.net/Jsagacity
 */
public class Person {
	private int _id;
	private String name;
	private int age;


	@Override
	public String toString() {
		return "Person [_id=" + _id + ", name=" + name + ", age=" + age + "]";
	}

	public Person(int _id, String name, int age) {
		this._id = _id;
		this.name = name;
		this.age = age;
	}

	public int get_id() {
		return _id;
	}

	public void set_id(int _id) {
		this._id = _id;
	}

	public String getName() {
		return name;
	}

	public void setName(String name) {
		this.name = name;
	}

	public int getAge() {
		return age;
	}

	public void setAge(int age) {
		this.age = age;
	}

}
数据库的操作类DbManager:
/**
 * Created by Layne_Yao on 2017-8-16 上午11:01:09.
 * CSDN:http://blog.csdn.net/Jsagacity
 */
public class DbManger {
	private static MySqliteHelper helper;

	public static MySqliteHelper getIntance(Context context) {
		if (helper == null) {
			helper = new MySqliteHelper(context);
		}
		return helper;
	}

	/**
	 * 根据sql语句在数据库中执行语句 db 数据库对象 sql sql语句
	 */
	public static void execSQL(SQLiteDatabase db, String sql) {
		if (db != null) {
			if (sql != null && !"".equals(sql)) {
				db.execSQL(sql);
			}
		}
	}

	/**
	 * 根据sql语句查询获得cursor对象 db 数据库对象 sql 查询的sql语句 selectionArgs 查询条件的占位符 return
	 * 查询的返回结构
	 */
	public static Cursor selectDataBySql(SQLiteDatabase db, String sql,
			String[] selectionArgs) {
		Cursor cursor = null;
		if (db != null) {
			cursor = db.rawQuery(sql, selectionArgs);
		}
		return cursor;
	}

	/**
	 * 把Cursor对象转化为list数据 cursor 游标对象 返回 list对象
	 */
	public static List<Person> cursorToList(Cursor cursor) {
		List<Person> list = new ArrayList<>();
		Person person;
		// moveToNext()如果返回true表示下一条记录存在,否则表示由表中数据读取完毕
		while (cursor.moveToNext()) {
			// getColumnIndex(String columnName)根据参数中指定的字段名称获取字段下标
			int columnIndex = cursor.getColumnIndex(Constant._ID);
			// getInt(int columnIndex)根据参数中指定的字段下标,获取对应int类型的value
			int _id = cursor.getInt(columnIndex);

			String name = cursor
					.getString(cursor.getColumnIndex(Constant.NAME));
			int age = cursor.getInt(cursor.getColumnIndex(Constant.AGE));
			person = new Person(_id, name, age);
			list.add(person);
		}
		return list;
	}

	/**
	 * 根据数据库以及数据库表名称获取表中数据总条目
	 */
	public static int getDataCount(SQLiteDatabase db, String tableName) {
		int count = 0;
		if (db != null) {
			Cursor cursor = db.rawQuery("select * from " + tableName, null);
			count = cursor.getCount();
		}
		return count;
	}

	/**
	 * 根据当前页码查询获取该页码对应的集合数据
	 */
	public static List<Person> getListByCurrentPage(SQLiteDatabase db,
			String tableName, int currentPage, int pageSize) {
		int index = (currentPage - 1) * pageSize;// 获取当前页码第一条数据的下标
		Cursor cursor = null;
		if (db != null) {
			String sql = "select * from "+tableName+" limit ?,?";
			cursor = db.rawQuery(sql, new String[]{index+"",pageSize+""});
		}
		return cursorToList(cursor);
	}

}
主页布局activity_main.xml:
<LinearLayout xmlns:android="http://schemas.android.com/apk/res/android"
    xmlns:tools="http://schemas.android.com/tools"
    android:layout_width="match_parent"
    android:layout_height="match_parent"
    android:orientation="vertical"
    tools:context="com.itman.seniorsqlitedemo.MainActivity" >

    <Button
        android:id="@+id/bt_add"
        android:layout_width="wrap_content"
        android:layout_height="wrap_content"
        android:layout_gravity="center_horizontal"
        android:text="批量数据添加" />

      <Button
        android:id="@+id/bt_simple_cursor"
        android:layout_width="wrap_content"
        android:layout_height="wrap_content"
        android:layout_gravity="center_horizontal"
        android:text="跳转到SimpleCursorAdapterActivity" />

      <Button
        android:id="@+id/bt_cursor"
        android:layout_width="wrap_content"
        android:layout_height="wrap_content"
        android:layout_gravity="center_horizontal"
        android:text="跳转到CursorAdapterActivity" />

      <Button
        android:id="@+id/bt_page"
        android:layout_width="wrap_content"
        android:layout_height="wrap_content"
        android:layout_gravity="center_horizontal"
        android:text="跳转到分页显示" />

</LinearLayout>
activity_simple_cursor_adapter.xml:
<LinearLayout xmlns:android="http://schemas.android.com/apk/res/android"
    xmlns:tools="http://schemas.android.com/tools"
    android:layout_width="match_parent"
    android:layout_height="match_parent"
    android:orientation="vertical"
    tools:context="com.itman.sqlitedemo.MainActivity" >

    <ListView
        android:id="@+id/lv_content"
        android:layout_width="match_parent"
        android:layout_height="match_parent" >
    </ListView>

</LinearLayout>
show_item.xml:
<LinearLayout xmlns:android="http://schemas.android.com/apk/res/android"
xmlns:tools="http://schemas.android.com/tools"
android:layout_width="match_parent"
android:layout_height="match_parent"
android:orientation="horizontal">
<TextView
android:id="@+id/tv_id"
android:layout_width="match_parent"
android:layout_height="wrap_content"
android:layout_weight="1"
android:gravity="center_horizontal"
android:text="id" />
<TextView
android:id="@+id/tv_name"
android:layout_width="match_parent"
android:layout_height="wrap_content"
android:layout_weight="1"
android:gravity="center_horizontal"
android:text="name" />
<TextView
android:id="@+id/tv_age"
android:layout_width="match_parent"
android:layout_height="wrap_content"
android:layout_weight="1"
android:gravity="center_horizontal"
android:text="age" />
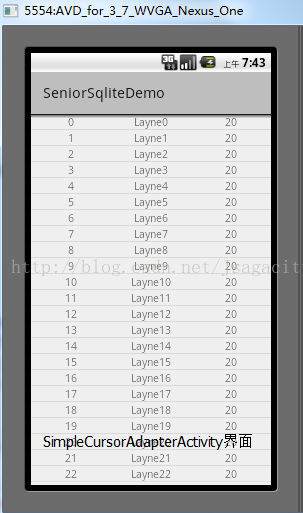
</LinearLayout>准备的差不多了,接着是SimpleCursorAdapter的简单使用:
/**
* Created by Layne_Yao on 2017-8-22 下午5:39:37.
* CSDN:http://blog.csdn.net/Jsagacity
*/
//演示从sqlite数据库中查询数据适配到ListView中
public class SimpleCursorAdapterActivity extends ActionBarActivity {
private ListView lv_content;
private MySqliteHelper helper;
private SQLiteDatabase db;
protected void onCreate(Bundle savedInstanceState) {
super.onCreate(savedInstanceState);
setContentView(R.layout.activity_simple_cursor_adapter);
lv_content = (ListView) findViewById(R.id.lv_content);
helper = DbManger.getIntance(this);
db = helper.getWritableDatabase();
String selectSql = "select * from "+Constant.TABLE_NAME;
Cursor cursor = DbManger.selectDataBySql(db, selectSql, null);
/*
* SimpleCursorAdapter(Context context, int layout, Cursor c, String[] from,
* int[] to, int flags)
* Context context 上下文对象
* int layout 表示适配器控件中每项item的布局id
* Cursor c 表示Cursor数据源
* String[] from 表示Cursor中数据表字段的数组
* int[] to 表示展示字段对应值的控件资源id
* int flags 设置适配器的标记
*/
SimpleCursorAdapter adapter = new SimpleCursorAdapter(this,R.layout.show_item, cursor,
new String[]{Constant._ID,Constant.NAME,Constant.AGE} , new int[]{R.id.tv_id,R.id.tv_name,R.id.tv_age},
SimpleCursorAdapter.FLAG_REGISTER_CONTENT_OBSERVER);
//将适配器的数据加载到控件中
lv_content.setAdapter(adapter);
}
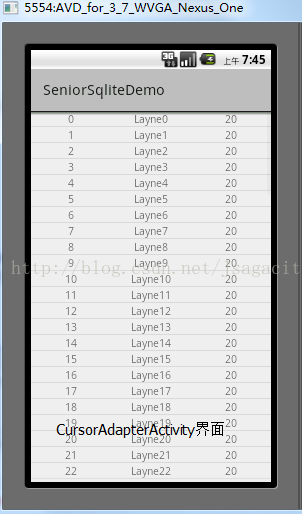
}CursorAdapter的简单使用:
/**
 * Created by Layne_Yao on 2017-8-22 下午5:39:37.
 * CSDN:http://blog.csdn.net/Jsagacity
 */
// 演示从sqlite数据库中查询数据适配到ListView中
public class CursorAdapterActivity extends ActionBarActivity {
	private ListView lv_content;

	private MySqliteHelper helper;
	private SQLiteDatabase db;

	protected void onCreate(Bundle savedInstanceState) {
		super.onCreate(savedInstanceState);
		setContentView(R.layout.activity_simple_cursor_adapter);
		lv_content = (ListView) findViewById(R.id.lv_content);

		helper = DbManger.getIntance(this);
		db = helper.getWritableDatabase();
		String selectSql = "select * from " + Constant.TABLE_NAME;
		Cursor cursor = DbManger.selectDataBySql(db, selectSql, null);
		MyCursorAdapter adapter = new MyCursorAdapter(this, cursor,
				CursorAdapter.FLAG_REGISTER_CONTENT_OBSERVER);
		lv_content.setAdapter(adapter);
	}

	/**
	 * 以内部类的形式定义适配器
	 */
	public class MyCursorAdapter extends CursorAdapter {
		// 必须定义的构造函数
		public MyCursorAdapter(Context context, Cursor c, int flags) {
			super(context, c, flags);
			// TODO Auto-generated constructor stub
		}

		/**
		 * 表示创建适配器控件中每个item对应的view对象 Context arg0 上下文 Cursor arg1 数据源cursor对象
		 * ViewGroup arg2 当前item的父布局 返回没想item的view对象
		 */
		@Override
		public View newView(Context arg0, Cursor arg1, ViewGroup arg2) {
			View view = LayoutInflater.from(CursorAdapterActivity.this)
					.inflate(R.layout.show_item, null);
			return view;
		}

		/**
		 * 通过newView()方法确定了每个item展示的view对象,在bindView()中对布局中的控件进行填充 View arg0
		 * 由newView()返回的每项view对象 Context arg1 上下文 Cursor arg2 数据源cursor对象
		 */
		@Override
		public void bindView(View arg0, Context arg1, Cursor arg2) {
			TextView tv_id = (TextView) arg0.findViewById(R.id.tv_id);
			TextView tv_name = (TextView) arg0.findViewById(R.id.tv_name);
			TextView tv_age = (TextView) arg0.findViewById(R.id.tv_age);

			tv_id.setText(arg2.getInt(arg2.getColumnIndex(Constant._ID)) + "");
			tv_name.setText(arg2.getString(arg2.getColumnIndex(Constant.NAME)));
			tv_age.setText(arg2.getInt(arg2.getColumnIndex(Constant.AGE)) + "");

		}

	}
}
最后一个知识点分页显示,先准备一个适配器:
/**
* Created by Layne_Yao on 2017-8-23 下午1:58:09.
* CSDN:http://blog.csdn.net/Jsagacity
*/
public class MyBaseAdapter extends BaseAdapter {
private Context context;
private List<Person> list;
public MyBaseAdapter(Context context, List<Person> list) {
this.context = context;
this.list = list;
}
public void setList(List<Person> list) {
this.list = list;
}
@Override
public int getCount() {
return list.size();
}
@Override
public Object getItem(int position) {
return list.get(position);
}
@Override
public long getItemId(int position) {
return position;
}
@Override
public View getView(int position, View convertView, ViewGroup parent) {
ViewHolder holder = null;
if(convertView == null){
convertView = LayoutInflater.from(context).inflate(R.layout.show_item, null);
holder = new ViewHolder();
holder.tv_id = (TextView) convertView.findViewById(R.id.tv_id);
holder.tv_name = (TextView) convertView.findViewById(R.id.tv_name);
holder.tv_age = (TextView) convertView.findViewById(R.id.tv_age);
convertView.setTag(holder);
}else{
holder = (ViewHolder)convertView.getTag();
}
holder.tv_id.setText(list.get(position).get_id()+"");
holder.tv_name.setText(list.get(position).getName());
holder.tv_age.setText(list.get(position).getAge()+"");
return convertView;
}
static class ViewHolder{
TextView tv_id,tv_name,tv_age;
}
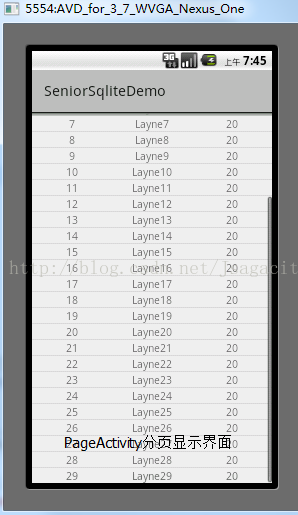
}分页显示的Java文件:
/**
 * Created by Layne_Yao on 2017-8-22 下午5:39:37.
 * CSDN:http://blog.csdn.net/Jsagacity
 */
// 演示从sqlite数据库中分页查询数据适配到ListView中
public class PageActivity extends ActionBarActivity {
	private static final String TAG = "PageActivity";

	private ListView lv_content;

	private MySqliteHelper helper;
	private SQLiteDatabase db;

	private int totalNum;// 表示当前控件加载数据的总条目
	private int pageSize = 15;// 表示煤业展示数据的条目
	private int pageNum;// 表示总页面
	private int currentPage = 1;// 当前页面
	private List<Person> totalList;// 表示数据源
	private MyBaseAdapter adapter;

	private boolean isDivPage;

	protected void onCreate(Bundle savedInstanceState) {
		super.onCreate(savedInstanceState);
		setContentView(R.layout.activity_simple_cursor_adapter);
		lv_content = (ListView) findViewById(R.id.lv_content);

		helper = DbManger.getIntance(this);
		db = helper.getWritableDatabase();
		// 获取数据表数据总条目
		totalNum = DbManger.getDataCount(db, Constant.TABLE_NAME);
		Log.e(TAG, "Text1");
		// 根据总条目与煤业展示数据条目,获取总页数
		pageNum = (int) Math.ceil(totalNum / (double) pageSize);
		Log.e(TAG, "Text2");
		if (currentPage == 1) {
			totalList = DbManger.getListByCurrentPage(db, Constant.TABLE_NAME,
					currentPage, pageSize);
		}
		Log.e(TAG, "Text3");

		adapter = new MyBaseAdapter(this, totalList);
		lv_content.setAdapter(adapter);

		//滚动侦听
		lv_content.setOnScrollListener(new OnScrollListener() {

			@Override
			public void onScrollStateChanged(AbsListView view, int scrollState) {
				if (isDivPage
						&& OnScrollListener.SCROLL_STATE_IDLE == scrollState) {
					if (currentPage < pageNum) {
						currentPage++;
						//根据最新的页码加载获取集合存储到数据源中
						totalList.addAll(DbManger.getListByCurrentPage(db,
								Constant.TABLE_NAME, currentPage, pageSize));
						adapter.notifyDataSetChanged();
					}
				}

			}

			@Override
			public void onScroll(AbsListView view, int firstVisibleItem,
					int visibleItemCount, int totalItemCount) {
				isDivPage = ((firstVisibleItem + visibleItemCount) == totalItemCount);

			}
		});
	}
}
最后是主页面的代码:
public class MainActivity extends ActionBarActivity implements OnClickListener {
	private Button bt_add;
	private Button bt_simple_cursor;
	private Button bt_cursor;
	private Button bt_page;
	public MySqliteHelper helper;

	@Override
	protected void onCreate(Bundle savedInstanceState) {
		super.onCreate(savedInstanceState);
		setContentView(R.layout.activity_main);
		bt_add = (Button) findViewById(R.id.bt_add);
		bt_simple_cursor = (Button) findViewById(R.id.bt_simple_cursor);
		bt_cursor = (Button) findViewById(R.id.bt_cursor);
		bt_page = (Button) findViewById(R.id.bt_page);

		bt_add.setOnClickListener(this);
		bt_simple_cursor.setOnClickListener(this);
		bt_cursor.setOnClickListener(this);
		bt_page.setOnClickListener(this);

		helper = new MySqliteHelper(this);
	}

	@Override
	public void onClick(View v) {
		switch (v.getId()) {
		case R.id.bt_add:
			SQLiteDatabase db = helper.getWritableDatabase();
			// 1.数据库显示开启事务
			db.beginTransaction();
			for (int i = 0; i <= 100; i++) {
				String sql = "insert into " + Constant.TABLE_NAME + " values("
						+ i + ",'Layne" + i + "',20)";
				db.execSQL(sql);
			}
			// 2.提交当前事务
			db.setTransactionSuccessful();
			// 3.关闭当前事务
			db.endTransaction();
			db.close();
			break;
		case R.id.bt_simple_cursor:
			startActivity(new Intent(MainActivity.this,
					SimpleCursorAdapterActivity.class));
			break;
		case R.id.bt_cursor:
			startActivity(new Intent(MainActivity.this,
					CursorAdapterActivity.class));
			break;
		case R.id.bt_page:
			startActivity(new Intent(MainActivity.this,
					PageActivity.class));
			break;

		}

	}

}
别忘了在配置文件里面注册其他的activity。运行结果:(运行成功之后,先批量添加数据,点击一次就好,因为主键Id也是主动添加的)

知识点有点乱,建议直接下载源码慢慢看。源码下载


 被折叠的 条评论
为什么被折叠?
被折叠的 条评论
为什么被折叠?
 到【灌水乐园】发言


