


在开发ListView的过程中,在其item里面有时会集成很多子控件,比如Button、ImageView等等的。有时需要单单点击这个子控件,并让这个子控件做出改变背景或状态的反应。并且点击item的其他地方都不需要反应。接下来就这种需求进行实现。
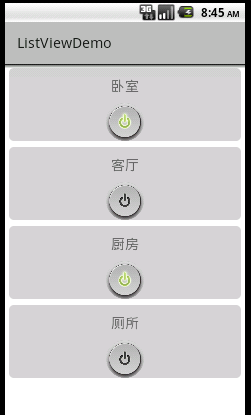
实现效果图:(当我们点击item中的开关时,会开和关的进行切换。点击item其他区域就无需响应)
直接演示源码,先准备一个开关Relay类:
public class Relay {
    private String relayName;
    private boolean isRelay;

    public Relay(String relayName, boolean isRelay) {
        super();
        this.relayName = relayName;
        this.isRelay = isRelay;
    }

    public String getRelayName() {
        return relayName;
    }

    public void setRelayName(String relayName) {
        this.relayName = relayName;
    }

    public boolean isRelay() {
        return isRelay;
    }

    public void setRelay(boolean isRelay) {
        this.isRelay = isRelay;
    }

}ListView的item布局:注意布局的android:descendantFocusability=”blocksDescendants” 属性,还有点击控件的android:clickable=”true”和android:focusable=”false”属性,这三个属性不能缺少,具体意思自行查解。
<RelativeLayout xmlns:android="http://schemas.android.com/apk/res/android"
    xmlns:tools="http://schemas.android.com/tools"
    android:layout_width="match_parent"
    android:layout_height="100dp"
    android:background="@drawable/listview_item_style"
    android:descendantFocusability="blocksDescendants" >

    <TextView
        android:id="@+id/tvName"
        android:layout_width="wrap_content"
        android:layout_height="wrap_content"
        android:layout_centerHorizontal="true"
        android:layout_marginTop="10dp"
        android:text="开关"
        android:textSize="18sp" />

    <ImageView
        android:id="@+id/imgRelay"
        android:layout_width="50dp"
        android:layout_height="50dp"
        android:layout_below="@id/tvName"
        android:layout_centerHorizontal="true"
        android:layout_marginTop="10dp"
        android:clickable="true"
        android:focusable="false"
        android:src="@drawable/relay_off" />

</RelativeLayout>
item布局的背景样式listview_item_style.xml:
<?xml version="1.0" encoding="utf-8"?>
<shape xmlns:android="http://schemas.android.com/apk/res/android"
    android:shape="rectangle">
    <corners android:radius="7dp" />
    <solid android:color="#d2d2d2"/>
</shape>自定义一个ListView的适配器:(其实这种实现难处理的地方就是点击时的响应处理,这里使用了经典的接口回调方式来处理)
public class RelayItemAdapter extends BaseAdapter {
    private List<Relay> mData;
     private LayoutInflater mInflater;

     public RelayItemAdapter(Context context, List<Relay> data) {
            this.mData = data;
            mInflater = LayoutInflater.from(context);
        }

    @Override
    public int getCount() {
        // TODO Auto-generated method stub
        return mData.size();
    }

    @Override
    public Object getItem(int position) {
        // TODO Auto-generated method stub
        return mData.get(position);
    }

    @Override
    public long getItemId(int position) {
        // TODO Auto-generated method stub
        return position;
    }

    @Override
    public View getView(final int position, View convertView, ViewGroup parent) {
         convertView = mInflater.inflate(R.layout.relay_item, null);
         if(convertView !=null){
             TextView tvName = (TextView) convertView.findViewById(R.id.tvName);
             ImageView imgRelay = (ImageView) convertView.findViewById(R.id.imgRelay);

             tvName.setText(mData.get(position).getRelayName());

             if(mData.get(position).isRelay()){
                 imgRelay.setImageResource(R.drawable.relay_on);
             }else{
                 imgRelay.setImageResource(R.drawable.relay_off);
             }

             imgRelay.setOnClickListener(new OnClickListener() {

                @Override
                public void onClick(View v) {
                    listener.onRelaySwitch(position);

                }
            });
         }
        return convertView;
    }

    public void changeSwitch(int position){
        if(mData.get(position).isRelay()){
            mData.get(position).setRelay(false);
        }else{
            mData.get(position).setRelay(true);
        }
        notifyDataSetChanged();
    }


    //定义监听接口
    public interface OnItemSwitchListener {

        void onRelaySwitch(int position);
    }

    private OnItemSwitchListener listener;

    public void setOnItemSwitchListener(OnItemSwitchListener listener) {
        this.listener = listener;
    }

}
主页activity_main.xml的布局:
<RelativeLayout xmlns:android="http://schemas.android.com/apk/res/android"
    xmlns:tools="http://schemas.android.com/tools"
    android:layout_width="match_parent"
    android:layout_height="match_parent"
    android:background="#ffffff"
    tools:context="com.itman.listviewdemo.MainActivity" >

    <ListView
        android:id="@+id/lvContent"
        android:layout_width="match_parent"
        android:dividerHeight="8dp"
        android:listSelector="#00000000"
        android:divider="#ffffff"
        android:layout_height="match_parent"
        android:layout_margin="5dp" />

</RelativeLayout>
MainActivity.java的代码:
public class MainActivity extends ActionBarActivity {
    private ListView lvContent;
    private RelayItemAdapter relayItemAdapter;

    @Override
    protected void onCreate(Bundle savedInstanceState) {
        super.onCreate(savedInstanceState);
        setContentView(R.layout.activity_main);
        lvContent = (ListView) findViewById(R.id.lvContent);

        List<Relay> relayList = new ArrayList<>();
        relayList.add(new Relay("卧室",true));
        relayList.add(new Relay("客厅",false));
        relayList.add(new Relay("厨房",true));
        relayList.add(new Relay("厕所",false));

        relayItemAdapter = new RelayItemAdapter(MainActivity.this,relayList);
        lvContent.setAdapter(relayItemAdapter);

        relayItemAdapter.setOnItemSwitchListener(new RelayItemAdapter.OnItemSwitchListener() {

            @Override
            public void onRelaySwitch(int position) {

                relayItemAdapter.changeSwitch(position);
            }
        });

    }

}
运行结果:(完美实现)


 1329
1329

 被折叠的 条评论
为什么被折叠?
被折叠的 条评论
为什么被折叠?
 到【灌水乐园】发言


