


首先,我们要知道swagger和postman的作用就是 校验接口的有效性。
我们再这里讲解以下swagger,swagger是:
依赖内嵌在项目中的一款在线文档测试工具; 让手写的word文档的工作交给swagger。
springboot集成Swagger
第一步:依赖添加
<!-- Swagger -->
<dependency>
    <groupId>io.springfox</groupId>
    <artifactId>springfox-swagger-ui</artifactId>
    <version>2.9.2</version>
</dependency>
<dependency>
    <groupId>io.springfox</groupId>
    <artifactId>springfox-swagger2</artifactId>
    <version>2.9.2</version>
</dependency>

<!-- 文档 -->
<dependency>
    <groupId>io.springfox</groupId>
    <artifactId>springfox-swagger2</artifactId>
    <version>2.9.2</version>
    <exclusions>
        <exclusion>
            <groupId>io.swagger</groupId>
            <artifactId>swagger-models</artifactId>
        </exclusion>
        <exclusion>
            <groupId>com.google.guava</groupId>
            <artifactId>guava</artifactId>
        </exclusion>
    </exclusions>
</dependency>

<dependency>
    <groupId>io.swagger</groupId>
    <artifactId>swagger-models</artifactId>
    <version>1.5.21</version>
</dependency>

<dependency>
    <groupId>io.springfox</groupId>
    <artifactId>springfox-swagger-ui</artifactId>
    <version>2.9.2</version>
</dependency>

<dependency>
    <groupId>com.github.xiaoymin</groupId>
    <artifactId>swagger-bootstrap-ui</artifactId>
    <version>1.8.5</version>
</dependency>
第二步:定义和开启swagger的配置类
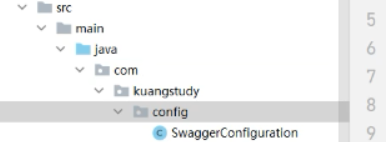
建立一个config包放置这个配置类
还需要在配置类,确定你需要生成的接口文档的路径,里面读取把哪个包下面的方法作为接口,只能是:controller
/**
 * itbooking系统平台<br/>
 * com.itbooking.config<br/>
 * SweggerConfiguration.java<br/>
 * 创建人:mofeng <br/>
 * 时间:2018年9月24日-下午5:35:07 <br/>
 * 2018itbooking-版权所有<br/>
 */
package com.kuangstudy.config;
import org.springframework.boot.SpringBootConfiguration;
import org.springframework.context.annotation.Bean;
import org.springframework.context.annotation.Configuration;
import springfox.documentation.builders.ApiInfoBuilder;
import springfox.documentation.builders.PathSelectors;
import springfox.documentation.builders.RequestHandlerSelectors;
import springfox.documentation.service.ApiInfo;
import springfox.documentation.spi.DocumentationType;
import springfox.documentation.spring.web.plugins.Docket;
import springfox.documentation.swagger2.annotations.EnableSwagger2;
/**
 * @author 飞哥
 * @Title: 学相伴出品
 * @Description: 我们有一个学习网站:https://www.kuangstudy.com
 * @date 2021/5/20 13:16
 */
@Configuration
@EnableSwagger2
public class SwaggerConfiguration {

    @Bean
    public Docket createRestApi() {
        return new Docket(DocumentationType.SWAGGER_2)
                .apiInfo(getApiInfo())
                .select()
                // 核心:读取把那个包下面的方法作为接口,只能是:controller
                .apis(RequestHandlerSelectors.basePackage("com.kuangstudy.controller"))
                .enable(false) // 关闭swagger
                .paths(PathSelectors.any())
                .build();
    }


    private ApiInfo getApiInfo() {
        return new ApiInfoBuilder()
                .title("APP项目数据接口")
                .description("在线体验文档")          .termsOfServiceUrl("https://api.lc.com/api")
                .contact("lc")
                .version("1.0")
                .build();
    }
}
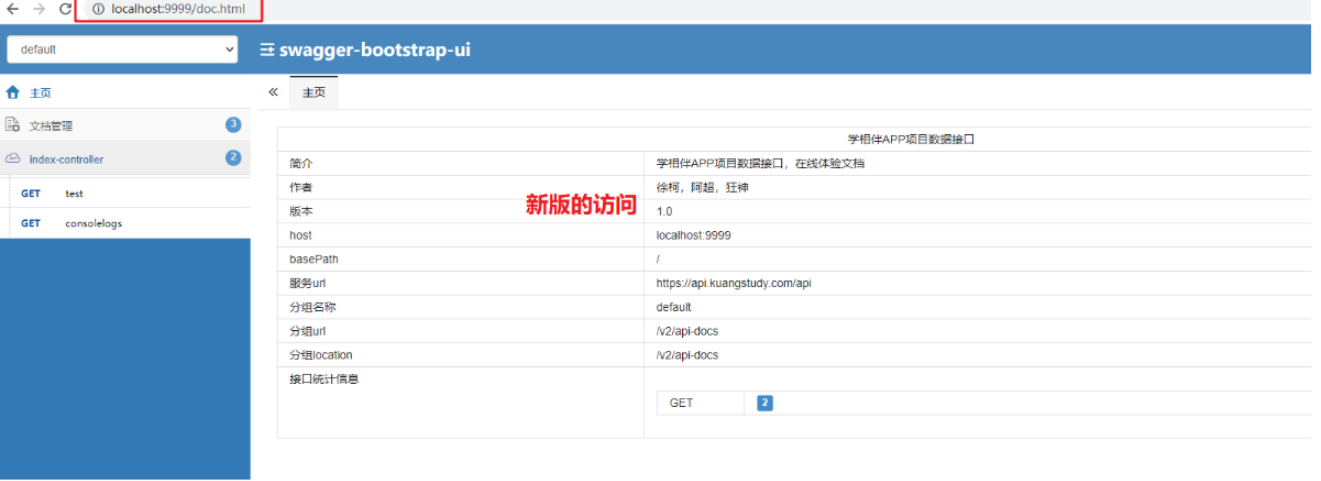
第三步:使用swagger
运行的项目即可,访问如下
如果报错:Failed to start bean ‘documentationPluginsBootstrapper’
就在启动类上加 @EnableWebMvc,并且创建下面的类
/**
 * @author lc
 * @version 1.0
 * @date 2021/12/27 15:33
 */

@Configuration
public class WebMvcConfig extends WebMvcConfigurationSupport {

/**
     * 发现如果继承了WebMvcConfigurationSupport,则在yml中配置的相关内容会失效。 需要重新指定静态资源
     *
     * @param registry
     */

    @Override
    public void addResourceHandlers(ResourceHandlerRegistry registry) {
        registry.addResourceHandler("/**").addResourceLocations(
                "classpath:/static/");
        registry.addResourceHandler("doc.html").addResourceLocations(
                "classpath:/META-INF/resources/");
        registry.addResourceHandler("/webjars/**").addResourceLocations(
                "classpath:/META-INF/resources/webjars/");
        super.addResourceHandlers(registry);
    }

    @Override
    public void addCorsMappings(CorsRegistry registry) {
        //设置允许跨域的路径
        registry.addMapping("/**")
                //设置允许跨域请求的域名
                //   .allowedOrigins("*")
                .allowedOriginPatterns("*")
                //这里:是否允许证书 不再默认开启
                .allowCredentials(true)
                //设置允许的方法
                .allowedMethods("*")
                //跨域允许时间
                .maxAge(3600);
    }
}
加上这个输入下面的swagger网址,不显示数据,那就用knife4j
注意,加上这个类后可能会影响拦截器的使用,
这个时候假如发现拦截器没有起作用,那可能是因为:有配置类继承了WebMvcConfigurationSupport(比如使用swagger的时候配置了),查询WebMvcConfigurationSupport源码发现其中有拦截器注册方法addInterceptors(InterceptorRegistry registry),所以在版本控制配置类中重写此方法添加拦截器,拦截器生效,问题解决。代码如下:
@Configuration
public class ApiConfig extends WebMvcConfigurationSupport {

	// 你自定义的拦截器类
	@Autowired
	private RequestParamInfoIntorceptor requestParamInfoIntorceptor;

	@Override
	protected void addInterceptors(InterceptorRegistry registry) {
		registry.addInterceptor(this.requestParamInfoIntorceptor).addPathPatterns("/**").excludePathPatterns("/luser/login", "/luser/register", "/send/message");
		super.addInterceptors(registry);
	}

}
旧版
http://localhost:你服务器端口/swagger-ui.html

新版
http://localhost:你服务器端口/doc.html
Swagger注解的使用,让接口页面看到对应的描述
掌握一些核心即可,千万不要死记硬背,你应该是写一个完整的,然后就赋值粘贴即可。
实际开发中主要是用使用这几个注解:
-
写在控制器类上
@Api(description = “用户管理”) // 控制器说明 -
写在控制器的方法上
@ApiOperation(value = “用户注册”) //方法的功能说明
@ApiImplicitParams(
@ApiImplicitParam(name = “user”, value = “用户对象”)
) //方法的参数说明
-
实体类上
@ApiModel(description = “用户实体”) // 实体类的说明 -
实体类的属性上
@ApiModelProperty(value = “用户编号”,required=true) // 属性说明
dataType=“Long” 类型,默认字符串 -
其他
再类上加上@ApiIgnore,那这个雷山更实用的所有swagger注解都失效
@ApiModel:用对象来接收参数
@ApiProperty:用对象接收参数时,描述对象的一个字段
完整的参考(学相伴-阿超):https://www.kuangstudy.com/bbs/1399753439654756353
/**
     * 在完成上述配置之后,其实就已经可以产生帮助文档了,但是这样的文档主要针对请求本身,而描述主要来源于函数等命名产生。
     * 对用户体验不好,我们通常需要自己增加一些说明来丰富文档内容。如果:
     * 加入
     *
     * @ApiIgnore 忽略暴露的 api
     * @ApiOperation(value = "查找", notes = "根据用户 ID 查找用户")
     * 添加说明
     * <p>
     * <p>
     * 其他注解:
     * @Api :用在类上,说明该类的作用
     * @ApiImplicitParams :用在方法上包含一组参数说明
     * @ApiResponses :用于表示一组响应
     * 完成上述之后,启动springboot程序,
     * 旧访问:http://localhost:8080/swagger-ui.html
     * 新访问:http://localhost:8080/doc.html
     * @ApiOperation() 用于方法;表示一个http请求的操作
     * value用于方法描述
     * notes用于提示内容
     * tags可以重新分组(视情况而用)
     * @ApiParam() 用于方法,参数,字段说明;表示对参数的添加元数据(说明或是否必填等)
     * name–参数名
     * value–参数说明
     * required–是否必填
     * @ApiModel()用于类 ;表示对类进行说明,用于参数用实体类接收
     * value–表示对象名
     * description–描述
     * 都可省略
     * @ApiModelProperty()用于方法,字段; 表示对model属性的说明或者数据操作更改
     * value–字段说明
     * name–重写属性名字
     * dataType–重写属性类型
     * required–是否必填
     * example–举例说明
     * hidden–隐藏
     * @ApiIgnore()用于类或者方法上,可以不被swagger显示在页面上 比较简单, 这里不做举例
     * @ApiImplicitParam() 用于方法
     * 表示单独的请求参数
     * @ApiImplicitParams() 用于方法,包含多个 @ApiImplicitParam
     * name–参数ming
     * value–参数说明
     * dataType–数据类型
     * paramType–参数类型
     * example–举例说明
     */

  @PostMapping("/login")
    @ApiOperation(value = "登录,获取token")
   /* @ApiImplicitParams({
            @ApiImplicitParam(name = "name", value = "用户名", required = true, dataType = "String"),
            @ApiImplicitParam(name = "password", value = "前端2次md5后的密码", required = true, dataType = "String")})
   */
    @ApiResponses({
            @ApiResponse(code = 201,message = "密码错误"),
            @ApiResponse(code = 202,message = "用户不存在"),
            @ApiResponse(code = 500,message = "服务器出现异常错误")
    })
    public ResultInfo login(@RequestBody User user){}


 9万+
9万+


 被折叠的 条评论
为什么被折叠?
被折叠的 条评论
为什么被折叠?
 到【灌水乐园】发言


