


一、实验要求:
1.ssh免密登录:准备两台Linux虚拟机,第一台可以免密登录到第二台机器
2.ssh禁止root用户远程登录
3.http:配置基于不同IP的访问不同的站点,要求默认首页文件为 first.html
二、实验准备
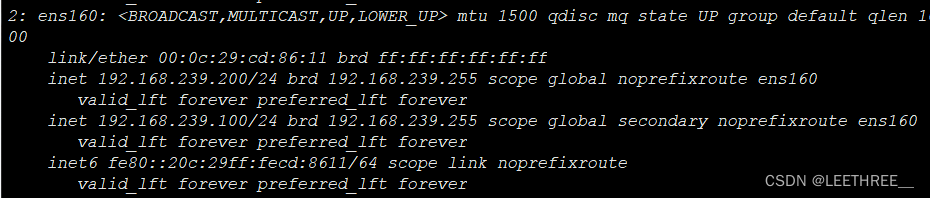
两台Redhat8虚拟机,ip配置如下
服务端:
客户端:

三、实验过程:
1.ssh免密登录
服务端:
配置服务端配置文件
[root@server ~]# vim /etc/ssh/sshd_config

Port 22 #指定端口

PubkeyAuthentication yes

#PasswordAuthentication yes
客户端:
制作秘钥
[root@haha ~]# ssh-keygen -t RSA

Generating public/private RSA key pair.

Enter file in which to save the key (/root/.ssh/id_rsa):

/root/.ssh/id_rsa already exists.

Overwrite (y/n)? y

Enter passphrase (empty for no passphrase):

Enter same passphrase again:

Your identification has been saved in /root/.ssh/id_rsa.

Your public key has been saved in /root/.ssh/id_rsa.pub.

The key fingerprint is:

SHA256:cjMRTrUZNMSDo/Jv2pqrKYJF9ZfWRc732Sc2JPmQlN4 root@haha

The key's randomart image is:

+---[RSA 3072]----+

|        o**.o.   |

|    .  oo.oOoo   |

|   . . .o+o+B.o  |

|  . . o +.. .*E.o|

| .   o.oS     =.+|

|  .   .o o   . o.|

|..     .         |

|o .  . oo        |

| . .o.==.        |

+----[SHA256]-----+
客户端发送公钥
[root@haha ~]# ssh-copy-id -i 192.168.239.200

/usr/bin/ssh-copy-id: INFO: Source of key(s) to be installed: "/root/.ssh/id_rsa.pub"

/usr/bin/ssh-copy-id: INFO: attempting to log in with the new key(s), to filter out any that are already installed

/usr/bin/ssh-copy-id: INFO: 1 key(s) remain to be installed -- if you are prompted now it is to install the new keys

Password:

Password:


Number of key(s) added: 1


Now try logging into the machine, with:   "ssh '192.168.239.200'"

and check to make sure that only the key(s) you wanted were added.
服务器端查看秘钥是否收到
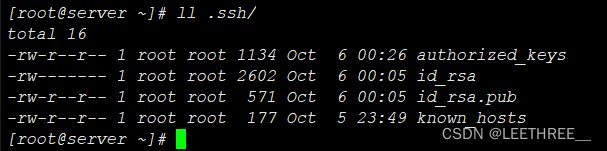
测试:
用户登录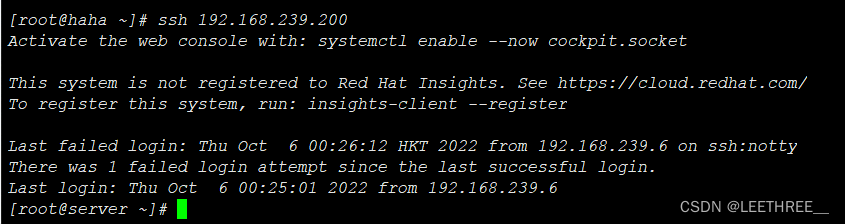 登录成功
登录成功
2.ssh禁止root用户远程登录:
在 /etc/ssh/sshd_config 配置文件中加入下面这条指令
denyusers root #创建黑名单拒绝某个用户访问
测试:
使用root用户登录
无法登陆
3.http:配置基于不同IP访问不同的站点,要求默认首页文件为 first.html
添加一个新的ip地址
[root@server ~]# nmcli c modify ens160 +ipv4.addresses 192.168.239.10/24

[root@server ~]# nmcli connection up ens160
创建两个网页文件根目录,并定义网页内容
[root@server ~]# mkdir -pv /www/ip/{10,200}

[root@server ~]# echo this is 10 > /www/ip/10/first.html

[root@server ~]# echo this is 200 > /www/ip/10/first.html
定义基于不同ip地址来访问网站的配置文件
[root@server ~]# cd /etc/httpd/conf.d

[root@server conf.d]# vim myhosts.conf

<Directory "/www/ip">

        AllowOverride None

        Require all granted

</Directory>

<VirtualHost 192.168.239.10:80 >

        DocumentRoot "/www/ip/10"

        ServerName 192.168.239.10

</VirtualHost>

<virtualHost 192.168.239.200:80 >

        DocumentRoot "/www/ip/200"

        ServerName 192.168.239.200

</VirtualHost>
编辑httpd主配置文件
[root@server ~]# vim /etc/httpd/conf/httpd.conf

<IfModule dir_module>

    DirectoryIndex index.html home.html first.html

</IfModule>
重启httpd服务
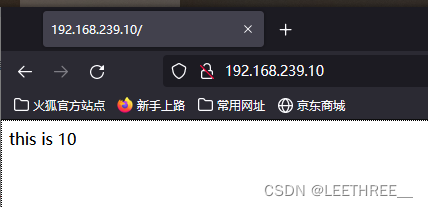
[root@server ~]# systemctl restart httpd客户机基于ip访问http服务
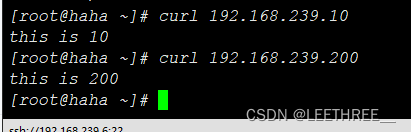
使用主机浏览器访问http服务


 1752
1752


 被折叠的 条评论
为什么被折叠?
被折叠的 条评论
为什么被折叠?
 到【灌水乐园】发言


