


一、Maven集成tomcat7插件实现动态部署
1)更改tomcat-user.xml配置文件,添加角色manager-script,授权maven动态操作tomcat

2)配置maven的setting.xml,添加server。
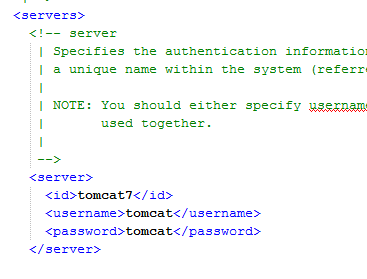
3)在项目的pom.xml中添加tomcat7插件,要与setting.xml中配置的tomcat server信息一致,配置如下:
<build>
<plugins>
<plugin>
<groupId>org.apache.tomcat.maven</groupId>
<artifactId>tomcat7-maven-plugin</artifactId>
<version>2.0-beta-1</version>
<configuration>
<url>http://localhost:8080/manager/text</url>
<server>tomcat7</server>
<username>tomcat</username>
<password>tomcat</password>
</configuration>
</plugin>
</plugins>
</build>
4)执行命令:tomcat7:deploy 运行

二、Maven集成jetty插件实现热部署
1)在项目的pom.xml文件中添加jetty插件,配置如下:
<build>
<plugins>
<plugin>
<groupId>org.eclipse.jetty</groupId>
<artifactId>jetty-maven-plugin</artifactId>
<version>9.2.3.v20140905</version>
<configuration>
<scanIntervalSeconds>1</scanIntervalSeconds>
<stopKey>jetty</stopKey>
<httpConnector>
<port>8080</port>
</httpConnector>
<webAppConfig>
<contextPath>/test</contextPath>
<extraClasspath>target/classes</extraClasspath>
</webAppConfig>
<scanIntervalSeconds>0</scanIntervalSeconds>
<scanTargets>
<scanTarget>target/classes</scanTarget>
<scanTarget>../子项目1/target/classes</scanTarget>
<scanTarget>../子项目2/target/classes</scanTarget>
</scanTargets>
<webAppSourceDirectory>${basedir}/src/main/webapp</webAppSourceDirectory>
<stopKey>jetty</stopKey>
<stopPort>9999</stopPort>
</configuration>
</plugin>
</plugins>
</build>
2)执行命令:jetty:run默认端口为8080
3)自定义端口启动 -Djetty.port=8020 jetty:run 以 8020端口启动


 215
215

 被折叠的 条评论
为什么被折叠?
被折叠的 条评论
为什么被折叠?
 到【灌水乐园】发言


