


目录
(7)重写customAuthenticationHandler方法:
1、自定义密码加密分析:
一般真正生产环境使用的用户密码都是需要进行加密处理的,不同项目所用到的密码加密的算法和方式不同。针对自己项目中所用到的密码加密规则进行分析。
如果只是单纯对用户输入的明文密码进行一系列的各种算法加密,并且加密过程中设计的一些自定义变量字符串等都是唯一不变的,那么此方式的自定义密码解密,只需要自定义一个实体类实现PasswordEncode接口,重写encode、matches方法。
如果在对用户输入的明文密码进行加密的时候需要用户名、盐值等动态变化的值,每个用户对应的值不同,并且保存在数据库中的。这种情况如果还是按照上面那样实现PasswordEncode接口重写方法就不行了。需要自定义handler验证方法。这个针对不同的cas服务端版本,代码上差别很大,建议使用本人尝试的5.1.x系列的版本进行搭建服务端肯定没有问题。
2、单纯密码加密:
(1)引入依赖:
注意添加依赖包的位置,应该是在该位置下进行添加的:

开启cas server的rest支持的包:
<!--开启cas server的rest支持-->
				<dependency>
				    <groupId>org.apereo.cas</groupId>
				    <artifactId>cas-server-support-rest</artifactId>
				    <version>${cas.version}</version>
				</dependency>
数据库认证相关的包:
<!--数据库认证相关 start-->
                <dependency>
                    <groupId>org.apereo.cas</groupId>
                    <artifactId>cas-server-support-jdbc</artifactId>
                    <version>${cas.version}</version>
                </dependency>
                <dependency>
                    <groupId>org.apereo.cas</groupId>
                    <artifactId>cas-server-support-jdbc-drivers</artifactId>
                    <version>${cas.version}</version>
                </dependency>
                <dependency>
                    <groupId>mysql</groupId>
                    <artifactId>mysql-connector-java</artifactId>
                    <version>${mysql.version}</version>
                </dependency>
                <!--数据库认证相关 end-->
(2)配置cas的jdbc连接信息:
由于此种方式的密码加密,只是实现一个接口重写下密码加密方法,因此用cas的jdbc连接。配置application.properties:
cas.authn.jdbc.query[0].sql=SELECT * FROM sys_user WHERE username=?
cas.authn.jdbc.query[0].url=jdbc:mysql://127.0.0.1:3306/demo?useUnicode=true&characterEncoding=UTF-8&autoReconnect=true&useSSL=false
cas.authn.jdbc.query[0].dialect=org.hibernate.dialect.MySQLDialect
cas.authn.jdbc.query[0].user=root
cas.authn.jdbc.query[0].password=123456
cas.authn.jdbc.query[0].driverClass=com.mysql.jdbc.Driver
cas.authn.jdbc.query[0].fieldPassword=password
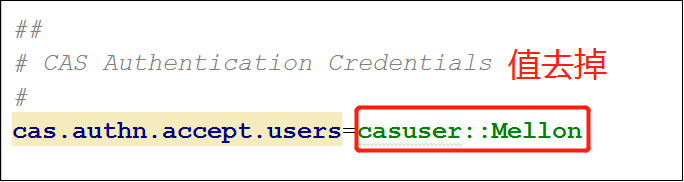
cas.authn.jdbc.query[0].passwordEncoder.type=com.cas.demo.auth.MyUserAuth(3)去掉配置的用户名和密码:
将application.properties配置文件中配置用户信息去掉:
(4)定义实体类实现接口:

(5)重写encode方法:

(6)重写matches方法:

(7)启动访问测试:
修改完成后,先执行maven的clean清下项目,防止因为缓存影响修改生效,然后启动idea中tomcat,访问输入用户和密码案进行访问测试。正常的话是可以正常登录的。
3、复杂密码加密:
(1)引入依赖:
注意添加依赖包的位置,应该是在该位置下进行添加的:

开启cas server的rest支持的包:
<!--开启cas server的rest支持-->
				<dependency>
				    <groupId>org.apereo.cas</groupId>
				    <artifactId>cas-server-support-rest</artifactId>
				    <version>${cas.version}</version>
				</dependency>
数据库认证相关的包:
<!--数据库认证相关 start-->
                <dependency>
                    <groupId>org.apereo.cas</groupId>
                    <artifactId>cas-server-support-jdbc</artifactId>
                    <version>${cas.version}</version>
                </dependency>
                <dependency>
                    <groupId>org.apereo.cas</groupId>
                    <artifactId>cas-server-support-jdbc-drivers</artifactId>
                    <version>${cas.version}</version>
                </dependency>
                <dependency>
                    <groupId>mysql</groupId>
                    <artifactId>mysql-connector-java</artifactId>
                    <version>${mysql.version}</version>
                </dependency>
                <!--数据库认证相关 end-->
自定义认证相关的包
<!--自定义认证,重写Credential-->
                <dependency>
                    <groupId>org.apereo.cas</groupId>
                    <artifactId>cas-server-core-webflow</artifactId>
                    <version>${cas.version}</version>
                </dependency>
                <dependency>
                    <groupId>org.apereo.cas</groupId>
                    <artifactId>cas-server-webapp-config</artifactId>
                    <version>${cas.version}</version>
                </dependency>
                <dependency>
                    <groupId>org.apereo.cas</groupId>
                    <artifactId>cas-server-support-validation</artifactId>
                    <version>${cas.version}</version>
                </dependency>
                <dependency>
                    <groupId>org.apache.commons</groupId>
                    <artifactId>commons-dbcp2</artifactId>
                    <version>2.3.0</version>
                </dependency>
                <dependency>
                    <groupId>javax.servlet</groupId>
                    <artifactId>javax.servlet-api</artifactId>
                    <version>3.1.0</version>
                </dependency>
(2)配置spring的jdbc连接方式:
由于此种方式的密码加密,是自定义认证方式,因此放弃cas自带的jdbc连接方式,使用spring的jdbc连接方式进行连接数据库。配置application.properties:
spring.datasource.driver-class-name=com.mysql.jdbc.Driver
spring.datasource.url=jdbc:mysql://127.0.0.1:3306/demo?useUnicode=true&characterEncoding=UTF-8&autoReconnect=true&useSSL=false
spring.datasource.username=root
spring.datasource.password=123456
spring.datasource.type=org.apache.commons.dbcp2.BasicDataSource
spring.jpa.database=mysql
spring.jpa.show-sql=true
spring.jpa.hibernate.ddl-auto=update
spring.jpa.properties.hibernate.dialect=org.hibernate.dialect.MySQL5Dialect
(3)定义实体类继承handler:
自定义一个实体类,继承AbstractPreAndPostProcessingAuthenticationHandler,重写需要的方法直到不报错为止,一般就是:实体类构造方法、authenticate、createHandlerResult、doAuthentication、supports这几个方法。

(4)重写authenticate方法:
重写authenticate的方法体,主要逻辑就是通过jdbc执行sql,通过用户名查询用户表获取各种信息,然后对用户输入的明文密码通过自定义的加密方法进行加密,然后比对自定义加密后的密码与数据库中保存的加密后的密码是否相同。

如果相同,那么就返回createHandlerResult,注意传入的Credential对象要新创建一个,将加密后的密码和用户名传入,默认的密码是用户界面输入的明文密码。
如果不相同,说明认证失败,或者因为其他业务比如:用户禁用、用户逻辑删除等业务,认定用户登录失败的地方,都返回FailedLoginException即可。

(5)重写support方法:

(6)定义实体类实现接口:
上面只是自定义了一个认证实体类,但是cas还不知道使用自定义的认证类,因此需要创建一个实体类实现config接口,注册自定义的认证类。
创建一个配置类,实现AuthenticationEventExecutionPlanConfigurer接口,重写configureAuthenticationExecutionPlan方法:

(7)重写customAuthenticationHandler方法:
创建一个AuthenticationHandler对象:

在customAuthenticationHandler方法体中注册认证器,调用上面自己创建的对象:

(8)配置spring-Boot扫描路径:
SpringFactoriesLoader属于Spring框架私有的一种扩展方案,其主要功能就是从指定的配置文件META-INF/spring.factories加载配置。通过这个方法,我们就能将自定义的认证方法让spring boot 自动配置扫描到。
修改META-INF/spring.factories配置文件,添加自定义的配置实体类的路径,默认的有一个路径,在其后面再添加自己的路径即可,用英文逗号分隔。

(9)启动访问测试:
修改完成后,先执行maven的clean清下项目,防止因为缓存影响修改生效,然后启动idea中tomcat,访问输入用户和密码案进行访问测试。正常的话是可以正常登录的。
(10)代码:
自定义用户认证的实体类代码如下:
package demo.server.cas.auth;

import demo.server.cas.util.PasswordUtil;
import org.apache.commons.lang3.StringUtils;
import org.apereo.cas.authentication.*;
import org.apereo.cas.authentication.handler.support.AbstractPreAndPostProcessingAuthenticationHandler;
import org.apereo.cas.authentication.principal.Principal;
import org.apereo.cas.authentication.principal.PrincipalFactory;
import org.apereo.cas.services.ServicesManager;
import org.springframework.beans.factory.annotation.Autowired;
import org.springframework.dao.DataAccessException;
import org.springframework.jdbc.core.JdbcTemplate;

import javax.security.auth.login.FailedLoginException;
import java.security.GeneralSecurityException;
import java.util.Collections;
import java.util.List;

public class MyUserHandler extends AbstractPreAndPostProcessingAuthenticationHandler {

    @Autowired
    private JdbcTemplate jdbcTemplate;


    public MyUserHandler(String name, ServicesManager servicesManager, PrincipalFactory principalFactory, Integer order) {
        super(name, servicesManager, principalFactory, order);
    }

    @Override
    public HandlerResult authenticate(Credential credential) throws GeneralSecurityException, PreventedException {
        //获取当前登录用户的用户名、明文密码
        final UsernamePasswordCredential upssc = (UsernamePasswordCredential) credential;
        final String username = upssc.getUsername();
        final String password = upssc.getPassword();
        String dbPassword = null;
        String salt = null;
        String encodePassword = null;
        try {
            //获取数据库中保存的加密密码,用户必须是未删除、正常状态的,否则就表示系统不允许该用户登录
            String sql = "select password from sys_user where status = '1' and del_flag = '0' and username=?";
            dbPassword = this.jdbcTemplate.queryForObject(
                    sql
                    , String.class, username);
            //如果查询的用户密码不为空,表示该用户正常。
            if(StringUtils.isNotEmpty(dbPassword)){
                //获取数据库中当前用户的加密盐值:salt
                String saltSql = "select salt from sys_user where status = '1' and del_flag = '0' and username=?";
                salt = this.jdbcTemplate.queryForObject(
                        saltSql
                        , String.class, username);
            }else{
                throw new FailedLoginException();
            }
            //使用自定义加密工具类,对用户输入的明文密码进行加密
            encodePassword = PasswordUtil.encrypt(username, password, salt);
        } catch (DataAccessException e) {
            //异常信息不打印,否则用户登录失败后会等好长时间空白页面然后再刷新页面提示认证失败,效果很差
            //e.printStackTrace();
            //有异常表示用户是非正常状态,认证失败
            throw new FailedLoginException();
        }
        //如果通过工具类加密后的密码与数据库中保存的加密密码一致,那么用户就登录成功,将用户名、加密后的密码创建一个Credential对象,传递下去。
        if(StringUtils.isNotEmpty(dbPassword) && StringUtils.isNotEmpty(encodePassword) && dbPassword.equals(encodePassword)){
            Credential newCredentinal =new UsernamePasswordCredential(username,encodePassword);
            return createHandlerResult(newCredentinal, this.principalFactory.createPrincipal(upssc.getUsername(), Collections.emptyMap()), null);
        }else{
            throw new FailedLoginException();
        }
    }

    @Override
    protected HandlerResult createHandlerResult(Credential credential, Principal principal, List<MessageDescriptor> warnings) {
        return super.createHandlerResult(credential, principal, warnings);
    }

    @Override
    protected HandlerResult doAuthentication(Credential credential) throws GeneralSecurityException, PreventedException {
        return null;
    }

    @Override
    public boolean supports(Credential credential) {
        return credential instanceof UsernamePasswordCredential;
    }
}
自定义用户认证的实体类注册配置类代码如下:
package demo.server.cas.auth;

import org.apereo.cas.authentication.AuthenticationEventExecutionPlan;
import org.apereo.cas.authentication.AuthenticationEventExecutionPlanConfigurer;
import org.apereo.cas.authentication.AuthenticationHandler;
import org.apereo.cas.authentication.principal.DefaultPrincipalFactory;
import org.apereo.cas.authentication.principal.PrincipalFactory;
import org.apereo.cas.configuration.CasConfigurationProperties;
import org.apereo.cas.services.ServicesManager;
import org.springframework.beans.factory.annotation.Autowired;
import org.springframework.beans.factory.annotation.Qualifier;
import org.springframework.boot.autoconfigure.jdbc.DataSourceAutoConfiguration;
import org.springframework.boot.context.properties.EnableConfigurationProperties;
import org.springframework.context.annotation.Bean;
import org.springframework.context.annotation.Configuration;
import org.springframework.context.annotation.Import;
//注入自定义的spring的datasource,以便自己可以通过jdbc执行sql
@Import({DataSourceAutoConfiguration.class})
@Configuration("myConfigure")
@EnableConfigurationProperties(CasConfigurationProperties.class)
public class MyConfigure implements AuthenticationEventExecutionPlanConfigurer {

    @Autowired
    @Qualifier("servicesManager")
    private ServicesManager servicesManager;

    @Autowired
    @Qualifier("jdbcPrincipalFactory")
    public PrincipalFactory jdbcPrincipalFactory;

    /**
     * 注册验证器
     *
     * @return
     */
    @Bean
    public AuthenticationHandler customAuthenticationHandler() {
        //优先验证
        return new MyUserHandler("customAuthenticationHandler", servicesManager,new DefaultPrincipalFactory(),1);
    }

    //注册自定义认证器
    @Override
    public void configureAuthenticationExecutionPlan(final AuthenticationEventExecutionPlan plan) {
        plan.registerAuthenticationHandler(customAuthenticationHandler());
    }

}


 8871
8871


 被折叠的 条评论
为什么被折叠?
被折叠的 条评论
为什么被折叠?
 到【灌水乐园】发言


