


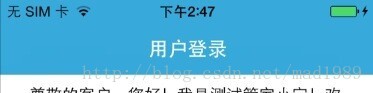
在iOS7下,默认导航栏背景,颜色是这样的,接下来我们就进行自定义,如果你仅仅是更改一下背景和颜色,代码会很简单,不需要很复杂的自定义View来替代leftBarItem

更改导航栏的背景和文字Color
方法一:
- //set NavigationBar 背景颜色&title 颜色
- [self.navigationController.navigationBar setBarTintColor:[UIColor colorWithRed:20/255.0 green:155/255.0 blue:213/255.0 alpha:1.0]];
- [self.navigationController.navigationBar setTitleTextAttributes:[NSDictionary dictionaryWithObjectsAndKeys:[UIColor whiteColor],UITextAttributeTextColor,nil]];
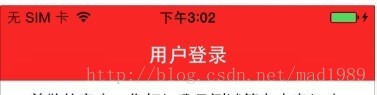
我们把背景改成了蓝色,title文字改成了白色,是不是很简单呢?NavigationBar极其push过去的子页面也会是你修改后的背景颜色
方法二:
- //设置NavigationBar背景颜色
- [[UINavigationBar appearance] setBarTintColor:[UIColor redColor]];
- //@{}代表Dictionary
- [[UINavigationBar appearance] setTitleTextAttributes:@{NSForegroundColorAttributeName:[UIColor whiteColor]}];
在导航栏使用背景图片:
如果您的应用程序使用了自定义图像作为栏的背景,你需要提供一个“更大”的图片,使其延伸了状态栏的后面。导航栏的高度现在是从44点(88像素)更改为64点(128像素)。
仍然可以使用了setBackgroundImage:方法来指定自定义图像的导航栏。下面是代码行设置背景图片:
- [[UINavigationBar appearance] setBackgroundImage:[UIImage imageNamed:@"nav_bg.png"] forBarMetrics:UIBarMetricsDefault];
效果图和上面的一样,我就不贴出来了。
改变导航栏标题的字体
就像iOS 6,我们可以通过使用导航栏的“titleTextAttributes”属性来自定义的文本样式。可以指定字体,文字颜色,文字阴影颜色,文字阴影在文本标题偏移属性字典,使用下面的文本属性键:
UITextAttributeFont - 字体
UITextAttributeTextColor - 文字颜色
UITextAttributeTextShadowColor - 文字阴影颜色
UITextAttributeTextShadowOffset - 偏移用于文本阴影
- NSShadow *shadow = [[NSShadow alloc] init];
- shadow.shadowColor = [UIColor colorWithRed:0.0 green:0.0 blue:0.0 alpha:0.8];
- shadow.shadowOffset = CGSizeMake(0, 1);
- [[UINavigationBar appearance] setTitleTextAttributes: [NSDictionary dictionaryWithObjectsAndKeys:
- [UIColor colorWithRed:245.0/255.0 green:245.0/255.0 blue:245.0/255.0 alpha:1.0], NSForegroundColorAttributeName,
- shadow, NSShadowAttributeName,
- [UIFont fontWithName:@"HelveticaNeue-CondensedBlack" size:21.0], NSFontAttributeName, nil nil]];
使用图片作为导航栏标题
不想标题栏是光秃秃的文字?可以通过使用代码行中的图像或标志取代它:简单地改变titleview用来自定义,(适用于较低版本)
- self.navigationItem.titleView = [[UIImageView alloc] initWithImage:[UIImage imageNamed:@"appcoda-logo.png"]];
效果如下,我随便用了个图片,别介意:
添加多个栏按钮项目
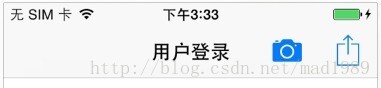
您希望添加导航栏的一侧不止一个栏按钮项目,无论是leftBarButtonItems和rightBarButtonItems 您在导航栏左侧/右侧指定自定义栏按钮项目。比如你想添加一个摄像头和一个共享按钮右侧的吧。您可以使用下面的代码:
- UIBarButtonItem *shareItem = [[UIBarButtonItem alloc] initWithBarButtonSystemItem:UIBarButtonSystemItemAction target:self action: nil nil];
- UIBarButtonItem *cameraItem = [[UIBarButtonItem alloc] initWithBarButtonSystemItem:UIBarButtonSystemItemCamera target:self action: nil nil];
- NSArray *itemsArr = @[shareItem,cameraItem];
- self.navigationItem.rightBarButtonItems = itemsArr;
自定义后退按钮的文字和颜色
通常情况下,我们使用UINavigationController时,push到的子页面,左上角会是系统自动取值上一层父页面的title名称,默认情况是这样,那么我们该如何修改它呢?
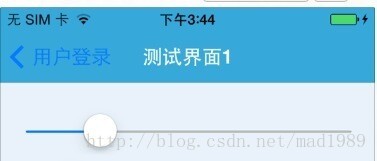
左侧显示了父页面的title:用户登录,可是我们想修改成返回,方式有很多,举些例子
方法一:
通过设置navigationItem的backBarButtonItem可以直接更换文字,【注意,要在父视图的Controller中设置】如下:
- UIBarButtonItem *item = [[UIBarButtonItem alloc] initWithTitle:@"返回" style:UIBarButtonItemStylePlain target:nil action:nil];
- self.navigationItem.backBarButtonItem = item;
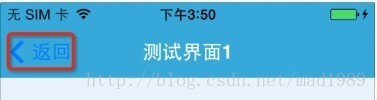
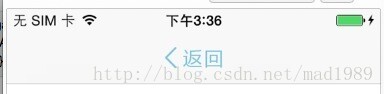
所有的子界面返回时都变成了我们定义的文字,如果不想显示文字,直接"",就会单独显示一个系统的返回箭头图标,也是很清晰的感觉。
做到这里发现文字颜色和背景有重复,那么如何自定义其颜色呢?在iOS7,可以改变tintColor属性,它提供了一个快速和简单的方式,下面是一个示例代码片段:
- [[UINavigationBar appearance] setTintColor:[UIColor whiteColor]];
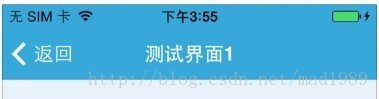
全是系统的图标和文字,这回看着舒服了,有木有?【除了后退按钮,请注意,tintColor属性影响所有按钮标题和按钮图像】
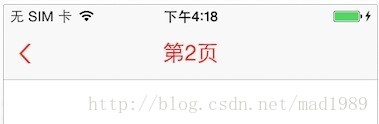
最后举个例子,另外一种实现自定义导航控制器返回按钮,代码如下:
- [self.navigationController.navigationBar setTitleTextAttributes:@{NSForegroundColorAttributeName: [UIColor redColor],NSFontAttributeName:[UIFont systemFontOfSize:19.0]}];
- self.title=[NSString stringWithFormat:@"第%lu页",(unsigned long)self.navigationController.viewControllers.count];
- //自定义返回按钮
- UIImage *backButtonImage = [[UIImage imageNamed:@"fanhui.png"] resizableImageWithCapInsets:UIEdgeInsetsMake(0, 30, 0, 0)];
- [[UIBarButtonItem appearance] setBackButtonBackgroundImage:backButtonImage forState:UIControlStateNormal barMetrics:UIBarMetricsDefault];
- //将返回按钮的文字position设置不在屏幕上显示
- [[UIBarButtonItem appearance] setBackButtonTitlePositionAdjustment:UIOffsetMake(NSIntegerMin, NSIntegerMin) forBarMetrics:UIBarMetricsDefault];
效果如下:
最后说一下使用pushViewController切换到下一个视图时,navigation controller按照以下3条顺序更改导航栏的左侧按钮(本段摘自网络):
1、如果B视图有一个自定义的左侧按钮(leftBarButtonItem),则会显示这个自定义按钮;
2、如果B没有自定义按钮,但是A视图的backBarButtonItem属性有自定义项,则显示这个自定义项;
3、如果前2条都没有,则默认显示一个后退按钮,后退按钮的标题是A视图的标题;
UINaviGationController通常被我们称为导航栏,他是视图与视图之间联系沟通的桥梁,一些著名的app都用到了他。下面我们来看一下如何建立一个navigation。
首先,我们通常新建工程是直接将视图控制器添加到window上,而现在有navigation以后,就多了一层:
Appdelegete.h:
- - (BOOL)application:(UIApplication *)application didFinishLaunchingWithOptions:(NSDictionary *)launchOptions
- {
- self.window = [[UIWindow alloc] initWithFrame:[[UIScreen mainScreen] bounds]];
- // Override point for customization after application launch.
- self.window.backgroundColor = [UIColor whiteColor];
- RootViewController *root = [[RootViewController alloc]init];
- UINavigationController *nav = [[UINavigationController alloc]initWithRootViewController:root];//先将root添加在navigation上
- [_window setRootViewController:nav];//navigation加在window上
- [nav release];
- [root release];
- [self.window makeKeyAndVisible];
- return YES;
- }
这样我们的navigation就加载上去了。下面我们来设置navigation的属性:
- - (void)viewDidLoad
- {
- [super viewDidLoad];
- // Do any additional setup after loading the view.
- [self.navigationController.navigationBar setTranslucent:NO];//设置navigationbar的半透明
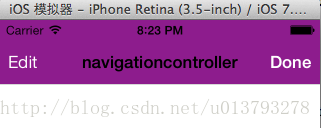
- self.title = @"navigationcontroller";//设置navigationbar上显示的标题
- [self.navigationController.navigationBar setBarTintColor:[UIColor purpleColor]];//设置navigationbar的颜色
- self.navigationItem.leftBarButtonItem = [[UIBarButtonItem alloc]initWithBarButtonSystemItem:UIBarButtonItemStyleDone target:self action:Nil];//设置navigationbar左边按钮
- self.navigationItem.rightBarButtonItem = [[UIBarButtonItem alloc]initWithBarButtonSystemItem:UIBarButtonItemStylePlain target:self action:Nil];//设置navigationbar右边按钮
- [self.navigationController.navigationBar setTintColor:[UIColor whiteColor]];//设置navigationbar上左右按钮字体颜色
- }
效果图如下:
这里还有一个属性常用,就是:
- NSArray *arr = [NSArray arrayWithObjects:@"1",@"2", nil nil];
- UISegmentedControl *segment = [[UISegmentedControl alloc]initWithItems:arr];
- self.navigationItem.titleView = segment;//设置navigation上的titleview
效果如下:

对,我们看到中间的字变成了两个可选的按钮,这就是navigation的另一个属性:navigationitem.titleview。
下面我们再建立一个视图,看一下两个视图之前是怎样通信的。
在第二个视图中,我添加了一个button来显示,并加了一个成员变量来接收从第一个视图中穿过来的值:
- @interface SecondViewController : UIViewController
- @property (copy,nonatomic) NSString *str;
- @end
- - (void)viewDidLoad
- {
- [super viewDidLoad];
- // Do any additional setup after loading the view.
- self.title = @"second";
- UIButton *aBUTTON = [[UIButton alloc]initWithFrame:CGRectMake(30, 30, 50, 30)];
- [aBUTTON setTitle:_str forState:UIControlStateNormal];
- [aBUTTON addTarget:self action:@selector(clicked) forControlEvents:UIControlEventTouchUpInside];
- [self.view addSubview:aBUTTON];
- }
然后我将第一个视图的右边按钮添加一个事件,点击按钮,就会推出第二个视图,并显示我们传过来的值:
- - (void)clicked{
- SecondViewController *second = [[SecondViewController alloc]init];
- [self.navigationController pushViewController:second animated:YES];
- second.str = @"hello!!";
- [second release];
- }
下面,我们来运行一下:
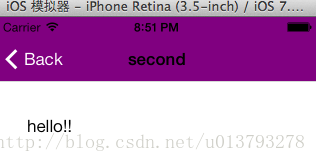
点进按钮以后,我们的第二个视图推出,button显示了传过来的值。
然后我们点击回button,还有navigation另外一个方法:
- - (void)clicked{
- [self.navigationController popViewControllerAnimated:YES];
- }
这样就可以回到第一个视图。
uinavigationcontroller的一些简单的属性就先说到这里,欢迎留言补充,谢谢。


 276
276


 被折叠的 条评论
为什么被折叠?
被折叠的 条评论
为什么被折叠?
 到【灌水乐园】发言


