


用dlib和opencv进行不同角度人脸检测及68个关键点提取(Python)
前几日为了在自己的单个旋转人脸数据集上复现SDM for face Alignment算法,研究了用dlib机器学习工具箱和opencv进行旋转人脸的检测及关键点提取,整理一下思路,希望有所帮助。
1. 软件要求
- Ubuntu(Windows应该也适用)
- dlib
- opencv2
- Python + Numpy
具体的安装过程不作详细介绍,可能要花些时间 =.=
2. 程序介绍
话不多说,直接上代码。
a) 导入函数
import cv2
import dlib
import numpy
import sys
import os
from math import *
b) 读取文件夹下的图片
# 获取原始图片
def getAllImg(folder):
    assert os.path.exists(folder)
    assert os.path.isdir(folder)
    imgList = os.listdir(folder)
    imgList = [item for item in imgList if os.path.isfile(os.path.join(folder, item))]
    return imgList

imgList = getAllImg('me_1')
print imgList   # 打印所有的图片名
得到me_1文件夹下的所有图片。
c) 人脸检测及关键点提取
首先,要下载dlib提供的已经训练好的关键点提取模型[链接]。因为我的人脸图片是不同角度的,所以不一定能够检测到人脸,所以当检测不到人脸时,依次旋转图片60度,再次检测,直到能够检测到人脸为止,如果旋转了360度还是检测不到人脸的话,那么认为该图片中不存在人脸。
PREDICTOR_PATH = 'shape_predictor_68_face_landmarks.dat'   # 关键点提取模型路径
landmarks = []   # 存储人脸关键点
# 1. 定义人脸检测器
detector = dlib.get_frontal_face_detector()

# 2. 载入关键点提取模型
predictor = dlib.shape_predictor(PREDICTOR_PATH)
have_face_img_num = 0  # 统计检测到人脸的图片个数

print '*** Face detection start! ***'

for img_name in imgList:
    im = cv2.imread('me_1/'+img_name)
    rotate_num = 0  # 旋转的次数
    degree = 60  # 每次旋转的角度

    while 1:
        rotate_num += 1
        rects = detector(im, 1)  # 检测人脸
        if len(rects) >= 1:      # 检测到人脸
            have_face_img_num += 1
            print ('img {}: rotating {} degree, get {} faces detected!'.format(img_name, degree*(rotate_num-1), len(rects)))
            row, col = im.shape[:2]
            if row > 600 and col > 600:   # 如果图片太大,从中心位置取600×600的切片
                im = im[row/2-300:row/2+300, col/2-300:col/2+300, :]
            rects = detector(im, 1)       # 再次检测人脸框,一般还是可以检测到的,所以这里没判断
            new_name = img_name.split('.')[0]+'_'+str(degree*(rotate_num-1))+'.png'  # 重新命名图片,命名规则为原来的图片名+旋转角度
            get_fea_points(rects, im, new_name)   # 调用关键点子程序,见步骤d)
            cv2.imwrite('me2/'+new_name,im)       # 保存图片到新的文件夹
            break
        else:                                     # 如果检测不到人脸
            if rotate_num == int(360/degree):     # 判断是否旋转完360度
                print ('img {}: after rotate {} degree, No face is detected!'.format(img_name, degree*(rotate_num-1)))
                break
            # 旋转60度
            rows, cols, channel = im.shape
            # 为了旋转之后不裁剪原图,计算旋转后的尺寸
            rowsNew=int(cols*fabs(sin(radians(degree))) + rows*fabs(cos(radians(degree))))
            colsNew=int(rows*fabs(sin(radians(degree))) + cols*fabs(cos(radians(degree))))
            M = cv2.getRotationMatrix2D((cols/2, rows/2), degree, 1)   # 旋转60度的仿射矩阵
            M[0,2] +=(colsNew-cols)/2
            M[1,2] +=(rowsNew-rows)/2
            im = cv2.warpAffine(im, M, (colsNew, rowsNew), borderValue=(255,255,255))  # 旋转60度,得到新图片
print ('*** success: {} / {}  ***'.format(have_face_img_num, len(imgList)))
d) 保存68个关键点的子函数并依次显示
将检测到的每张人脸的68个特征点保存到一个pts文件中。
def get_fea_points(rects, im, new_name):
    global landmarks
    feas = []   # 关键点
    fea_file_name = new_name[:-3] + 'pts'  #  pts文件名为旋转后图片名称.pts
    fea_file = open('me2/'+fea_file_name, 'a')  # 新建pts文件
    fea_file.write('version: 1'+'\n'+'n_points: 68'+'\n'+'{'+'\n')  # 写入文件头部信息
    for i in range(len(rects)):    # 遍历所有检测到的人脸(我的是单个人脸)
        landmarks = numpy.matrix([[p.x, p.y] for p in predictor(im, rects[i]).parts()])
    im = im.copy()
    # 使用enumerate 函数遍历序列中的元素以及它们的下标
    for idx, point in enumerate(landmarks):
        pos = (point[0,0], point[0,1])   # 依次保存每个关键点
        feas.append(pos)
        # 在图上画出关键点
        cv2.circle(im, pos, 3, color=(0,255,0))
    for pos in feas:
        fea_file.write(str(pos[0])+ ' '+ str(pos[1])+'\n')  # 写如特征点到pts文件
    fea_file.write('}')  # 写pts文件尾部
    fea_file.close()
    cv2.namedWindow("im", 2)  # 显示标记特征点的图片
    cv2.imshow("im", im)
    cv2.waitKey(0)
3. 实验结果
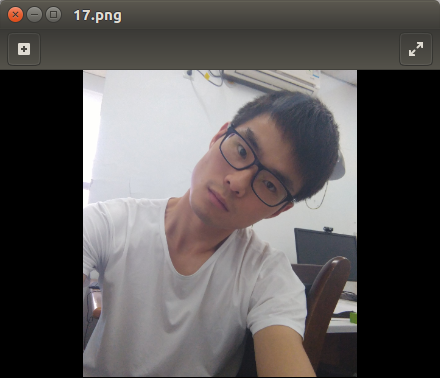
读取原始图像,如果不能检测到人脸,依次旋转该图片以便检测到人脸,检测到人脸之后进行特征点提取:
原图
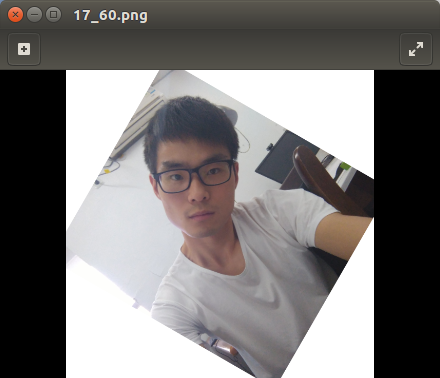
旋转60度后的图
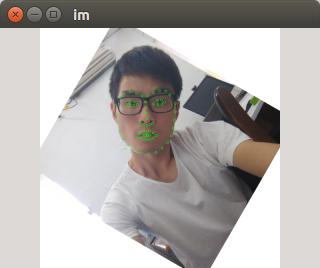
关键点标记图


 被折叠的 条评论
为什么被折叠?
被折叠的 条评论
为什么被折叠?
 到【灌水乐园】发言


