标题js轮播图
以下分享2种轮播图
第一种
布局:
<div class="wraper">

    <img src="../2019-12-11js/img/1.jpg" alt="" class="active">
    <img src="../2019-12-11js/img/2.jpg" alt="">
    <img src="../2019-12-11js/img/3.jpg" alt="">
    <img src="../2019-12-11js/img/4.jpg" alt="">

    <div id="pre"> < </div>
     <div id="next"> > </div>
</div>
以下为css 样式
.wraper{
    width: 300px;
    height: 200px;
    position: relative;
}
.wraper>img{
    width: 300px;
    height: 200px;
    display: none;
}
#pre{
    width: 30px;
    height: 50px;
    background-color: rgba(100,100,100,0.8);
    color: #fff;
    position: absolute;
    left: 0;
    top: calc(50% - 25px);
    line-height: 50px;
    text-align: center;
}
#next{
    width: 30px;
    height: 50px;
    background-color: rgba(100,100,100,0.8);
    color: #fff;
    position: absolute;
    right: 0;
    top: calc(50% - 25px);
    line-height: 50px;
    text-align: center;
}
.wraper>.active{
    display: block;
}
最后为js代码
var pre = document.getElementById(‘pre’);
var next = document.getElementById(‘next’);
var imgs = document.querySelectorAll(’.wraper>img’);
// 声明计数器  表示当前图片的索引值,默认0 第一张图片
var count = 0
next.onclick = function(){

    // 每点击一次自增1
    ++count
    // 清空图片默认样式  让图片回到初始化状态
    for(var i = 0;i<imgs.length;i++){
        imgs[i].className = ''
    }
    // 先限制  在添加样式
    if(count>=4){
        count = 0
    }
    imgs[count].className = 'active'


}
pre.onclick = function () {
        --count
        for (var b = 0; b < imgs.length; b++) {
            imgs[b].className = ''


        }
        // 先限制  在添加样式
        if (count < 0) {
            count = 3
        }
        imgs[count].className = 'active'

    }


}
最后我们看一下效果图,点击左右箭头即可实现轮播效果

接下来是第二种轮播图
布局
<div class="wrape">
    <img src="../2019-12-11js/img/1.jpg" alt="" class="active">
    <img src="../2019-12-11js/img/2.jpg" alt="">
    <img src="../2019-12-11js/img/3.jpg" alt="">
    <img src="../2019-12-11js/img/4.jpg" alt="">

    <div class="circle">
        <span class="active_circle"></span>
        <span></span>
        <span></span>
        <span></span>
    </div>
</div>
css样式,和上面那个一样,只是多了几个圆的设置
       .wrape {
        width: 500px;
        height: 300px;
        position: relative;

    }

    .wrape>img {
        width: 500px;
        height: 300px;
        display: none;
    }

    .circle {
        position: absolute;
        bottom: 20px;
        left: calc(50% - 60px);
    }

    span {
        width: 30px;
        height: 30px;
        display: inline-block;
        border-radius: 50%;
        background-color: rgba(100, 100, 100, 0.8);
    }

    .active_circle {
        background-color: #ccc;
    }

    .active {
        display: block;
    }

    .wrape .active {
        display: block;
    }
js代码
// 点击小球,切换对应的图片
var spans = document.getElementsByTagName('span')
var imgs = document.getElementsByTagName('img')
var pre = document.getElementById('pre')
var next = document.getElementById('next')
for (var i = 0; i < spans.length; i++) {
// 给小球添加属性
// 记录用户点击的是哪一个小圆点
spans[i].i = i // 给每个span对象添加i 属性并赋值为 在spans 数组中的索引值
// 给每个小圆点添加点击事件
spans[i].onclick = function () {
// 先清空样式
for (var j = 0; j < spans.length; j++) {
spans[j].className = ''
imgs[j].className = ''
}
var index = this.i // 保存当前点击小圆点的索引值
count = index // 点击上一张下一张时不会乱
this.className = 'active_circle' // 给当前点击小圆点添加样式
imgs[index].className = 'active'; // 显示对应图片
}
}
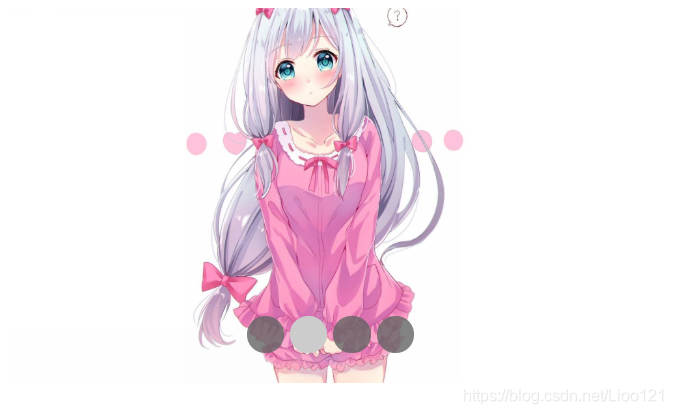
效果图:
通过点击下方圆点实现轮播效果

最后可以将2种方法合起来
<style>
    .wrape {
        width: 500px;
        height: 300px;
        position: relative;

    }

    .wrape>img {
        width: 500px;
        height: 300px;
        display: none;
    }

    .circle {
        position: absolute;
        bottom: 20px;
        left: calc(50% - 60px);
    }

    span {
        width: 30px;
        height: 30px;
        display: inline-block;
        border-radius: 50%;
        background-color: rgba(100, 100, 100, 0.8);
    }

    .active_circle {
        background-color: #ccc;
    }

    .active {
        display: block;
    }

    .wrape .active {
        display: block;
    }

    #pre {
        width: 30px;
        height: 50px;
        background-color: rgba(100, 100, 100, 0.8);
        color: #fff;
        position: absolute;
        left: 0;
        top: calc(50% - 25px);
        line-height: 50px;
        text-align: center;
    }

    #next {
        width: 30px;
        height: 50px;
        background-color: rgba(100, 100, 100, 0.8);
        color: #fff;
        position: absolute;
        right: 0;
        top: calc(50% - 25px);
        line-height: 50px;
        text-align: center;
    }
</style>
</head>

 <body>
<div class="wrape">
    <img src="../2019-12-11js/img/1.jpg" alt="" class="active">
    <img src="../2019-12-11js/img/2.jpg" alt="">
    <img src="../2019-12-11js/img/3.jpg" alt="">
    <img src="../2019-12-11js/img/4.jpg" alt="">
    <div id="pre">
        👈 </div> <div id="next"> 👉
    </div>
    <div class="circle">
        <span class="active_circle"></span>
        <span></span>
        <span></span>
        <span></span>
    </div>
</div>
<script>
    // 点击小球,切换对应的图片
    var spans = document.getElementsByTagName('span')
    var imgs = document.getElementsByTagName('img')
    var pre = document.getElementById('pre')
    var next = document.getElementById('next')
    for (var i = 0; i < spans.length; i++) {

        // 给小球添加属性
        // 记录用户点击的是哪一个小圆点
        spans[i].i = i  // 给每个span对象添加i 属性并赋值为 在spans 数组中的索引值
        // 给每个小圆点添加点击事件
        spans[i].onclick = function () {
            // 先清空样式
            for (var j = 0; j < spans.length; j++) {
                spans[j].className = ''
                imgs[j].className = ''
            }
            var index = this.i // 保存当前点击小圆点的索引值
            count = index  // 点击上一张下一张时不会乱
            this.className = 'active_circle' // 给当前点击小圆点添加样式
            imgs[index].className = 'active'; // 显示对应图片

        }
    }
    // 声明计数器  表示当前图片的索引值,默认0 第一张图片 点击上一个 --count,下一个++count
    var count = 0
    next.onclick = function () {

        // 每点击一次自增1
        ++count
        // 清空图片默认样式  让图片回到初始化状态
        for (var a = 0; a < imgs.length; a++) {
            imgs[a].className = ''
            spans[a].className = ''
        }
        // 先限制  在添加样式
        if (count >= 4) {
            count = 0
        }
        // 点击下一张切换替换
        imgs[count].className = 'active'
        // 点击下一个小圆点切换到下一个
        spans[count].className = 'active_circle'

    }
    pre.onclick = function () {
        --count
        for (var b = 0; b < imgs.length; b++) {
            imgs[b].className = ''
            spans[b].className = ''

        }
        // 先限制  在添加样式
        if (count < 0) {
            count = 3
        }
        imgs[count].className = 'active'
        spans[count].className = 'active_circle'

    }


 302
302

 被折叠的 条评论
为什么被折叠?


