


一、选择器类别
简单选择器:根据名称、ID、类别来选择元素。
组合选择器:根据元素之间的特定关系来选择元素。
伪类选择器:根据某种状态来选择元素。
伪元素选择器:为一个元素的指定部分设置样式。
属性选择器:根据一个属性或属性值来选择元素。
二、简单选择器
2.1 元素选择器
它是根据元素名称来选择HTML元素的,是CSS最基本的选择器,换而言之,文档的元素就是最基本的选择器。
如果设置 HTML 的样式,选择器通常将是某个 HTML 元素,比如p、h1,甚至是html,body都可以作为元素选择器。
html,body {
            background-color: aliceblue;
        }

        h1 {
            text-align: center;
            color: purple;
        }

        p {
            color: red;
        }
2.2 ID选择器
它是使用一个HTML的id属性来选择一个特定的元素。
ID选择器最重要的就是唯一性,每个ID只能出现一次,不能重复。
例如,给id="classmate"的标签添加样式:
#classmate
{
    text-align: center;
}
2.3 类选择器
它可以选择具有特定class属性的HTML元素,要选择具有特定类别的元素,需要写一个点.字符后面紧跟类别名称,也可以在定义类选择器的时候,将元素名称添加到点的前面,这样的类选择器选择的元素就更具体了。
class属性可以实现多个样式的叠加,但class属性的命名不能以数字开头。
如果想给以下两个标签添加样式:
 <!DOCTYPE html>
 <html lang="en">
 <head>
    <meta charset="UTF-8">
    <meta http-equiv="X-UA-Compatible" content="IE=edge">
    <meta name="viewport" content="width=device-width, initial-scale=1.0">
    <title>类选择器</title>
 </head>
 <body>
    <h1 class="important"> This heading is very important. </h1>
    <p class="important"> This paragraph is very important. </p>
 </body>
 </html>
由上方代码可见,h1标签和p标签的class属性是一样的,相比于ID选择器,它并不是唯一的,可以通过类选择器将同一class属性一起进行添加样式,代码如下:
*.important        # 通配符可省略
{
    color:red;
}
类选择器可以结合元素选择器来使用。
p.important
{
color:red;
}
这样设置类选择器的话,选择器会匹配 class 属性包含 important 的所有 p 元素,但是其他任何类型的元素都不匹配,不论是否有此 class 属性。
2.4 分组选择器
当多个元素的样式相同的时候,我们没有必要重复地为每个元素都设置样式,我们可以通过在多个选择器之间使用逗号分隔的分组选择器来统一设置元素样式。
分组选择器选择所有具有相同样式的HTML元素,实现的方法就是将多个选择器用逗号分隔。
为p,h1和div标签添加统一样式:
p,h1,div {
            background-color: aliceblue;
        }
2.5 通用选择器
它选择页面上所有的HTML元素,定义选择器的方法是使用通配符星号(*)。
为所有的元素添加样式:
* {
            background-color: yellow;
        }
2.6 选择器的优先级
简单选择器优先级顺序: !important>id选择器>类选择器>标签选择器>通配符选择器如果在简单选择器里的某个样式上加了!important,那么此时它的优先级是最高的。
三、组合选择器
它通过一些特殊符号将多个简单选择器连接起来。
3.1 后代选择器
它通过空格连接,匹配作为指定元素后代的所有元素。
 <!DOCTYPE html>
 <html lang="en">
 <head>
    <meta charset="UTF-8">
    <meta http-equiv="X-UA-Compatible" content="IE=edge">
    <meta name="viewport" content="width=device-width, initial-scale=1.0">
    <title> 后代选择器</title>
    <style>
        #first h1 {
            background-color: antiquewhite;
        }
    </style>
 </head>
 <body>
    <div id="first">
        <h1>这是第一段</h1>
        <p>这是第一段正文</p>
        <div id="second">
            <h1>这是第二段</h1>
            <p>这是第二段正文</p>
            <div id="third">
                <h1>这是第三段</h1>
                <p>这是第三段正文</p>
            </div>
        </div>
    </div>
    <div>
        <p>这里属于注释</p>
    </div>
 </body>
 </html>
效果如下:
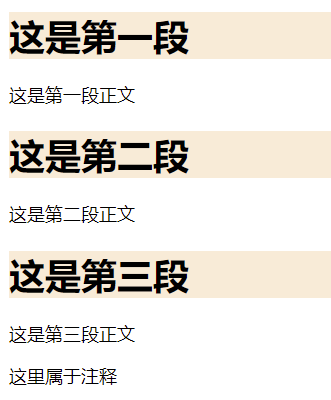
从效果可以看出,在id属性为first的div标签下的所有h1标签都被添加了样式。
3.2 子选择器
通过大于号连接,只能选择作为某元素的子元素,不能选择到孙辈的元素。
 <!DOCTYPE html>
 <html lang="en">
 <head>
    <meta charset="UTF-8">
    <meta http-equiv="X-UA-Compatible" content="IE=edge">
    <meta name="viewport" content="width=device-width, initial-scale=1.0">
    <title> 子选择器</title>
    <style>
        #first>h1 {
            background-color: antiquewhite;
        }
    </style>
 </head>
 <body>
    <div id="first">
        <h1>这是第一段</h1>
        <p>这是第一段正文</p>
        <div id="second">
            <h1>这是第二段</h1>
            <p>这是第二段正文</p>
            <div id="third">
                <h1>这是第三段</h1>
                <p>这是第三段正文</p>
            </div>
        </div>
    </div>
    <div>
        <p>这里属于注释</p>
    </div>
 </body>
 </html>
效果如下:
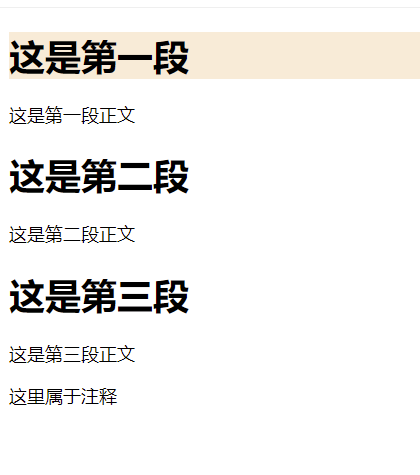
从效果可以看出,只有id为first的div元素下的子元素h1标签被添加了样式。
3.3 相邻的兄弟选择器
通过加号+连接
相邻兄弟选择器只能选中紧跟其后的那个标签,不能选择隔开的标签。
3.4 通用的兄弟选择器
通过波浪线~连接
通用兄弟选择器选中的是所有由选择器1指定的兄弟标签(不能被包含,那是父子,不能乱了关系),可以隔开。
四、伪类选择器
属于类选择器的一种,根据特定状态选取元素。
基本语法为selector:鼠标行为{},这里selector为其他基础选择器,冒号及鼠标行为就是常用的伪类选择器。
鼠标点击前:
使用冒号和link连接(:link),代表鼠标没有操作时元素的默认样式。
鼠标点击后:
使用冒号和visited连接(:visited),代表鼠标点击并离开元素之后的样式。
鼠标悬停时:
使用冒号和hover连接(:hover),代表鼠标悬停或者是划过元素时元素的样式。
鼠标点击时:
使用冒号和active连接(:active),代表鼠标点击元素的瞬间,元素显示的样式。
<!DOCTYPE html>
<html lang="en">
<head>
<meta charset="UTF-8">
<meta http-equiv="X-UA-Compatible" content="IE=edge">
<meta name="viewport" content="width=device-width, initial-scale=1.0">
<title>CSS伪类选择器</title>
<style>
a:link {
color: red;
}
a:visited {
color: green;
}
a:hover {
color: yellow;
}
a:active {
color: skyblue;
}
div {
width: 200px;
height: 200px;
background-color: skyblue;
}
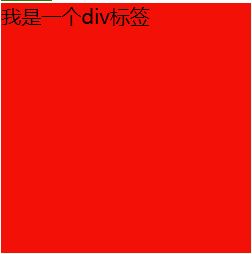
div:hover {
background-color: red;
}
div:active {
width: 100px;
height: 100px;
}
</style>
</head>
<body>
<a href="#">a标签</a>
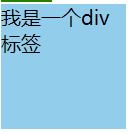
<div>
我是一个div标签
</div>
</body>
</html>代码运行后,a标签的各种样式如下:
点击前,a标签的样式:

悬停时,a标签的样式:

点击时,a标签的样式:

点击后,a标签的样式:

div标签的两种样式如下:
点击前,div标签的样式:
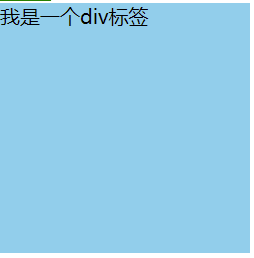
悬停时,div标签的样式:
点击后,div标签的样式:
注意:
1.冒号和后面的鼠标行为,没有任何空格,必须连接在一起。
2.四个伪类选择器必须按照以上介绍的顺序书写(:link,:visited,:hover,:active),否则在浏览器中部分样式不能实现。
3.伪类选择器全部一起使用的情况,主要是应用在超链接上,偶尔也会独立使用在其他标签上面。
4.伪类选择器也可以应用在其他元素上,但是只能实现active激活瞬间和hover鼠标悬停效果。
五、伪元素选择器
通过伪元素选择器,可以设置元素指定部分的样式。主要用来设置元素内文本的首字母,首行的样式、或是在元素内容之前或之后插入其他内容。
基本语法为selector::pseudo-element{},其中selector为目标元素,::pseudo-element代表向目标元素内,添加伪元素,并对伪元素的内容进行修饰。
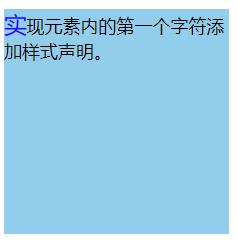
双冒号first-letter伪元素(::first-letter):
用来实现向文本的首个字符添加样式。
 <!DOCTYPE html>
 <html lang="en">
 <head>
    <meta charset="UTF-8">
    <meta http-equiv="X-UA-Compatible" content="IE=edge">
    <meta name="viewport" content="width=device-width, initial-scale=1.0">
    <title>first-letter</title>
    <style>
        div {
            width: 200px;
            height: 200px;
            background-color: skyblue;
        }

        div::first-letter {
            color: blue;
            font-size: 20px;
        }
    </style>
 </head>
 <body>
    <div>
        实现元素内的第一个字符添加样式声明。
    </div>
 </body>
 </html>
效果如下:
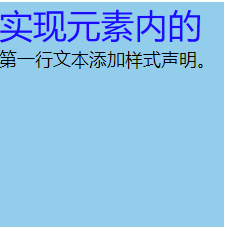
双冒号first-line伪元素(::first-line):
用来实现向文本的首行添加特殊样式,无论宽度变大还是变小,都只能实现对第一行中的文本样式进行修饰。
<!DOCTYPE html>
 <html lang="en">
 <head>
    <meta charset="UTF-8">
    <meta http-equiv="X-UA-Compatible" content="IE=edge">
    <meta name="viewport" content="width=device-width, initial-scale=1.0">
    <title>first-line</title>
    <style>
        div {
            width: 200px;
            height: 200px;
            background-color: skyblue;
        }

        div::first-line {
            color: blue;
            font-size: 30px;
        }
    </style>
 </head>
 <body>
    <div>
        实现元素内的第一行文本添加样式声明。
    </div>
 </body>
 </html>
效果如下:
双冒号before伪元素(::before):
用来实现在元素内容之前插入内容。
双冒号after伪元素(::after):
用来实现在元素内容之后插入内容。
<!DOCTYPE html>
<html lang="en">
<head>
   <meta charset="UTF-8">
   <meta http-equiv="X-UA-Compatible" content="IE=edge">
   <meta name="viewport" content="width=device-width, initial-scale=1.0">
   <title>before-after</title>
   <style>
       div {
           width: 200px;
           height: 200px;
           background-color: skyblue;
       }

       div::before {
           content: "我是向前添加";
           font-size: 30px;
       }

       div::after {
           content: "我是向后添加";
           font-size: 30px;
       }
   </style>
</head>
<body>
   <div>
       实现元素内部向前向后插入内容。
   </div>
</body>
</html>
效果如下:
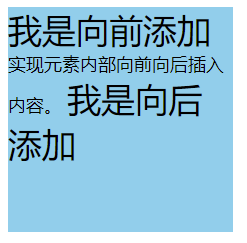
在使用伪元素选择器向前向后插入内容时,必须配合content才能实现效果。
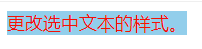
双冒号selection伪元素(::selection):
用来更改选中文本的样式,只支持几个样式声明:
color(文本颜色)
background(背景)
cursor(鼠标样式)
outline(描边效果)
 <!DOCTYPE html>
 <html lang="en">
 <head>
    <meta charset="UTF-8">
    <meta http-equiv="X-UA-Compatible" content="IE=edge">
    <meta name="viewport" content="width=device-width, initial-scale=1.0">
    <title>selection</title>
    <style>
        div::selection {
            color: red;
            background-color: skyblue;
        }
    </style>
 </head>
 <body>
    <div>
        更改选中文本的样式。
    </div>
 </body>
 </html>
效果如下:
六、属性选择器
属性选择器是根据属性或属性值来查找元素。
基本语法为Element[attribute="value"],Element[attribute]的含义是查找带有该属性的元素,然后添加样式声明。
[attribute]:来查找HTML结构中,带有attribute属性的所有元素
[attribute="value"]:来查找HTML结构中,带有attribute属性,并且属性值为value的元素
[attribute~="value"]:来查找HTML结构中,带有attribute属性,并且在多个属性值中包含value元素
[attribute|="value"]:来查找HTML结构中,带有attribute属性,并且属性值以value或者是value-开头的元素
 <!DOCTYPE html>
 <html lang="en">
 <head>
    <meta charset="UTF-8">
    <meta http-equiv="X-UA-Compatible" content="IE=edge">
    <meta name="viewport" content="width=device-width, initial-scale=1.0">
    <title>CSS属性选择器</title>
    <style>
        [type] {
            width: 50px;
            height: 50px;
        }

        [name="sex"] {
            width: 20px;
            height: 20px;
        }

        [class~="box"] {
            background-color: yellow;
        }

        [class|="box"] {
            background-color: blue;
        }
    </style>
 </head>
 <body>
    <h1>基础信息</h1>
    用户名:<input type="text" class="box"><br>
    密码框:<input type="password"><br>
    回答问题:<input type="text"><br>
    性别选择:<input type="radio" name="sex">男 <input type="radio" name="sex">女 <br>
    是否核酸:<input type="radio" name="yesOrno">是 <input type="radio" name="yesOrno">否 <br>
    <h1>元素修饰</h1>
    <p class="box big bobo">我是一个p元素我有三个类名,分别是:box,big,bobo</p>
    <p class="box bobo">我是一个p元素我有两个类名,分别是box和bobo</p>
    <div class="box">我是一个div元素,我有一个类名叫做box</div>
    <div class="box-qf">我是一个div元素,我有一个类名叫做box-qf</div>
 </body>
 </html>
效果如下:

注意:该属性的值只能有一个不能有多个
简单选择器和组合选择器,可以完成元素的查找。
其他选择器可以更加精准高效的查找元素,从而能提高我们编码速度。
属性选择器,在实际开发的过程中,大部分会应用在表单控件中,因为表单控件可添加的属性比较多。
七、选择器的优先级权重
CSS优先级的权重:
行内样式>ID选择器>类选择器>元素选择器>通用选择器
选择器选择的范围越小,越精确,优先级就越高
通用选择器权重值0,元素选择器权重值1,类选择器权重值10,ID选择器权重值100,行内选择器权重值1000


 47
47

 被折叠的 条评论
为什么被折叠?
被折叠的 条评论
为什么被折叠?
 到【灌水乐园】发言


