


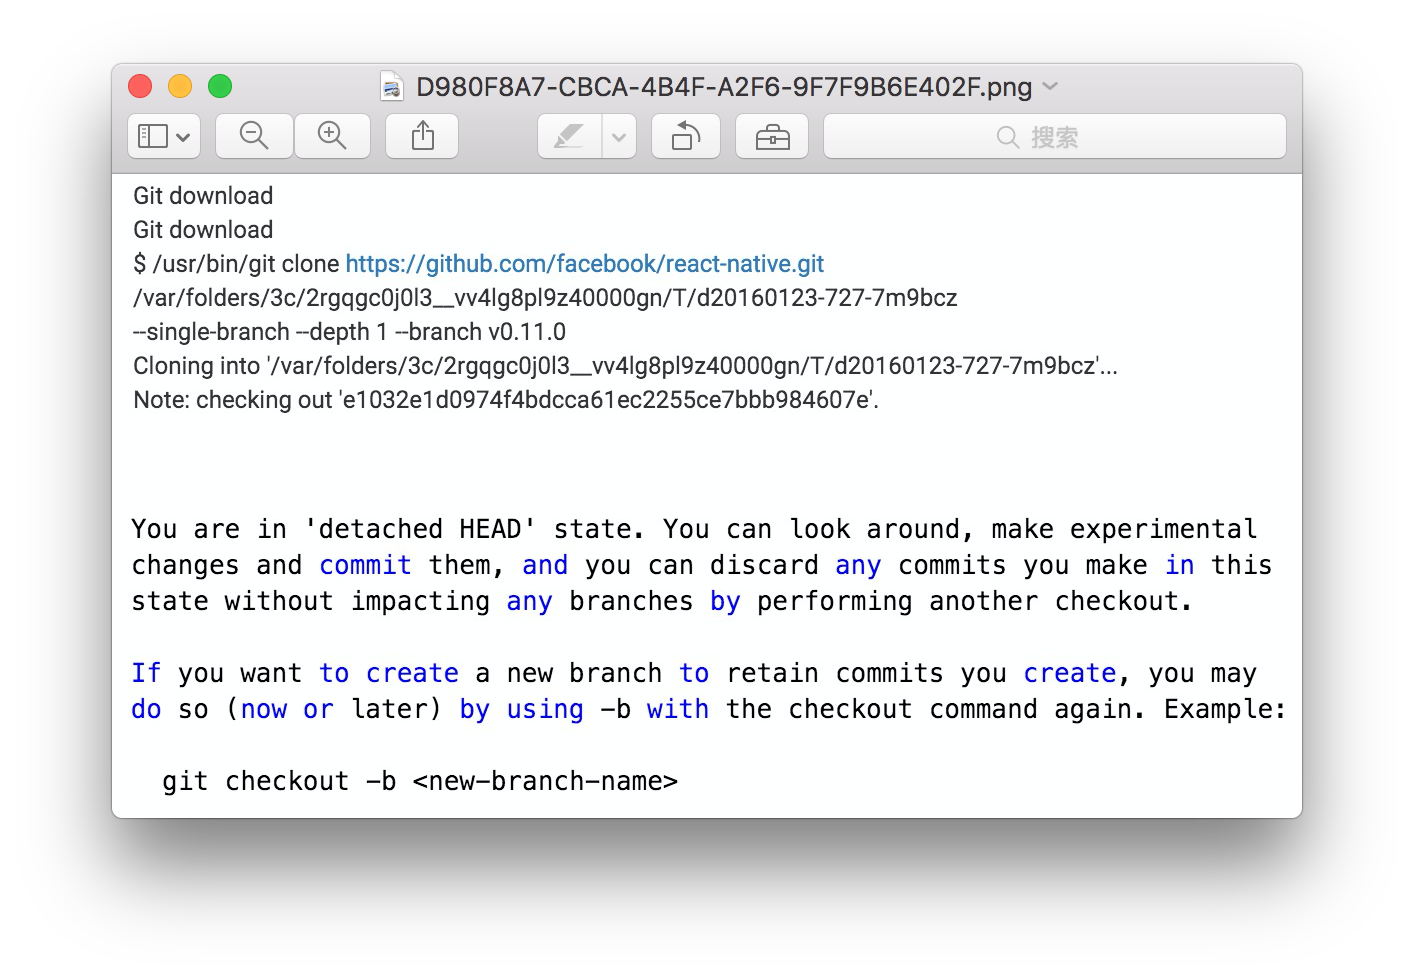
安装react native依赖
本例在工程跟目录下创建了一个ReactComponent文件夹用来存放react native文件。终端进入ReactComponent目录,执行npm install react-native –save安装react native依赖。
通过cocoapods对工程安装React Native
在工程根目录(本例工程名为Integration)中创建Podfile文件,添加如下内容:
# 请将:path后面的内容修改为正确的路径。
pod 'React', :path => ‘./ReactComponent/node_modules/react-native', :subspecs => [
'Core',
'RCTImage',
'RCTNetwork',
'RCTText',
'RCTWebSocket',
'RCTActionSheet’,
'RCTGeolocation’,
'RCTSettings’,
'RCTVibration’,
'RCTSettings’,
'RCTLinkingIOS',
#添加其他你想在工程中使用的依赖。
]
PS:根据实际需要添加模块依赖,例如不导入RCTText就无法使用Text组件。然后pod install安装依赖。我在install过程中一开始出现了下面问题:
原因是“撞墙了”,解放方法是将Ruby镜像更换成淘宝的Ruby镜像http://ruby.taobao.org/。
gem sources -l      查看当前Ruby镜像
gem sources --remove 镜像url  移除当前
gem sources -a http://ruby.taobao.org/      添加淘宝镜像
更换成淘宝镜像后再执行pod install,发现就能正常安装了。
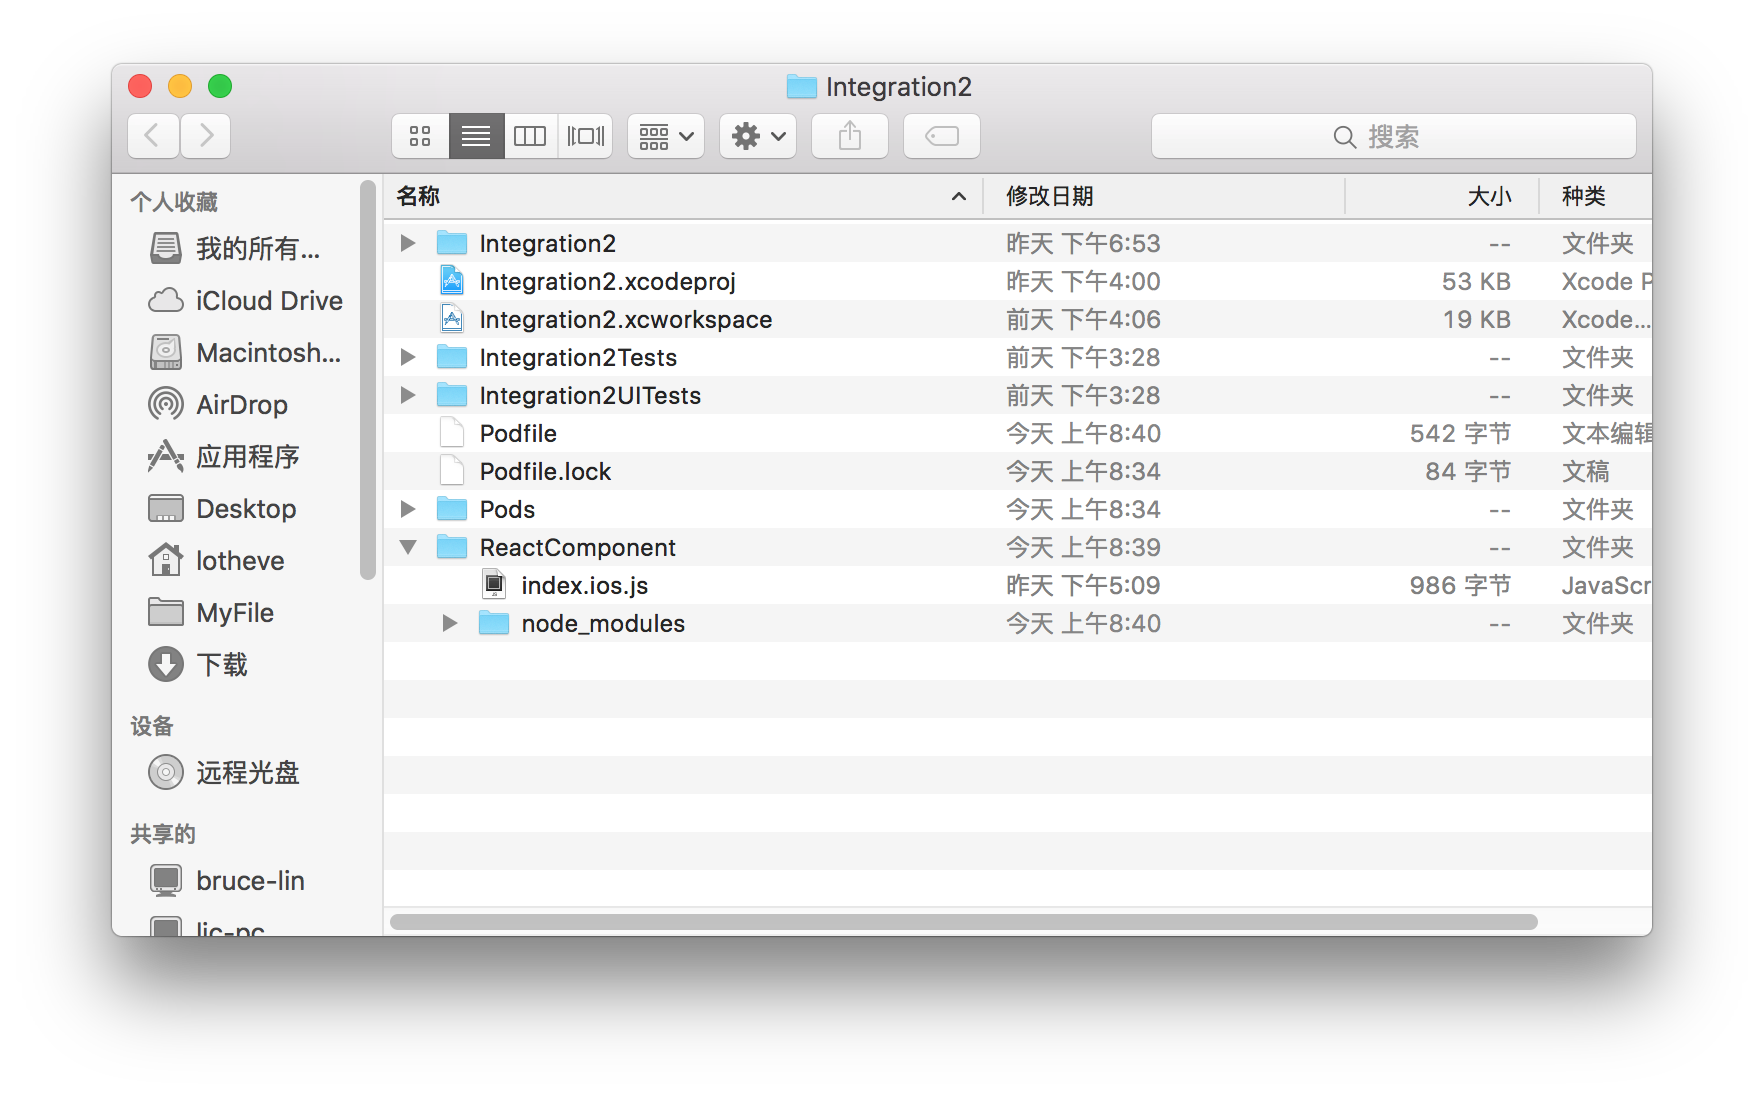
创建React Native应用
在ReactComponent中创建入口文件index.ios.js。然后在ReactComponent目录下创建index.ios.js文件。文档结构如下:
在index.ios.js添加演示代码
'use strict';

var React = require('react-native');
var {
  AppRegistry,
  StyleSheet,
  Text,
  View,
} = React;

var App = React.createClass({
  render: function() {
    return (
      <View style={styles.container}>
        <Text style={styles.welcome}>
          Welcome to React Native!
        </Text>
        <Text style={styles.instructions}>
          To get started, edit index.android.js
        </Text>
        <Text style={styles.instructions}>
          Shake or press menu button for dev menu
        </Text>
      </View>
    );
  }
});

var styles = StyleSheet.create({
  container: {
    flex: 1,
    justifyContent: 'center',
    alignItems: 'center',
    backgroundColor: '#F5FCFF',
  },
  welcome: {
    fontSize: 20,
    textAlign: 'center',
    margin: 10,
  },
  instructions: {
    textAlign: 'center',
    color: '#333333',
    marginBottom: 5,
  },
});

AppRegistry.registerComponent('Integration', () =>App);
往原生添加RCTRootView用来显示RN界面
引入RCTRootView文件
#import <RCTRootView.h>
植入RCTRootView
- (void)viewDidLoad {
    [super viewDidLoad];
    [self initRNView];
}

- (void)initRNView{
    NSURL *jsCodeLocation;
    //获取index.ios.bundle的地址。ndex.ios.bundle会由packager服务创建,可以通过React Native服务器访问到
    jsCodeLocation = [NSURL URLWithString:@"http://localhost:8081/index.ios.bundle?platform=ios&dev=true"];
    //需要注意这里的参数模块名对应index文件中的注册的入口组件名
    RCTRootView *rootView = [[RCTRootView alloc]initWithBundleURL:jsCodeLocation moduleName:@"Integration" initialProperties:nil                          launchOptions:nil];
    //植入到原生
    rootView.frame = CGRectMake(0, 64, 300, 300);
    [self.view addSubview:rootView];
}
启动开发服务器
如果此时直接运行程序,会得到如下报错:
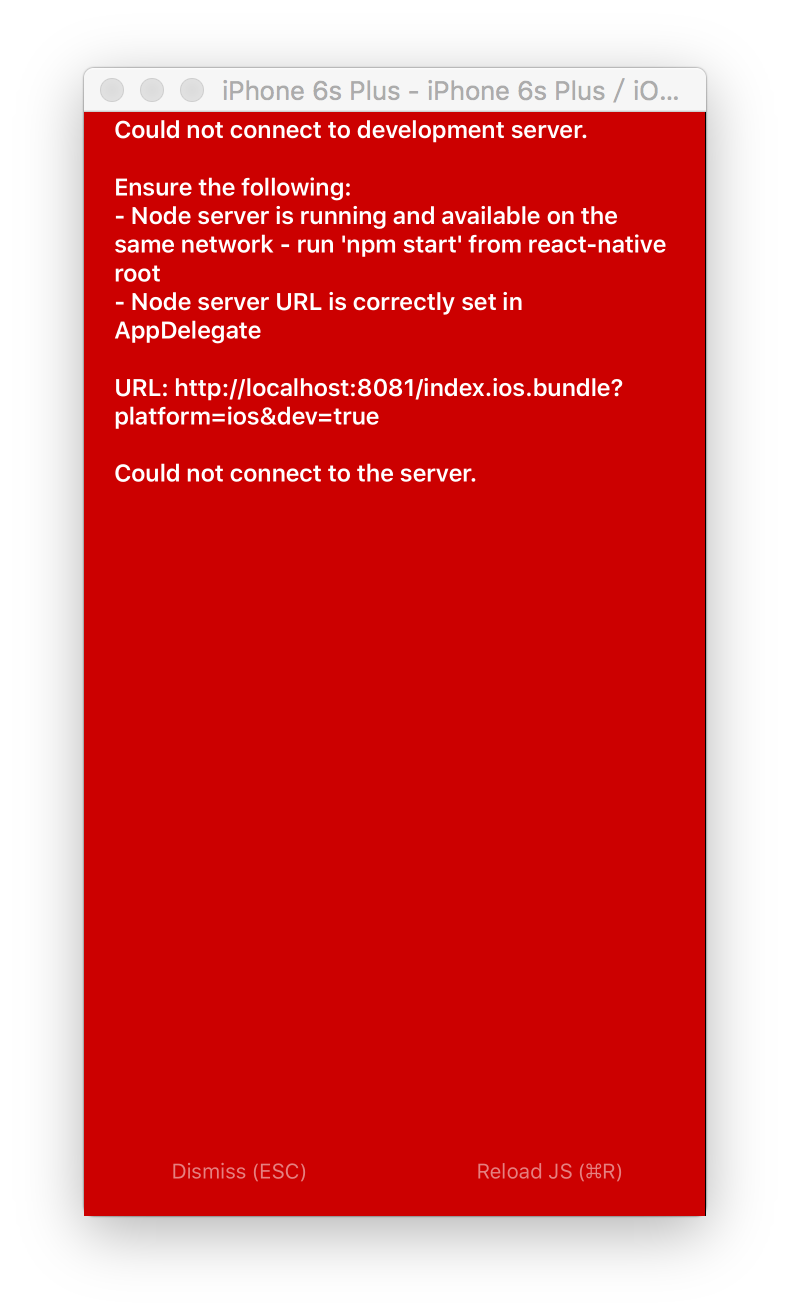
设置允许Http请求。打开info.plist文件,添加

再次运行,报错如下:
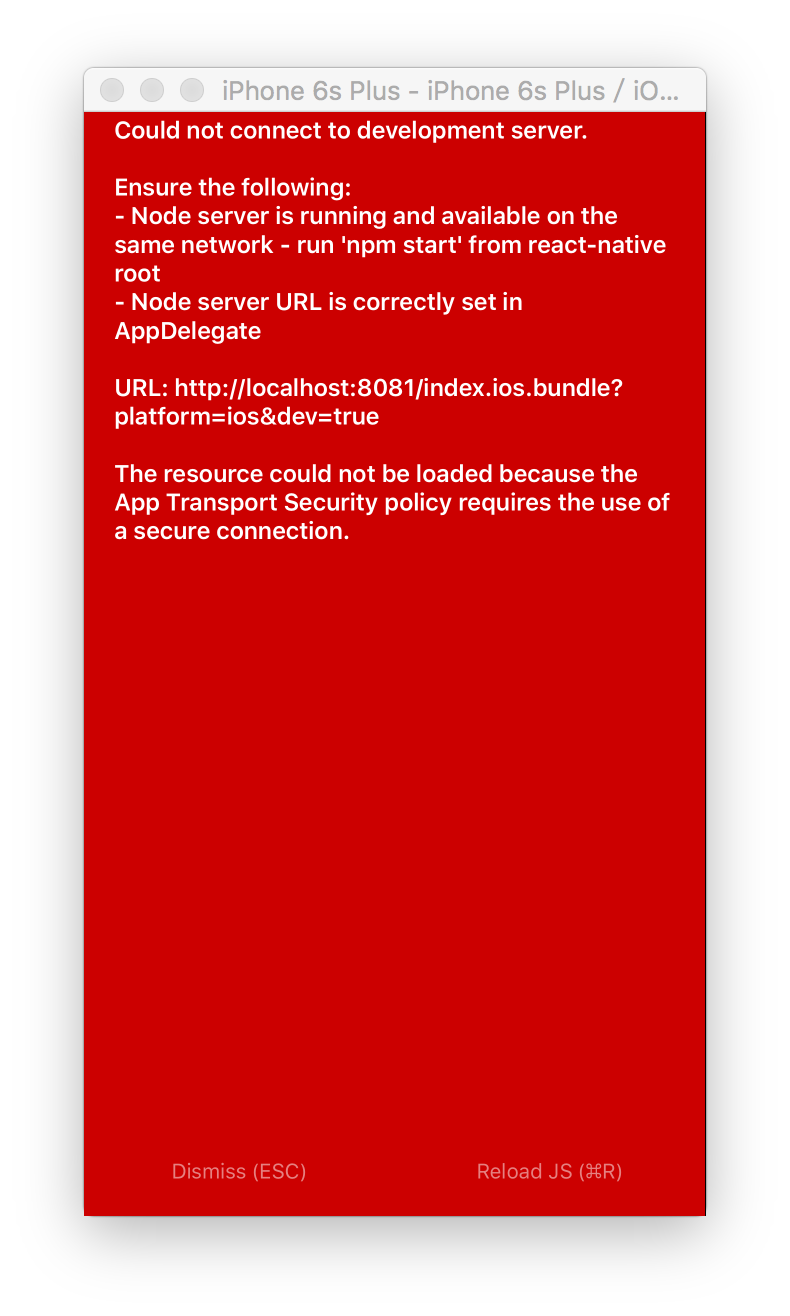
很明显,我们还没启动RN服务器。打开终端,在工程根目录中执行
JS_DIR=`pwd`/ReactComponent; cd ReactComponent/node_modules/react-native; npm run start -- --root $JS_DIR
注意:JS_DIR变量是查找JS文件的目录,在本例中即为ReactComponent目录;cd后面的路径由实际的文档排版决定,保证进入到react-native(即packager所在的目录)。
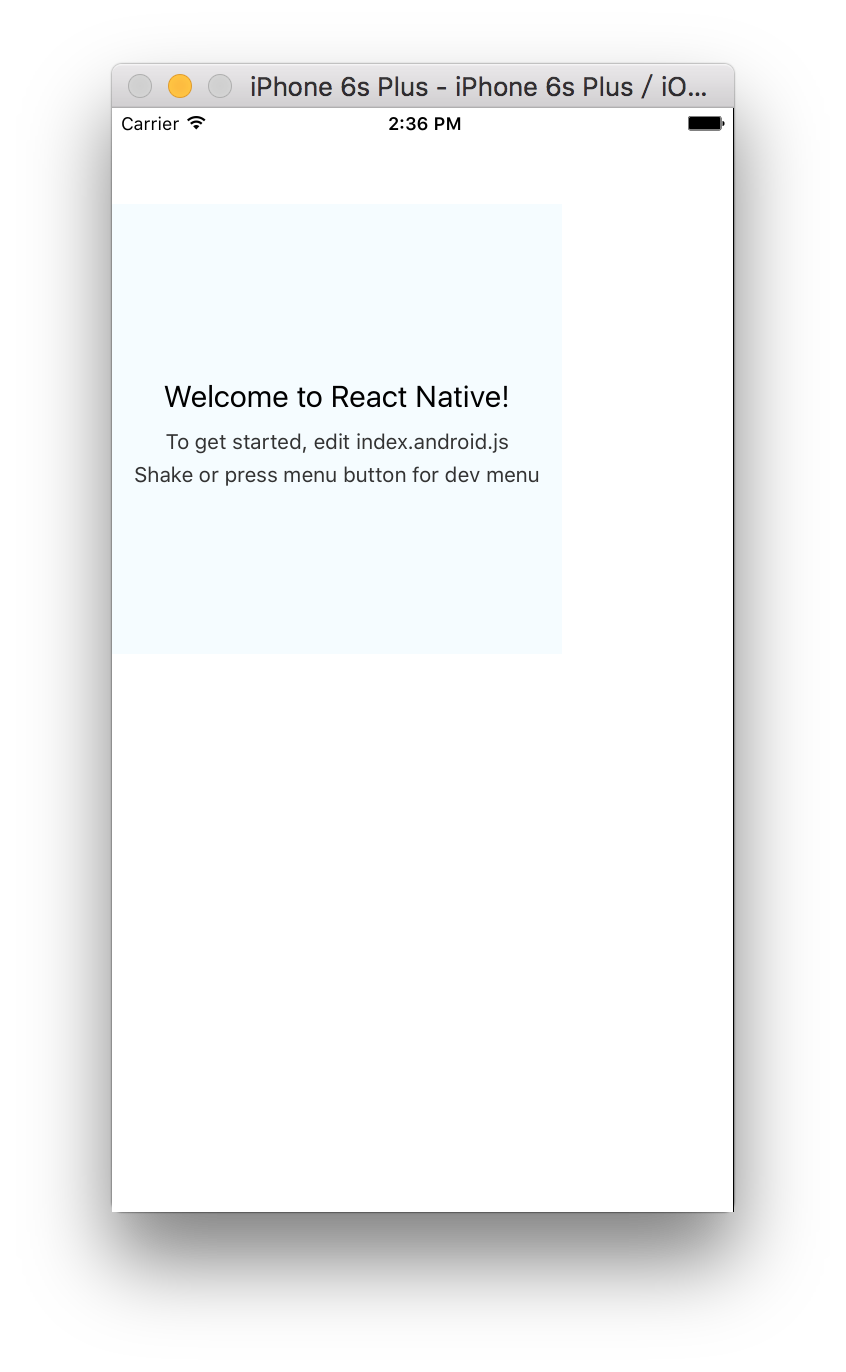
好了,启动服务器之后再次运行,完美植入!


 483
483

 被折叠的 条评论
为什么被折叠?
被折叠的 条评论
为什么被折叠?
 到【灌水乐园】发言


