


目录
2.3.1 同步获取在线文件(require-from-url)
2.2.3 生成一个 HTML5 文件(html-webpack-plugin)
2.3.5 修改微应用 public > index.html
2.4.2 修改主应用 public > index.html
1. 为什么要提取公共依赖
可以看 qiankun issue 上的一些讨论:
提取公共依赖 doc · Issue #581 · umijs/qiankun · GitHub https://github.com/umijs/qiankun/issues/581
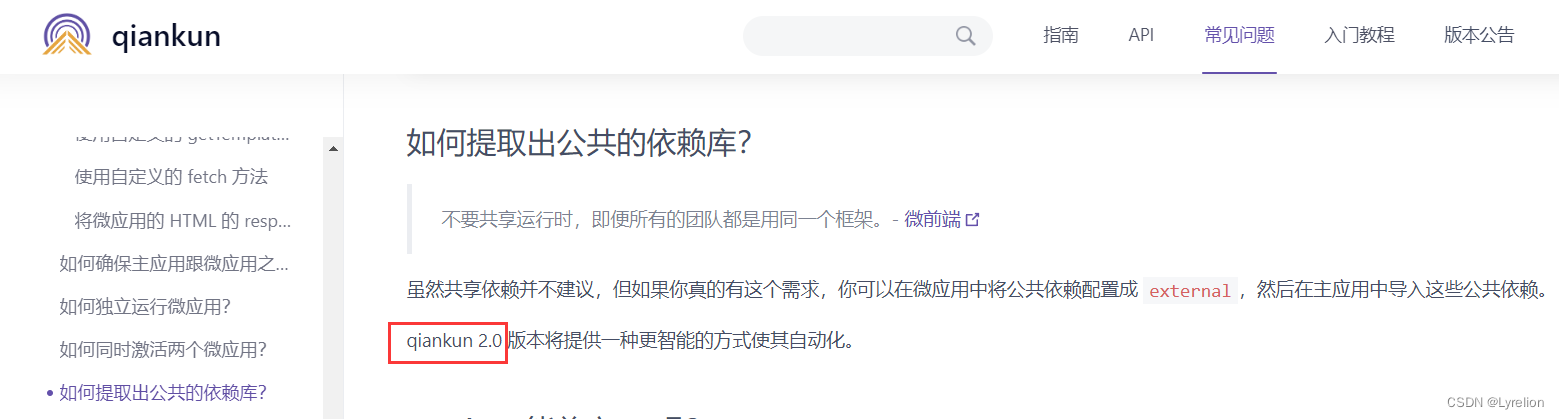
以主应用和微应用都采用 Vue3 开发为例,提取公共依赖的目的:
- 减少相同资源的重复加载
- 资源版本不同步
- 打包文件庞大
2. 如何提取公共依赖
2.1 基本思路
- 相同依赖 采用 CDN 的方式加载,并把 所有依赖的 CDN 链接 统一放到一个文件中进行管理
- 把存放 CDN 链接的文件,引入到 vue.config.js 中去
- 在项目打包时,添加忽略部分文件打包的配置,把以CDN方式加载的依赖忽略掉
- 把CDN加载的链接,动态添加到 index.html 中去
2.2 改造主应用
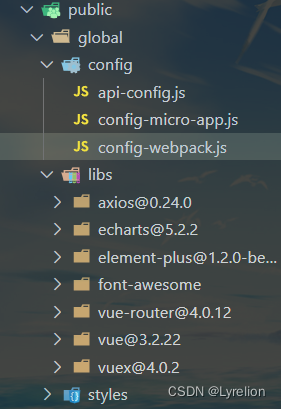
2.2.1 修改目录、添加配置文件及资源
- 在主应用的 public 下新建 global > config 文件夹,用于存放 全部应用公共接口地址配置、微应用配置、公共依赖 CDN 地址 等内容
- 在 config 文件夹下 新建 api-config.js,用于存放全部应用公共接口地址配置
- 在 config 文件夹下 新建 config-micro-app.js,用于存放微应用配置
- 在 config 文件夹下 新建 config-webpack.js,用于存放公共依赖 CDN 地址
- 在主应用的 public 下新建 libs 文件夹,用于存放各种依赖包
目录结构整体如下:
2.2.2 config-webpack.js
config-webpack.js 文件中包含如下内容:
- webpack 打包忽略文件配置
- CDN 公共依赖地址
微应用中的依赖,就是读取主应用中的 config-webpack.js 这个配置文件
把项目打包部署到服务器上,public 文件夹内容不会被打包改变;因此线上项目的 public/libs 文件夹中就是依赖,依赖包的在线地址就能拿到了
综上所述,在 config-webpack.js 中,导出公共依赖地址配置
// CDN 链接(读取线上配置)
exports.cdn = {
  css: [
    'http://192.xxxx/xxxx-app/global/libs/element-plus@1.2.0-beta.3/theme-chalk/index.css',
    'http://192.xxxx/xxxx-app/global/libs/font-awesome/4.7.0/css/font-awesome.min.css',
    'http://192.xxxx/xxxx-app/global/styles/variable.css',
  ],
  js: [
    'http://192.xxxx/xxxx-app/global/libs/vue@3.2.22/vue.global.js',
    'http://192.xxxx/xxxx-app/global/libs/vue-router@4.0.12/vue-router.global.js',
    'http://192.xxxx/xxxx-app/global/libs/vuex@4.0.2/vuex.global.js',
    'http://192.xxxx/xxxx-app/global/libs/axios@0.24.0/axios.min.js',
    'http://192.xxxx/xxxx-app/global/libs/element-plus@1.2.0-beta.3/index.full.min.js',
    'http://192.xxxx/xxxx-app/global/libs/echarts@5.2.2/echarts.js',
    // 这里引入了公共接口配置
    'http://xxxx/xxxx-app/global/config/api-config.js',
  ],
};
如果没有部署项目(也就是没有依赖在线地址)也没关系,可以将微应用基座应用运行起来,通过 localhost 方式读取基座应用中的 libs 文件夹,路径如下:
// CDN 链接(读取本地配置)
exports.cdn = {
  css: [
    'http://localhost:7080/global/libs/element-plus@1.2.0-beta.3/theme-chalk/index.css',
    'http://localhost:7080/global/libs/font-awesome/4.7.0/css/font-awesome.min.css',
    'http://localhost:7080/global/styles/variable.css',
  ],
  js: [
    'http://localhost:7080/global/libs/vue@3.2.22/vue.global.js',
    'http://localhost:7080/global/libs/vue-router@4.0.12/vue-router.global.js',
    'http://localhost:7080/global/libs/vuex@4.0.2/vuex.global.js',
    'http://localhost:7080/global/libs/axios@0.24.0/axios.min.js',
    'http://localhost:7080/global/libs/element-plus@1.2.0-beta.3/index.full.min.js',
    'http://localhost:7080/global/libs/echarts@5.2.2/echarts.js',
    // 这里引入了公共接口配置
    'http://localhost:7080/global/config/api-config.js',
  ],
};
Webpack 打包时,如果使用 CDN 链接引入,则构建时要忽略相关资源,下面就是忽略打包文件的配置
// Webpack 打包时,如果使用 CDN 链接引入,则构建时要忽略相关资源
exports.externals = {
  vue: 'Vue',
  'vue-router': 'VueRouter',
  vuex: 'Vuex',
  axios: 'axios',
  'element-plus': 'ElementPlus',
  echarts: 'echarts',
};
2.2.3 一些说明
api-config.js:
const appConfig = {
  jdpAppCode: 'DCP.DSM',
  jdpOuApiContext: 'http://xxxx/ou',
  jdpBpmApiContext: 'http://xxxx/bpm',
}
config-micro-app.js:
window.microApp = [
  {
    name: 'river-micro-app',
    entries: {
      dev: '//localhost:7081/',
      product: '//192.xxxx/xxxx-app/',
    },
    container: '#micro-app',
    activeRule: '#/layout',
  },
];
libs / config-webpack.js 依赖包获取地址:
UNPKG - vueThe CDN for vue https://unpkg.com/browse/vue@3.2.22/dist/
2.3 添加微应用配置
2.3.1 同步获取在线文件(require-from-url)
由于 config-webpack.js 在主应用里,所以无法直接使用 require() 引入
微应用中采用 require-from-url 第三方依赖,实现同步获取在线文件(从节点中的URL加载模块)
 https://www.npmjs.com/package/require-from-url
npm install require-from-url -save-dev
官网示例:
var requireFromUrl = require('require-from-url/sync');
var HelloWorld = requireFromUrl("https://nodeway.org/HelloWorld.js");
var api = new HelloWorld;
api.on('data', console.log);
2.3.2 读取线上 Webpack 配置文件
在 vue.config.js 中,添加如下代码:
// 同步获取在线JS
const requireFromUrl = require('require-from-url/sync');

// 微应用 - 读取线上 Webpack 配置文件(CDN 地址配置、忽略打包文件配置)
const webpackOnline = 'http://localhost:xxxx/global/config/config-webpack.js';
const { cdn, externals } = requireFromUrl(webpackOnline);
2.2.3 生成一个 HTML5 文件(html-webpack-plugin)
 https://webpack.docschina.org/plugins/html-webpack-plugin/
npm install --save-dev html-webpack-plugin
官网示例:
在 webpack 配置文件中添加如下代码,使用 htmlWebpackPlugin
const HtmlWebpackPlugin = require('html-webpack-plugin');
const path = require('path');

module.exports = {
  entry: 'index.js',
  output: {
    path: path.resolve(__dirname, './dist'),
    filename: 'index_bundle.js',
  },
  plugins: [new HtmlWebpackPlugin()],
};
这将会生成一个包含以下内容的 dist/index.html (HTML5)文件:
<!DOCTYPE html>
<html>
  <head>
    <meta charset="UTF-8" />
    <title>webpack App</title>
  </head>
  <body>
    // 在 body 中使用 script 标签引入你所有 webpack 生成的 bundle
    <script src="index_bundle.js"></script>
  </body>
</html>
2.3.4 修改 vue.config.js
- 增加打包忽略 CDN 依赖文件的配置代码
- 把 CDN 链接,注入到 htmlWebpackPlugin 里(htmlWebpackPlugin 主要是生成 html 的,在 html 中可以拿到它的值)
// 同步获取在线JS
const requireFromUrl = require('require-from-url/sync');
const { name } = require('./package');

// 微应用 - 读取线上的 Webpack 配置文件(CDN 地址配置、忽略打包文件配置)
const webpackOnline = 'http://localhost:8083/global/config/config-webpack.js';
const { cdn, externals } = requireFromUrl(webpackOnline);

// 判断是否是生产环境
const isProd = process.env.NODE_ENV === 'production';

// 静态资源的公共地址,部署到生产环境时,按需修改前项为项目名称(其中name为项目名称)
const publicPath = isProd
                   ? `http://localhost:9160/${name}/`
                   : 'http://localhost:8081';

module.exports = {
  devServer: {
    port: 8081,
    headers: {
      'Access-Control-Allow-Origin': '*',
    },
  },
  publicPath,
  // 自定义 Webpack 配置
  configureWebpack: (config) => {
    // 生产环境
    if (isProd) {
      // 去除 console
      Object.assign(
        config.optimization.minimizer[0].options.minimizer.options.compress, {
          drop_console: true,
        },
      );
    }

    return {
      externals, // 打包时忽略这些依赖
      output: {
        library: `${name}-[name]`,
        libraryTarget: 'umd', // 把子应用打包成 umd
      },
    };
  },

  chainWebpack: (config) => {
    config.plugin('html').tap((args) => {
      // 在 html 中,注入 CDN 链接
      args[0].cdn = cdn;
      return args;
    });
  },
};
2.3.5 修改微应用 public > index.html
把 CDN 链接,动态添加到 public/index.html 中去:在 head 结束标签前 添加以下代码:
<!DOCTYPE html>
<html>
  <head>
    ...
    <!-- 使用 CDN 的 CSS、JS 文件 -->
    <% for (var i in htmlWebpackPlugin.options.cdn && htmlWebpackPlugin.options.cdn.css) { %>
      <link href="<%= htmlWebpackPlugin.options.cdn.css[i] %>" ignore rel="stylesheet">
    <% } %>
    <% for (var i in htmlWebpackPlugin.options.cdn && htmlWebpackPlugin.options.cdn.js) { %>
      <script src="<%= htmlWebpackPlugin.options.cdn.js[i] %>"></script>
    <% } %>
  </head>
</html>
2.4 添加主应用配置
2.4.1 修改 vue.config.js
由于 config-webpack.js 在主应用里,所以可以直接使用 require() 引入,不需要第三方依赖
// 主应用 - 读取本地的 Webpack 配置文件(CDN 地址配置、忽略打包文件配置)
const { cdn, externals } = require('./public/global/config/config-webpack');- 增加打包忽略 CDN 依赖文件的配置代码
- 把 CDN 链接,注入到 htmlWebpackPlugin 里(htmlWebpackPlugin 主要是生成 html 的,在 html 中可以拿到它的值)
const { name } = require('./package');

// 主应用 - 读取本地的 Webpack 配置文件(CDN 地址配置、忽略打包文件配置)
const { externals, cdn } = require('./public/global/config/config-webpack');

// 判断是否是生产环境
const isProd = process.env.NODE_ENV === 'production';

// 静态资源的公共地址,部署到生产环境时,按需修改前项为项目名称(其中name为项目名称)
const publicPath = isProd ? `/${name}/` : '/';

module.exports = {
  devServer: {
    port: 8081,
  },
  publicPath,

  // 自定义 Webpack 配置
  configureWebpack: (config) => {
    // 生产环境
    if (isProd) {
      // 去除 console
      Object.assign(
        config.optimization.minimizer[0].options.minimizer.options.compress, {
          drop_console: true,
        },
      );
    }

    return {
      externals, // 打包时忽略这些依赖
    };
  },

  chainWebpack: (config) => {
    config.plugin('html').tap((args) => {
      // 在 html 中,注入 CDN 链接
      args[0].cdn = cdn;
      return args;
    });
  },
};
2.4.2 修改主应用 public > index.html
把 CDN 链接,动态添加到 public/index.html 中去:在 head 结束标签前 添加以下代码:
<!DOCTYPE html>
<html>
  <head>
    ...
    <!-- 使用 CDN 的 CSS、JS 文件 -->
    <% for (var i in htmlWebpackPlugin.options.cdn && htmlWebpackPlugin.options.cdn.css) { %>
      <link href="<%= htmlWebpackPlugin.options.cdn.css[i] %>" ignore rel="stylesheet">
    <% } %>
    <% for (var i in htmlWebpackPlugin.options.cdn && htmlWebpackPlugin.options.cdn.js) { %>
      <script src="<%= htmlWebpackPlugin.options.cdn.js[i] %>"></script>
    <% } %>
  </head>
</html>


 2712
2712

 被折叠的 条评论
为什么被折叠?
被折叠的 条评论
为什么被折叠?
 到【灌水乐园】发言


