


上篇:LNMP环境部署WordPress——使用源码包安装方式部署环境-CSDN博客
目录
一.前提准备
本次实验部署基于上篇的源码部署的环境,上篇搭建拉博客项目,本文描述更换禅道项目。
禅道是一款国产开源项目管理软件,它的功能包含产品管理、项目管理、质量管理、文档管理、组织管理和事务管理等。作为专业的研发项目管理软件,功能覆盖了研发项目管理的整体核心流程。
1. 名词区别
在官网的一些软件包版本时,常见的尾缀单词的所代表意思如下:
-
LTS:Long-Term Support(长期支持)。这种版本通常会获得更长时间的技术支持和更新,适合那些希望在较长时间内维护和使用稳定版本的用户。
-
RC:Release Candidate(发布候选版)。这种版本是在正式发布之前的最终测试阶段,通常用于征求用户反馈和进行最后的调整。
-
Beta:Beta版。这种版本是在软件开发过程中的测试阶段,通常包含了新功能和改进,但可能存在一些未解决的问题。
-
Alpha:Alpha版。这是开发初期的版本,通常仅用于内部测试或限定的测试群体中,可能存在较多的问题和缺陷。
-
Stable:稳定版)通常表示这是一个已经经过充分测试,没有明显 bug 或重大问题的版本。这是最适合普通用户使用的版本,因为它们提供了可靠的功能和性能,可以用于日常使用而不太容易出现意外情况。
2. 下载项目软件包
官网链接:禅道下载 - 禅道开源项目管理软件
官方手册:选择适合您的安装方法 - 禅道使用手册 - 禅道开源项目管理软件
我下载好的包链接:https://pan.baidu.com/s/1PAjaDHnEAfAKuw4VYDAitA?pwd=df3l
提取码:df3l
使用链接下载:
[root@localhost ~]# wget -P /opt https://www.zentao.net/dl/zentao/20.0/ZenTaoPMS-20.0-zbox_amd64.tar.gz
以上途径选其一即可.
3. 上传项目源码到虚拟机并解压
[root@localhost ~]# cd /opt

#下载至虚拟机后解压
[root@localhost opt]# tar -zxvf ZenTaoPMS-20.0-zbox_amd64.tar.gz
注:Linux一键安装包必须直接解压到/opt目录下。(援引官方)
二.安装Apache
(本实验基于上篇文章,因此避免80端口冲突)
1. 环境清理
[root@localhost ~]# yum -y remove httpd
2.关闭Nginx
[root@localhost ~]# systemctl stop nginx
[root@localhost ~]# systemctl status nginx
● nginx.service - nginx
   Loaded: loaded (/usr/lib/systemd/system/nginx.service; enabled; vendor preset: disabled)
   Active: inactive (dead) since 六 2024-05-11 20:44:00 CST; 6s ago
  Process: 47401 ExecStop=/usr/sbin/nginx -s quit (code=exited, status=0/SUCCESS)
  Process: 46671 ExecStart=/usr/sbin/nginx (code=exited, status=0/SUCCESS)
 Main PID: 46672 (code=exited, status=0/SUCCESS)

5月 11 16:53:21 localhost.localdomain systemd[1]: Starting nginx...
5月 11 16:53:21 localhost.localdomain nginx[46671]: nginx: [warn] conflicting server name "localhost" on 0.0.0.0:80, ignored
5月 11 16:53:21 localhost.localdomain systemd[1]: Started nginx.
5月 11 20:44:00 localhost.localdomain systemd[1]: Stopping nginx...
5月 11 20:44:00 localhost.localdomain nginx[47401]: nginx: [warn] conflicting server name "localhost" on 0.0.0.0:80, ignored
5月 11 20:44:00 localhost.localdomain systemd[1]: Stopped nginx.

#下载常用工具包
[root@localhost ~]# yum install -y net-tools
[root@localhost ~]# netstat -ntlp | grep nginx
#这里没有提示代表成功停止拉nginx
3. 下载Apache
本文使用版本2.4.59
[root@localhost ~]# wget https://downloads.apache.org/httpd/httpd-2.4.59.tar.gz
4. 下载APR组件
[root@localhost ~]# wget http://archive.apache.org/dist/apr/apr-1.5.0.tar.gz
[root@localhost ~]# wget http://archive.apache.org/dist/apr/apr-util-1.5.4.tar.gz
[root@localhost ~]# ll
总用量 11536
-rw-r--r--  1 root root 1016391 11月 17 2013 apr-1.5.0.tar.gz
-rw-r--r--  1 root root  874044 9月  20 2014 apr-util-1.5.4.tar.gz
-rw-r--r--  1 root root 9843252 4月   4 21:33 httpd-2.4.59.tar.gz

#可以看到此处我下载到root目录下的apache的源码包和apr组件的包
4.1 安装apr
#解压apr
[root@localhost ~]# tar -xf apr-1.5.0.tar.gz
#进入目录
[root@localhost ~]# cd apr-1.5.0
#配置编译apr,生成Makefile,一般常用的有 --prefix=PREFIX 这个选项的意思是定义软件包安装到哪里
[root@localhost apr-1.5.0]# ./configure --prefix=/usr/local/src/apr

#此处等待几秒即可完成

#编译安装
[root@localhost apr-1.5.0]# make && make install

#这里也是等待几秒就可以完成
#进入apr的路径进行查看,默认情况下,系统搜索库文件的路径只有/lib,/usr/lib
#我们需要进行修改在/etc/ld.so.conf.d/中创建以.conf为后缀名的文件
#而后把要增添的路径直接写至此文件中。此时库文件增添的搜索路径重启后有效,若要使用增添的路径立即生效则要使用ldconfig命令
[root@localhost apr-1.5.0]# cd /usr/local/src/apr/
[root@localhost apr]# ll
总用量 0
drwxr-xr-x 2 root root 26 5月 11 21:26 bin
drwxr-xr-x 2 root root 108 5月 11 21:26 build-1
drwxr-xr-x 3 root root 19 5月 11 21:26 include
drwxr-xr-x 3 root root 140 5月 11 21:26 lib
[root@localhost apr]# cd /etc/ld.so.conf.d/
[root@localhost ld.so.conf.d]# echo /usr/local/src/apr/lib/ >apr.conf
[root@localhost ld.so.conf.d]# cd - #切换回上一个工作目录
/usr/local/src/apr
#使命令生效
[root@localhost apr]# ldconfig
#将头文件软链接到/usr/include目录下
[root@localhost apr]# ln -s /usr/local/src/apr/include/ /usr/include/apr
[root@localhost apr]# ll /usr/include/apr
lrwxrwxrwx 1 root root 27 5月 11 21:31 /usr/include/apr -> /usr/local/src/apr/include/4.2 安装apr-util组件
#返回下载存放的目录
[root@localhost apr]# cd ~
#下载依赖
[root@localhost ~]# yum install dnf -y
[root@localhost ~]# dnf -y install expat-devel libxml2-devel pcre-devel
#解压apr-util
[root@localhost ~]# tar -xf apr-util-1.5.4.tar.gz
#进入解压目录
[root@localhost ~]# cd apr-util-1.5.4
#编译配置
[root@localhost apr-util-1.5.4]# ./configure --prefix=/usr/local/src/apr-util --with-apr=/usr/local/src/apr

#此处等待几秒即可,生成Makefile文件,需要伴随着上一个指定的依赖

[root@localhost apr-util-1.5.4]# make && make install
#等待几秒即可完成
#切换到apr-util安装目录进行查看,默认情况下,系统搜索库文件的路径只有/lib,/usr/lib
#我们需要进行修改在/etc/ld.so.conf.d/中创建以.conf为后缀名的文件
#而后把要增添的路径直接写至此文件中。此时库文件增添的搜索路径重启后有效,若要使用增添的路径立即生效则要使用ldconfig命令
[root@localhost apr-util-1.5.4]# cd /usr/local/src/apr-util/
[root@localhost apr-util]# ll
总用量 0
drwxr-xr-x 2 root root 26 5月 11 21:46 bin
drwxr-xr-x 3 root root 19 5月 11 21:46 include
drwxr-xr-x 3 root root 164 5月 11 21:46 lib
[root@localhost apr-util]# cd /etc/ld.so.conf.d/
[root@localhost ld.so.conf.d]# echo /usr/local/src/apr-util/ >apr-util.conf
[root@localhost ld.so.conf.d]# cd - #切换回上一个工作目录
/usr/local/src/apr-util
#使其生效
[root@localhost apr-util]# ldconfig
#将头文件软链接到/usr/include目录下
[root@localhost apr-util]# ln -s /usr/local/src/apr-util/include/ /usr/include/apr-util
[root@localhost apr-util]# ll /usr/include/apr-util
lrwxrwxrwx 1 root root 32 5月 11 21:50 /usr/include/apr-util -> /usr/local/src/apr-util/include/
5. 安装httpd
#回到源码包目录
[root@localhost ~]# cd
#解压
[root@localhost ~]# tar -xf httpd-2.4.59.tar.gz
#进入解压后目录
[root@localhost ~]# cd httpd-2.4.59

#配置编译httpd,生成make文件
[root@localhost httpd-2.4.59]# ./configure --prefix=/usr/local/src/httpd --with-apr=/usr/local/src/apr --with-apr-util=/usr/local/src/apr-util

#此处等待几秒编译即可

[root@localhost httpd-2.4.59]# make && make install

#此处等待15-30秒左右
#进入安装目录
[root@localhost httpd-2.4.59]# cd /usr/local/src/httpd/
[root@localhost httpd]# ls
bin build cgi-bin conf error htdocs icons include logs man manual modules
#将头文件软链接到/usr/include目录下
[root@localhost httpd]# ln -s /usr/local/src/httpd/include/ /usr/include/httpd
[root@localhost httpd]# ll /usr/include/httpd
lrwxrwxrwx 1 root root 29 5月 11 22:03 /usr/include/httpd -> /usr/local/src/httpd/include/
#配置httpd的全局环境变量,并生成效果
[root@lnh httpd]# echo "export PATH=$PATH:/usr/local/src/httpd/bin" > /etc/profile.d/httpd.sh
[root@lnh httpd]# source /etc/profile.d/httpd.sh
[root@localhost httpd]# which httpd
/usr/local/src/httpd/bin/httpd
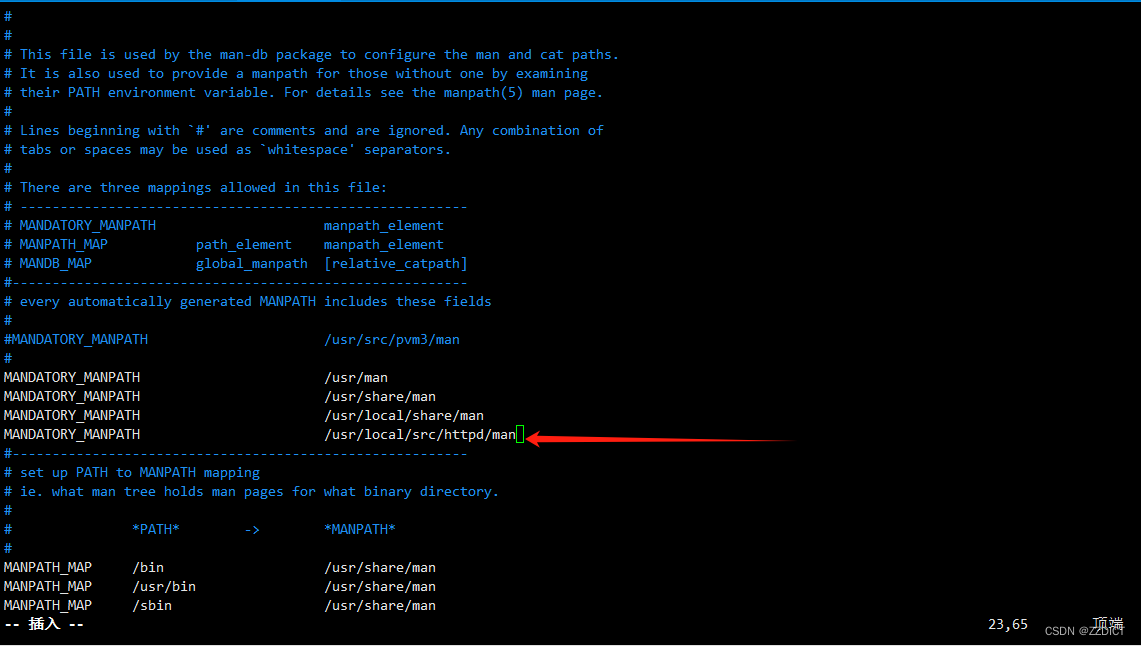
[root@localhost httpd]# vim /etc/man_db.conf +23
#在行添加上如下内容,具体可看下图
MANDATORY_MANPATH /usr/local/src/httpd/man
#开启服务
[root@localhost httpd]# httpd
AH00558: httpd: Could not reliably determine the server's fully qualified domain name, using localhost.localdomain. Set the 'ServerName' directive globally to suppress this message
httpd (pid 75183) already running

#查看端口
[root@localhost httpd]# netstat -antp | grep httpd
tcp6       0      0 :::80                   :::*                    LISTEN      75183/httpd

[root@localhost httpd]# ss -antl
State       Recv-Q Send-Q                         Local Address:Port                                        Peer Address:Port
LISTEN      0      128                                127.0.0.1:9000                                                   *:*
LISTEN      0      128                                        *:22                                                     *:*
LISTEN      0      80                                      [::]:3306                                                [::]:*
LISTEN      0      128                                     [::]:80                                                  [::]:*
LISTEN      0      128                                     [::]:22                                                  [::]:*
6. 将httpd服务加入systemd
[root@localhost httpd]# cd /usr/lib/systemd/system
[root@localhost system]# cp sshd.service httpd.service
[root@localhost system]# vim httpd.service

#这个文件里如果有,就删除全部,并新增如下内容
[Unit]
Description=httpd server daemon   #服务
After=network.target sshd-keygen.target

[Service]
Type=forking
ExecStart=/usr/local/src/httpd/bin/httpd  #服务安装的地方 开启
ExecStop=/usr/local/src/httpd/bin/httpd  -s stop  #停止
ExecReload=/bin/kill -HUP $MAINPID    #重新加载并发出信号(对pid对组程序的进程号)可留可删

[Install]
WantedBy=multi-user.target

#重新加载一下并生效
[root@localhost system]# systemctl daemon-reload
#查看一下这个服务状态
[root@localhost system]# systemctl status httpd.service
● httpd.service - httpd server daemon
   Loaded: loaded (/usr/lib/systemd/system/httpd.service; disabled; vendor preset: disabled)
   Active: inactive (dead)

#这里看到80端口在使用
[root@localhost system]# ss -antl
State       Recv-Q Send-Q                         Local Address:Port                                        Peer Address:Port
LISTEN      0      128                                127.0.0.1:9000                                                   *:*
LISTEN      0      128                                127.0.0.1:3306                                                   *:*
LISTEN      0      128                                        *:22                                                     *:*
LISTEN      0      128                                     [::]:80                                                  [::]:*
LISTEN      0      128                                     [::]:22                                                  [::]:*

#这里要确保80端口关闭,这里httpd服务没开,80端口还被监听着,因此我要关闭它,保证后续命令不会出现错误
#下载并确保lsof命令可以用
[root@localhost system]# yum -y install lsof

#查看80端口被哪些进程占用
[root@localhost system]# lsof -i :80
COMMAND   PID   USER   FD   TYPE DEVICE SIZE/OFF NODE NAME
httpd   75184 daemon    4u  IPv6 143438      0t0  TCP *:http (LISTEN)
httpd   75185 daemon    4u  IPv6 143438      0t0  TCP *:http (LISTEN)
httpd   75186 daemon    4u  IPv6 143438      0t0  TCP *:http (LISTEN)

#强制杀死这些进程
[root@localhost system]# kill -9 75184 75185 75186
#再次查看是否完全关闭
[root@localhost system]# lsof -i :80
[root@localhost system]# ss -antl
State       Recv-Q Send-Q                         Local Address:Port                                        Peer Address:Port
LISTEN      0      128                                127.0.0.1:9000                                                   *:*
LISTEN      0      128                                        *:22                                                     *:*
LISTEN      0      128                                     [::]:22                                                  [::]:*

#经确认,80端口无占用
三.启动禅道
#确保关闭mysql和apache
[root@localhost ~]# systemctl stop mysqld
[root@localhost ~]# systemctl stop httpd
启动
[root@localhost ~]# /opt/zbox/zbox start
23:40:16.02 INFO ==> Starting service with Apache port=80, MySQL port=3306...
23:40:16.03 INFO ==> Starting mysql service...
23:40:17.15 INFO ==> Starting apache service...
23:40:17.20 INFO ==> Starting xxd service...
23:40:17.21 INFO ==> Starting roadrunner service...
=============================================================================
Service Port Status Version Comment
=============================================================================
Apache 80 running 2.4.59
PHP - running 8.1.28 prefork
MySQL 3306 running 10.6.16 MariaDB
XXD 11443 11444 running 8.1
Roadrunner - running 2023.3.12 @zentao
=============================================================================
Application Version
=============================================================================
zentao 20.0
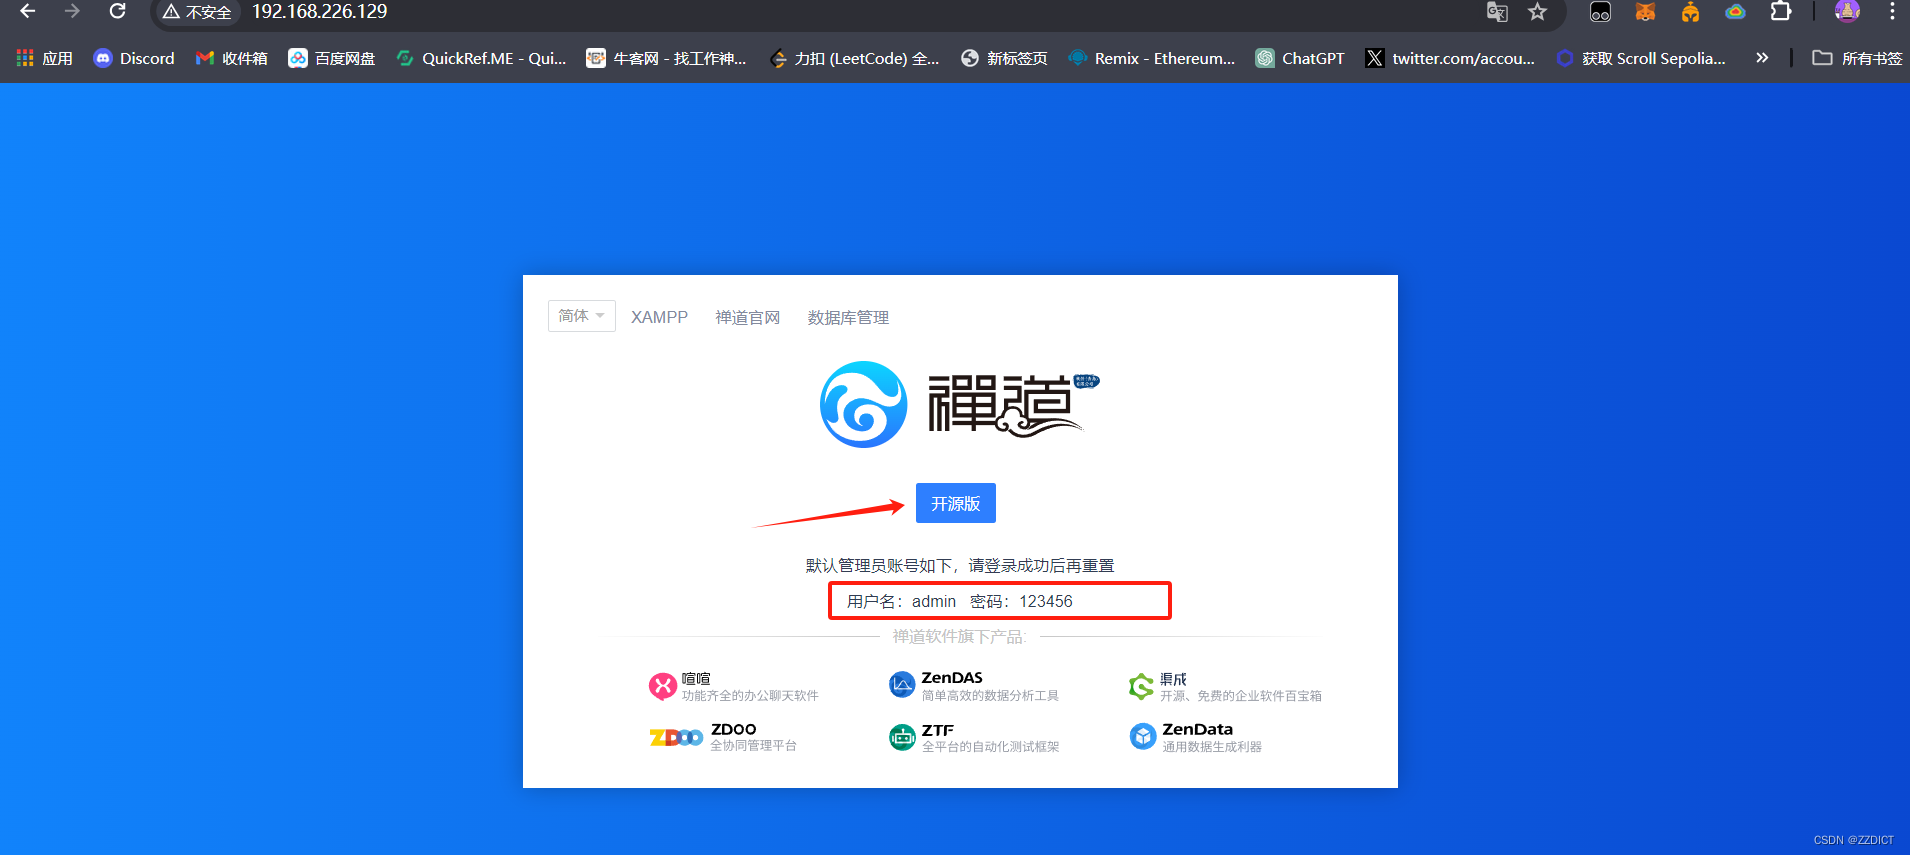
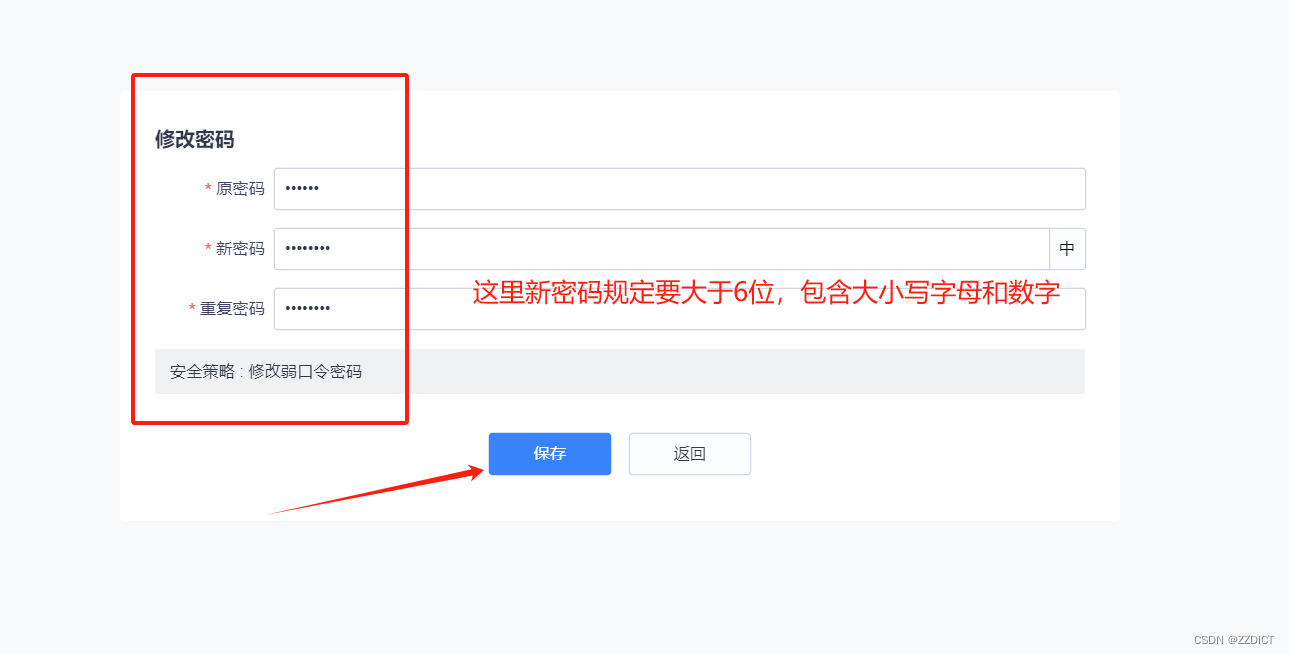
adminer 4.8.1 此时在浏览器输入IP即可访问到 , 点击“开源版”,进入到禅道登录界面, 输入默认用户名admin,密码123456,进入后修改密码。


到此,就正式部署好拉,可以开始研究一下禅道项目了!


 91
91


 被折叠的 条评论
为什么被折叠?
被折叠的 条评论
为什么被折叠?
 到【灌水乐园】发言


