


目录
一. 环境准备
项目官网:RuoYi-Vue: 🎉 基于SpringBoot,Spring Security,JWT,Vue & Element 的前后端分离权限管理系统,同时提供了 Vue3 的版本
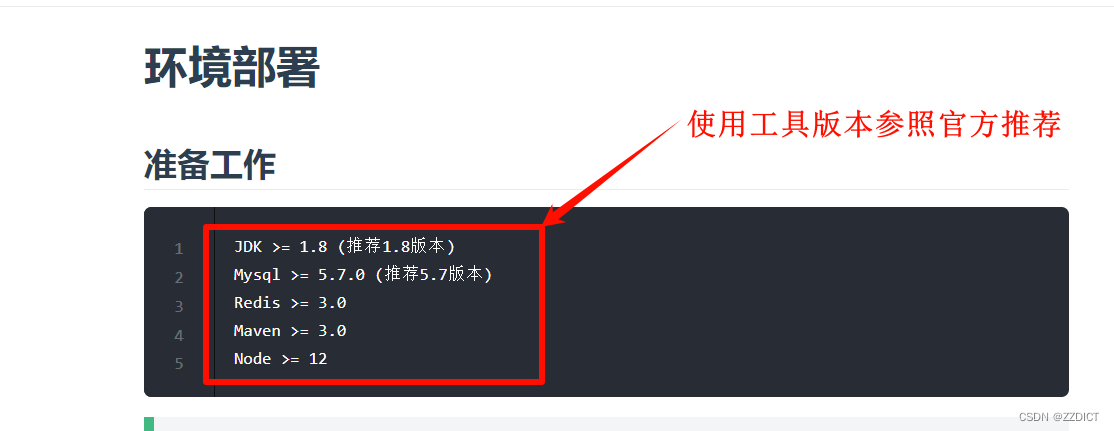
官方文档:环境部署 | RuoYi
(所有服务器关闭selinux和防火墙,进行时间同步)
| 服务器功能 | 主机IP | 主机名 | 服务名称 | 配置 | 系统 |
|---|---|---|---|---|---|
| 前端服务器 | 192.168.226.21 | Nginx | Nginx | 2C4G | Rocky_linux9.4 |
| 后端服务器+代码打包 | 192.168.226.22 | Java | Java、Maven、Nodejs、Git | 2C4G | Rocky_linux9.4 |
| 数据库/缓存 | 192.168.226.23 | DB | MySQL、Redis | 2C4G | Rocky_linux9.4 |
修改主机名以区分
#192.168.226.21
[root@localhost ~]# hostnamectl set-hostname Nginx   #修改完重新连接即可或使用bash命令

#192.168.226.22
[root@localhost ~]# hostnamectl set-hostname Java    #修改完重新连接即可或使用bash命令

#192.168.226.23
[root@localhost ~]# hostnamectl set-hostname DB      #修改完重新连接即可或使用bash命令
初始化配置脚本,不想手动设置的可以跑脚本执行,其中需要你输入的是固定的IP,网关,DNS参数。输入格式见图:
#!/bin/bash
# **********************************************************
# * File Name     : rocky_linux
# * Author        : Elk
# * Email         : elk_deer@foxmail.com
# * Create time   : 2024-06-15 20:12
# * Description   : 不合理设置喊我,持续更新维护中......
# **********************************************************
# 检查是否以 root 用户运行脚本
if [ "$(id -u)" -ne 0 ]; then
  tput bold
  tput setaf 1
  tput setaf 3
  echo "请以 root 用户运行此脚本。"
  tput sgr0
  exit 1
fi

# 启用网络接口
enable_network_interface() {
  local interface=$1
  if ip link set "$interface" up; then
    tput bold
	tput setaf 2
    echo "网络接口 $interface 已启用。"
	tput sgr0
  else
    tput bold
	tput setaf 1
    echo "无法启用网络接口 $interface,请检查接口名称。"
	tput sgr0
    exit 1
  fi
}

# 配置 YUM 源
configure_yum_repos() {
  sed -e 's|^mirrorlist=|#mirrorlist=|g' \
      -e 's|^#baseurl=http://dl.rockylinux.org/$contentdir|baseurl=https://mirrors.aliyun.com/rockylinux|g' \
      -i.bak \
      /etc/yum.repos.d/Rocky-*.repo
  tput bold
  tput setaf 2
  echo "YUM 源配置已更新。"
  tput sgr0
  dnf makecache
  yum -y install epel-release
}

# 停止和禁用防火墙,禁用 SELinux
configure_security() {
  systemctl stop firewalld && systemctl disable firewalld
  firewall-cmd --reload
  tput bold
  tput setaf 2
  echo "防火墙已停止并禁用。"
  tput sgr0
  sed -i 's/SELINUX=enforcing/SELINUX=disabled/' /etc/selinux/config
  tput bold
  tput setaf 2
  echo "SELinux 已禁用。"
  tput sgr0
}

# 检查并安装chrony,进行时间同步
function install_and_sync_time_with_chrony() {
    # 检查是否已经安装chrony
    if ! command -v chronyd &>/dev/null; then
        sudo dnf install -y chrony &> /dev/null
        # 检查安装是否成功
        if ! command -v chronyd &>/dev/null; then
            tput bold
            tput setaf 1
            echo "安装 chrony 失败。请检查您的包管理器并重试。"
            tput sgr0
            exit 1
        else
            tput bold
            tput setaf 2
            echo "chrony 安装成功。"
            tput sgr0
        fi
    else
        tput bold
        tput setaf 2
        echo "chrony 已安装。"
        tput sgr0
    fi

    # 确保安装其他必要的软件包
    sudo dnf install -y vim wget unzip tar lrzsz &> /dev/null
    if [ $? -eq 0 ]; then
        tput bold
        tput setaf 2
        echo "其他软件包安装成功。"
        tput sgr0
    else
        tput bold
        tput setaf 1
        echo "安装其他软件包失败。"
        tput sgr0
        exit 1
    fi


    # 启动 chronyd 服务并启用开机启动
    if sudo systemctl start chronyd && sudo systemctl enable chronyd; then
        tput bold
        tput setaf 2
		echo "chronyd 服务已成功启动并设置为开机启动。"
		tput sgr0
    else
		tput bold
		tput setaf 1
        echo "启动或启用 chronyd 服务失败。请检查 systemctl 状态。"
		tput sgr0
        exit 1
    fi

    # 强制同步时间
    sudo chronyc -a makestep
	tput bold
    tput setaf 2
    echo "时间同步已成功完成。"
	tput sgr0
}


# 自定义 IP 地址
configure_ip_address() {
  tput bold
  tput blink
  tput setaf 1
  read -p "******输入你要设置的IP >>>  : " ip_a
  tput sgr0
  tput bold
  tput blink
  tput setaf 6
  read -p "******输入你要设置的网关>>> : " gat
  tput sgr0
  tput bold
  tput blink
  tput setaf 3
  read -p "******输入你要设置的DNS>>>  : " dnns
  tput sgr0

  # 判断当前连接的名字
  connection_name=$(nmcli -t -f NAME,DEVICE con show --active | grep -E "ens33|Wired connection 1" | cut -d: -f1)

  if [[ "$connection_name" == "ens33" ]]; then
    # 针对 ens33 连接进行配置
    nmcli con mod "ens33" ipv4.method manual ipv4.addresses "${ip_a}/24" ipv4.gateway "${gat}" ipv4.dns "${dnns}" autoconnect yes
  elif [[ "$connection_name" == "Wired connection 1" ]]; then
    # 针对 Wired connection 1 连接进行配置
    nmcli con mod "Wired connection 1" ipv4.method manual ipv4.addresses "${ip_a}/24" ipv4.gateway "${gat}" ipv4.dns "${dnns}" autoconnect yes
  else
	tput bold
	tput setaf 1
    echo "无法识别的网络连接名称:$connection_name"
	tput sgr0
    return 1
  fi

  tput setab 5
  tput setaf 15
  tput bold
  echo "IP 地址配置成功,即将重启系统。"
  tput sgr0

  nmcli con up "$connection_name"
  reboot
}


# 主函数
main() {
  local interface="ens33"
  enable_network_interface "$interface"
  configure_yum_repos
  configure_security
  install_and_sync_time_with_chrony
  configure_ip_address "$interface"
}

# 调用主函数
main
二. 安装Nginx
#配置Nginxyum源
[root@Nginx ~]# cat > /etc/yum.repos.d/nginx.repo <<EOF
[nginx-stable]
name=nginx stable repo
baseurl=http://nginx.org/packages/centos/\$releasever/\$basearch/
gpgcheck=1
enabled=1
gpgkey=https://nginx.org/keys/nginx_signing.key
module_hotfixes=true

[nginx-mainline]
name=nginx mainline repo
baseurl=http://nginx.org/packages/mainline/centos/\$releasever/\$basearch/
gpgcheck=1
enabled=0
gpgkey=https://nginx.org/keys/nginx_signing.key
module_hotfixes=true
EOF


#安装Nginx
[root@Nginx ~]# yum install -y nginx

#启动Nginx
[root@Nginx ~]# systemctl enable --now nginx
三. 安装Java
# 上传java包到服务器,这里我上传的jdk-8
[root@Java ~]# ll
total 185296
-rw-------. 1 root root       815 Jun  6 14:00 anaconda-ks.cfg
-rw-r--r--  1 root root 189736377 Jun 25 23:52 jdk-8u151-linux-x64.tar.gz

# 安装java环境
[root@Java ~]# tar -xf jdk-8u151-linux-x64.tar.gz -C /usr/local/
[root@Java ~]# mv /usr/local/jdk1.8.0_151/ /usr/local/java
[root@Java ~]# vim /etc/profile.d/java.sh
JAVA_HOME=/usr/local/java
PATH=$PATH:$JAVA_HOME/bin

[root@Java ~]# source /etc/profile.d/java.sh
[root@Java ~]# java -version
java version "1.8.0_151"
Java(TM) SE Runtime Environment (build 1.8.0_151-b12)
Java HotSpot(TM) 64-Bit Server VM (build 25.151-b12, mixed mode)
四. 安装MySQL、Redis
# 安装mysql8.0
[root@DB ~]# yum install -y mysql-server
[root@DB ~]# systemctl enable --now mysqld

[root@DB ~]# mysqladmin -uroot password '1234'
#这个系统中下载mysql是默认没密码的,若此方法没成功修改,就登录mysql使用命令修改ALTER USER 'root'@'localhost' IDENTIFIED BY '1234';
[root@DB ~]# mysql -uroot -p1234
mysql: [Warning] Using a password on the command line interface can be insecure.
Welcome to the MySQL monitor.  Commands end with ; or \g.
Your MySQL connection id is 9
Server version: 8.0.36 Source distribution

Copyright (c) 2000, 2024, Oracle and/or its affiliates.

Oracle is a registered trademark of Oracle Corporation and/or its
affiliates. Other names may be trademarks of their respective
owners.

Type 'help;' or '\h' for help. Type '\c' to clear the current input statement.

#创建库
mysql> create database ruoyi character set utf8 collate  utf8_general_ci;
Query OK, 1 row affected, 2 warnings (0.00 sec)

#创建远程用户
mysql> create user 'root'@'%' IDENTIFIED BY '1234';
Query OK, 0 rows affected (0.01 sec)

#给远程用户授权
mysql> GRANT all privileges ON *.* TO "root"@"%";
Query OK, 0 rows affected (0.00 sec)

#刷新权限
mysql> flush privileges;
Query OK, 0 rows affected (0.00 sec)

mysql> exit
Bye


[root@DB ~]# wget http://download.redis.io/releases/redis-4.0.9.tar.gz
[root@DB ~]# tar -xf redis-4.0.9.tar.gz -C /usr/local/
[root@DB ~]# mv /usr/local/redis-4.0.9/ /usr/local/redis
[root@DB ~]# yum install -y gcc make
[root@DB ~]# cd /usr/local/redis/
[root@DB redis]# make
[root@DB redis]# vim redis.conf   #修改如下参数
bind 0.0.0.0
port 6379
daemonize yes
logfile "/var/log/redis.log"       #定义log文件
dir /usr/local/redis/data          #本地数据库存放持久化数据的目录该目录


[root@DB redis]# mkdir data
[root@DB redis]# ./src/redis-server redis.conf &
[root@DB redis]# ss -tnlp
State          Recv-Q         Send-Q                 Local Address:Port                  Peer Address:Port        Process
LISTEN         0              128                          0.0.0.0:22                         0.0.0.0:*            users:(("sshd",pid=854,fd=3))
LISTEN         0              511                          0.0.0.0:6379                       0.0.0.0:*            users:(("redis-server",pid=6424,fd=6))
LISTEN         0              70                                 *:33060                            *:*            users:(("mysqld",pid=2964,fd=21))
LISTEN         0              128                             [::]:22                            [::]:*            users:(("sshd",pid=854,fd=4))
LISTEN         0              151                                *:3306                             *:*            users:(("mysqld",pid=2964,fd=24))
[1]+  Done                    ./src/redis-server redis.conf
五. 配置打包环境
1. 配置前端打包环境
[root@Java ~]# wget https://nodejs.org/dist/v12.18.4/node-v12.18.4-linux-x64.tar.xz
[root@Java ~]# tar -xf node-v12.18.4-linux-x64.tar.xz -C /usr/local/
[root@Java ~]# mv /usr/local/node-v12.18.4-linux-x64/ /usr/local/node
[root@Java ~]# vim /etc/profile.d/node.sh
[root@Java ~]# source /etc/profile.d/node.sh
[root@Java ~]# node -v
v12.18.4
2. 配置后端打包环境
[root@Java ~]# wget https://mirrors.tuna.tsinghua.edu.cn/apache/maven/maven-3/3.9.5/binaries/apache-maven-3.9.5-bin.tar.gz --no-check-certificate
[root@Java ~]# tar -xf apache-maven-3.9.5-bin.tar.gz -C /usr/local/
[root@Java ~]# mv /usr/local/apache-maven-3.9.5/ /usr/local/maven
[root@Java ~]# vim /etc/profile.d/mvn.sh
[root@Java ~]# source /etc/profile.d/mvn.sh
[root@Java ~]# mvn -version
Apache Maven 3.9.5 (57804ffe001d7215b5e7bcb531cf83df38f93546)
Maven home: /usr/local/maven
Java version: 1.8.0_151, vendor: Oracle Corporation, runtime: /usr/local/java/jre
Default locale: en, platform encoding: UTF-8
OS name: "linux", version: "5.14.0-427.13.1.el9_4.x86_64", arch: "amd64", family: "unix"
3. 获取代码
[root@Java ~]# yum install -y git
[root@Java ~]# git clone https://gitee.com/y_project/RuoYi-Vue.git
[root@Java ~]# ll
total 208796
drwxr-xr-x  14 root root      4096 Jun 29 09:52 RuoYi-Vue
-rw-------.  1 root root       815 Jun  6 14:00 anaconda-ks.cfg
-rw-r--r--   1 root root   9359994 Oct  3  2023 apache-maven-3.9.5-bin.tar.gz
-rw-r--r--   1 root root 189736377 Jun 25 23:52 jdk-8u151-linux-x64.tar.gz
-rw-r--r--   1 root root  14696128 Sep 15  2020 node-v12.18.4-linux-x64.tar.xz
4. 前端代码打包
[root@Java ~]# cd RuoYi-Vue/ruoyi-ui
#替换为国内的taobaoyuan
[root@Java ruoyi-ui]# npm install --registry=https://registry.npmmirror.com
[root@Java ruoyi-ui]# npm run build:prod

构建打包成功之后,会在根目录生成 dist 文件夹,里面就是构建打包好的文件,通常是 xxx.js 、xxx.css、index.html 等静态文件。

通常情况下 dist 文件夹的静态文件发布到你的 nginx 或者静态服务器即可,其中的 index.html 是后台服务的入口页面。
[root@Java ruoyi-ui]# ls
README.md  babel.config.js  bin  build  dist  node_modules  package-lock.json  package.json  public  src  vue.config.js
[root@Java ruoyi-ui]# cd dist/
[root@Java dist]# ls
favicon.ico  html  index.html  index.html.gz  robots.txt  static


# 将静态资源移动到其他位置,然后进行后端代码打包
[root@Java dist]# cd /root/RuoYi-Vue
[root@Java RuoYi-Vue]# mv ruoyi-ui/ /opt/
5. 后端项目打包
[root@Java dist]# cd /root/RuoYi-Vue
[root@Java RuoYi-Vue]# vim ruoyi-admin/src/main/resources/application.yml
# 修改redis配置信息
  redis:
    # 地址
    host: 192.168.226.23
    # 端口,默认为6379
    port: 6379
    # 数据库索引
    database: 0
    # 密码
    password:
    # 连接超时时间
    timeout: 10s
    lettuce:

[root@Java RuoYi-Vue]# vim ruoyi-admin/src/main/resources/application-druid.yml
## 注意数据库名字。。。。
### 修改数据库url,修改数据库密码
# 数据源配置
spring:
    datasource:
        type: com.alibaba.druid.pool.DruidDataSource
        driverClassName: com.mysql.cj.jdbc.Driver
        druid:
            # 主库数据源
            master:
                url: jdbc:mysql://192.168.226.23:3306/ruoyi?useUnicode=true&characterEncoding=utf8&zeroDateTimeBehavior=convertToNull&useSSL=true&serverTimezone=GMT%2B8
                username: root
                password: 1234


# 开始进行后端打包
[root@Java RuoYi-Vue]# mvn package
......
[INFO] Replacing main artifact with repackaged archive
[INFO] ------------------------------------------------------------------------
[INFO] Reactor Summary for ruoyi 3.8.7:
[INFO]
[INFO] ruoyi .............................................. SUCCESS [  0.003 s]
[INFO] ruoyi-common ....................................... SUCCESS [03:15 min]
[INFO] ruoyi-system ....................................... SUCCESS [  0.365 s]
[INFO] ruoyi-framework .................................... SUCCESS [ 28.358 s]
[INFO] ruoyi-quartz ....................................... SUCCESS [  2.765 s]
[INFO] ruoyi-generator .................................... SUCCESS [  2.231 s]
[INFO] ruoyi-admin ........................................ SUCCESS [01:38 min]
[INFO] ------------------------------------------------------------------------
[INFO] BUILD SUCCESS
[INFO] ------------------------------------------------------------------------
[INFO] Total time:  05:45 min
[INFO] Finished at: 2024-06-29T10:12:28+08:00
[INFO] ------------------------------------------------------------------------

[root@Java RuoYi-Vue]# ls ruoyi-admin/target/
classes  generated-sources  maven-archiver  maven-status  ruoyi-admin.jar  ruoyi-admin.jar.original
#其中ruoyi-admin.jar 放在后端服务器运行
六. 项目上线
1.前端项目上线
# 拷贝前端资源到前端服务器
[root@Java RuoYi-Vue]# cd /opt
[root@Java opt]# scp -r ruoyi-ui/ 192.168.226.21:/opt/

#前端项目上线,注意切换到Nginx主机
[root@Nginx ~]# rm -rf /usr/share/nginx/html/*
[root@Nginx ~]# cp -r /opt/ruoyi-ui/dist/* /usr/share/nginx/html/
[root@Nginx ~]# ls /usr/share/nginx/html/
favicon.ico  html  index.html  index.html.gz  robots.txt  static

[root@Nginx ~]# vim /etc/nginx/conf.d/default.conf   #将配文件内容全删除,使用下述内容,注意修改你自己的IP
upstream rs {
    server 192.168.226.22:8080;    #注意修改IP
}
server {
    listen       80;
    server_name  localhost;

    access_log  /var/log/nginx/host.access.log  main;

    location / {
        root   /usr/share/nginx/html;
        try_files $uri $uri/ /index.html;
        index  index.html index.htm;
    }

    location /prod-api/ {
      proxy_pass http://rs/;
      proxy_set_header Host $http_host;
      proxy_set_header X-Real-IP $remote_addr;
      proxy_set_header X-Forwarded-For $proxy_add_x_forwarded_for;
   }

    error_page   500 502 503 504  /50x.html;
    location = /50x.html {
        root   /usr/share/nginx/html;
    }
}

[root@Nginx ~]# systemctl restart nginx
#前端上线完成,但是由于后端还未上线,所以打开页面有报错,并且验证码无法显示 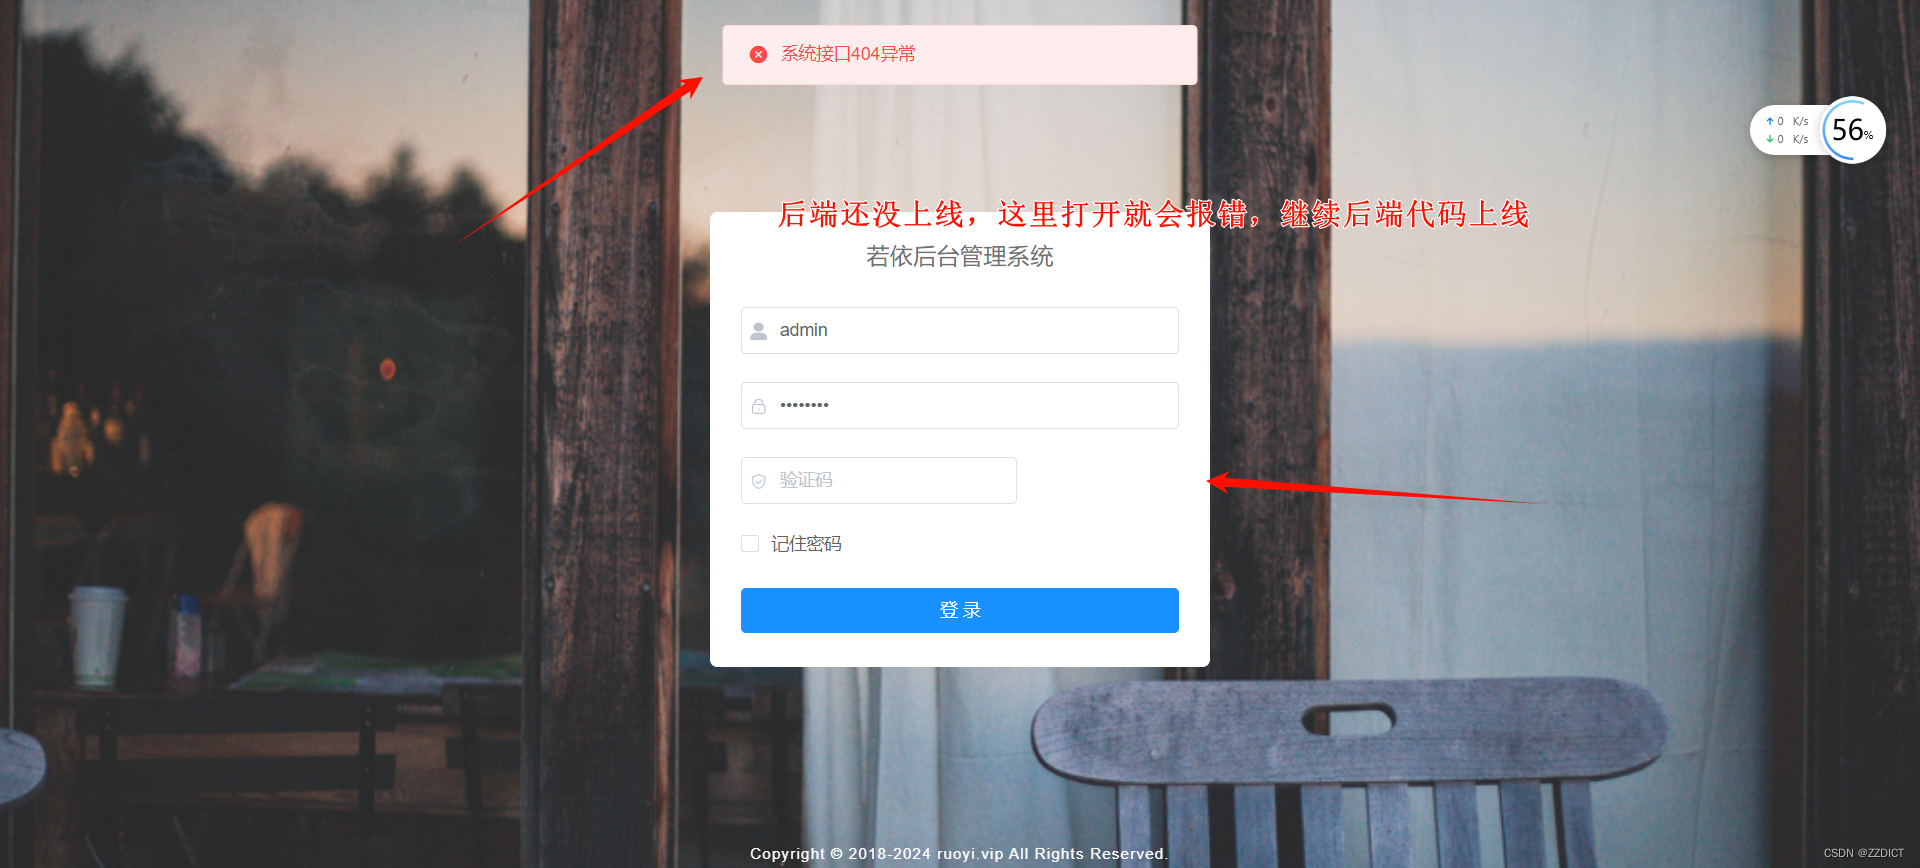
2. 后端项目上线
#注意切换到Java主机,将jar包放到后端服务器的/opt目录里
[root@Java opt]# cp ~/RuoYi-Vue/ruoyi-admin/target/ruoyi-admin.jar /opt/

#导入初始化数据,首先将初始化数据传到数据库服务器
[root@Java opt]# cd /root/RuoYi-Vue/sql
[root@Java sql]# ls
quartz.sql  ry_20240529.sql
[root@Java sql]# scp * 192.168.226.23:/opt/


#注意切换切换到DB主机,导入初始化数据
[root@DB redis]# mysql -uroot -p'1234' ruoyi < /opt/quartz.sql
mysql: [Warning] Using a password on the command line interface can be insecure.
[root@DB redis]# mysql -uroot -p'1234' ruoyi < /opt/ry_20240529.sql           #这里文件名注意修改,因为文件名的数字可能会变
mysql: [Warning] Using a password on the command line interface can be insecure.
#开始测试上线后端服务
[root@Java opt]# java -jar -server -Xmx1024m -Xms1024m ruoyi-admin.jar
Application Version: 3.8.7
Spring Boot Version: 2.5.15
// _ooOoo_ //
// o8888888o //
// 88" . "88 //
// (| ^_^ |) //
// O\ = /O //
// ____/`---'\____ //
// .' \\| |// `. //
// / \\||| : |||// \ //
// / _||||| -:- |||||- \ //
// | | \\\ - /// | | //
// | \_| ''\---/'' | | //
// \ .-\__ `-` ___/-. / //
// ___`. .' /--.--\ `. . ___ //
// ."" '< `.___\_<|>_/___.' >'"". //
// | | : `- \`.;`\ _ /`;.`/ - ` : | | //
// \ \ `-. \_ __\ /__ _/ .-` / / //
// ========`-.____`-.___\_____/___.-`____.-'======== //
// `=---=' //
// ^^^^^^^^^^^^^^^^^^^^^^^^^^^^^^^^^^^^^^^^^^^^^^^^^^ //
// 佛祖保佑 永不宕机 永无BUG //
11:43:54.508 [main] INFO c.r.RuoYiApplication - [logStarting,55] - Starting RuoYiApplication using Java 1.8.0_151 on Java with PID 3736 (/opt/ruoyi-admin.jar started by root in /opt)
11:43:54.511 [main] DEBUG c.r.RuoYiApplication - [logStarting,56] - Running with Spring Boot v2.5.15, Spring v5.3.33
.
.
.
.
.
.
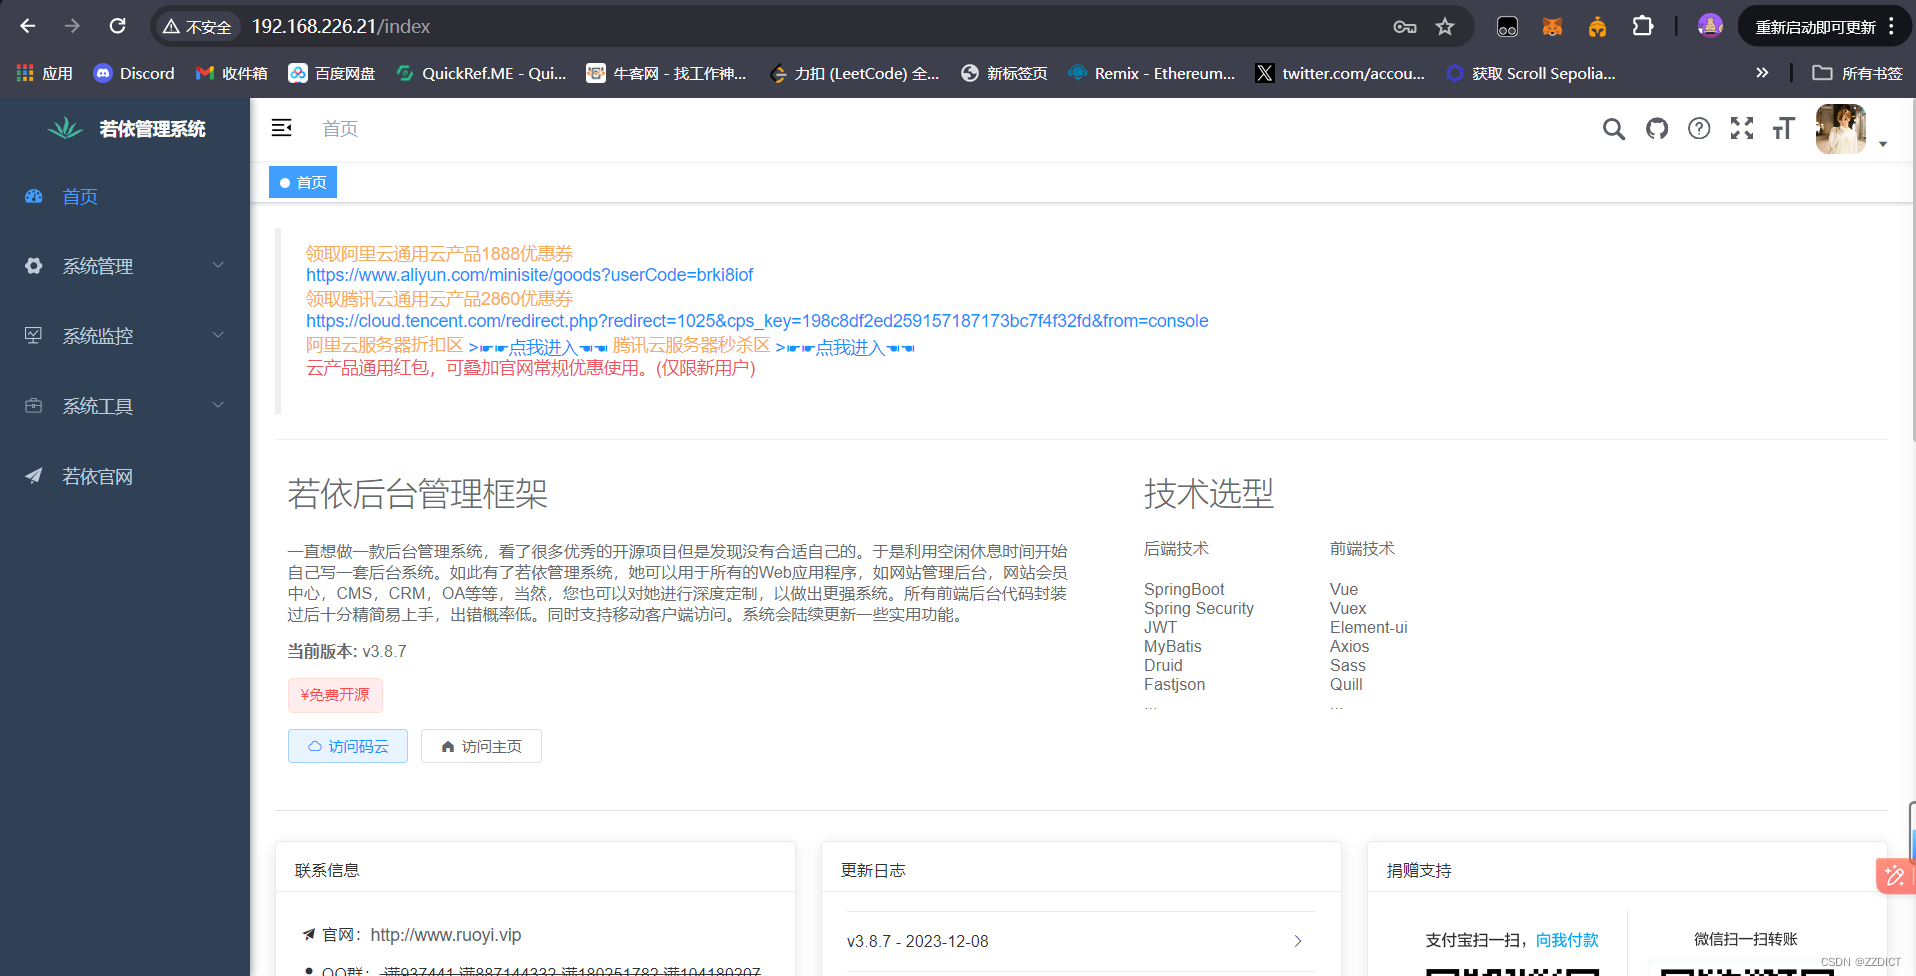
11:44:04.002 [main] INFO c.r.RuoYiApplication - [logStarted,61] - Started RuoYiApplication in 10.054 seconds (JVM running for 10.706)
(♥◠‿◠)ノ゙ 若依启动成功 ლ(´ڡ`ლ)゙
.-------. ____ __
| _ _ \ \ \ / /
| ( ' ) | \ _. / '
|(_ o _) / _( )_ .'
| (_,_).' __ ___(_ o _)'
| |\ \ | || |(_,_)'
| | \ `' /| `-' /
| | \ / \ /
''-' `'-' `-..-'
11:44:08.843 [http-nio-8080-exec-1] INFO o.a.c.c.C.[.[.[/] - [log,173] - Initializing Spring DispatcherServlet 'dispatcherServlet'
#开始正式上线
[root@Java opt]# nohup java -jar -server -Xmx1024m -Xms1024m ruoyi-admin.jar &
日志文件查看:
[root@Java opt]# ll
total 81588
-rw------- 1 root root     6337 Jun 29 12:33 nohup.out
-rw-r--r-- 1 root root 83530769 Jun 29 11:40 ruoyi-admin.jar
drwxr-xr-x 8 root root     4096 Jun 29 09:56 ruoyi-ui
[root@Java opt]# tail -f nohup.out
 .-------.       ____     __
 |  _ _   \      \   \   /  /
 | ( ' )  |       \  _. /  '
 |(_ o _) /        _( )_ .'
 | (_,_).' __  ___(_ o _)'
 |  |\ \  |  ||   |(_,_)'
 |  | \ `'   /|   `-'  /
 |  |  \    /  \      /
 ''-'   `'-'    `-..-'
12:33:01.636 [http-nio-8080-exec-2] INFO  o.a.c.c.C.[.[.[/] - [log,173] - Initializing Spring DispatcherServlet 'dispatcherServlet'
注:
# 如果报错链接不上数据库,且数据库配置无问题,将RuoYi-Vue/ruoyi-admin/src/main/resources/application-druid.yml文件中,
master:
    url: jdbc:mysql://192.168.226.23:3306/ruoyi?useUnicode=true&characterEncoding=utf8&zeroDateTimeBehavior=convertToNull&useSSL=false&serverTimezone=GMT%2B8

将url中useSSL=yes改成useSSL=false,然后重新打包上线

在JDBC连接MySQL数据库时,useSSL参数用于指定是否使用SSL(安全套接层)加密连接。SSL是一种用于在计算机网络上提供安全通信的协议,它可以确保在客户端和服务器之间传输的数据在传输过程中是加密的,从而提供了一定程度的安全性。

当useSSL参数设置为false时,表示不使用SSL加密连接。这通常在开发和测试环境中比较常见,因为在这些环境下,对数据传输的安全性要求可能较低,而且SSL加密会增加一些额外的性能开销。在这种情况下,如果数据库服务器不要求强制的SSL连接,你可以将useSSL参数设置为false来简化连接配置。

但是,在生产环境中,特别是涉及到敏感数据的应用,强烈建议使用SSL加密来保护数据的传输安全性。在生产环境中,通常会将useSSL参数设置为true,以确保数据库连接是安全的。

在你的连接字符串中,useSSL=false表示不使用SSL加密连接。如果你的数据库服务器要求SSL连接,那么你需要将useSSL参数设置为true,以便建立加密连接。


 9480
9480


 被折叠的 条评论
为什么被折叠?
被折叠的 条评论
为什么被折叠?
 到【灌水乐园】发言


