


通常,我们使用webpack来打包我们的模块化后的应用程序,webpack 会生成一个
可部署的/dist目录,然后把打包后的内容放置在此目录中。只要/dist目录中
的内容部署到server上,client (通常是浏览器)就能够访问此server的网站及其
资源。
而最后一步获取资源是比较耗费时间的,这就是为什么浏览器使用一种名为
缓存的技术。可以通过命中缓存,以降低网络流量,使网站加载速度更快,然而,
如果我们在部署新版本时不更改资源的文件名,浏览器可能会认为它没有被更新,就
会使用它的缓存版本。由于缓存的存在,当你需要获取新的代码时,就会显得很棘
手。
所以,我们需要通过必要的配置,以确保 webpack 编译生成的文件能够被客户端缓存,而在文件内容变化后,能够请求到新的文件。
我们在demo下创建以下文件

index.js、another1.js、another2.js
import _ from 'lodash'

console.log('index.js、another1.js、another2.js')
console.log(_.join(['index.js、another1.js、another2.js','lodash']))
index.html
<!DOCTYPE html>
<html lang="en">
<head>
    <meta charset="UTF-8">
    <meta name="viewport" content="width=device-width, initial-scale=1.0">
    <title>中国男足,永远的神</title>
</head>
<body>
</body>
</html>
webpack.config.js
const path = require('path')
const HtmlWebpackPlugin = require('html-webpack-plugin')

module.exports = {
    //代码入口分离
    entry : {
        index:'./src/index.js',
        another1:'./src/another1.js',
        another2:'./src/another2.js',
    },
    output : {
        filename:'[name].bundle.js',
        path:path.resolve(__dirname,'./dist'),
        clean:true,
        assetModuleFilename:'images/[contenthash][ext][query]'
    },

    mode : 'development',

    devtool:'inline-source-map',

    plugins:[
        new HtmlWebpackPlugin({
            template:'./index.html',
            filename:'app.html',
            inject:"body"
        }),
    ],

    devServer:{
        static:'./dist'
    }
    //production环境压缩css代码
    optimization:{
        // 防止重复,抽离公共的方法,代码分离(2)
        splitChunks:{
            chunks:'all'
        }
    }
}
1、输出文件的文件名(output filename)
我们可以通过替换 output.filename 中的 substitutions设置,来定义输出文件的名称。webpack 提供了一种使用称为 substitution(可替换模板字符串)的方式,通过带括号字符串来模板化文件名。其中,[contenthash] substitution 将根据资源内容创建出唯一 hash。
当资源内容发生变化时,[contenthash] 也会发生变化。
webpack.config.js
module.exports = {
    //代码入口分离
    entry : {
        index:'./src/index.js',
        another1:'./src/another1.js',
        another2:'./src/another2.js',
    },
    output : {
        filename:'[name].[contenthash].js',
        path:path.resolve(__dirname,'./dist'),
        clean:true,
        assetModuleFilename:'images/[contenthash][ext][query]'
    },
}
执行npx webpack后,我们发现/dist目录下的打包后的文件都加上了一个哈希hash值

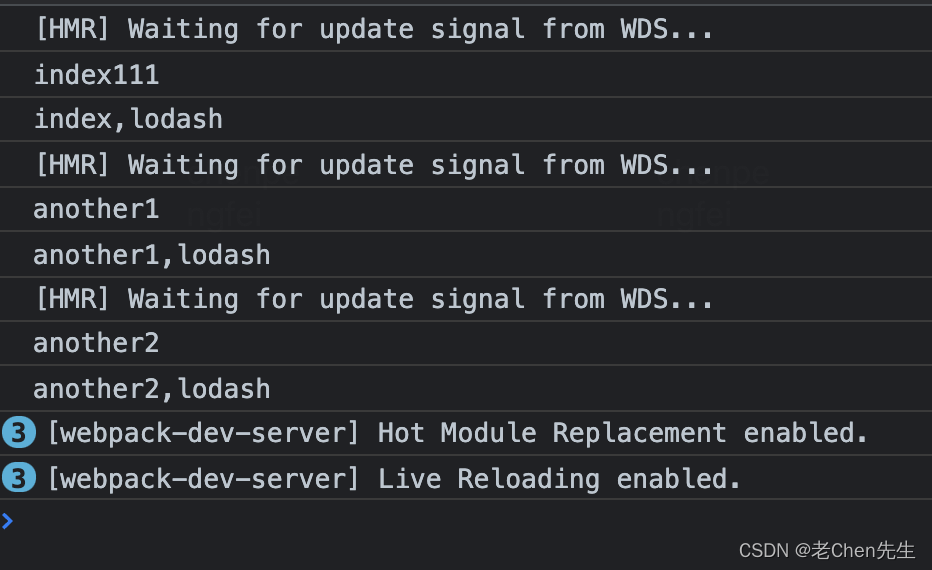
npx webpack-dev-server --open打开浏览器,页面控制台成功打印了字符串

我们将index.js内的console.log('index)改为console.log('index11'),而another1.js和another2.js不做改变,再次执行打包,发现只有打包后的index.js的bundle名字变了

我们放上对比图

1.1、扩展:将JS打包在同一个目录下
我们可以将JS打包在一个文件加下面,通过output.filename 属性,在每个文件名字前加上你想要的目录名称,这里我们叫scripts
webpack.config.js
output : {
   filename:'scripts/[name].[contenthash].js',
    path:path.resolve(__dirname,'./dist'),
    clean:true,
    assetModuleFilename:'images/[contenthash][ext][query]'
},
执行npx webpack打包,这时打包后的js就都放在scripts文件夹下面了

2、缓存第三方库
将第三方库(library)(例如 lodash 或 react)提取到单独的 vendor chunk 文件中,是比较推荐的做法,这是因为,它们很少像本地的源代码那样频繁修改。因此通过实现以上步骤,利用 client 的长效缓存机制,命中缓存来消除请求,并减少向 server 获取资源,同时还能保证 client 代码和 server 代码版本一致。
这可以通过使用 SplitChunksPlugin 插件的cacheGroups选项来实现。我们在 optimization.splitChunks 添加如下:
splitChunks: {
    cacheGroups: {
        vendor: {
            test: /[\\/]node_modules[\\/]/,
            name: 'vendors',
            chunks: 'all',
        },
    },
},
webpack.config.js
const path = require('path')
const HtmlWebpackPlugin = require('html-webpack-plugin')

module.exports = {
    //代码入口分离
    entry : {
        index:'./src/index.js',
        another1:'./src/another1.js',
        another2:'./src/another2.js',
    },
    output : {
        filename:'[name].[contenthash].js',
        path:path.resolve(__dirname,'./dist'),
        clean:true,
        assetModuleFilename:'images/[contenthash][ext][query]'
    },

    mode : 'development',

    devtool:'inline-source-map',

    plugins:[
        new HtmlWebpackPlugin({
            template:'./index.html',
            filename:'app.html',
            inject:"body"
        }),
    ],

    devServer:{
        static:'./dist'
    },

    //production环境压缩css代码
    optimization:{
    	// 防止重复,抽离公共的方法,代码分离(2)
        // splitChunks:{
        //     chunks:'all'
        // }
        splitChunks: {
            cacheGroups: {
                vendor: {
                    test: /[\\/]node_modules[\\/]/,
                    name: 'vendors',
                    chunks: 'all',
                },
            },
        },
    }
}
执行npx webpack打包,我们发现第三方库的 vendors bundle文件名中已经将node_modules给排除了


我们执行npx webpack-dev-server --open打开浏览器,发现lodash依旧正常引用
2.1、扩展:splitChunk 的相关配置参数
建议将公共使用的第三方类库显式地配置为公共的部分,而不是 webpack 自己去判断处理
chunks: 表示显示块的范围,有三个可选值:initial(初始块)、async(按需加载块)、all(全部块),默认为all;minSize: 表示在压缩前的最小模块大小,默认为0minChunks: 表示被引用次数,默认为1;maxAsyncRequests: 最大的按需(异步)加载次数,默认为1;maxInitialRequests: 最大的初始化加载次数,默认为1;name: 拆分出来块的名字(Chunk Names),默认由块名和hash值自动生成;cacheGroups: 缓存组。
cacheGroups缓存组中还有其他几个参数:
priority: 表示缓存的优先级;test: 缓存组的规则,表示符合条件的的放入当前缓存组,值可以是function、boolean、string、RegExp,默认为空;reuseExistingChunk: 表示可以使用已经存在的块,即如果满足条件的块已经存在就使用已有的,不再创建一个新的块。
本博客参考:


 1415
1415


 被折叠的 条评论
为什么被折叠?
被折叠的 条评论
为什么被折叠?
 到【灌水乐园】发言


