


1、自定义图像增强技术概述
1.1自定义图像增强概念
深度学习的自定义图像增强技术是一种通过自定义的算法和策略对图像进行变换,以增加模型泛化能力和提高训练效果的技术。这些增强技术可以应用于各种深度学习任务,如图像分类、目标检测、图像分割等。
自定义图像增强技术的核心思想是通过模拟真实世界中的图像变化,生成更多的训练样本,从而让模型能够更好地适应各种复杂场景。这些变化可以包括图像的旋转、平移、缩放、裁剪、颜色变换、噪声添加等。
在深度学习中,自定义图像增强技术通常与深度学习框架(如TensorFlow、PyTorch等)结合使用。通过编写自定义的图像增强代码或使用框架提供的图像增强库,可以方便地实现各种复杂的增强策略。
以下是一些常见的自定义图像增强技术:
- 几何变换:通过旋转、平移、缩放、裁剪等操作,改变图像的几何形状和位置。这些变换可以模拟真实世界中物体的位置、角度和大小变化,提高模型对不同视角和尺寸的图像的处理能力。
- 颜色变换:通过调整图像的亮度、对比度、饱和度等参数,改变图像的颜色分布和视觉效果。这些变换可以模拟不同光照条件、曝光时间等因素对图像的影响,提高模型对不同颜色和光照条件的适应性。
- 噪声添加:在图像中添加随机噪声,如高斯噪声、椒盐噪声等。这些噪声可以模拟真实世界中图像的噪声干扰,提高模型对噪声的鲁棒性。
- 数据混合:将不同图像或图像的不同部分进行混合,生成新的训练样本。这种技术可以模拟真实世界中物体的遮挡、重叠等场景,提高模型对复杂场景的处理能力。
在自定义图像增强技术的实现中,需要注意以下几点:
- 增强策略的多样性:为了充分模拟真实世界中的图像变化,需要设计多种不同的增强策略,并随机选择或组合使用。
- 增强强度的控制:不同的任务和数据集可能需要不同的增强强度。过强的增强可能导致模型无法学习到有效的特征,而过弱的增强则可能无法提高模型的泛化能力。因此,需要根据实际情况调整增强强度。
- 实时性和效率:在训练过程中,需要实时地对图像进行增强。因此,需要保证增强算法的高效性和实时性,以避免对训练过程造成过大的开销。
自定义图像增强技术是深度学习中一种重要的技术手段,通过模拟真实世界中的图像变化,可以提高模型的泛化能力和训练效果。在实际应用中,需要根据任务和数据集的特点选择合适的增强策略和增强强度,并保证增强算法的高效性和实时性。
1.2 BaseImageAugmentationLayer简介
数据增强是训练任何鲁棒性计算机视觉模型的重要组成部分。虽然KerasCV提供了大量预先构建的高质量数据增强技术,但您可能仍然希望实现自己的自定义技术。KerasCV 提供了一个用于编写数据增强层的基类:BaseImageAugmentationLayer。使用 BaseImageAugmentationLayer 构建的任何增强层都将自动与 KerasCV 的 RandomAugmentationPipeline 类兼容。
本指南将向您展示如何使用 BaseImageAugmentationLayer 实现自己的自定义增强层。作为示例,我们将实现一个将所有图像调整为蓝色的层。
目前,KerasCV 的预处理层仅支持使用 Keras 3 的 TensorFlow 后端。
下面是如何使用 BaseImageAugmentationLayer 实现一个自定义蓝色色调增强层的步骤:
-
导入必要的库:
首先,您需要导入 TensorFlow、Keras 和 KerasCV 的相关库。
-
定义自定义增强层:
继承BaseImageAugmentationLayer并重写apply_transform方法,该方法将执行实际的图像变换。 -
实现蓝色色调变换:
在apply_transform方法中,您可以编写代码来将图像转换为蓝色色调。这通常涉及将图像的 RGB 值转换为 HSV 颜色空间,修改色调(Hue)分量,然后再转换回 RGB。 -
测试您的增强层:
使用一些示例图像测试您的增强层,以确保它按预期工作。 -
集成到数据管道:
如果您正在使用RandomAugmentationPipeline,可以将您的自定义增强层添加到管道中,以便在训练期间自动应用。 -
训练模型:
使用包含您的自定义增强层的数据管道来训练模型,并观察性能是否有所改善。
以下是一个简化的代码示例,展示了如何开始实现一个自定义的蓝色色调增强层:
import tensorflow as tf
from keras_cv.layers import BaseImageAugmentationLayer

class BlueTintAugmentation(BaseImageAugmentationLayer):
    def apply_transform(self, images, **kwargs):
        # 假设 images 是一个批量的图像,格式为 [batch_size, height, width, channels]
        # 转换为 HSV 颜色空间
        hsv_images = tf.image.rgb_to_hsv(images)

        # 修改色调分量(Hue),使图像偏向蓝色
        # 注意:这只是一个示例,您可能需要调整值以获得所需的蓝色色调
        hsv_images = tf.image.adjust_hue(hsv_images, delta=0.2)  # 假设将色调向蓝色移动0.2

        # 转换回 RGB 颜色空间
        augmented_images = tf.image.hsv_to_rgb(hsv_images)

        return augmented_images

# 现在,您可以将此 BlueTintAugmentation 层集成到您的数据管道中,并在训练期间使用它
图像增强应该以样本为单位进行操作,而不是以批次为单位。这是许多机器学习实践者在实现自定义技术时经常犯的一个错误。BaseImageAugmentationLayer 提供了一套清晰的抽象,使得以样本为单位实现图像增强技术变得更加容易。这是通过允许最终用户重写 augment_image() 方法,并在内部自动进行矢量化来实现的。
大多数增强技术还需要从一个或多个随机分布中进行采样。KerasCV 提供了一个抽象层来使随机采样可由最终用户配置:即 FactorSampler API。
最后,许多增强技术需要关于输入图像中存在的像素值的一些信息。KerasCV 提供了 value_range API 来简化这方面的处理。
在我们的示例中,我们将使用 FactorSampler API、value_range API 和 BaseImageAugmentationLayer 来实现一个健壮、可配置且正确的 RandomBlueTint 层。
1.3必要的准备
设置
!pip install -q --upgrade keras-cv
!pip install -q --upgrade keras  # Upgrade to Keras 3
库导入
import os

os.environ["KERAS_BACKEND"] = "tensorflow"

import keras
from keras import ops
from keras import layers
import keras_cv
import matplotlib.pyplot as plt
2、BaseImageAugmentationLayer使用步骤
2.1 编制辅助函数
编制辅助函数实现可视化和一些变换
def imshow(img):
    img = img.astype(int)
    plt.axis("off")
    plt.imshow(img)
    plt.show()


def gallery_show(images):
    images = images.astype(int)
    for i in range(9):
        image = images[i]
        plt.subplot(3, 3, i + 1)
        plt.imshow(image.astype("uint8"))
        plt.axis("off")
    plt.show()


def transform_value_range(images, original_range, target_range):
    images = (images - original_range[0]) / (original_range[1] - original_range[0])
    scale_factor = target_range[1] - target_range[0]
    return (images * scale_factor) + target_range[0]


def parse_factor(param, min_value=0.0, max_value=1.0, seed=None):
    if isinstance(param, keras_cv.core.FactorSampler):
        return param
    if isinstance(param, float) or isinstance(param, int):
        param = (min_value, param)
    if param[0] == param[1]:
        return keras_cv.core.ConstantFactorSampler(param[0])
    return keras_cv.core.UniformFactorSampler(param[0], param[1], seed=seed)
2.2 重写augment_image()
class RandomBlueTint(keras_cv.layers.BaseImageAugmentationLayer):
    def augment_image(self, image, *args, transformation=None, **kwargs):
        # image is of shape (height, width, channels)
        [*others, blue] = ops.unstack(image, axis=-1)
        blue = ops.clip(blue + 100, 0.0, 255.0)
        return ops.stack([*others, blue], axis=-1)
上述代码层重写了 BaseImageAugmentationLayer.augment_image() 方法。这个方法用于对传递给层的图像进行增强。默认情况下,使用 BaseImageAugmentationLayer 会为你提供几个不错的免费功能:
- 支持非批量输入(HWC 张量)
- 支持批量输入(BHWC 张量)
- 对批量输入的自动矢量化(有关这方面的更多信息,请参阅自动矢量化性能)
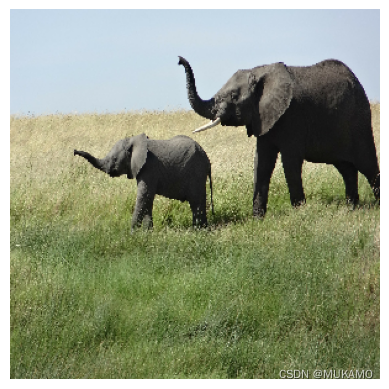
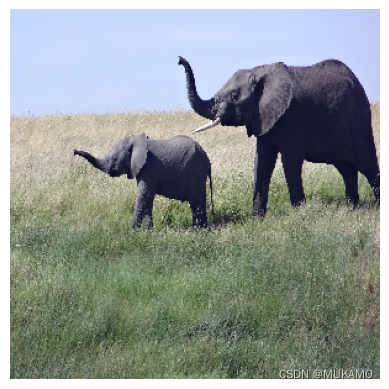
现在,我们来看看改写后的代码带来的效果:
SIZE = (300, 300)
elephants = keras.utils.get_file(
    "african_elephant.jpg", "https://i.imgur.com/Bvro0YD.png"
)
elephants = keras.utils.load_img(elephants, target_size=SIZE)
elephants = keras.utils.img_to_array(elephants)
imshow(elephants)
Downloading data from https://i.imgur.com/Bvro0YD.png
 4217496/4217496 ━━━━━━━━━━━━━━━━━━━━ 0s 0us/step
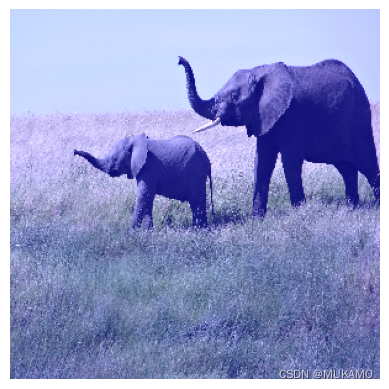
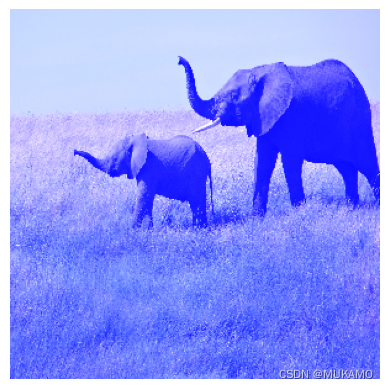
图像进行增强并可视化结果:
layer = RandomBlueTint()
augmented = layer(elephants)
imshow(ops.convert_to_numpy(augmented))
新建立的层也可以应用于批量输入:
layer = RandomBlueTint()
augmented = layer(ops.expand_dims(elephants, axis=0))
imshow(ops.convert_to_numpy(augmented)[0])
2.3使用 FactorSampler API 添加随机行为。
通常,图像增强技术不应在每次调用层的 __call__ 方法时都执行相同的操作。KerasCV 提供了 FactorSampler API,允许用户为随机分布提供可配置选项。
class RandomBlueTint(keras_cv.layers.BaseImageAugmentationLayer):
    """RandomBlueTint randomly applies a blue tint to images.

    Args:
      factor: A tuple of two floats, a single float or a
        `keras_cv.FactorSampler`. `factor` controls the extent to which the
        image is blue shifted. `factor=0.0` makes this layer perform a no-op
        operation, while a value of 1.0 uses the degenerated result entirely.
        Values between 0 and 1 result in linear interpolation between the original
        image and a fully blue image.
        Values should be between `0.0` and `1.0`.  If a tuple is used, a `factor` is
        sampled between the two values for every image augmented.  If a single float
        is used, a value between `0.0` and the passed float is sampled.  In order to
        ensure the value is always the same, please pass a tuple with two identical
        floats: `(0.5, 0.5)`.
    """

    def __init__(self, factor, **kwargs):
        super().__init__(**kwargs)
        self.factor = parse_factor(factor)

    def augment_image(self, image, *args, transformation=None, **kwargs):
        [*others, blue] = ops.unstack(image, axis=-1)
        blue_shift = self.factor() * 255
        blue = ops.clip(blue + blue_shift, 0.0, 255.0)
        return ops.stack([*others, blue], axis=-1)
然后,程序员可以配置RandomBlueTint 层的随机行为。程序员可以为其提供一个要从中采样的值范围:
many_elephants = ops.repeat(ops.expand_dims(elephants, axis=0), 9, axis=0)
layer = RandomBlueTint(factor=0.5)
augmented = layer(many_elephants)
gallery_show(ops.convert_to_numpy(augmented))
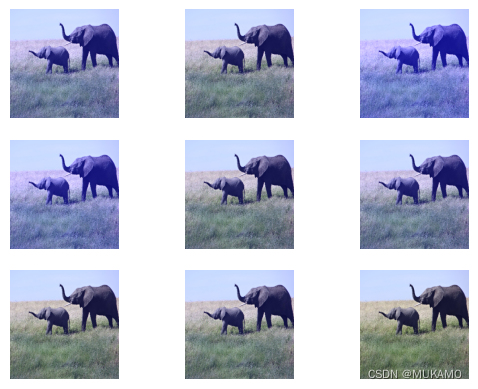
每个图像都会根据从 (0, 0.5) 范围内随机采样的因子进行不同的增强。
many_elephants = ops.repeat(ops.expand_dims(elephants, axis=0), 9, axis=0)
factor = keras_cv.core.NormalFactorSampler(
    mean=0.3, stddev=0.1, min_value=0.0, max_value=1.0
)
layer = RandomBlueTint(factor=factor)
augmented = layer(many_elephants)
gallery_show(ops.convert_to_numpy(augmented))
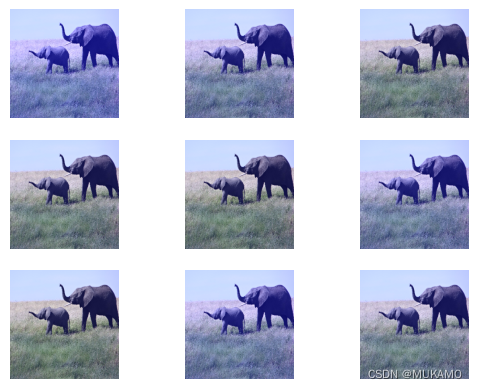
正如你所看到的,现在的增强操作是从正态分布中抽取的。FactorSampler 有多种类型,包括 UniformFactorSampler、NormalFactorSampler 和 ConstantFactorSampler。你也可以实现你自己的 FactorSampler。
2.4重写 get_random_transformation()
现在,假设层会影响预测目标:无论这些目标是边界框、分类标签还是回归目标。当层在增强标签时,它需要知道图像上应用了哪些增强操作。幸运的是,BaseImageAugmentationLayer 在设计时已经考虑到了这一点。
为了处理这个问题,BaseImageAugmentationLayer 提供了一个可重写的 get_random_transformation() 方法,以及 augment_label()、augment_target()、augment_bounding_boxes() 等方法。未来还会添加 augment_segmentation_map() 等方法。
class RandomBlueTint(keras_cv.layers.BaseImageAugmentationLayer):
    """RandomBlueTint randomly applies a blue tint to images.

    Args:
      factor: A tuple of two floats, a single float or a
        `keras_cv.FactorSampler`. `factor` controls the extent to which the
        image is blue shifted. `factor=0.0` makes this layer perform a no-op
        operation, while a value of 1.0 uses the degenerated result entirely.
        Values between 0 and 1 result in linear interpolation between the original
        image and a fully blue image.
        Values should be between `0.0` and `1.0`.  If a tuple is used, a `factor` is
        sampled between the two values for every image augmented.  If a single float
        is used, a value between `0.0` and the passed float is sampled.  In order to
        ensure the value is always the same, please pass a tuple with two identical
        floats: `(0.5, 0.5)`.
    """

    def __init__(self, factor, **kwargs):
        super().__init__(**kwargs)
        self.factor = parse_factor(factor)

    def get_random_transformation(self, **kwargs):
        # kwargs holds {"images": image, "labels": label, etc...}
        return self.factor() * 255

    def augment_image(self, image, transformation=None, **kwargs):
        [*others, blue] = ops.unstack(image, axis=-1)
        blue = ops.clip(blue + transformation, 0.0, 255.0)
        return ops.stack([*others, blue], axis=-1)

    def augment_label(self, label, transformation=None, **kwargs):
        # you can use transformation somehow if you want

        if transformation > 100:
            # i.e. maybe class 2 corresponds to blue images
            return 2.0

        return label

    def augment_bounding_boxes(self, bounding_boxes, transformation=None, **kwargs):
        # you can also perform no-op augmentations on label types to support them in
        # your pipeline.
        return bounding_boxes
为了使用这些新方法,程序员需要以字典的形式提供输入,该字典维护从图像到目标的映射。
目前,KerasCV 支持以下标签类型:
通过 augment_label() 处理的标签。
通过 augment_bounding_boxes() 处理的边界框。
为了在使用增强层的同时处理预测目标,程序员必须按照以下方式打包你的输入:
labels = ops.array([[1, 0]])
inputs = {"images": ops.convert_to_tensor(elephants), "labels": labels}
此时输入调用自定义的层:
layer = RandomBlueTint(factor=(0.6, 0.6))
augmented = layer(inputs)
print(augmented["labels"])
2.0
输入和标签都被增强了。请注意,当变换值大于 100 时,标签会按照上面层中的指定被修改为包含 2.0。
2.5 定义取值范围
假设你在多个流程中使用你新创建的增强层。一些流程中的值范围在 [0, 255] 之间,一些流程已经将图像归一化到 [-1, 1] 的范围,而还有一些流程使用 [0, 1] 的值范围。
如果用户用值范围在 [0, 1] 的图像调用你的层,那么输出将是没有意义的!
为了解决这个问题,你的增强层需要支持不同的值范围。你可以通过以下方式来实现这一点:
- 提供value_range参数:在你的层定义中添加一个value_range参数,允许用户指定输入图像的值范围。这个参数可以是一个元组,例如
(0, 1) 或 (0, 255)。 - 在层内部进行转换:根据value_range参数的值,你可以在增强操作之前和之后对图像进行必要的转换。例如,如果value_range是
(0, 1),但你的增强操作需要图像在 (0, 255) 范围内,你可以在增强之前将图像乘以 255,并在增强之后将结果除以 255。 - 文档说明:在层的文档中清楚地说明value_range参数的作用,以及如果未正确设置此参数可能会导致的问题。
layer = RandomBlueTint(factor=(0.1, 0.1))
elephants_0_1 = elephants / 255
print("min and max before augmentation:", elephants_0_1.min(), elephants_0_1.max())
augmented = layer(elephants_0_1)
print(
    "min and max after augmentation:",
    ops.convert_to_numpy(augmented).min(),
    ops.convert_to_numpy(augmented).max(),
)
imshow(ops.convert_to_numpy(augmented * 255).astype(int))
Clipping input data to the valid range for imshow with RGB data ([0..1] for floats or [0..255] for integers).

min and max before augmentation: 0.0 1.0
min and max after augmentation: 0.0 26.488235
请注意,这是一个非常弱的增强!因子(Factor)仅设置为 0.1。
让我们使用 KerasCV 的值范围(value_range)API 来解决这个问题。
class RandomBlueTint(keras_cv.layers.BaseImageAugmentationLayer):
    """RandomBlueTint randomly applies a blue tint to images.

    Args:
      value_range: value_range: a tuple or a list of two elements. The first value
        represents the lower bound for values in passed images, the second represents
        the upper bound. Images passed to the layer should have values within
        `value_range`.
      factor: A tuple of two floats, a single float or a
        `keras_cv.FactorSampler`. `factor` controls the extent to which the
        image is blue shifted. `factor=0.0` makes this layer perform a no-op
        operation, while a value of 1.0 uses the degenerated result entirely.
        Values between 0 and 1 result in linear interpolation between the original
        image and a fully blue image.
        Values should be between `0.0` and `1.0`.  If a tuple is used, a `factor` is
        sampled between the two values for every image augmented.  If a single float
        is used, a value between `0.0` and the passed float is sampled.  In order to
        ensure the value is always the same, please pass a tuple with two identical
        floats: `(0.5, 0.5)`.
    """

    def __init__(self, value_range, factor, **kwargs):
        super().__init__(**kwargs)
        self.value_range = value_range
        self.factor = parse_factor(factor)

    def get_random_transformation(self, **kwargs):
        # kwargs holds {"images": image, "labels": label, etc...}
        return self.factor() * 255

    def augment_image(self, image, transformation=None, **kwargs):
        image = transform_value_range(image, self.value_range, (0, 255))
        [*others, blue] = ops.unstack(image, axis=-1)
        blue = ops.clip(blue + transformation, 0.0, 255.0)
        result = ops.stack([*others, blue], axis=-1)
        result = transform_value_range(result, (0, 255), self.value_range)
        return result

    def augment_label(self, label, transformation=None, **kwargs):
        # you can use transformation somehow if you want

        if transformation > 100:
            # i.e. maybe class 2 corresponds to blue images
            return 2.0

        return label

    def augment_bounding_boxes(self, bounding_boxes, transformation=None, **kwargs):
        # you can also perform no-op augmentations on label types to support them in
        # your pipeline.
        return bounding_boxes


layer = RandomBlueTint(value_range=(0, 1), factor=(0.1, 0.1))
elephants_0_1 = elephants / 255
print("min and max before augmentation:", elephants_0_1.min(), elephants_0_1.max())
augmented = layer(elephants_0_1)
print(
    "min and max after augmentation:",
    ops.convert_to_numpy(augmented).min(),
    ops.convert_to_numpy(augmented).max(),
)
imshow(ops.convert_to_numpy(augmented * 255).astype(int))
min and max before augmentation: 0.0 1.0
min and max after augmentation: 0.0 1.0
现在我们的大象只被轻微地染上了蓝色。当使用 0.1 的因子时,这是预期之中的行为。
现在,程序员可以配置层以支持他们可能需要的任何值范围。请注意,只有与颜色信息交互的层才应该使用值范围 API。许多增强技术,如 RandomRotation(随机旋转),则不需要这个。
2.6 自动矢量化的性能
如果程序员正在思考:在样本基础上实现我的增强是否会带来性能影响?
幸运的是,keras已经对自动矢量化、手动矢量化以及非矢量化实现的性能进行了广泛的分析。在这个基准测试中,使用自动矢量化、无自动矢量化以及手动矢量化实现了一个RandomCutout层。经过keras内部进行了基准测试。它们也分别使用了jit_compile参数进行了基准测试。
测试的主要结论是,手动矢量化与自动矢量化之间的差异是微乎其微的!
请注意,Eager模式下的性能将大不相同。在TensorFlow中,Eager模式是一种即时执行模式,它允许你立即看到操作的结果,而不需要首先构建一个计算图。这种模式对于调试和原型设计非常有用,但通常不如编译后的图模式(如使用@tf.function注解的模式)性能高。因此,在部署模型或进行性能基准测试时,通常会使用图模式。
2.7常见的陷阱
有些层不能自动矢量化。GridMask就是这样一个例子。
如果程序员在调用层时遇到了错误,尝试在构造函数中添加以下代码:
class UnVectorizable(keras_cv.layers.BaseImageAugmentationLayer):
    def __init__(self, **kwargs):
        super().__init__(**kwargs)
        # this disables BaseImageAugmentationLayer's Auto Vectorization
        self.auto_vectorize = False
此外,请确保在你的augment_*方法中接受kwargs以确保向前兼容性。KerasCV将来会添加更多的标签类型,如果你不包含kwargs参数,你的增强层将不会具有向前兼容性。
在编写可重用和可扩展的Keras层时,考虑到未来的扩展性是非常重要的。通过在函数定义中包含**kwargs,你可以允许函数接受任意数量的关键字参数,而无需在定义时明确指定它们。这提供了一种机制,使得当KerasCV或相关库在将来添加新功能或参数时,你的代码能够自然地适应这些变化,而不需要进行任何修改。
总结
KerasCV 提供了一套标准的 API,以简化自定义数据增强技术的实现过程。这些 API 包括 BaseImageAugmentationLayer、FactorSampler API 和 value_range API。
我们使用这些 API 实现了一个高度可配置的 RandomBlueTint 层。这个层可以接受独立图像作为输入,也可以接受包含“images”和标签的字典作为输入,支持非批处理和批处理的输入。输入图像可以是任何值域范围,并且用于采样蓝色调色值的随机分布可以由最终用户进行配置。
当我们谈论扩展关于使用 KerasCV 的 RandomBlueTint 层的内容时,可以包括以下几个方面来提供更详细的信息和背景:
- RandomBlueTint 层的功能
- 功能描述:RandomBlueTint 层为图像添加一个随机的蓝色色调,从而模拟各种光线条件或颜色偏差。
- 参数配置:用户可以配置色调的强度、随机分布的类型(如均匀分布、正态分布等)以及分布的参数(如均值、标准差等)。
- 输入兼容性
- 独立图像:层可以直接接受单张图像作为输入。
- 图像与标签的字典:对于包含图像和对应标签的数据集,层可以处理一个字典,其中“images”键对应的值是图像数组,“labels”键对应的值是标签数组。
- 批处理输入:层可以处理批量图像,即一次处理多张图像。
- 值域处理
- 自动值域调整:RandomBlueTint 层能够自动检测输入图像的值域范围(如 [0, 1] 或 [0, 255]),并相应地调整增强操作以确保图像质量。
- 用户定义值域:用户也可以指定输入图像的值域范围,以便更精确地控制增强效果。
- 随机性
- 随机分布:用户可以选择不同的随机分布来生成蓝色色调的强度值。这允许用户模拟各种自然和人为的颜色变化。
- 种子设置:为了实验的可重复性,用户可以设置随机种子,以确保在多次运行中得到相同的随机结果。
- 性能优化
- TensorFlow 优化:RandomBlueTint 层利用 TensorFlow 的优化功能,如自动矢量化,以加速批量图像的处理。
- GPU 支持:如果可用,层将利用 GPU 进行计算,以进一步提高处理速度。
- 集成性
- 与 Keras 模型集成:RandomBlueTint 层可以像其他 Keras 层一样,直接集成到神经网络模型中,以便在训练过程中实时应用数据增强。
- 预处理管道:层也可以作为预处理管道的一部分,用于在数据加载后、模型训练前对图像进行增强。
- 示例和文档
- 示例代码:提供详细的示例代码,演示如何使用 RandomBlueTint 层对图像进行增强,并展示如何将其集成到 Keras 模型中。
- 文档说明:编写清晰的文档,解释 RandomBlueTint 层的参数、用法、注意事项以及可能的错误和解决方法。
- 扩展性
- 自定义增强:鼓励用户基于 RandomBlueTint 层的框架,开发自定义的增强层,以满足特定的需求。
- 与其他库的集成:探索与其他图像处理和增强库的集成,以扩展 RandomBlueTint 层的功能。
KerasCV通过BaseImageAugmentationLayer自定义图像增强,程序员可以取得以下一些好处:
- 高度的灵活性和可配置性:BaseImageAugmentationLayer允许用户根据具体任务和数据集的特点,灵活地定义和配置图像增强的策略。用户可以指定各种图像变换操作(如旋转、缩放、平移等)以及这些操作的参数(如旋转角度的范围、缩放比例等),从而生成符合需求的增强图像。
- 避免过拟合:在深度学习模型的训练过程中,数据增强技术是一种常用的防止过拟合的方法。通过BaseImageAugmentationLayer自定义图像增强,可以大大增加训练数据的多样性和数量,使模型在训练过程中能够学习到更多不同形态和变换下的图像特征,从而提高模型的泛化能力。
- 提高模型的鲁棒性:由于实际环境中图像可能会受到各种因素的影响(如光照、噪声、遮挡等),因此模型的鲁棒性对于其在实际应用中的表现至关重要。通过BaseImageAugmentationLayer自定义图像增强,可以模拟这些影响因素,使模型在训练过程中就能够学习到如何处理和应对这些变化,从而提高模型的鲁棒性。
- 简化代码和集成过程:KerasCV的BaseImageAugmentationLayer是基于Keras框架实现的,因此它可以无缝地与现有的Keras代码集成,无需对整体架构进行大规模修改。此外,KerasCV还提供了一系列用于数据增强的工具和函数,可以大大简化用户编写自定义图像增强代码的过程。
- 可视化预览和调整:KerasCV通常还提供可视化工具,允许用户在应用变换之前预览结果。这有助于用户直观地了解增强效果,并根据需要调整参数以达到理想的增强效果。
通过KerasCV的BaseImageAugmentationLayer自定义图像增强,用户可以根据具体需求灵活配置图像增强的策略,提高模型的泛化能力和鲁棒性,并简化代码和集成过程。


 被折叠的 条评论
为什么被折叠?
被折叠的 条评论
为什么被折叠?
 到【灌水乐园】发言


