


UITableView编辑
编辑的步骤:
1.开启TableView编辑状态
2.允许哪个分区的哪行是可以编辑的(默认都能编辑)
3.指定可以编辑的样式(删除 or 添加)
4.完成编辑(提交编辑)
完成编辑步骤:
1.操作数据源数组(添加或删除)
2.刷新UI界面
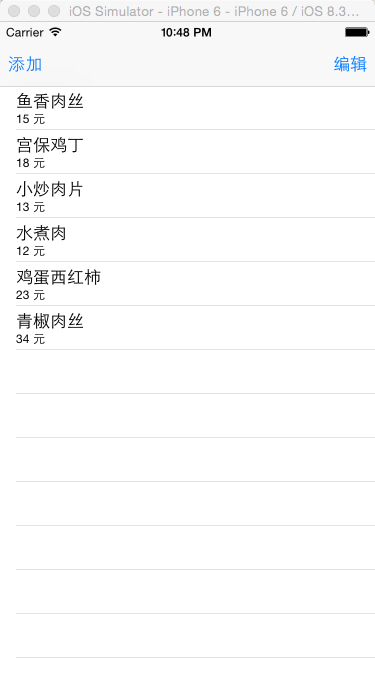
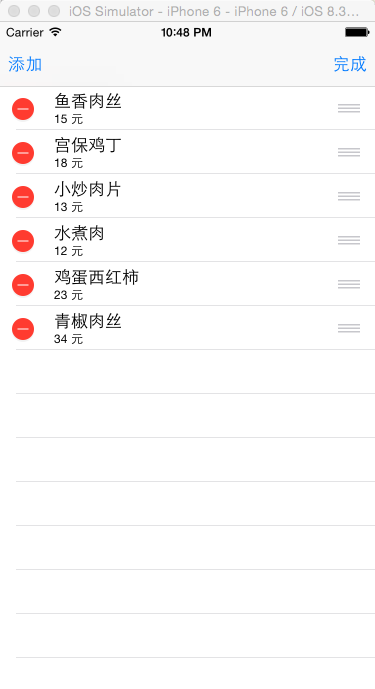
删除
开启TableView编辑状态
// 实现点击按钮方法(点击编辑按钮,进入编辑状态)
 - (void)editClick:(UIBarButtonItem *)buttonItem
{
// 1.开启编辑状态
[self.tableView setEditing:!self.tableView.editing animated:YES];
// 编辑时更改标题
if (self.tableView.editing == NO){
    buttonItem.title = @"编辑";
}else{
    buttonItem.title = @"完成";
}
}
允许编辑
 - (BOOL)tableView:(UITableView *)tableView canEditRowAtIndexPath:(NSIndexPath *)indexPath
{
// 可以利用indexPath控制哪个分区的哪行 不能编辑
return YES;
}
指定编辑的样式
 - (UITableViewCellEditingStyle)tableView:(UITableView *)tableView editingStyleForRowAtIndexPath:(NSIndexPath *)indexPath{
if (indexPath.section == 0) {
    if ([_firstArray[indexPath.row] isEqualToString:@"添加"]) {
        return UITableViewCellEditingStyleInsert;
    }
}else{
    if ([_secondArray[indexPath.row] isEqualToString:@"添加"]) {
        return UITableViewCellEditingStyleInsert;
    }
}
 return UITableViewCellEditingStyleDelete;
}
提交编辑
    - (void)tableView:(UITableView *)tableView commitEditingStyle:(UITableViewCellEditingStyle)editingStyle forRowAtIndexPath:(NSIndexPath *)indexPath
    {
    if(editingStyle == UITableViewCellEditingStyleDelete){
        // 删除
        // 先删除数据
        [_firstArray removeObjectAtIndex:indexPath.row];
        // 刷新页面
        // 整体刷新 (UITableView) 重新走一遍数据源代理方法,达到刷新页面的效果
        //[tableView reloadData];
        // 删除的刷新效果 (该方法可以进行多行删除),数组中填所有已经删除的索引
        [tableView deleteRowsAtIndexPaths:@[indexPath] withRowAnimation:(UITableViewRowAnimationBottom)];
    }else{
        // 添加
        // 先操作数据
        [_firstArray insertObject:@"123" atIndex:indexPath.row];
        // 刷新界面
        [tableView insertRowsAtIndexPaths:@[indexPath] withRowAnimation:(UITableViewRowAnimationTop)];

}
移动
移动的步骤:
1.开启编辑状态
2.允许哪个分区的哪行可以移动
3.完成移动 (操作数据源数组 、刷新界面)
4.限制跨区移动
允许哪个分区的哪行可以移动(第一步删除时已经完成)
 - (BOOL)tableView:(UITableView *)tableView canMoveRowAtIndexPath:(NSIndexPath *)indexPath
{
return  YES;
}
完成移动
- (void)tableView:(UITableView *)tableView moveRowAtIndexPath:(NSIndexPath *)sourceIndexPath toIndexPath:(NSIndexPath *)destinationIndexPath
{
// sourceIndexPath 来源的索引
// destinationIndexPath 目的地的索引
// 移动的分来:同分区移动 和 跨分区移动
// 判断分区移动
if (sourceIndexPath.section == destinationIndexPath.section) {
        // 同区
        // 操作firstArray
        // 把来源索引下 数组对应的元素 保存一下
        NSString *str = _firstArray[sourceIndexPath.row];
        // 把来源的索引 删除数组中对应的元素
        [self.firstArray removeObjectAtIndex:sourceIndexPath.row];
        // 插入到移动的目的地索引处
        [self.firstArray insertObject:str atIndex:destinationIndexPath.row];

        // 移动刷新方法
        [tableView moveRowAtIndexPath:sourceIndexPath toIndexPath:destinationIndexPath];

        }
限制跨区移动
- (NSIndexPath *)tableView:(UITableView *)tableView targetIndexPathForMoveFromRowAtIndexPath:(NSIndexPath *)sourceIndexPath toProposedIndexPath:(NSIndexPath *)proposedDestinationIndexPath
{
// sourceIndexPath 来源索引
// proposedDestinationIndexPath 建议目的地索引
NSLog(@"执行");
if(sourceIndexPath.section == proposedDestinationIndexPath.section)
{
    // 同区移动 可以返回 目的地的索引
    return proposedDestinationIndexPath;
}else{
    // 跨区移动 需要限制(从哪里来,还会哪里去)
    return sourceIndexPath;
}

}
添加
步骤:(代理传值)
1.将数据中的字典转为模型,创建Model文件,将要传得值设为属性
2.创建ViewController和协议,在初始化方法中布局界面
3.遵守协议
4.设置代理
5.让代理去干活,重写协议中必须实现的方法
创建model文件
// FoodModel.h文件:
@property (nonatomic, retain) NSString *foodName;
@property (nonatomic, retain) NSString *money;
// FoodModel.m文件:
- (void)dealloc
{
    [_foodName release];
    [_money release];
    [super dealloc];
}


- (void)setValue:(id)value forUndefinedKey:(NSString *)key
{
    NSLog(@"%@",key);
}
创建ViewController和协议,在初始化方法中布局界面
//SecondViewController.h文件:


#import "FoodModel.h"


@protocol SecondViewControllerDelegate <NSObject>

- (void)addFood:(FoodModel *)model;

@end
@interface SecondViewController : UIViewController <UITextFieldDelegate>

@property (nonatomic, assign) id<SecondViewControllerDelegate> delegate;

@end

// SecondViewController.m文件:

- (void)viewDidLoad {
    [super viewDidLoad];
    // Do any additional setup after loading the view.

self.view.backgroundColor = [UIColor whiteColor];

UITextField *textField = [[UITextField alloc]initWithFrame:CGRectMake(100, 100, 200, 50)];
textField.backgroundColor = [UIColor yellowColor];
textField.delegate = self;
[self.view addSubview:textField];
[textField release];
}

- (BOOL)textFieldShouldReturn:(UITextField *)textField
{
FoodModel *model = [[FoodModel alloc]init];
model.foodName = textField.text;
model.money = @"10";
// 进行传值 让代理去干活 协议中得方法
if ([_delegate respondsToSelector:@selector(addFood:)]) {
      [_delegate addFood:model];
}


[self dismissViewControllerAnimated:YES completion:nil];

[model release];
return YES;
}
遵守协议
@interface RootTableViewController () <SecondViewControllerDelegate>设置代理
- (void)AddBarButtobItemClick:(UIBarButtonItem *)addButtonItem
{
    SecondViewController *secondVC = [[SecondViewController alloc]init];

[self presentViewController:secondVC animated:YES completion:nil];
// 设置代理
secondVC.delegate = self;

[secondVC release];
}
让代理去干活,重写协议中必须实现的方法
- (void)addFood:(FoodModel *)model
{
// 添加进数组
[self.dataArray addObject:model];
// 刷新页面
[self.tableView reloadData];
}


 1400
1400

 被折叠的 条评论
为什么被折叠?
被折叠的 条评论
为什么被折叠?
 到【灌水乐园】发言


