


Day02 项目搭建与前后联调
二、项目基础概念
1、三级分类
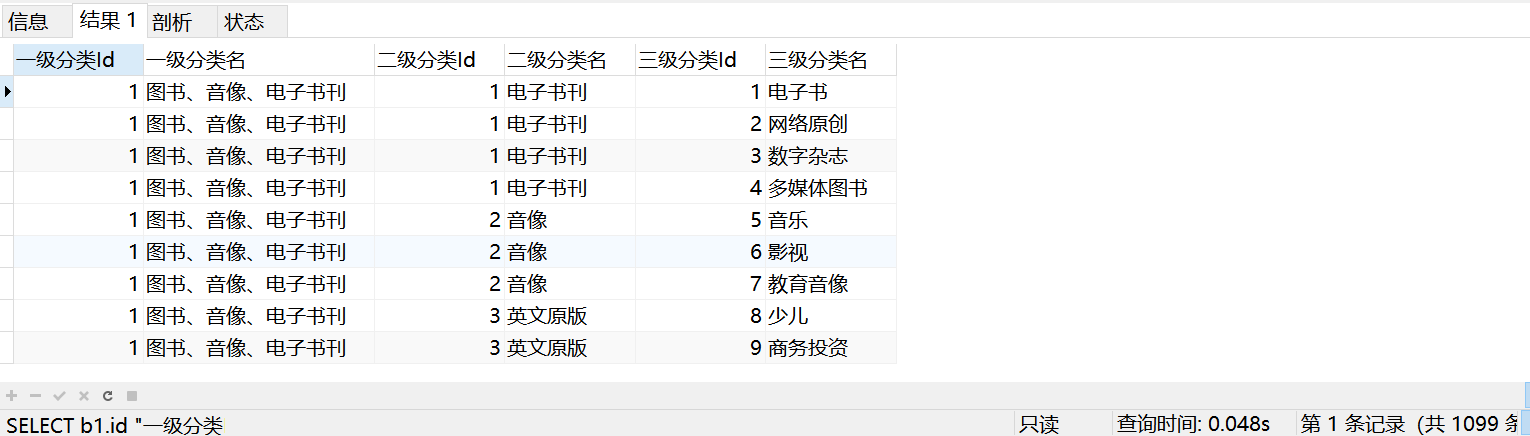
建立好数据库之后,查询出所有分类商品
SELECT b1.id "一级分类Id",b1.`name` "一级分类名",b2.id "二级分类Id",b2.`name` "二级分类名",b3.id "三级分类Id",b3.`name` "三级分类名"
FROM base_category1 b1
LEFT JOIN base_category2 b2 ON b1.id = b2.category1_id
LEFT JOIN base_category3 b3 ON b2.id = b3.category2_id
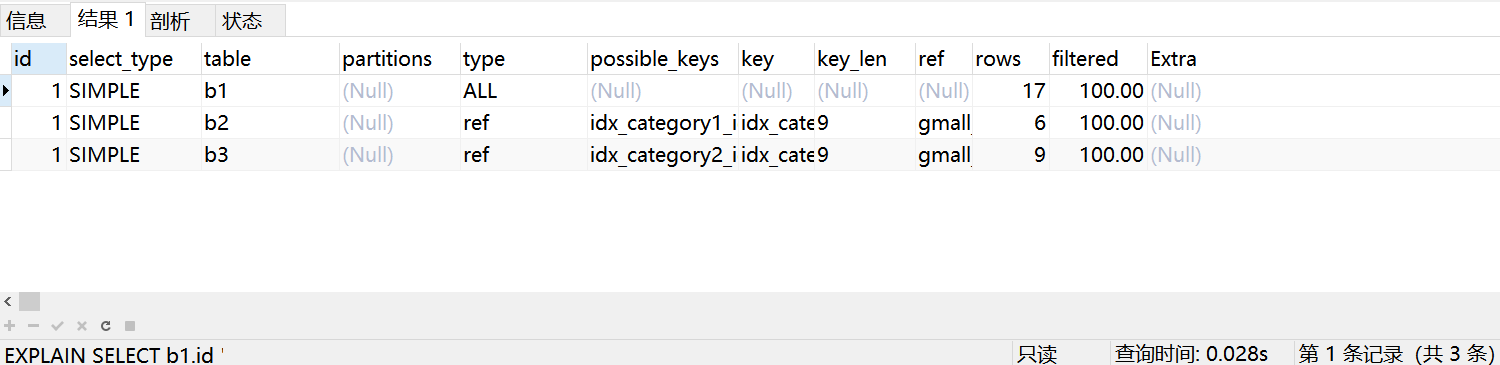
此时我们用 EXPLAIN 分析一下
EXPLAIN SELECT b1.id "一级分类Id",b1.`name` "一级分类名",b2.id "二级分类Id",b2.`name` "二级分类名",b3.id "三级分类Id",b3.`name` "三级分类名"
FROM base_category1 b1
LEFT JOIN base_category2 b2 ON b1.id = b2.category1_id
LEFT JOIN base_category3 b3 ON b2.id = b3.category2_id

type 为 ALL,rows 太多了 17×113×1099
发现没有用到索引,此时我们需要加索引,那么应该怎么加?给谁加呢?注意:要遵循小表驱动大表的原则
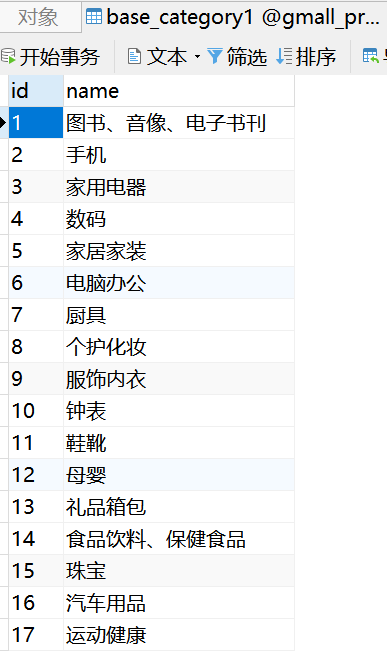
先看下这几张表
base_category1:一级分类表只有一个主键索引
base_category2:二级分类表可以给 category1_id 建索引

ALTER TABLE base_category2 ADD INDEX idx_category1_id(category1_id)
此时效果明显

接着看 base_category3,可以给 category2_id 建索引
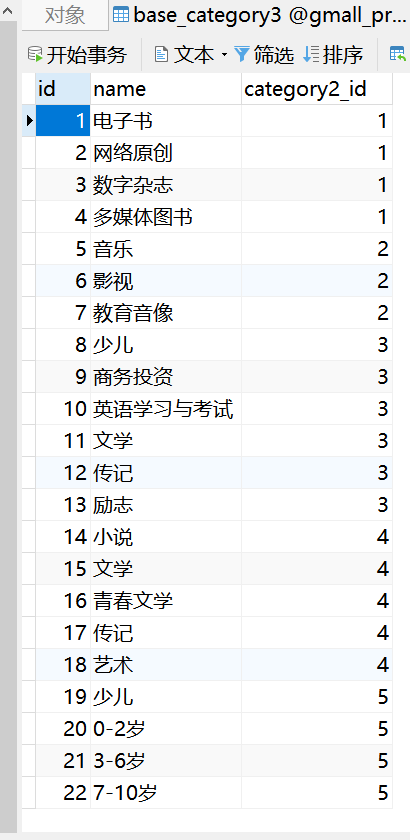
ALTER TABLE base_category3 ADD INDEX idx_category2_id(category2_id)
效果更明显了
2、平台属性
三、商品模块(后台)
1、网关创建
https://spring.io/projects/spring-cloud-gateway
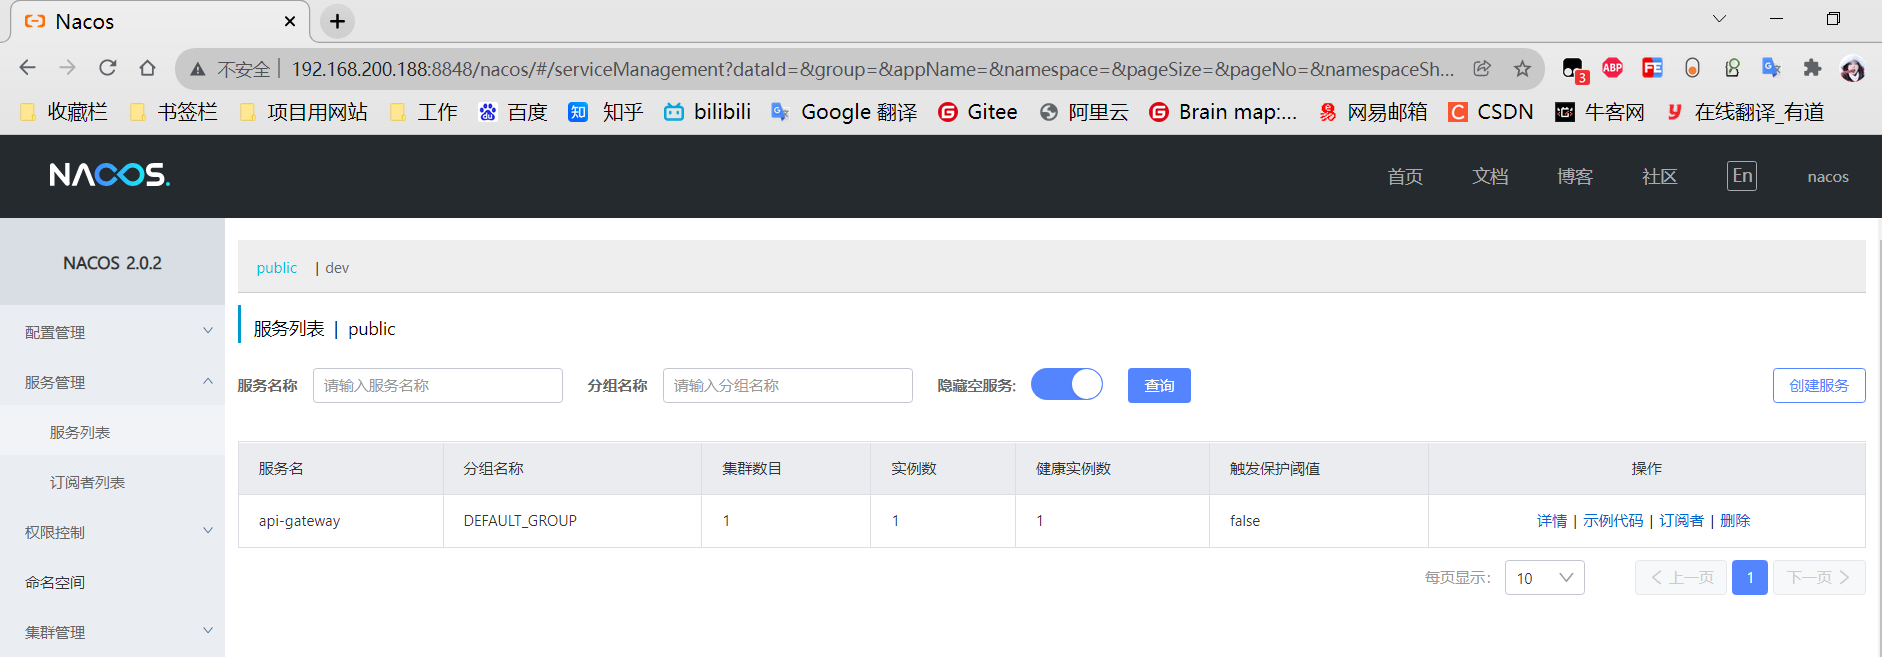
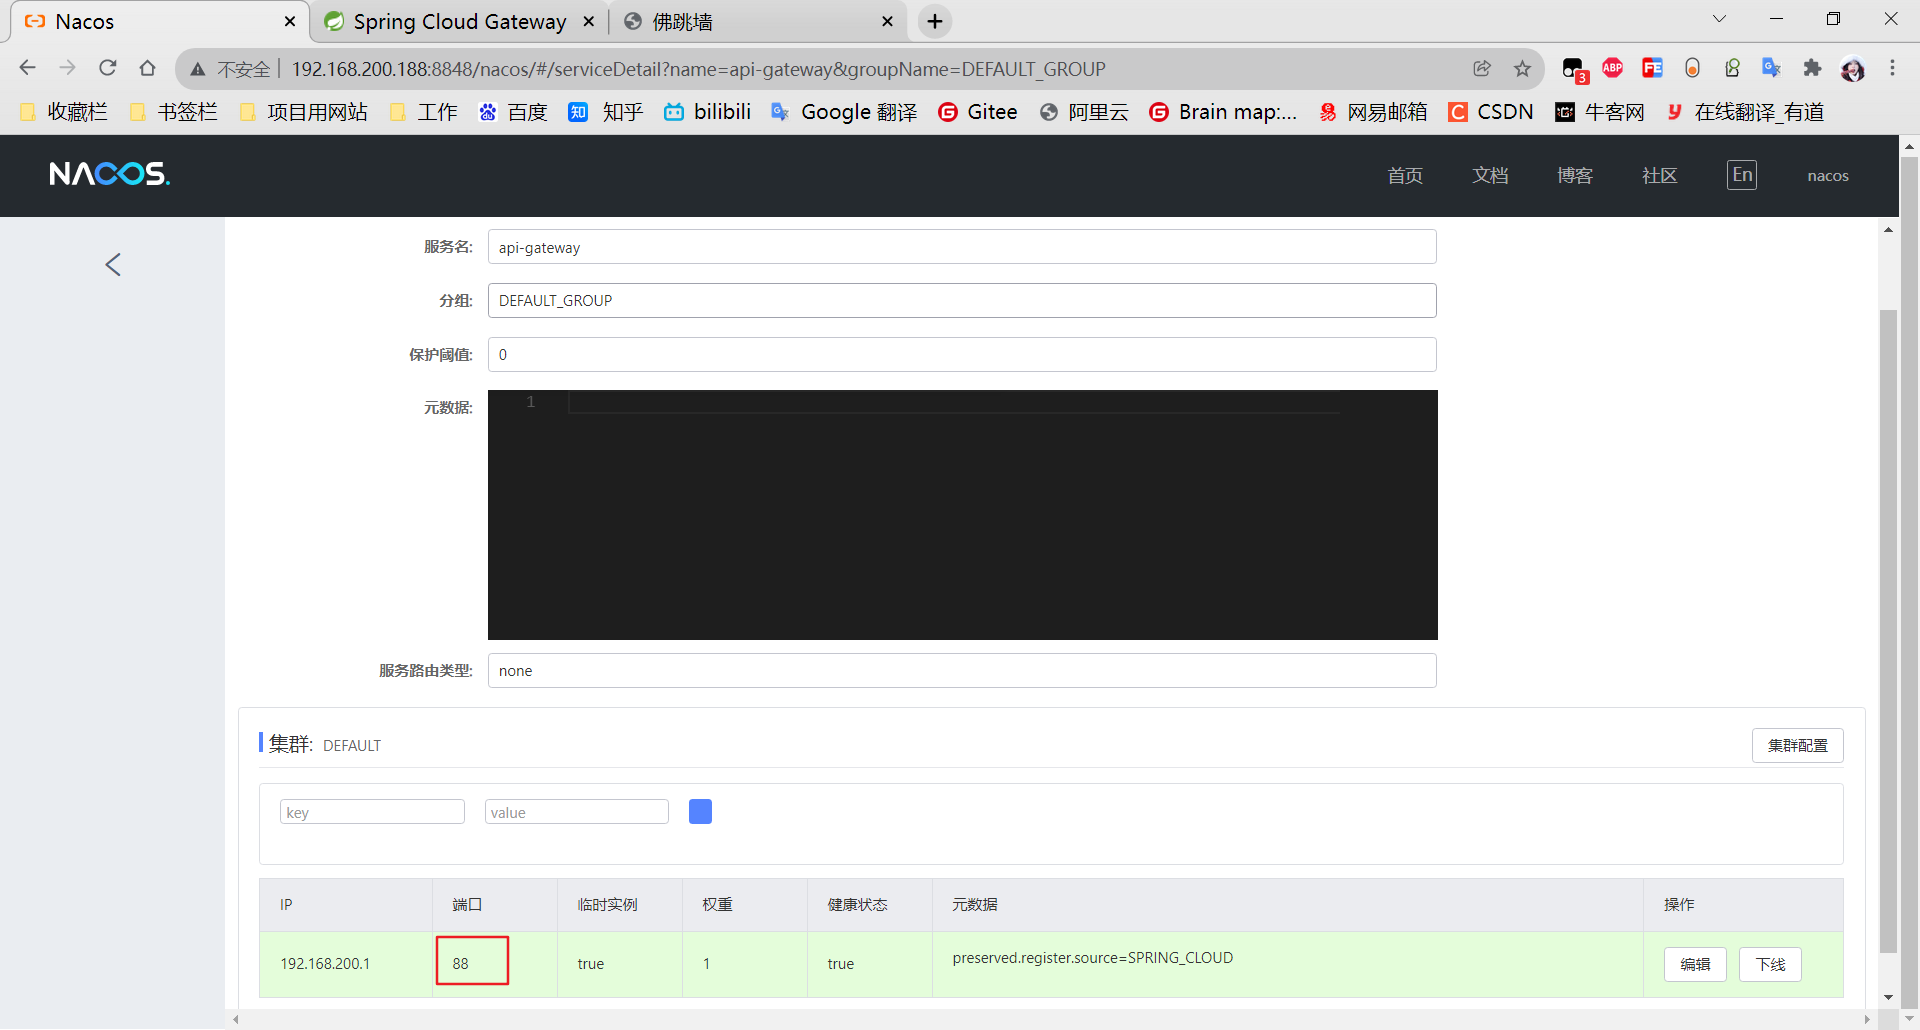
新建 api-gateway
(1)pom.xml
<dependencies>
    <dependency>
        <groupId>org.springframework.cloud</groupId>
        <artifactId>spring-cloud-starter-gateway</artifactId>
    </dependency>

    <!-- 流量控制 -->
    <dependency>
        <groupId>com.alibaba.cloud</groupId>
        <artifactId>spring-cloud-starter-alibaba-sentinel</artifactId>
    </dependency>

    <!--开发者工具-->
    <dependency>
        <groupId>org.springframework.boot</groupId>
        <artifactId>spring-boot-devtools</artifactId>
        <optional>true</optional>
    </dependency>

    <!--链路追踪-->
    <dependency>
        <groupId>org.springframework.cloud</groupId>
        <artifactId>spring-cloud-starter-zipkin</artifactId>
    </dependency>

    <!-- 服务注册 -->
    <dependency>
        <groupId>com.alibaba.cloud</groupId>
        <artifactId>spring-cloud-starter-alibaba-nacos-discovery</artifactId>
    </dependency>

    <!-- 服务配置-->
    <dependency>
        <groupId>com.alibaba.cloud</groupId>
        <artifactId>spring-cloud-starter-alibaba-nacos-config</artifactId>
    </dependency>
</dependencies>
(2)bootstrap.properties
spring.application.name=api-gateway
server.port=88
# 指定 nacos 地址
spring.cloud.nacos.server-addr=192.168.200.188:8848
(3)ApiGatewayApplication
新建 com.atguigu.gmall.ApiGatewayApplication
@SpringCloudApplication
public class ApiGatewayApplication {
    public static void main(String[] args) {
        SpringApplication.run(ApiGatewayApplication.class,args);
    }
}
运行启动类
(4)application.yaml
接下来可以参考官网配置 application.yaml:https://spring.io/projects/spring-cloud-gateway#learn

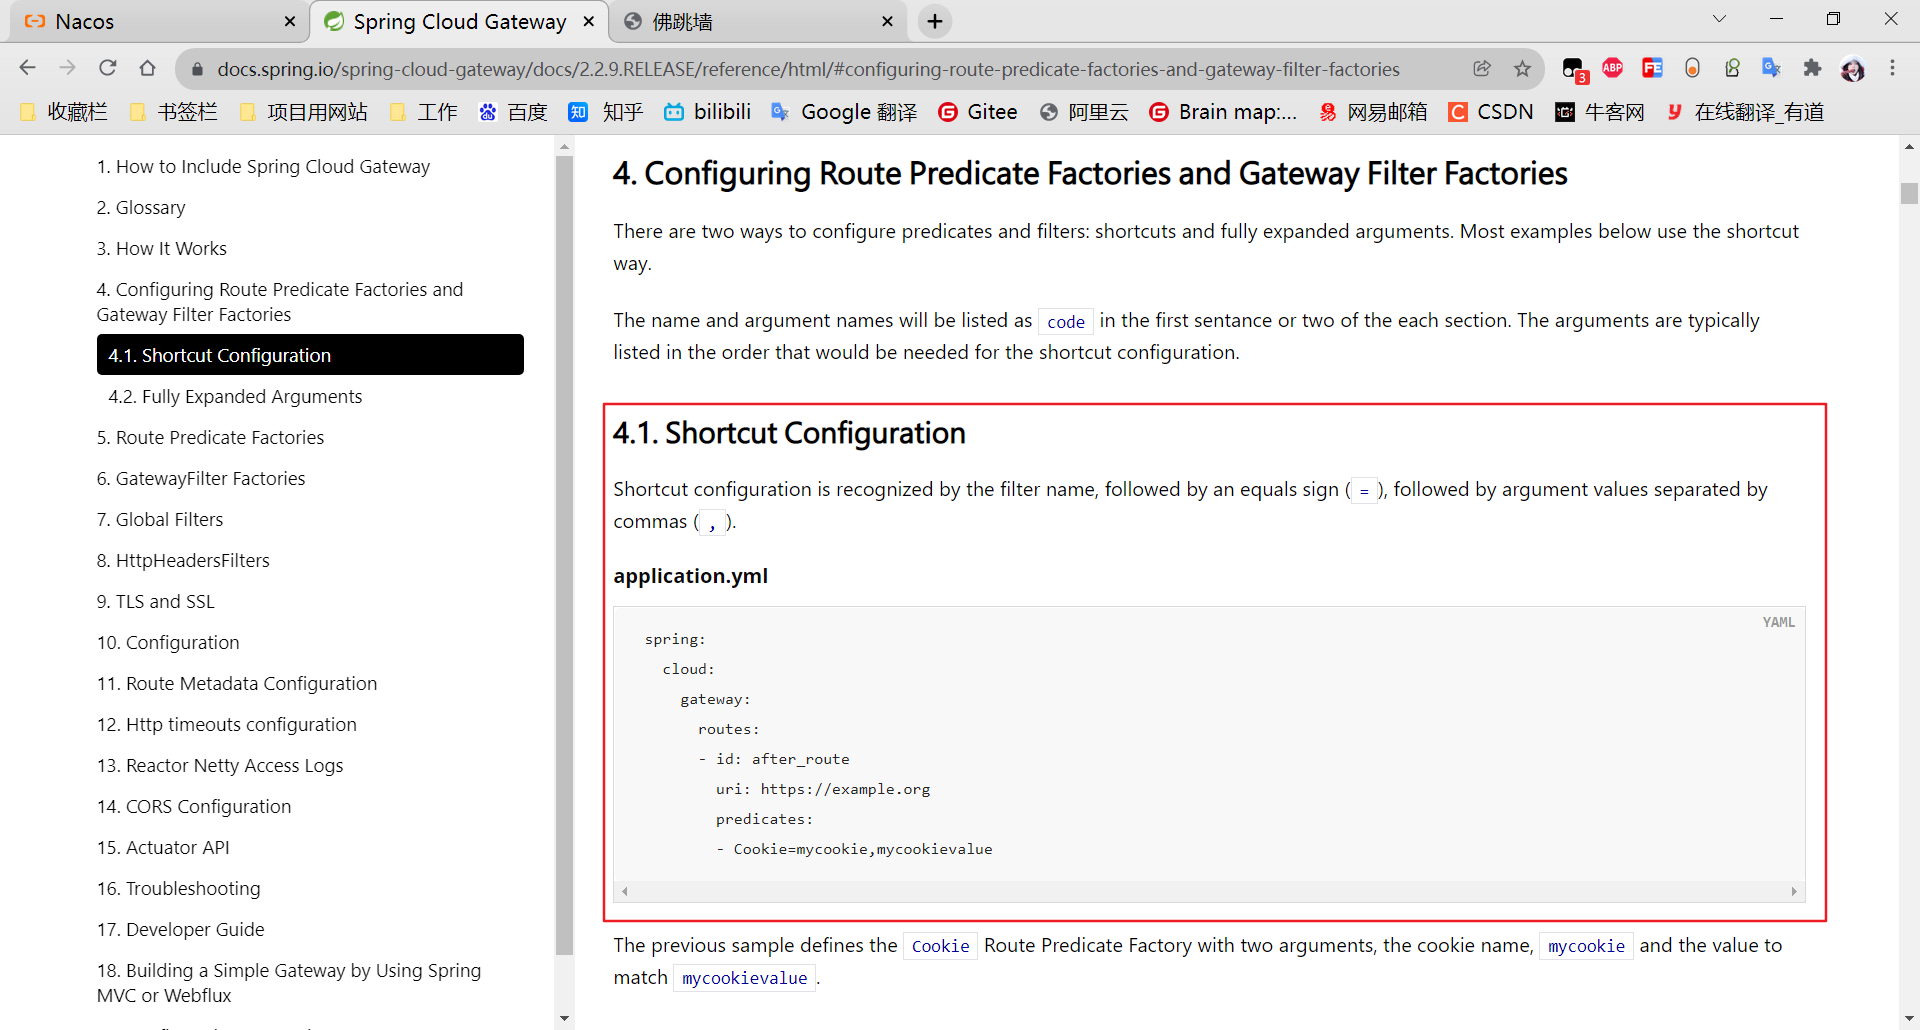
官网的 application.yaml
spring:
  cloud:
    gateway:
      routes:
      - id: after_route
        uri: https://example.org
        predicates:
        - Cookie=mycookie,mycookievalue
我们根据后台管理系统和官网的例子修改成自己需要的
spring:
cloud:
gateway:
routes:
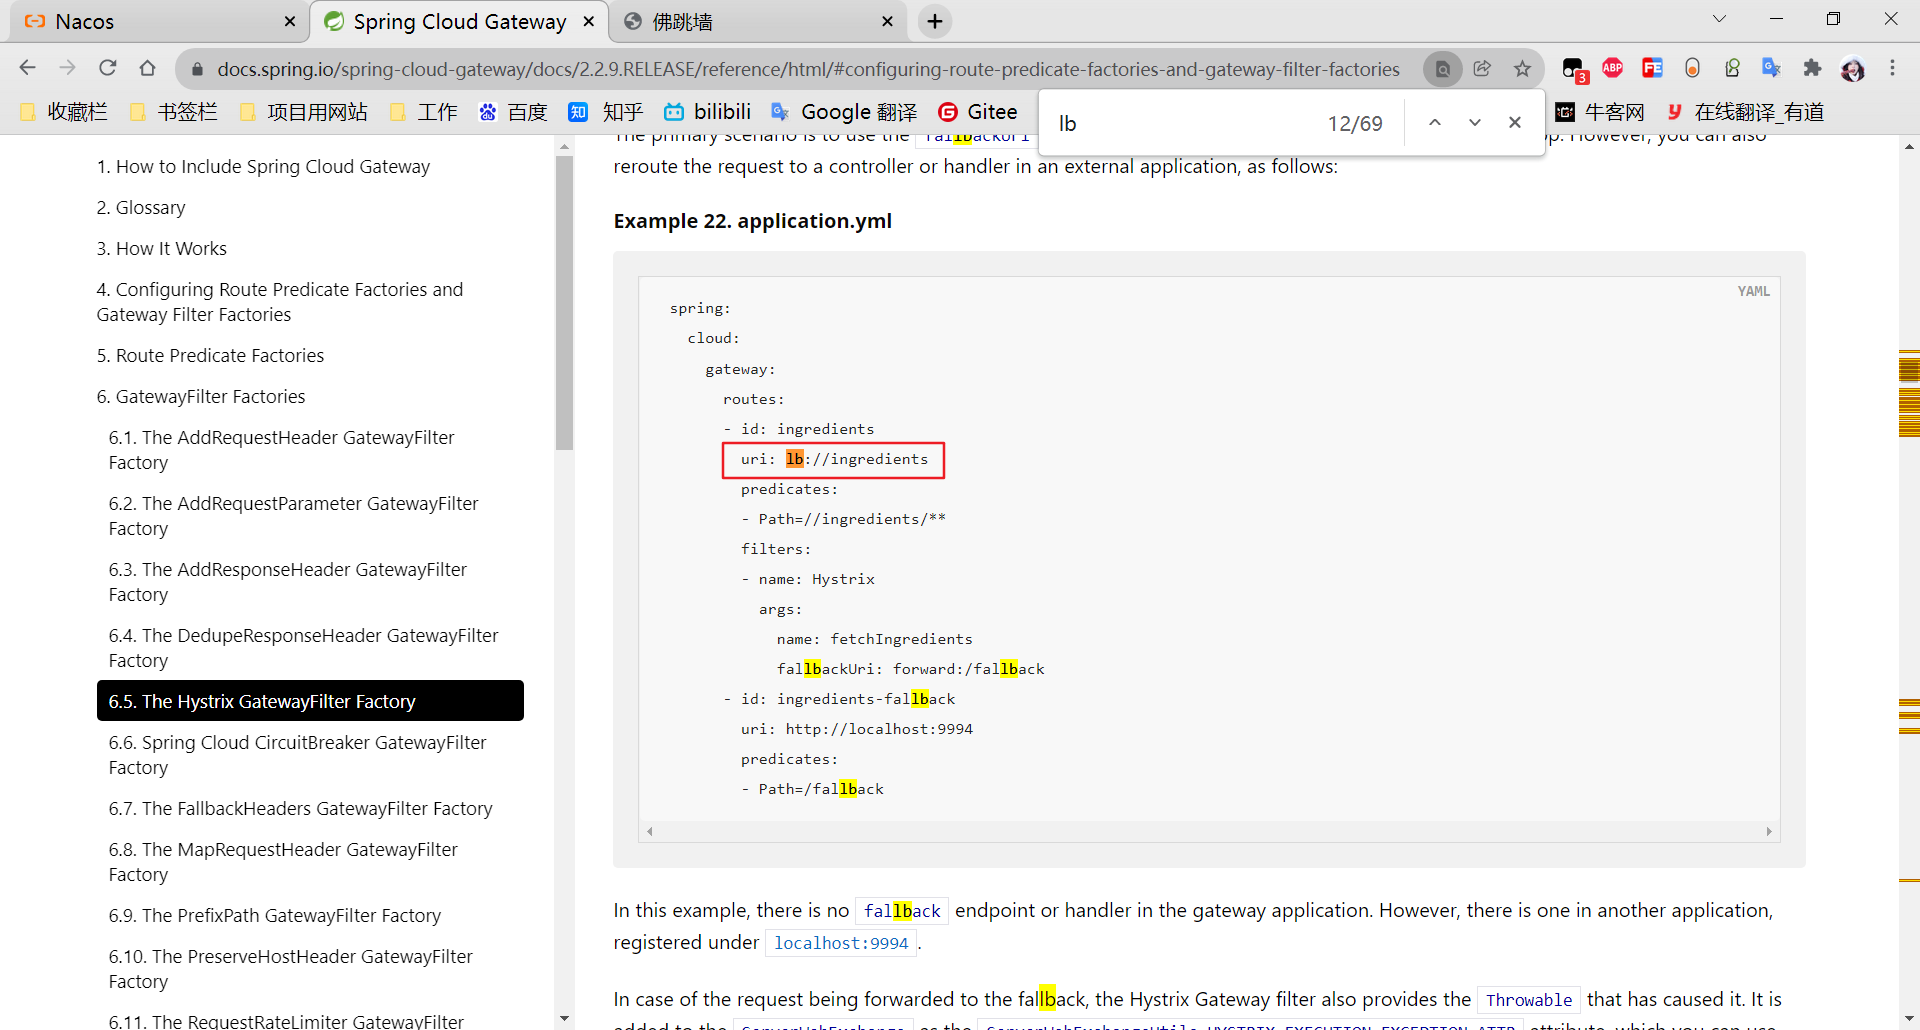
- id: admin-product
uri: lb://service-product
predicates:
- Path=/admin/product/**
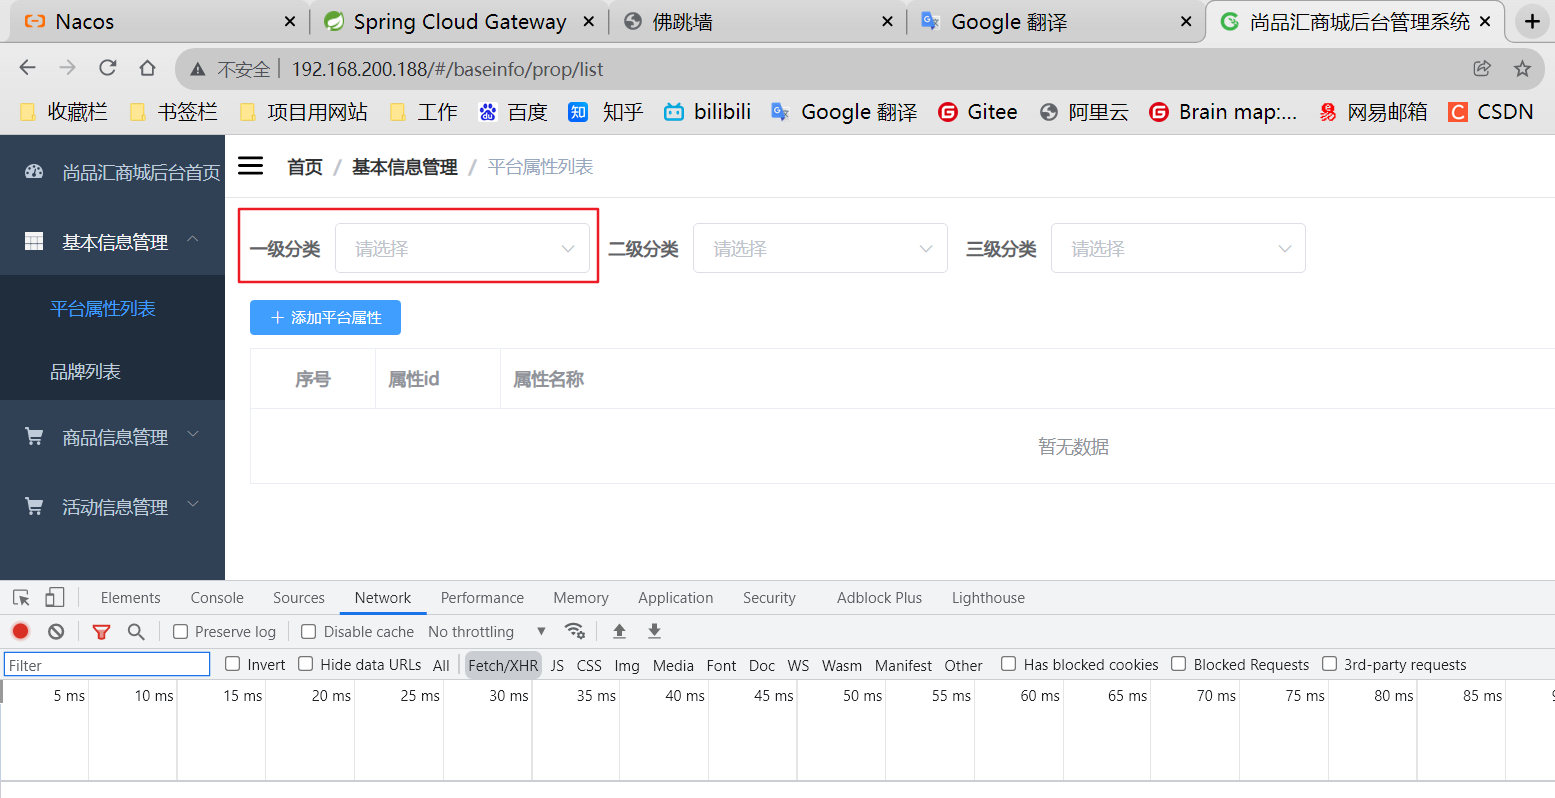
2、网关全局跨域配置
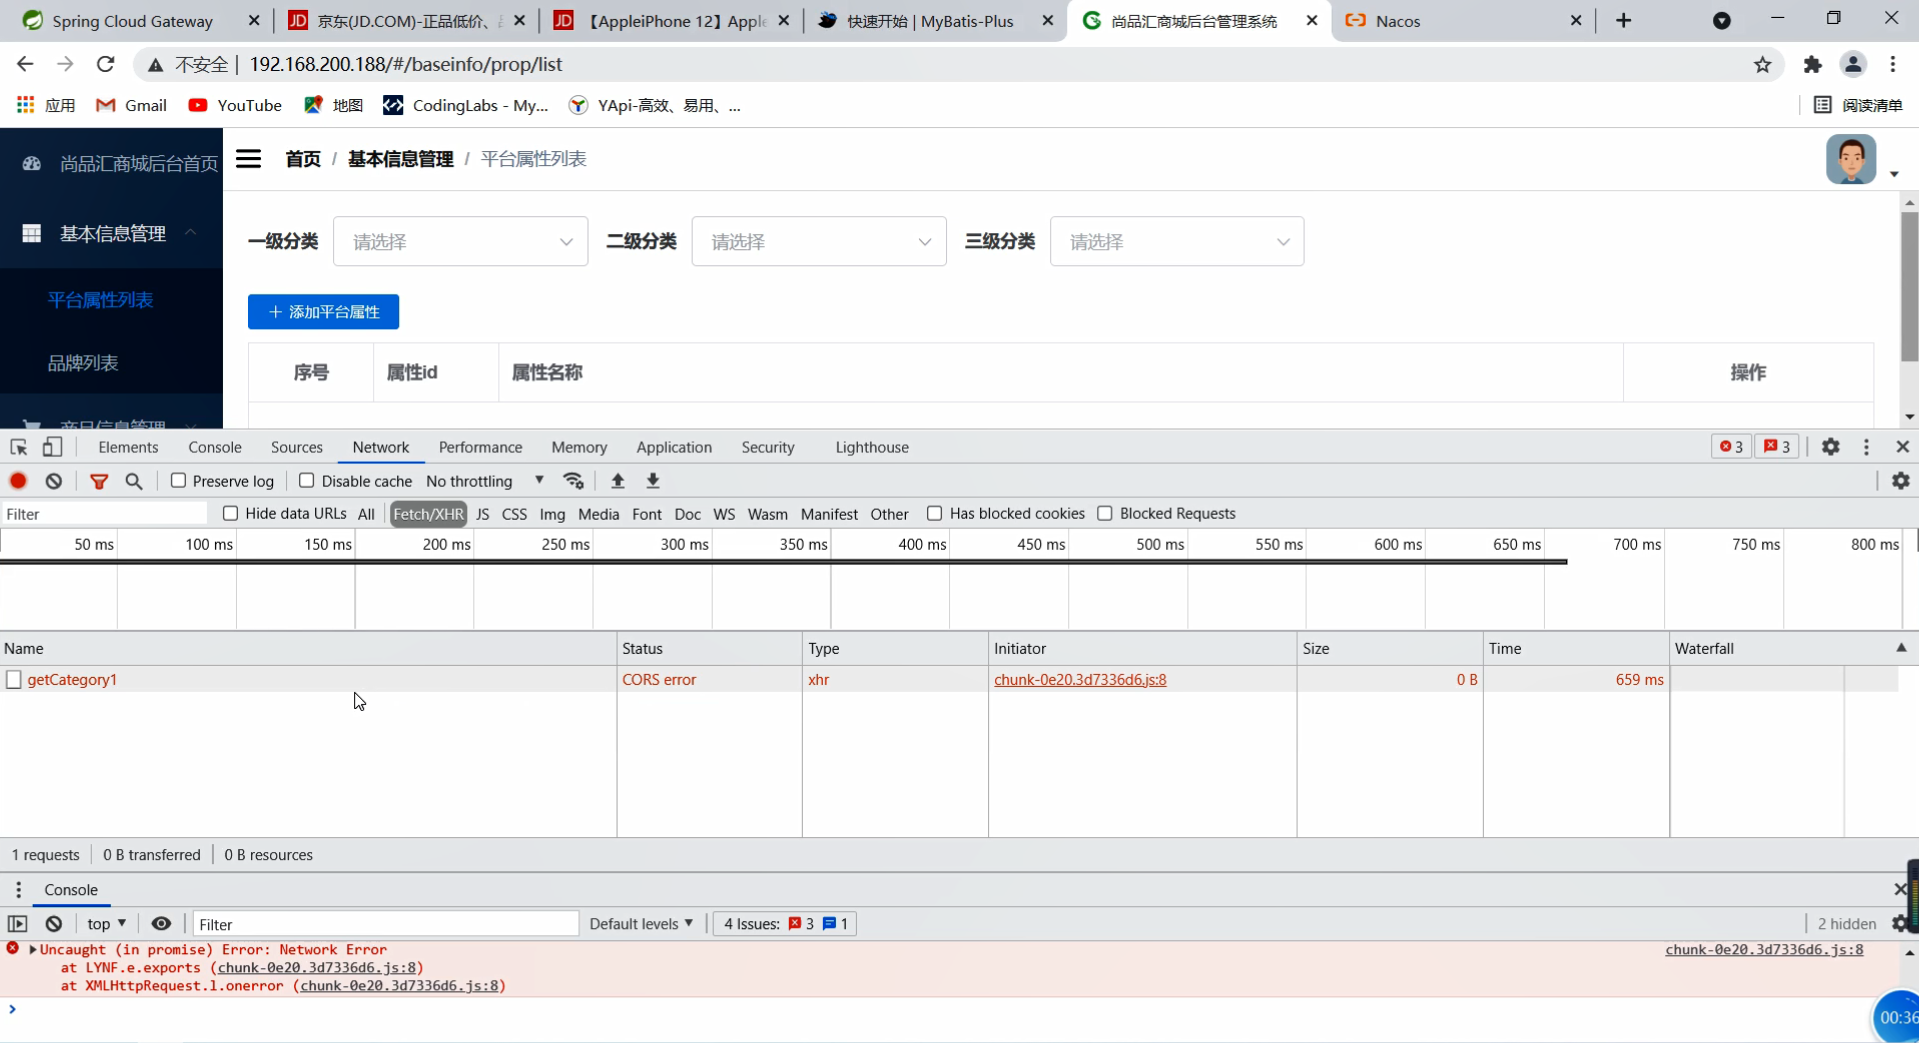
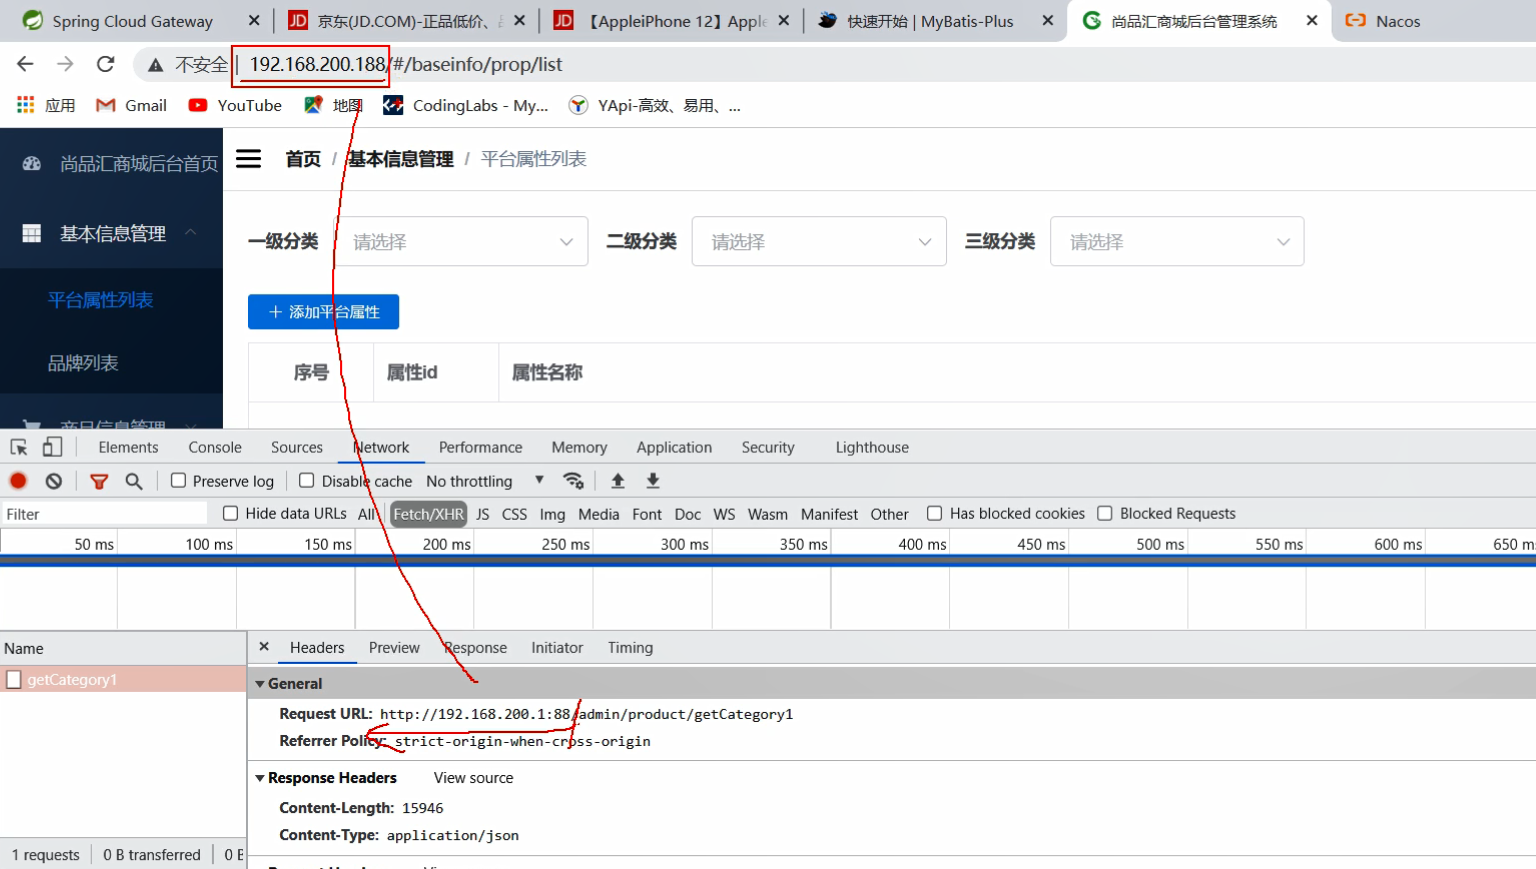
(1)CORS Configuration
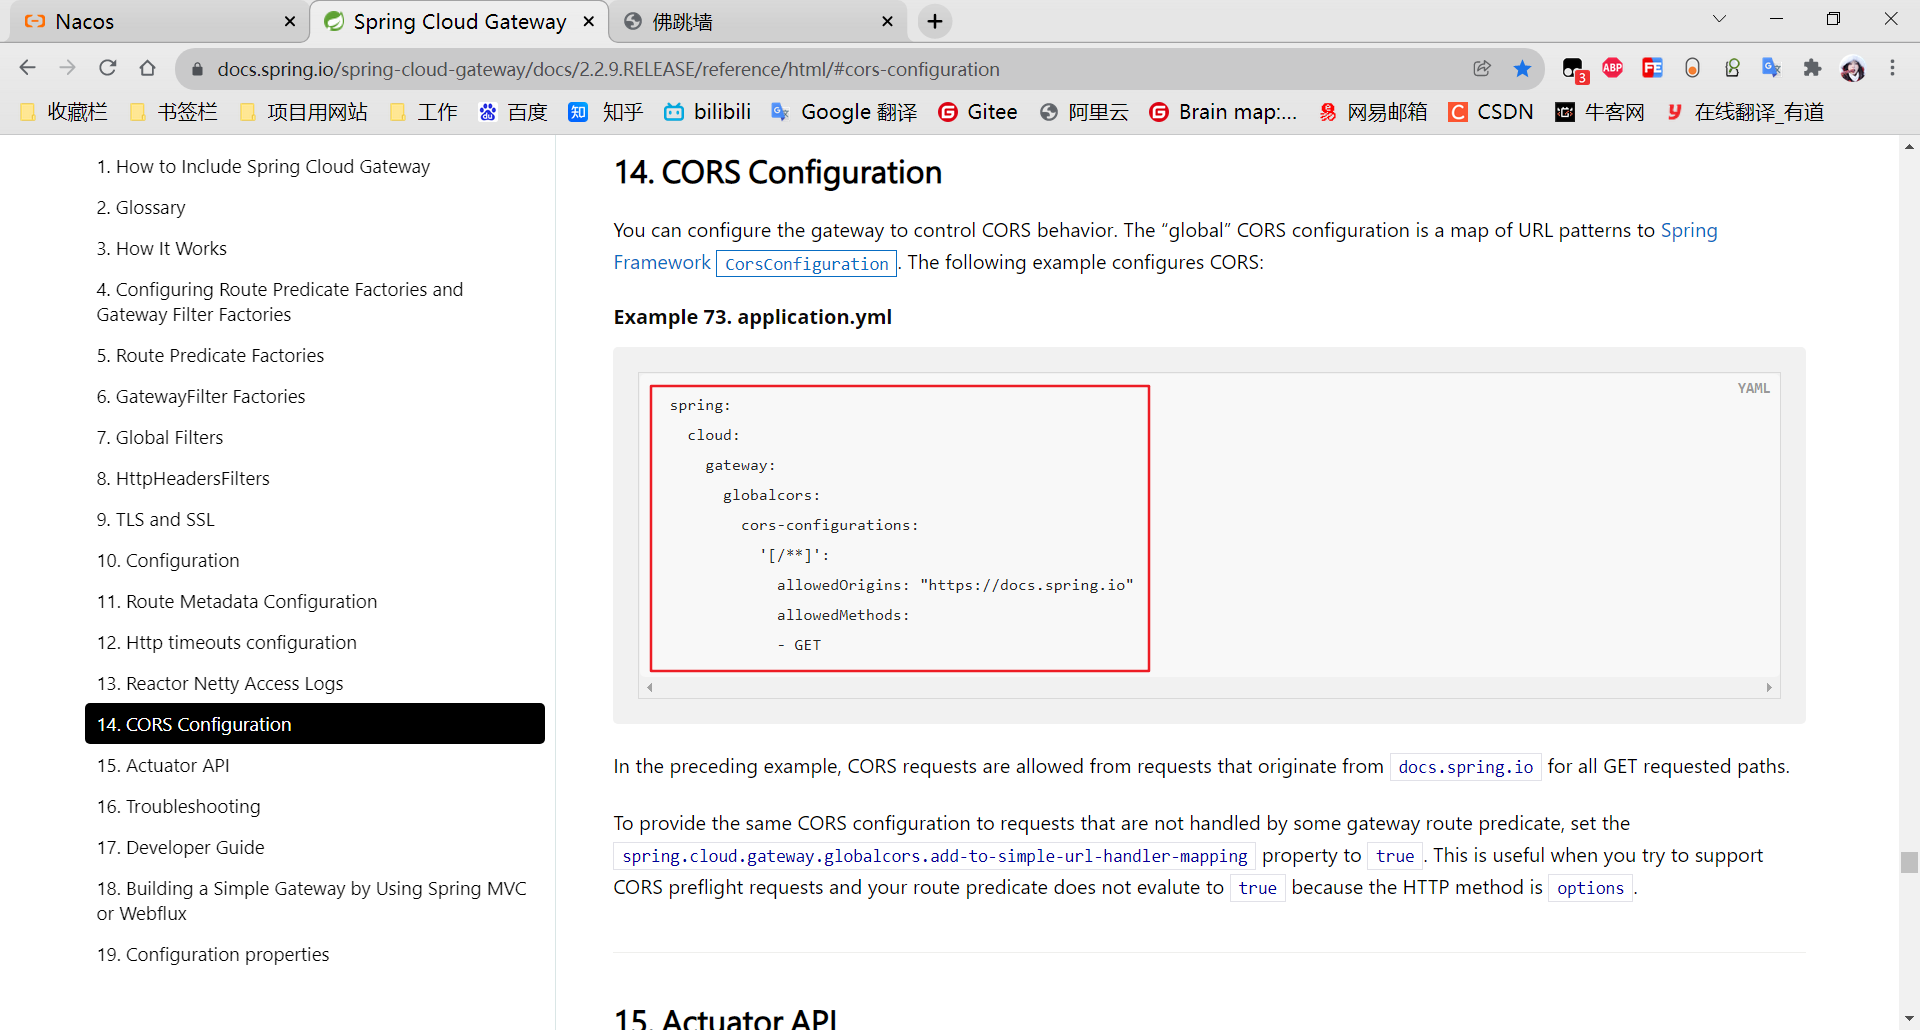
(2)application.yaml
spring:
  cloud:
    gateway:
      globalcors:
        cors-configurations:
          '[/**]':
            allowedOrigins: "*"
            allowedMethods: "*"
      routes:
        - id: admin-product
          uri: lb://service-product
          predicates:
            - Path=/admin/product/**
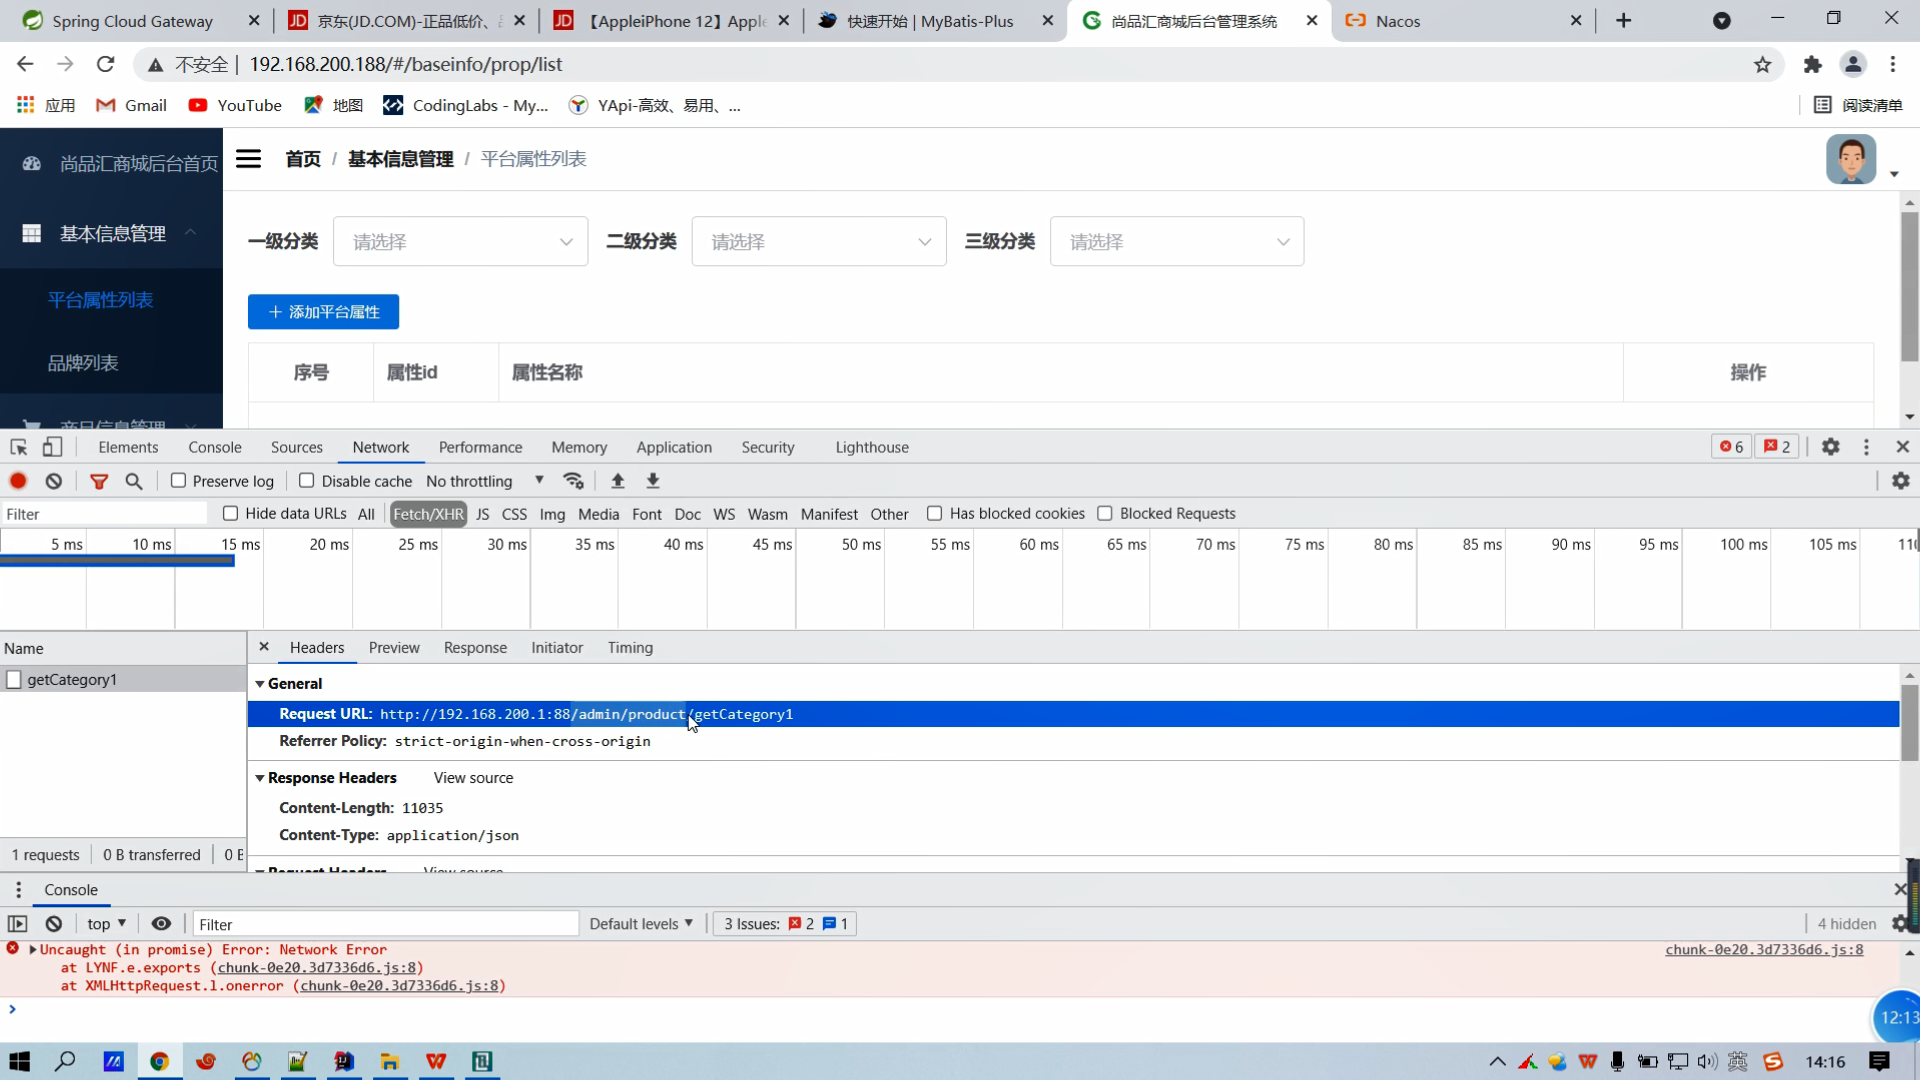
现在的后台管理系统就变成了
[外链图片转存失败,源站可能有防盗链机制,建议将图片保存下来直接上传(img-j59mbqV7-1639308085688)(C:\Users\YangFan\AppData\Roaming\Typora\typora-user-images\image-20211207175900849.png)]
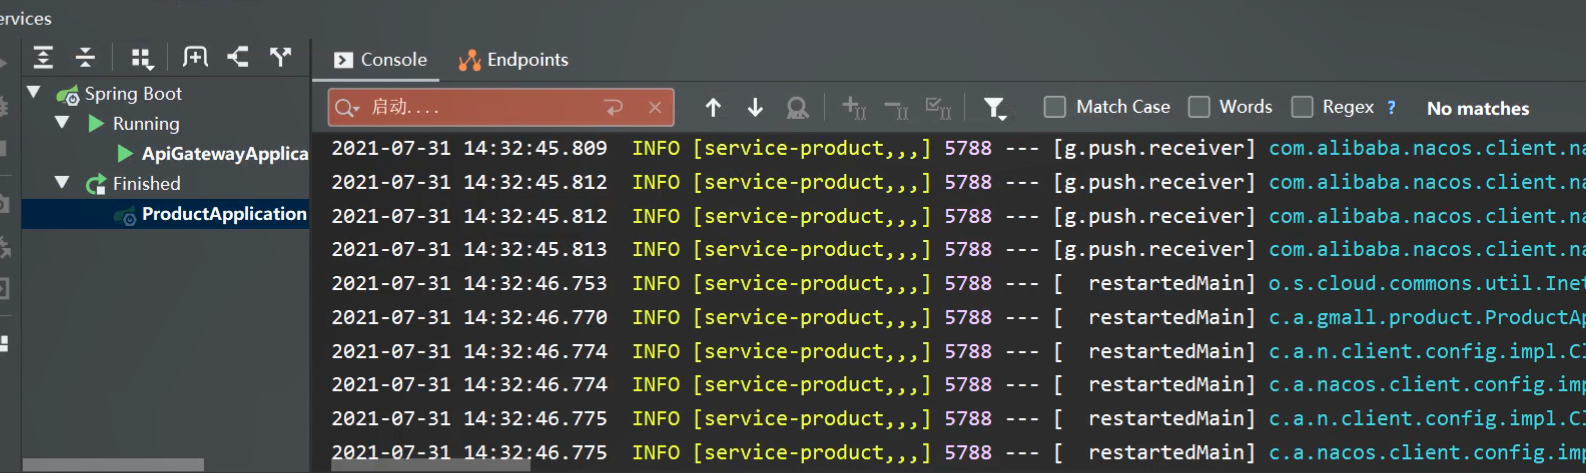
3、商品模块创建完成
(1)ProductApplication
新建 com.atguigu.gmall.product.ProductApplication
@SpringCloudApplication
public class ProductApplication {
    public static void main(String[] args) {
        SpringApplication.run(ProductApplication.class,args);
    }
}
SpringCloudApplication 注解包含了 SpringBootApplication 和 EnableDiscoveryClient
@Target({ElementType.TYPE})
@Retention(RetentionPolicy.RUNTIME)
@Documented
@Inherited
@SpringBootApplication
@EnableDiscoveryClient
@EnableCircuitBreaker
public @interface SpringCloudApplication {
}
(2)bootstrap.properties
spring.application.name=service-product

spring.cloud.nacos.server-addr=192.168.200.188:8848
(3)application.yaml
server:
  port: 8000
spring:
  datasource:
    url: jdbc:mysql://192.168.200.188:3306/gmall_product?characterEncoding=utf-8&useSSL=false
    username: root
    password: root
4、导入 MyBatis-plus 的配置
(1)为啥 Mybatis-plus 能起来
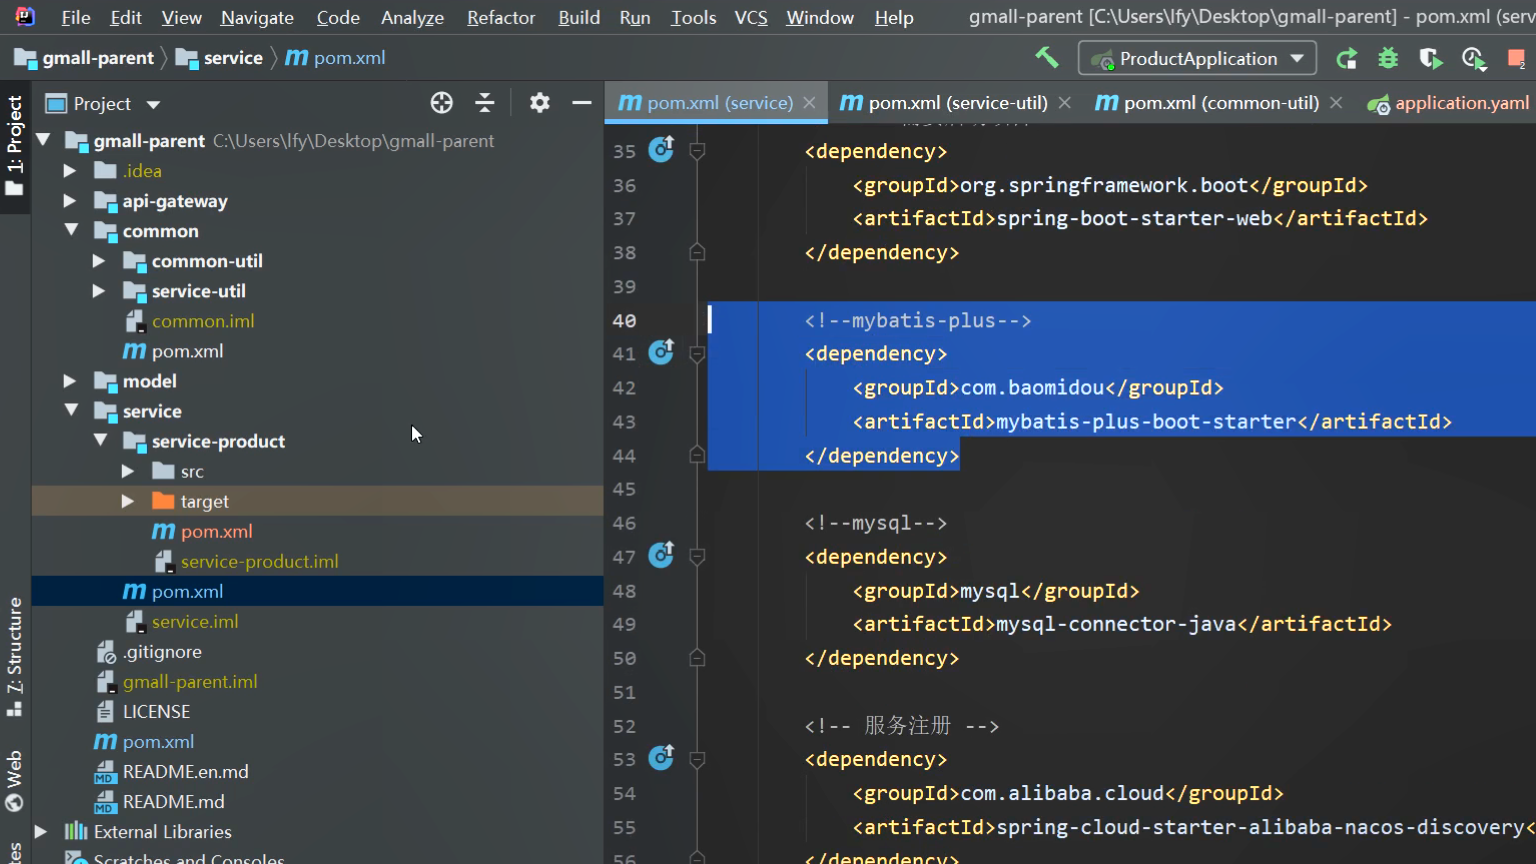
com.atguigu.gmall.common.config.MybatisPlusConfig
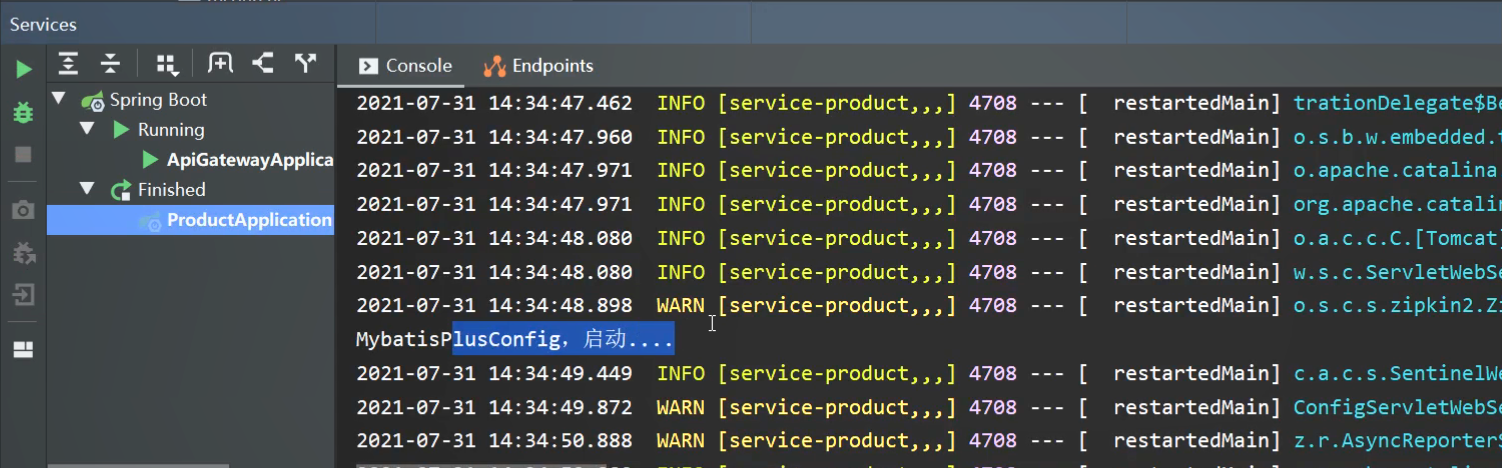
在 MybatisPlusConfig 加一个“启动…”
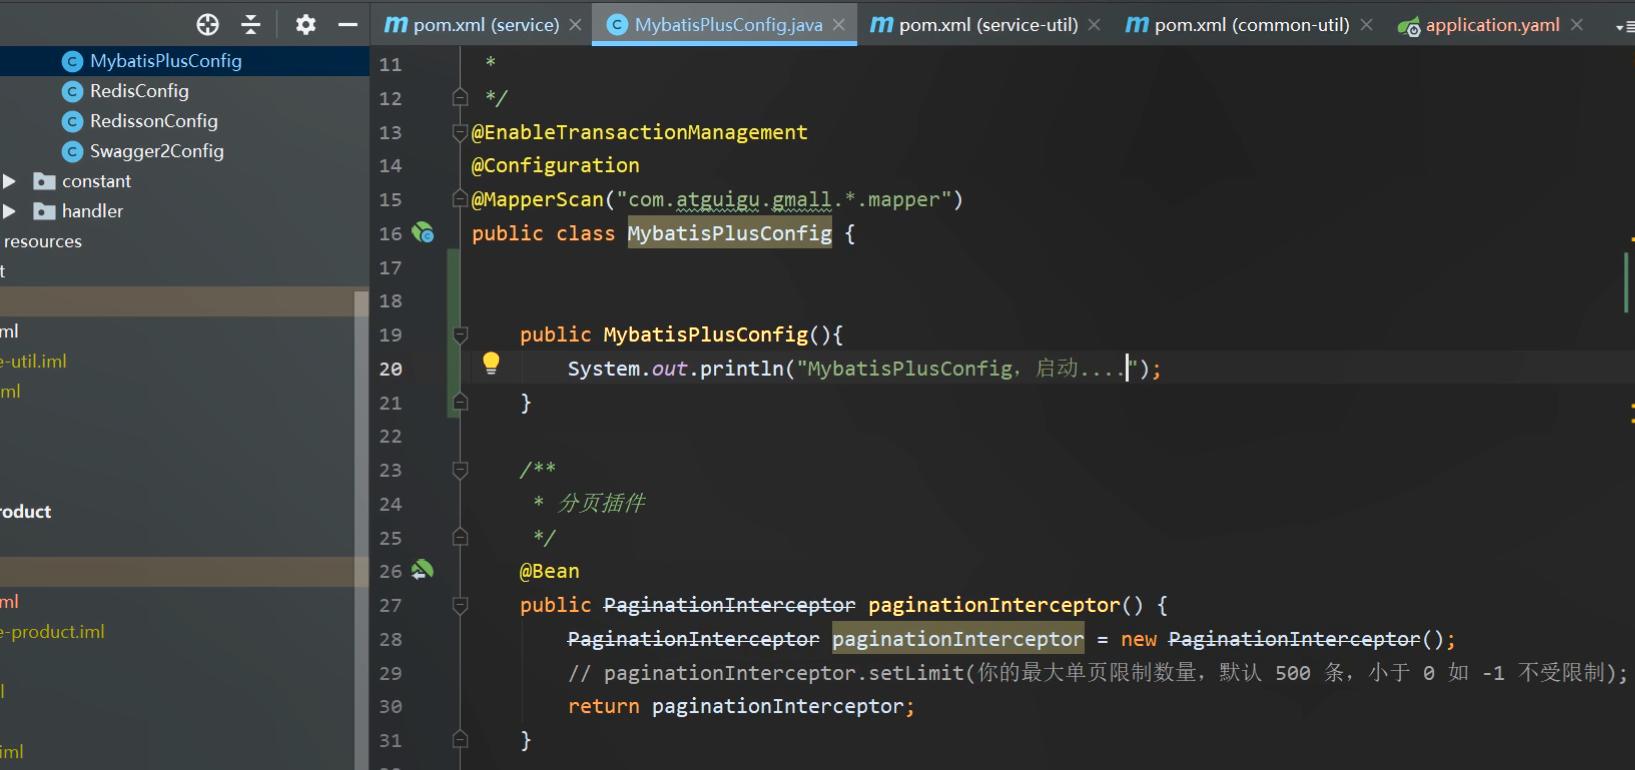
发现并没有打印“启动…”,因为 ProductApplication 和 MybatisPlusConfig 不在同一个包下
此时需要改一下启动类 ProductApplication
//@SpringCloudApplication
@SpringBootApplication(scanBasePackages = "com.atguigu.gmall")
@EnableDiscoveryClient
@EnableCircuitBreaker
public class ProductApplication {
    public static void main(String[] args) {
        SpringApplication.run(ProductApplication.class,args);
    }
}
(2)ProductApplication
但是也不同非得这样,我们可以导入 MybatisPlusConfig
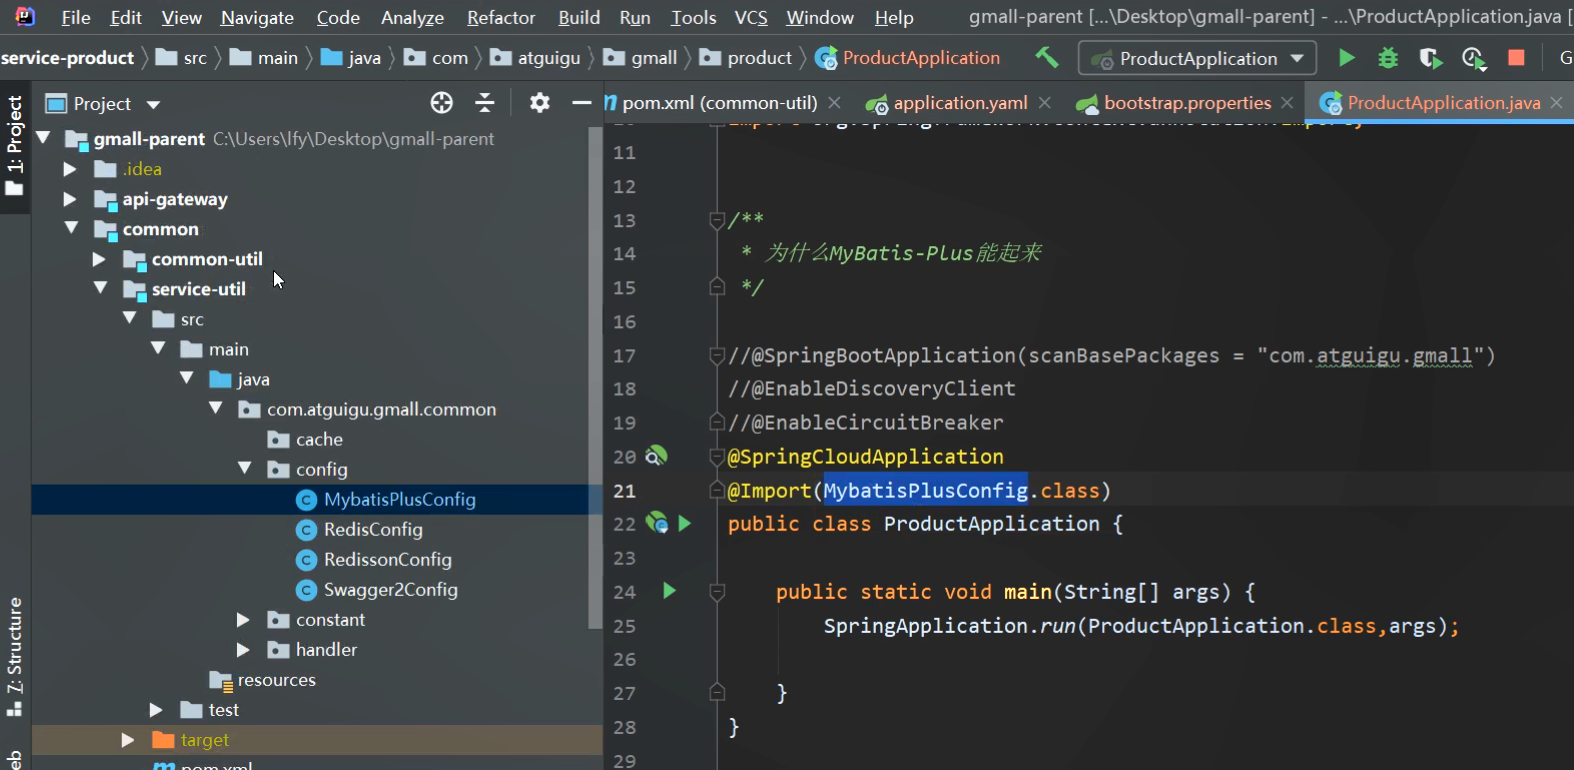
@SpringCloudApplication
@Import(MybatisPlusConfig.class)//单独导入MyBatis-Plus的配置
public class ProductApplication {
    public static void main(String[] args) {
        SpringApplication.run(ProductApplication.class,args);
    }
}
5、电商管理系统API接口文档
(1)获取一、二、三级分类
一级:
| 接口 | http://api.gmall.com/admin/product/getCategory1 |
|---|---|
| 请求参数 | 无 |
| 请求方式 | get |
| 例: | http://api.gmall.com/admin/product/getCategory1 |
| 返回值 | { ****“code”****😗***200****, ****“message”****😗***“成功”****, ****“data”****:[ { ****“id”****😗***1****, *“name”****😗***“图书、音像、电子书刊”* } |
{
    "code":200,
    "message":"成功",
    "data":[
        {
            "id":1,
            "name":"图书、音像、电子书刊"
        }
…
    ],
    "ok":true
}
二级:
| 接口 | http://api.gmall.com/admin/product/getCategory2/{category1Id} |
|---|---|
| 请求参数 | category1Id:一级分类ID |
| 请求方式 | get |
| 例: | http://api.gmall.com/admin/product/getCategory2/1 |
| 返回值 | { ****“code”****😗***200****, ****“message”****😗***“成功”****, ****“data”****:[ { ****“id”****😗***13****, ****“name”****😗***“手机通讯”****, *“category1Id”****😗***1* } ], *“ok”****😗***true* } |
{
    "code":200,
    "message":"成功",
    "data":[
        {
            "id":13,
            "name":"手机通讯",
            "category1Id":1
        }
    ],
    "ok":true
}
三级:
| 接口 | http://api.gmall.com/admin/product/getCategory3/{category2Id} |
|---|---|
| 请求参数 | Category2Id:二级分类ID |
| 请求方式 | get |
| 例: | http://api.gmall.com/admin/product/getCategory3/13 |
| 返回值 | { ****“code”****😗***200****, ****“message”****😗***“成功”****, ****“data”****:[ { ****“id”****😗***13****, ****“name”****😗***“手机通讯”****, *“category2Id”****😗***1* }… ], *“ok”****😗***true* } |
{
    "code":200,
    "message":"成功",
    "data":[
        {
            "id":13,
            "name":"手机通讯",
            "category2Id":1
        }
…
    ],
    "ok":true
}
① ProductAdminController
com.atguigu.gmall.product.controller.ProductAdminController
/**
 * 对接后台管理系统,/admin/product相关请求
 */
@RequestMapping("/admin/product")
@RestController
public class ProductAdminController {

    @Autowired
    CategoryService categoryService;

    /**
     * 获取一级分类信息
     * @return
     */
    @GetMapping("/getCategory1")
    public Result<List<BaseCategory1>> getCategory1(){
        List<BaseCategory1> category1s = categoryService.getCategory1();
        return Result.ok(category1s);
    }

    /**
     * 获取二级分类信息
     * @param category1Id
     * @return
     */
    @GetMapping("/getCategory2/{category1Id}")
    public Result<List<BaseCategory2>> getCategory2(@PathVariable("category1Id") Long category1Id){
        if(category1Id > 0){
            List<BaseCategory2> category2s = categoryService.getCategory2(category1Id);
            return Result.ok(category2s);
        }else {
            return Result.build(null, ResultCodeEnum.SECKILL_ILLEGAL);
        }
    }

    /**
     * 获取三级分类信息
     * @param category2Id
     * @return
     */
    @GetMapping("/getCategory3/{category2Id}")
    public Result<List<BaseCategory3>> getCategory3(@PathVariable("category2Id") Long category2Id){
        if(category2Id > 0){
            List<BaseCategory3> category3s = categoryService.getCategory3(category2Id);
            return Result.ok(category3s);
        }else {
            return Result.build(null, ResultCodeEnum.SECKILL_ILLEGAL);
        }
    }
}
② CategoryService
com.atguigu.gmall.product.service.CategoryService
/**
 * 操作三个 分类表
 */
public interface CategoryService{
    List<BaseCategory1> getCategory1();

    List<BaseCategory2> getCategory2(Long category1Id);

    List<BaseCategory3> getCategory3(Long category2Id);
}
③ CategoryServiceImpl
com.atguigu.gmall.product.service.impl.CategoryServiceImpl
@Service
public class CategoryServiceImpl implements CategoryService {

    @Autowired
    BaseCategory1Mapper baseCategory1Mapper;

    @Autowired
    BaseCategory2Mapper baseCategory2Mapper;

    @Autowired
    BaseCategory3Mapper baseCategory3Mapper;

    @Override
    public List<BaseCategory1> getCategory1() {
        //查询所有一级菜单
        List<BaseCategory1> list = baseCategory1Mapper.selectList(null);
        return list;
    }

    @Override
    public List<BaseCategory2> getCategory2(Long category1Id) {
        //查询所有二级菜单
        QueryWrapper<BaseCategory2> wrapper = new QueryWrapper<>();
        wrapper.eq("category1_id",category1Id);

        return baseCategory2Mapper.selectList(wrapper);
    }

    @Override
    public List<BaseCategory3> getCategory3(Long category2Id) {
        //查询所有三级菜单
        QueryWrapper<BaseCategory3> wrapper = new QueryWrapper<>();
        wrapper.eq("category2_id",category2Id);

        return baseCategory3Mapper.selectList(wrapper);
    }
}
④ BaseCategory1Mapper
com.atguigu.gmall.product.mapper.BaseCategory1Mapper
/**
 * 操作一级菜单的Mapper
 */
public interface BaseCategory1Mapper extends BaseMapper<BaseCategory1> {

}
⑤ BaseCategory2Mapper
com.atguigu.gmall.product.mapper.BaseCategory2Mapper
/**
 * 操作二级菜单的Mapper
 */
public interface BaseCategory2Mapper extends BaseMapper<BaseCategory2> {

}
⑥ BaseCategory3Mapper
com.atguigu.gmall.product.mapper.BaseCategory3Mapper
/**
 * 操作三级菜单的Mapper
 */
public interface BaseCategory3Mapper extends BaseMapper<BaseCategory3> {

}


 320
320


 被折叠的 条评论
为什么被折叠?
被折叠的 条评论
为什么被折叠?
 到【灌水乐园】发言


