


前言
springsecurity原理和基础这里暂时不讲,网上资料太多了,这个大家可以自行查找学习,基本上没什么太大区别,看几篇文章就了解了,这篇文章主要是针对自定义登录页做一个demo,通过这个小 demo,大家可以直接理解springsecurity 处理登录的流程。
在springsecurity 6.x之前的版本里,实现springsecurity web configuration 需要继承 WebSecurityConfigurerAdaper,但是在 6.X的新版本里,这个类已经不复存在了,而是使用 SpringSecurityFilterChain 而且有很多方法也都 depricated了,估计不久的将来,这些方法也会被 remove 掉,所以下面是基于springsecurity 6.2 版本实现的自定义登录页的功能,没有任何多余的代码,甚至从数据库查询user信息都是mock的,就是为了方便大家学习,网上看了很多资料,要么太繁琐,不知道核心在哪里,要么没办法复现,废话少说,直接上代码:
Springsecurity Filter Chain 配置:
package com.boot.config;

import org.springframework.context.annotation.Bean;
import org.springframework.context.annotation.Configuration;
import org.springframework.security.config.annotation.web.builders.HttpSecurity;
import org.springframework.security.config.annotation.web.configuration.EnableWebSecurity;
import org.springframework.security.crypto.password.NoOpPasswordEncoder;
import org.springframework.security.crypto.password.PasswordEncoder;
import org.springframework.security.web.SecurityFilterChain;


@Configuration
@EnableWebSecurity
public class SecurityConfig {

    /**
     * PasswordEncoder:加密编码,这里使用 NoOpPasswordEncoder 明文密码,如果需要加密,用 BCryptPasswordEncoder
     */
    @Bean
    public PasswordEncoder passwordEncoder(){
        //明文加密
        return NoOpPasswordEncoder.getInstance();
    }

    @Bean
    public SecurityFilterChain securityFilterChain(HttpSecurity http) throws Exception {
        http.authorizeHttpRequests(authorizeHttpRequests->
                authorizeHttpRequests
                        .requestMatchers("/login").permitAll()
//                        .requestMatchers(HttpMethod.POST, "/login").permitAll()
                        .anyRequest().authenticated()
        );
        http.formLogin(formLogin->
                formLogin
                        .loginPage("/mylogin.html")
                        .loginProcessingUrl("/login")
                        .permitAll()
        );
        // 注意 6.2 版本里这里要使用 csrf.disable() 而不是 withDefault() 方法,网上很多使用 withDefault()方法的,个人实践不成功
        http.csrf(csrf->csrf.disable());
        return http.build();
    }

}
写一个普通的 controller,后面我们就用这个 /user/login 做测试
@RestController
public class LoginController {

    @GetMapping("/user/login")
    public String login(){
        return "login";
    }

}
实现 UserDetailsService
package com.boot.service.impl;

import org.springframework.security.core.userdetails.UserDetails;
import org.springframework.security.core.userdetails.UserDetailsService;
import org.springframework.security.core.userdetails.UsernameNotFoundException;
import org.springframework.stereotype.Service;

import org.springframework.security.core.userdetails.User;

@Service
public class UserDetailsServiceImpl implements UserDetailsService {

    @Override
    public UserDetails loadUserByUsername(String username) throws UsernameNotFoundException {

        return User.withUsername("user")
                .password("123456")
                .build();

    }
}
这里只是简单的创建了一个 user,实际情况下可以在这里查询 db 里的user,为了简单化流程,这里就略过查询 db 的逻辑了,大家可以自行根据 mybatis 处理这一块内容
自定义的登录页
<!DOCTYPE html>
<html lang="en" xmlns:th="https://www.thymeleaf.org">
<head>
    <meta charset="UTF-8">
    <title>登录页面</title>
</head>
<body>
<h1 style="background-color: chocolate">欢迎登录</h1>
<form action="/login" method="post">
  用户名:<input type="text" name="username"><br/>
  密码:<input type="text" name="password"><br/>
  <input type="submit" value="登录">
</form>
</body>
</html>
注意这里的 form action 一定要和 SecurityConfig 里的 loginProcessUrl一致,具体原因后面讲,注意这个页面要放在 resources 下的 static 目录下,其他目录可能会跳转不成功
项目目录
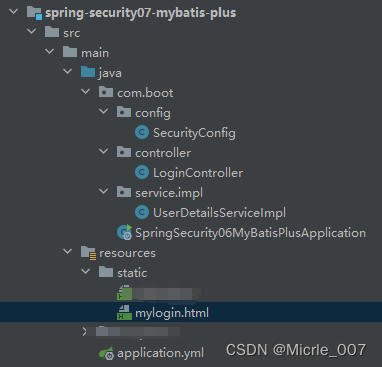
简单说一下自定义登录页的原理
/**
 * 配置问题的主要问题点:
 *      1. http.csrf(withDefaults()); 这个方式禁用csrf已经不起作用了,必须要 http.csrf(csrf->csrf.disable());
 *      2. 表单里的 action 一定要是 /login
 *      3. loginProcessingUrl("/login") 这个 /login 接口只是一个虚拟的接口,springsecurity 一旦看到 endpoint/login 就会触发
 *          UsernamePasswordAuthenticationFilter 的校验逻辑,这个类会获取表单里的用户名和密码
 *
 *          在 Spring Security 中,所有的 HTTP 请求都会通过一系列的过滤器,这些过滤器组成了一个过滤器链。UsernamePasswordAuthenticationFilter
 *          就是其中的一个过滤器。每一个过滤器都对所有请求进行检查,看是否应该处理该请求。如果应该处理,该过滤器就会处理该请求;如果不应该处理,
 *          该过滤器就会将请求传递给过滤器链中的下一个过滤器。
 *
 *          UsernamePasswordAuthenticationFilter 的工作方式就是检查每个传入的 HTTP 请求,看是否是一个 POST 请求,且请求的路径是否匹配登录路径
 *          (默认是 /login,可以通过 .loginProcessingUrl("/yourLoginPath") 来修改)。如果满足这些条件,这个过滤器就会处理该请求,
 *          从请求参数中提取出用户名和密码,然后创建一个 UsernamePasswordAuthenticationToken,并将其传递给 AuthenticationManager。
 *
 *          这个过程是在 UsernamePasswordAuthenticationFilter 的 attemptAuthentication 方法中完成的。这个方法会检查请求的 HTTP 方法和路径,
 *          如果匹配,就处理该请求;如果不匹配,就返回 null,将处理权交给过滤器链中的下一个过滤器。
 *
 */
测试
访问 http://localhost:8886/user/login 会跳转到 mylogin.html 上:
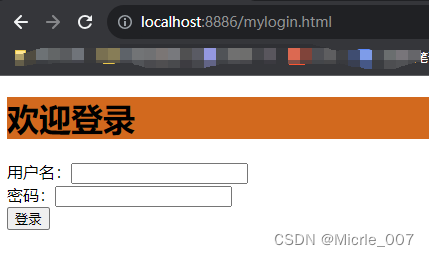
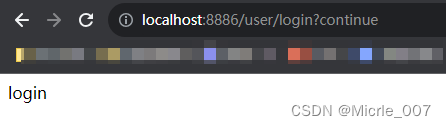
输入用户名和密码,可以发现请求又被重定向回 /user/login 接口,而且访问成功:
Tips:
建议大家在测试的时候用 chrom 浏览器的隐身模式,快捷键: ctrl+shift+n


 1970
1970

 被折叠的 条评论
为什么被折叠?
被折叠的 条评论
为什么被折叠?
 到【灌水乐园】发言


