


1.开发中遇到的问题与解决过程
当我在开发中遇到的一个具体问题是关于跨域访问。在一个项目中,我需要从前端向后端发送跨域请求,但是由于浏览器的同源策略限制,跨域请求会被阻止。我在解决这个问题时,采取了以下步骤:
-
查阅官方文档: 首先,我查阅了Spring Boot官方文档和CORS(跨域资源共享)的相关说明。了解了CORS的工作原理以及在Spring Boot中如何配置CORS。
-
搜索解决方案: 我进行了大量的网络搜索,找到了一些关于在Spring Boot项目中处理跨域请求的常见做法和最佳实践。我阅读了一些技术博客和Stack Overflow上的讨论,以便更好地理解问题和解决方案。
-
尝试不同方法: 根据我查阅的资料,我尝试了几种不同的方法来解决跨域请求的问题。其中包括使用Spring Security的
CorsConfiguration类进行配置,以及编写自定义的过滤器来处理跨域请求。
通过这个问题的解决过程,我学到了以下经验和教训:
- 了解了CORS的基本概念和工作原理,以及在Spring Boot中的应用方法。
- 学会了如何查阅官方文档和利用网络资源解决技术问题。
- 意识到在处理跨域请求时,安全性是一个非常重要的考虑因素,需要仔细思考和测试所采取的措施。
为了更好地应对类似问题,我会建议:
- 在项目初期就考虑跨域请求的处理方式,而不是将它作为一个次要的问题。这样可以避免在后期因为跨域请求带来的问题而导致进度延迟。
- 在解决技术问题时,要多方查阅资料,包括官方文档、技术博客、论坛等,以便获得更多的解决思路和方案。
- 对于涉及安全性的技术问题,一定要进行充分的测试和验证,确保所采取的措施不会引入新的安全风险。
2.经典项目练习分享
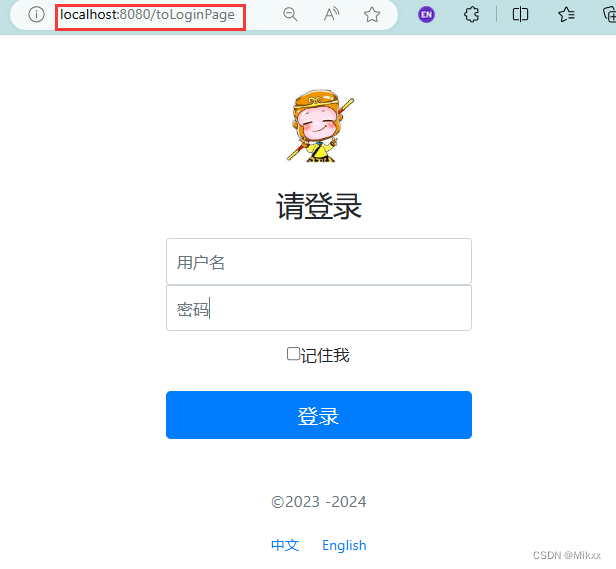
项目名称:用户登录管理系统
效果图
接下来是一些关键代码示例(不完整)
创建Spring Boot项目,引入Thymeleaf依赖
<dependency>
    <groupId>org.springframework.boot</groupId>
    <artifactId>spring-boot-starter-thymeleaf</artifactId>
</dependency>
创建模板页面并引入静态资源文件
<!doctype html>
<html lang="en" xmlns:th="http://www.thymeleaf.org">
<head>
    <meta charset="UTF-8">
    <meta name="viewport"
          content="width=device-width, user-scalable=no, initial-scale=1.0, maximum-scale=1.0, minimum-scale=1.0">
    <meta http-equiv="X-UA-Compatible" content="ie=edge">
    <title>用户登录界面</title>
    <link th:href="@{/css/bootstrap.min.css}" rel="stylesheet">
    <link th:href="@{/css/signin.css}" rel="stylesheet">
</head>
<body class="text-center">
    <!--用户登录form表单-->
    <from class="form-signin">
        <img class="mb-4" th:src="@{/img/login.jpg}" alt="孙悟空" width="72" height="72">
        <h1 class="h3 mb-3 font-weight-normal" th:text="#{login.tip}">请登录</h1>
        <input type="text" class="form-control" th:placeholder="#{login.username}" required="" autofocus="">
        <input type="password" class="form-control" th:placeholder="#{login.password}" required="">
        <div class="checkbox mb-3">
            <label>
                <input type="checkbox" value="remember-me">[[#{login.rememberme}]]
            </label>
        </div>
        <button class="btn btn-lg btn-primary btn-block" type="submit">登录</button>
        <p class="mt-5 mb-3 text-muted">©<span th:text="${currentYear}">2018</span>
            -<span th:text="${currentYear}+1">2019</span></p>
    </from>
</body>
</html>
控制类(Restful API)
@Controller
public class LoginController {
    @GetMapping("/toLoginPage")
    public String toLoginPage(Model model){
        model.addAttribute("currentYear", Calendar.getInstance().get(Calendar.YEAR));
        return "login";
    }
}
以上示例演示了一个简单的用户登录管理系统的前端端实现,包括了实体类定义、数据访问层(Repository)、服务层和控制器(Restful API)。通过完成这样的练习项目,你会学习到如何使用特定的编程语言、框架或库来实现用户登录管理功能,例如使用Spring Security在Java中实现用户认证与授权。
3.Spring Boot常用注解介绍
当谈及Spring Boot常用注解时,主要是指Spring框架中用于实现依赖注入、声明Bean、控制层处理等功能的注解。下面我将介绍几个常用的注解,并说明它们在Spring Boot中的作用和用法。
1.@Controller
作用:标识一个类作为Spring MVC的Controller,处理HTTP请求。
示例代码:
@Controller
public class UserController {
    @RequestMapping("/user/{id}")
    public String getUserById(@PathVariable Long id, Model model) {
        // 处理业务逻辑并返回视图
        return "userDetail";
    }
}
2.@Service
作用:标识一个类作为服务层的Bean,通常用于定义业务逻辑。
- 作用:标识一个类作为Spring MVC的Controller。
- 用法:通常与@RequestMapping一起使用,处理HTTP请求,并返回相应的视图或数据。
示例代码:
@Service
public class UserService {
    public List<User> getAllUsers() {
        // 执行获取用户逻辑
        return userRepository.findAll();
    }
}
3.@Component
作用:泛指组件,将一个类标识为Spring的组件,表明可以通过Spring容器进行管理。如果一个类不属于以下三层(@Controller、@Service、@Repository),则可以使用@Component来表明。 示例代码:
@Component
public class CustomComponent {
    // 实现自定义组件的功能
}
4.@Autowired
作用:自动装配,通过类型匹配来注入Bean实例。
示例代码:
@Service
public class UserService {
    private final UserRepository userRepository;

    @Autowired
    public UserService(UserRepository userRepository) {
        this.userRepository = userRepository;
    }
}
4.数据层框架的整合和使用
当涉及数据层框架的整合和使用时,JdbcTemplate、MyBatis和MyBatis-Plus是常用的选择。它们分别代表了不同的持久化技术,并且在Spring Boot项目中都有广泛的应用。下面分别介绍它们的原理、用法以及在实际项目中的应用,并结合具体的案例或示例代码进行解释:
JdbcTemplate
原理:
JdbcTemplate是Spring提供的对JDBC操作的封装,通过它可以方便地进行数据库操作,避免了繁琐的连接管理和异常处理。
用法:
@Repository
public class UserRepository {
    @Autowired
    private JdbcTemplate jdbcTemplate;

    public User findById(Long id) {
        return jdbcTemplate.queryForObject(
            "SELECT * FROM users WHERE id = ?",
            new Object[]{id},
            new BeanPropertyRowMapper<>(User.class)
        );
    }
}
MyBatis
原理:
MyBatis是一款优秀的持久层框架,它通过XML或注解配置SQL语句,并提供了灵活的映射功能,将Java类和数据库表进行映射。
用法:
@Mapper
public interface UserMapper {
    @Select("SELECT * FROM users WHERE id = #{id}")
    User findById(Long id);
}
MyBatis-Plus
原理:
MyBatis-Plus在MyBatis的基础上进行了扩展,提供了更多的便捷功能,如条件构造器、分页、性能分析等。
用法:
@Repository
public interface UserMapper extends BaseMapper<User> {
    // 这里无需写具体的SQL语句,继承BaseMapper即可获得通用的增删改查方法
}
这些数据层框架在实际项目中都有着广泛的应用,开发者可以根据项目的需要选择适合的框架。通过以上介绍,希望你能更好地理解各种数据层框架的原理、用法以及在实陃项目中的应用。
5.前端模板引擎Thymeleaf的整合和使用
整合Thymeleaf
在Spring Boot中整合Thymeleaf非常简单,只需在pom.xml文件中添加Thymeleaf和Spring Boot的Starter依赖即可:
<dependency>
    <groupId>org.springframework.boot</groupId>
    <artifactId>spring-boot-starter-thymeleaf</artifactId>
</dependency>
使用方法
基本语法
Thymeleaf的基本语法与HTML类似,但是通过特定的属性来标识动态内容,如${...}或th:...。
模板变量传递
在Controller中通过Model将数据传递到Thymeleaf模板:
@Controller
public class UserController {
    @GetMapping("/user")
    public String getUser(Model model) {
        User user = userService.getUserById(1);
        model.addAttribute("user", user);
        return "user";
    }
}
在Thymeleaf模板中可以通过${user.name}来访问user对象的属性。
条件判断
<div th:if="${user.isAdmin}">
    <p>管理员权限</p>
 </div>
循环
<ul>
    <li th:each="product : ${products}">
        <span th:text="${product.name}">Product Name</span>
    </li>
</ul>
示例模板
<!DOCTYPE html>
<html xmlns:th="http://www.thymeleaf.org">
<head>
    <title>User Profile</title>
</head>
<body>
    <h1 th:text="${user.name}">User Name</h1>
    <p th:if="${user.isAdmin}">This user is an admin.</p>
    <ul>
        <li th:each="role : ${user.roles}" th:text="${role}">Role</li>
    </ul>
</body>
</html>
通过以上介绍,希望你能更好地了解Thymeleaf在Spring Boot中的整合和使用方法,包括基本语法、模板变量的传递、条件判断、循环等,并且能够通过示例模板更直观地了解Thymeleaf的实际应用。
6.Bootstrap前端框架的整合及应用
在Spring Boot项目中整合和应用Bootstrap前端框架非常常见,Bootstrap提供了丰富的CSS样式和JavaScript插件,能够帮助开发者快速构建美观的Web页面。下面将介绍如何在Spring Boot项目中整合并应用Bootstrap前端框架,以及一些常用组件的实际运用和效果展示:
整合Bootstrap
在Spring Boot项目中整合Bootstrap非常简单,只需在HTML页面中引入Bootstrap的CSS和JavaScript文件即可:
<!DOCTYPE html>
<html lang="en">
<head>
    <meta charset="UTF-8">
    <meta name="viewport" content="width=device-width, initial-scale=1.0">
    <link href="https://cdn.bootcdn.net/ajax/libs/bootstrap/5.3.0/css/bootstrap.min.css" rel="stylesheet">
    <script src="https://cdn.bootcdn.net/ajax/libs/bootstrap/5.3.0/js/bootstrap.bundle.min.js"></script>
    <title>Spring Boot with Bootstrap</title>
</head>
<body>
    <!-- Your content here -->
</body>
</html>
常用组件的实际运用和效果展示
导航栏(Navbar)
<nav class="navbar navbar-expand-lg navbar-light bg-light">
  <div class="container-fluid">
    <a class="navbar-brand" href="#">Navbar</a>
    <button class="navbar-toggler" type="button" data-bs-toggle="collapse" data-bs-target="#navbarNav" aria-controls="navbarNav" aria-expanded="false" aria-label="Toggle navigation">
      <span class="navbar-toggler-icon"></span>
    </button>
    <div class="collapse navbar-collapse" id="navbarNav">
      <ul class="navbar-nav">
        <li class="nav-item">
          <a class="nav-link active" aria-current="page" href="#">Home</a>
        </li>
        <li class="nav-item">
          <a class="nav-link" href="#">Features</a>
        </li>
        <li class="nav-item">
          <a class="nav-link" href="#">Pricing</a>
        </li>
        <li class="nav-item">
          <a class="nav-link disabled" href="#" tabindex="-1" aria-disabled="true">Disabled</a>
        </li>
      </ul>
    </div>
  </div>
</nav>
按钮(Button)
<button type="button" class="btn btn-primary">Primary button</button>
<button type="button" class="btn btn-secondary">Secondary button</button>
表格(Table)
<table class="table">
  <thead>
    <tr>
      <th scope="col">#</th>
      <th scope="col">First</th>
      <th scope="col">Last</th>
      <th scope="col">Handle</th>
    </tr>
  </thead>
  <tbody>
    <tr>
      <th scope="row">1</th>
      <td>Mark</td>
      <td>Otto</td>
      <td>@mdo</td>
    </tr>
    <tr>
      <th scope="row">2</th>
      <td>Jacob</td>
      <td>Thornton</td>
      <td>@fat</td>
    </tr>
  </tbody>
</table>
通过以上介绍,你可以了解如何在Spring Boot项目中整合并应用Bootstrap前端框架,以及一些常用组件的实际运用和效果展示,包括导航栏、按钮和表格等。希望这些示例能帮助你更好地使用Bootstrap来构建漂亮的Web页面。
7.总结
简化配置
Spring Boot 提供了自动化配置的功能,大部分情况下无需手动配置,只需添加相应的依赖,Spring Boot 就会根据项目中的依赖自动配置应用程序上下文、数据库连接、安全认证等常用功能,大大减少了开发人员的配置工作。
内嵌容器
Spring Boot 支持内嵌 Servlet 容器(如Tomcat、Jetty),这意味着应用程序可以打包为一个可执行的 JAR 文件,并且不需要外部安装独立的 Servlet 容器,方便了应用程序的部署和交付。
微服务支持
Spring Boot 对构建微服务应用提供了良好的支持,包括对 RESTful API 的开发、服务注册与发现、配置中心等方面的功能,使得开发者可以更容易地构建和管理微服务架构。
监控与管理
Spring Boot 提供了丰富的健康检查、监控和管理端点,可以帮助开发者实时监控应用程序的运行状态,包括内存使用、线程情况、HTTP请求统计等,并且可以通过 Actuator 模块进行远程管理。
生态丰富
Spring Boot 生态系统非常丰富,拥有大量的第三方库和插件,可以帮助开发者快速集成各种功能,例如集成数据库、消息队列、缓存等,以及与各种云平台的集成。
总的来说,Spring Boot 大大简化了 Spring 应用程序的开发和部署,提高了开发效率,降低了学习成本,是构建 Java 应用程序的理想选择。


 5万+
5万+


 被折叠的 条评论
为什么被折叠?
被折叠的 条评论
为什么被折叠?
 到【灌水乐园】发言


