


Spring是一个轻量级的控制反转(IoC)和面向切面(AOP)的容器框架
控制反转(Inversion of Control,缩写IoC),是面向对象编程中的一种设计原则,可以用来减低计算机代码之间的耦合度。
依赖:classA 类中含有 classB 的实例,在 classA 中调用 classB 的方法完成功能,即 classA 对 classB 有依赖
控制:创建对象,给对象的属性赋值,管理对象之间的关系
反转:控制反转就是对对象控制权的转移,从程序代码本身反转到了外部容器。通过容器实现对象的创建,属性赋值,依赖的管理。
正转:开发人员在代码中,使用new 构造方法创建对象(主动管理对象),如下
User user = new User();Ioc 的实现:
1、DI依赖注入(Dependency Injection,简称DI):组件不做定位查询,只提供普通的Java方法让容器去决定依赖关系
容器全权负责的组件的装配,它会把符合依赖关系的对象通过JavaBean属性或者构造函数传递给需要的对象。
(1)设值注入(Setter Injection):通过JavaBean属性注射依赖关系的做法称为设值方法注入
(2)构造注入(Constructor Injection): 将依赖关系作为构造函数参数传入的做法称为构造器注入
2、依赖查找(Dependency Lookup):容器提供回调接口和上下文条件给组件
Spring 框架使用依赖注入(DI)实现 IoC
spring的IOC是使用的di实现了ioc的功能, spring底层创建对象,使用的是反射机制
spring是一个容器,管理对象,给属性赋值, 底层是反射创建对象
Spring 容器负责创建、管理所有的 Java 对象,这些 Java 对象被称为 Bean
Spring 容器管理着容器中 Bean 之间的依赖关系,Spring 使用“依赖注入”(DI)的方式来管理 Bean之间的依赖关系。使用 IoC 实现对象之间的解耦和
Java中创建对象主要有如下方式:
(1)构造方法,new对象
User user = new User();(2)反射机制
【1】使用class的newInstance()方法
// 通过反射机制,获取Class,通过Class来实例化对象
Class className = Class.forName("com.xx.User");

// newInstance()方法会调用User类的无参数构造方法,完成对象的创建(必须保证无参构造方法是存在)
Object obj = className.newInstance();//User对象无参构造
【2】使用Constructor的newInstance()方法
Class userClass = Class.forName("reflect.xx.User");

Constructor constructor = userClass .getConstructor();
Object obj = constructor.newInstance();
(3)序列化和反序列化
/*
序列化对象
*/
ObjectOutputStream oos = new ObjectOutputStream(new FileOutputStream("src/iostream/users"));

            /**
             * 1、一次序列化多个对象
             *  将对象放到集合当中,序列化集合。
             *  参与序列化的ArrayList集合以及集合中的元素都需要实现 java.io.Serializable接口
             * 2、ArrayList 也实现了 java.io.Serializable 接口
             * public class ArrayList<E> extends AbstractList<E>
             *         implements List<E>, RandomAccess, Cloneable, java.io.Serializable
             * */
            //创建List数组
            List<Student> list = new ArrayList<>();
            User u1 = new User();
            list.add(u1);

            oos1.writeObject(list);

            oos1.flush();


/*
反序列化对象
*/
ObjectInputStream ois = new ObjectInputStream(new FileInputStream("src/iostream/users"));
            // 开始反序列化,读
            List<User> list = (List<User>) ois.readObject();
            for (User user:list) {
                System.out.println(user);
            }
(4)克隆
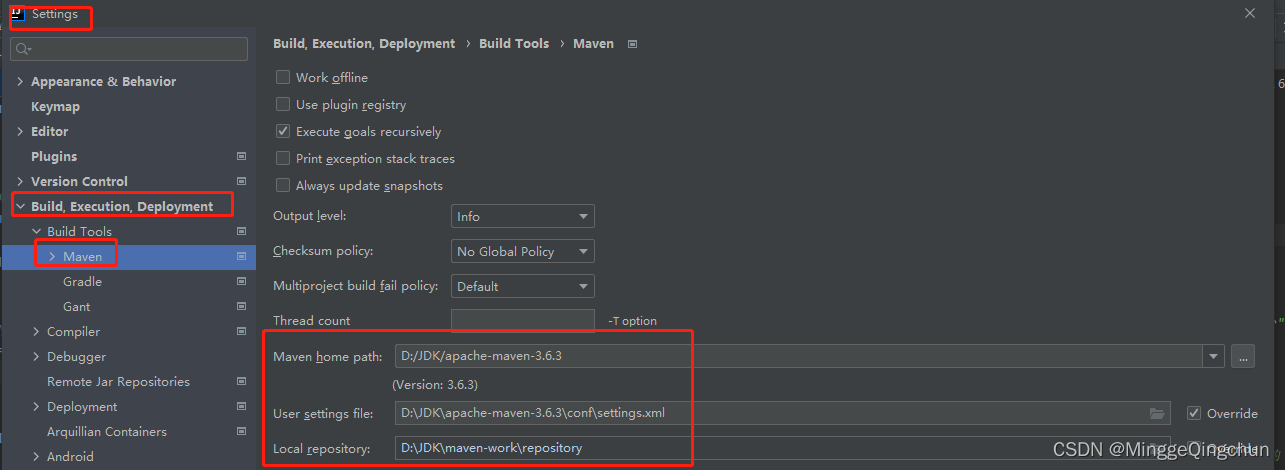
User user1 = (User) user.clone();首先我们先设置一下maven的本地仓库
一、基于XML配置文件的DI
(一)设值注入(Setter Injection)
set 注入也叫设值注入是指,通过 setter 方法传入被调用者的实例
1、简单类型
简单类型set注入语法如下:
<bean id="xx" class="xx">
    <property name="属性名字" value="属性值" />
    ...
</bean>
注:
(1)没有set方法报错
Bean property 'userName' is not writable or has an invalid setter method
(2)有set方法没赋值 不报错,值为null;User{userName='null', age=18}
(3)没有email属性,但是有setEmail方法,不会报错,该属性值不存在
(4)spring还可以创建非自定义对象,如 java.util.Date
(1)创建一个Java类对象User
public class User {
    private String userName;
    private int age;

    public User() {
        System.out.println("spring会调用User类的无参构造方法创建对象");
    }

    /*
    (1)没有set方法报错
        Bean property 'userName' is not writable or has an invalid setter method
    (2)有set方法没赋值
        不报错,值为null;User{userName='null', age=18}
    (3)没有email属性,但是有setEmail方法,不会报错,该属性值不存在
    */
    public void setUserName(String userName) {
        this.userName = userName;
    }

    public void setAge(int age) {
        this.age = age;
    }

    //没有email属性,但是有setEmail方法,不会报错,该属性值不存在
    public void setEmail(String email) {
        System.out.println("setEmail="+email);
    }

    @Override
    public String toString() {
        return "User{" +
                "userName='" + userName + '\'' +
                ", age=" + age +
                '}';
    }
}
(2)spring配置文件 applicationContext.xml
<?xml version="1.0" encoding="UTF-8"?>
<beans xmlns="http://www.springframework.org/schema/beans"
       xmlns:xsi="http://www.w3.org/2001/XMLSchema-instance"
       xsi:schemaLocation="http://www.springframework.org/schema/beans http://www.springframework.org/schema/beans/spring-beans.xsd">

    <!-- set注入(设值注入);简单类型set注入;声明User对象
        注入:赋值
        简单类型:spring中规定java的基本数据类型和String都是简单类型
        Spring 框架使用依赖注入(DI)实现 IoC;
        常用注入有两种:set注入(设值注入)、构造注入

        1、set注入(设值注入):spring调用Java类对象的set方法,在set方法中完成属性赋值
        (1)简单类型set注入
            <bean id="xx" class="xx">
                <property name="属性名字" value="属性值" />
                ...
            </bean>
    -->
    <bean id="user" class="com.mycompany.p1setinject.User">
        <!--简单类型set注入
            <bean id="xx" class="xx">
                <property name="属性名字" value="属性值" />
                ...
            </bean>

        (1)没有set方法报错
            Bean property 'userName' is not writable or has an invalid setter method
        (2)有set方法没赋值
            不报错,值为null;User{userName='null', age=18}
        (3)没有email属性,但是有setEmail方法,不会报错,该属性值不存在
        -->
        <property name="userName" value="admin" /><!-- 类似setUserName("admin") -->
        <property name="age" value="18" />
        <property name="email" value="45678545@qq.com" />
    </bean>

    <!-- bean创建非自定义对象 -->
    <bean id="myDate" class="java.util.Date">
        <property name="time" value="987657289037632" />
    </bean>

</beans>
(3)测试类
public class TestSetInject {
    @Test
    public void testSetInjectNormal(){
        String config = "p1setinject/applicationContext.xml";

        ApplicationContext ac = new ClassPathXmlApplicationContext(config);

        User user = (User) ac.getBean("user");
        System.out.println(user);
    }

    @Test
    public void testSetDate(){
        String config = "p1setinject/applicationContext.xml";

        ApplicationContext ac = new ClassPathXmlApplicationContext(config);

        Date date = (Date) ac.getBean("myDate");
        System.out.println("myDate="+date);
    }
}
2、引用类型
语法如下
(1)简单类型set注入
    <bean id="xx" class="xx">
        <property name="属性名字" value="属性值" />
        <property name="引用对象名称" ref="引用对象bean的id(对象的名称)" />
        ...
    </bean>

(2)引用类型set注入:spring调用类的set方法
    <bean id="xx" class="xx">
        <property name="属性名称" ref="引用对象bean的id(对象的名称)" />
    </bean>
(1)User和Address对象
public class User {
    private String userName;
    private int age;

    //声明一个引用类型
    private Address address;

    public User() {
        System.out.println("spring会调用User类的无参构造方法创建对象");
    }

    public void setUserName(String userName) {
        this.userName = userName;
    }

    public void setAge(int age) {
        this.age = age;
    }

    public void setAddress(Address address) {
        this.address = address;
    }

    @Override
    public String toString() {
        return "User{" +
                "userName='" + userName + '\'' +
                ", age=" + age +
                ", address=" + address +
                '}';
    }
}


public class Address {
    private String name;
    private String address;

    public void setName(String name) {
        this.name = name;
    }

    public void setAddress(String address) {
        this.address = address;
    }

    @Override
    public String toString() {
        return "Address{" +
                "name='" + name + '\'' +
                ", address='" + address + '\'' +
                '}';
    }
}
(2)spring配置文件 applicationContext.xml
<?xml version="1.0" encoding="UTF-8"?>
<beans xmlns="http://www.springframework.org/schema/beans"
       xmlns:xsi="http://www.w3.org/2001/XMLSchema-instance"
       xsi:schemaLocation="http://www.springframework.org/schema/beans http://www.springframework.org/schema/beans/spring-beans.xsd">

    <!-- set注入(设值注入);引用类型set注入;声明User对象
        注入:赋值
        简单类型:spring中规定java的基本数据类型和String都是简单类型
        Spring 框架使用依赖注入(DI)实现 IoC;
        常用注入有两种:set注入(设值注入)、构造注入

        1、set注入(设值注入):spring调用Java类对象的set方法,在set方法中完成属性赋值
        (1)简单类型set注入
            <bean id="xx" class="xx">
                <property name="属性名字" value="属性值" />
                <property name="引用对象名称" ref="引用对象bean的id(对象的名称)" />
                ...
            </bean>

        (2)引用类型set注入:spring调用类的set方法
            <bean id="xx" class="xx">
                <property name="属性名称" ref="引用对象bean的id(对象的名称)" />
            </bean>
    -->
    <bean id="user" class="com.mycompany.p2setinjectreference.User">
        <!--引用类型set注入:spring调用类的set方法
            <bean id="xx" class="xx">
                <property name="属性名称" ref="引用对象bean的id(对象的名称)" />
            </bean>
        -->
        <property name="userName" value="admin" /><!-- 类似setUserName("admin") -->
        <property name="age" value="18" />
        <!-- 引用类型
            <property name="属性名称" ref="引用对象bean的id(对象的名称)" />
        -->
        <property name="address" ref="myAddress" />
    </bean>

    <!--声明Address对象-->
    <bean id="myAddress" class="com.mycompany.p2setinjectreference.Address">
        <property name="name" value="家住址" />
        <property name="address" value="江南水乡" />
    </bean>
(二)构造注入(Constructor Injection)
spring调用类的有参构造方法,在创建对象同时,在构造方法中给属性赋值
构造注入使用 <constructor-arg> 标签
<constructor-arg>标签:一个<constructor-arg>标签表示构造方法的一个参数
<constructor-arg> 标签属性:
(1)name:表示构造方法的形参名
(2)index:表示构造方法的参数位置,参数从左往右位置是 0 , 1 ,2...
(3)value:构造方法形参是简单类型,使用value
(4)ref:构造方法形参是引用类型,使用ref
注:
(1)使用name属性实现构造注入;给形参赋值位置可以打乱,根据形参名name赋值
(2)使用index属性实现构造注入;给形参赋值位置可以打乱,根据index赋值
(3)省略index;使用index属性实现构造注入;给形参赋值位置不可以打乱
User和Address对象
public class User {
    private String userName;
    private int age;

    //声明一个引用类型
    private Address address;

    public User() {
        System.out.println("spring会调用User类的无参构造方法创建对象");
    }

    /**
     * 创建有参数构造方法
     */
    public User(String userName, int age, Address address) {
        System.out.println("=====User有参数构造方法======");
        //属性赋值
        this.userName = userName;
        this.age = age;
        this.address = address;
    }

    public void setUserName(String userName) {
        this.userName = userName;
    }

    public void setAge(int age) {
        this.age = age;
    }

    public void setAddress(Address address) {
        this.address = address;
    }

    @Override
    public String toString() {
        return "User{" +
                "userName='" + userName + '\'' +
                ", age=" + age +
                ", address=" + address +
                '}';
    }
}
spring配置文件 applicationContext.xml
<?xml version="1.0" encoding="UTF-8"?>
<beans xmlns="http://www.springframework.org/schema/beans"
       xmlns:xsi="http://www.w3.org/2001/XMLSchema-instance"
       xsi:schemaLocation="http://www.springframework.org/schema/beans http://www.springframework.org/schema/beans/spring-beans.xsd">

    <!-- 构造注入;声明User对象
        注入:赋值
        简单类型:spring中规定java的基本数据类型和String都是简单类型
        Spring 框架使用依赖注入(DI)实现 IoC;
        常用注入有两种:set注入(设值注入)、构造注入

        1、set注入(设值注入):spring调用Java类对象的set方法,在set方法中完成属性赋值
        (1)简单类型set注入
            <bean id="xx" class="xx">
                <property name="属性名字" value="属性值" />
                ...
            </bean>

        (2)引用类型set注入:spring调用类的set方法
            <bean id="xx" class="xx">
                <property name="属性名称" ref="引用对象bean的id(对象的名称)" />
            </bean>

        2、构造注入:spring调用类的有参构造方法,在创建对象同时,在构造方法中给属性赋值
            构造注入使用 <constructor-arg> 标签
            <constructor-arg>标签:一个<constructor-arg>标签表示构造方法的一个参数
            <constructor-arg> 标签属性:
                name:表示构造方法的形参名
                index:表示构造方法的参数位置,参数从左往右位置是 0 , 1 ,2...
                value:构造方法形参是简单类型,使用value
                ref:构造方法形参是引用类型,使用ref
    -->

    <!--声明Address对象-->
    <bean id="myAddress" class="com.mycompany.p3constructorinject.Address">
        <property name="name" value="家住址" />
        <property name="address" value="江南水乡" />
    </bean>

    <!--(1)使用name属性实现构造注入;给形参赋值位置可以打乱,根据形参名name赋值-->
    <bean id="user" class="com.mycompany.p3constructorinject.User">
        <constructor-arg name="age" value="20" />
        <constructor-arg name="userName" value="admin" />
        <!-- 引用类型,构造方法形参是引用类型,使用ref-->
        <constructor-arg name="address" ref="myAddress" />
    </bean>

    <!--(2)使用index属性实现构造注入;给形参赋值位置可以打乱,根据index赋值-->
    <bean id="user1" class="com.mycompany.p3constructorinject.User">
        <constructor-arg index="1" value="20" />
        <constructor-arg index="0" value="root" />
        <constructor-arg index="2" ref="myAddress" />
    </bean>

    <!--(2)省略index;使用index属性实现构造注入;给形参赋值位置不可以打乱-->
    <bean id="user2" class="com.mycompany.p3constructorinject.User">
        <constructor-arg value="root" />
        <constructor-arg value="20" />
        <constructor-arg ref="myAddress" />
    </bean>

    <!-- 创建File,使用构造注入 -->
    <bean id="myFile" class="java.io.File">
        <constructor-arg name="parent" value="D:\Java\JavaProject\spring-course\spring-1" />
        <constructor-arg name="child" value="readme.txt" />
    </bean>
</beans>(三)引用类型自动注入
引用类型属性的注入,也可不在配置文件中显示注入。可通过<bean/>标签设置 autowire 属性值,为引用类型属性进行隐式自动注入(默认是不自动注入引用类型属 性)
引用类型自动注入:spring根据某些规则给引用类型赋值;常用规则:byName;byType
1、byName:按名称自动注入
当配置文件中被调用者 bean 的 id 值与代码中调用者 bean 类的属性名相同时,可使用byName 方式,让容器自动将被调用者 bean 注入给调用者 bean。容器是通过调用者的 bean类的属性名与配置文件的被调用者 bean 的 id 进行比较而实现自动注入的

语法如下,使用autowire = "byName"
<bean id="xx" class="xx" autowire="byName">
    <property name="xx" value="xx" />
</bean>
User对象
public class User {
    private String userName;
    private int age;

    //声明一个引用类型
    private Address address;

    public User() {
        System.out.println("spring会调用User类的无参构造方法创建对象");
    }

    public void setUserName(String userName) {
        this.userName = userName;
    }

    public void setAge(int age) {
        this.age = age;
    }

    public void setAddress(Address address) {
        this.address = address;
    }

    @Override
    public String toString() {
        return "User{" +
                "userName='" + userName + '\'' +
                ", age=" + age +
                ", address=" + address +
                '}';
    }
}
spring配置文件 applicationContext.xml
<?xml version="1.0" encoding="UTF-8"?>
<beans xmlns="http://www.springframework.org/schema/beans"
       xmlns:xsi="http://www.w3.org/2001/XMLSchema-instance"
       xsi:schemaLocation="http://www.springframework.org/schema/beans http://www.springframework.org/schema/beans/spring-beans.xsd">

    <!-- 引用类型自动注入:spring根据某些规则给引用类型赋值
        常用规则:byName;byType
        1、byName(按名称注入):
            Java中引用类型的属性名和spring容器(spring配置文件)中<bean>的id名称一致
            且数据类型一致,这样spring容器中的bean就能够给属性赋值

            语法:
            <bean id="xx" class="xx" autowire="byName">
                <property name="xx" value="xx" />
            </bean>
        2、byType(按类型注入):
            Java中引用类型的数据类型和spring容器(spring配置文件)的<bean>的class属性是同源关系
           同源关系:
            (1)java类中引用类型的数据类型和bean的class的值一致
            (2)java类中引用类型的数据类型和bean的class的值是父子类关系
            (3)java类中引用类型的数据类型和bean的class的值是接口和实现类关系
           语法:
           <bean id="xx" class="xx" autowire="byType">
                <property name="xx" value="xx" />
           </bean>

           注:
           使用byName,属性是引用类型时,不用使用<property>标签,但是单独声明引用类型时
           其<bean>标签的id值需要和Java属性值名一致
    -->

    <!-- (1)byName -->
    <bean id="user" class="com.mycompany.p4referenceautobyname.User" autowire="byName">
        <property name="userName" value="admin" />
        <property name="age" value="20" />
        <!--引用类型-->
<!--        <property name="address" ref="myAddress" />-->
    </bean>

    <!--声明Address对象;因为不是使用ref指向,自动查找,需要使用Java对象的属性名-->
    <bean id="address" class="com.mycompany.p4referenceautobyname.Address">
        <property name="name" value="家住址" />
        <property name="address" value="江南水乡" />
    </bean>

</beans>
注: 使用byName,属性是引用类型时,不用使用<property>标签,但是单独声明引用类型时 其<bean>标签的id值需要和Java属性值名一致
2、byType:按类型自动注入
使用 byType 方式自动注入,要求:配置文件中被调用者 bean 的 class 属性指定的类,要与代码中调用者 bean 类的某引用类型属性类型同源。即要么相同,要么有 is-a 关系(子 类,或是实现类)。但这样的同源的被调用 bean 只能有一个。多于一个,容器就不知该匹配哪一个
语法如下:
<bean id="xx" class="xx" autowire="byType">
    <property name="xx" value="xx" />
</bean>
同源关系:
(1)java类中引用类型的数据类型和bean的class的值一致
(2)java类中引用类型的数据类型和bean的class的值是父子类关系
(3)java类中引用类型的数据类型和bean的class的值是接口和实现类关系
User和Address对象
public class User {
    private String userName;
    private int age;

    //声明一个引用类型
    private Address address;
    private Address address1;

    public User() {
        System.out.println("spring会调用User类的无参构造方法创建对象");
    }

    public void setUserName(String userName) {
        this.userName = userName;
    }

    public void setAge(int age) {
        this.age = age;
    }

    public void setAddress(Address address) {
        System.out.println("address:"+address);
        this.address = address;
    }

    public void setAddress1(Address address1) {
        System.out.println("address1111:"+address1);
        this.address1 = address1;
    }

    @Override
    public String toString() {
        return "User{" +
                "userName='" + userName + '\'' +
                ", age=" + age +
                ", address=" + address +
                '}';
    }
}


public class Address {
    private String name;
    private String address;

    public void setName(String name) {
        this.name = name;
    }

    public void setAddress(String address) {
        this.address = address;
    }

    @Override
    public String toString() {
        return "Address{" +
                "name='" + name + '\'' +
                ", address='" + address + '\'' +
                '}';
    }
}


public class DetailAddress extends Address{
}
spring配置文件 applicationContext.xml
<?xml version="1.0" encoding="UTF-8"?>
<beans xmlns="http://www.springframework.org/schema/beans"
       xmlns:xsi="http://www.w3.org/2001/XMLSchema-instance"
       xsi:schemaLocation="http://www.springframework.org/schema/beans http://www.springframework.org/schema/beans/spring-beans.xsd">

    <!-- 引用类型自动注入:spring根据某些规则给引用类型赋值
        常用规则:byName;byType
        1、byName(按名称注入):
            Java中引用类型的属性名和spring容器(spring配置文件)中<bean>的id名称一致
            且数据类型一致,这样spring容器中的bean就能够给属性赋值

            语法:
            <bean id="xx" class="xx" autowire="byName">
                <property name="xx" value="xx" />
            </bean>
        2、byType(按类型注入):
            Java中引用类型的数据类型和spring容器(spring配置文件)的<bean>的class属性是同源关系
           同源关系:
            (1)java类中引用类型的数据类型和bean的class的值一致
            (2)java类中引用类型的数据类型和bean的class的值是父子类关系
            (3)java类中引用类型的数据类型和bean的class的值是接口和实现类关系
           语法:
           <bean id="xx" class="xx" autowire="byType">
                <property name="xx" value="xx" />
           </bean>

           注:
           (1)使用byName,属性是引用类型时,不用使用<property>标签,但是单独声明引用类型时
            其<bean>标签的id值需要和Java属性值名一致
           (2)在byType中, 在xml配置文件中声明bean只能有一个,多余一个报错
            NoUniqueBeanDefinitionException:
            No qualifying bean of type 'com.mycompany.p5referenceautobytype.Address' available:
            expected single matching bean but found 2: myAddress,mySubAddress
    -->

    <!-- (2)byType -->
    <bean id="user" class="com.mycompany.p5referenceautobytype.User" autowire="byType">
        <property name="userName" value="admin" />
        <property name="age" value="20" />
        <!--引用类型-->
<!--        <property name="address" ref="myAddress" />-->
    </bean>

    <!--声明Address对象-->
<!--    <bean id="myAddress" class="com.mycompany.p5referenceautobytype.Address">-->
<!--        <property name="name" value="家住址" />-->
<!--        <property name="address" value="江南水乡" />-->
<!--    </bean>-->

    <!--声明Address对象子类-->
    <bean id="mySubAddress" class="com.mycompany.p5referenceautobytype.DetailAddress">
        <property name="name" value="详细家住址" />
        <property name="address" value="详细江南水乡" />
    </bean>

</beans>
注:
在byType中, 在xml配置文件中声明bean只能有一个,多余一个报错
NoUniqueBeanDefinitionException: No qualifying bean of type 'com.mycompany.p5referenceautobytype.Address' available: expected single matching bean but found 2: myAddress,mySubAddress(四)多个Spring配置文件
在实际应用里,随着应用规模的增加,系统中 Bean 数量也大量增加,导致配置文件变得非常庞大、臃肿。为了避免这种情况的产生,提高配置文件的可读性与可维护性,可以将Spring 配置文件分解成多个配置文件。
包含关系的配置文件:
多个配置文件中有一个总文件,总配置文件将各其它子文件通过<import/>引入。在 Java代码中只需要使用总配置文件对容器进行初始化即可
applicationContext.xml :表示主配置文件
包含关系配置文件;包含其他的配置文件的,主配置文件一般是不定义对象
语法:
 <import resource="其他配置文件路径" />

classpath:类路径(class文件所在的目录)
在spring的配置文件中要指定其他文件的位置, 需要使用classpath,告诉spring到哪去加载读取文件
如下,主配置文件
<?xml version="1.0" encoding="UTF-8"?>
<beans xmlns="http://www.springframework.org/schema/beans"
       xmlns:xsi="http://www.w3.org/2001/XMLSchema-instance"
       xsi:schemaLocation="http://www.springframework.org/schema/beans http://www.springframework.org/schema/beans/spring-beans.xsd">

    <!--applicationContext.xml :表示主配置文件
        包含关系配置文件;包含其他的配置文件的,主配置文件一般是不定义对象
        语法:
            <import resource="其他配置文件路径" />
            classpath:类路径(class文件所在的目录)
                在spring的配置文件中要指定其他文件的位置, 需要使用classpath,告诉spring到哪去加载读取文件
    -->

    <!-- (1)加载文件列表 -->
    <import resource="classpath:p6moreconfig/spring-user.xml" />
    <import resource="classpath:p6moreconfig/spring-address.xml" />

    <!-- (2)通配符批量加载
        在包含关系的配置文件中,可以通配符(*:表示任意字符)
        注: 主的配置文件名称不能包含在通配符的范围内(主配置文件不能定义为spring-xx.xml)
        查找文件陷入死循环,报错
        BeanDefinitionStoreException: Detected cyclic loading of file [D:\xx\工程模块名\target\classes\p6moreconfig\spring-total.xml] - check your import definitions!
     -->
<!--    <import resource="classpath:p6moreconfig/spring-*.xml" />-->

</beans>
User类的配置文件
<?xml version="1.0" encoding="UTF-8"?>
<beans xmlns="http://www.springframework.org/schema/beans"
       xmlns:xsi="http://www.w3.org/2001/XMLSchema-instance"
       xsi:schemaLocation="http://www.springframework.org/schema/beans http://www.springframework.org/schema/beans/spring-beans.xsd">

    <bean id="user" class="com.mycompany.p6moreconfig.User" autowire="byType">
        <property name="userName" value="admin" />
        <property name="age" value="20" />
        <!--引用类型-->
<!--        <property name="address" ref="myAddress" />-->
    </bean>

</beans>


 1053
1053


 被折叠的 条评论
为什么被折叠?
被折叠的 条评论
为什么被折叠?
 到【灌水乐园】发言


