


在创建springboot项目的时候,勾选spring web , jdbc Api , mybatis framework , mysql driver.
然后配置好数据库的连接配置:
application.yml
spring:
  datasource:
      username: root
      password: root
      url: jdbc:mysql://127.0.0.1:3306/mp?serverTimezone=Asia/Shanghai
      driver-class-name: com.mysql.cj.jdbc.Driver
注解的使用方法:
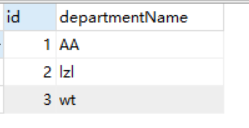
创建数据库表department
然后写mapper接口:
package org.lzl.bootmybatis.mapper;

import org.apache.ibatis.annotations.*;
import org.lzl.bootmybatis.bean.Department;

@Mapper
//@mapper的作用是可以给mapper接口自动生成一个实现类,让spring对mapper接口的bean进行管理,并且可以省略去写复杂的xml文件
public interface DepartmentMapper {
    @Select("select *from department where id=#{id}")
    public Department getDeptById(Integer id);

    @Delete("delete from department where id=#{id}")
    public int deleteDeptById(Integer id);

    @Options(useGeneratedKeys = true,keyProperty = "id")//实现回写操作
    @Insert("insert into department(departmentName) values(#{departmentName})")
    public int insertDept(Department department);

    @Update("update department set departmentName=#{departmentName} where id=#{id}")
    public int updateDept(Department department);
}
@mapper注解相当于已经给容器中注入了该类的bean:
如果项目有很多mapper接口,也可以将@MapperScan该注解加在springboot启动类的上面,该注解可以批量生成mapper
编写控制器层测试:
@RestController
public class DeptController {
    @Autowired
    DepartmentMapper departmentMapper;//警告不用管

    @GetMapping("/dept/{id}")
    public Department getDepartment(@PathVariable("id") Integer id){
        return departmentMapper.getDeptById(id);

    }

    @GetMapping("/dept")
    public Department insertDept(Department department){
        departmentMapper.insertDept(department);
        return department;
    }
 }
测试结果: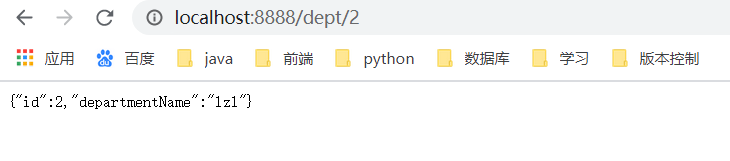
可实际开发中用的最多的还是配置文件+mapper.xml的形式
现在具体讲一下怎么操作:按照下图的形式创建文件:

先写接口吧:
package org.lzl.bootmybatis.mapper;

import org.lzl.bootmybatis.bean.Employee;
@Mapper
public interface EmployeeMapper {

    public Employee getEmpById(Integer id);

    public void insertEmp(Employee employee);

}
employeeMapper.xml:
<?xml version="1.0" encoding="UTF-8" ?>
<!DOCTYPE mapper
        PUBLIC "-//mybatis.org//DTD Mapper 3.0//EN"
        "http://mybatis.org/dtd/mybatis-3-mapper.dtd">
<!--namespace:该mapper.xml映射文件的 唯一标识符-->
<mapper namespace="org.lzl.bootmybatis.mapper.EmployeeMapper">

    <select id="getEmpById" parameterType="int" resultType="org.lzl.bootmybatis.bean.Employee">
        select * from employee where id = #{id}
    </select>

    <!--因为开启了陀罗峰命名 所以#{dId}-->
    <insert id="insertEmp" parameterType="org.lzl.bootmybatis.bean.Employee">
        insert  into employee(lastName,email,gender,d_id) values(#{lastName},#{email},#{gender},#{dId})
    </insert>

</mapper>
mybatis核心配置文件:
<?xml version="1.0" encoding="UTF-8" ?>
<!DOCTYPE configuration  PUBLIC "-//mybatis.org//DTD Config 3.0//EN"  "http://mybatis.org/dtd/mybatis-3-config.dtd">
<configuration>
    <settings>
    <!--开启陀罗峰命名 和 下划线的自动转化-->
        <setting name="mapUnderscoreToCamelCase" value="true"/>
    </settings>
</configuration>
想要核心配置文件生效:需要在application.yml中配置:
mybatis:
  config-location: classpath:mybatis/mybatis-config.xml
  mapper-locations: classpath:mybatis/mapper/*.xml
  #开启陀罗峰命名
  #configuration:
    #map-underscore-to-camel-case: true
注意一点:有configuration 就不能有 config-location,这两个不能共存!强烈推荐不写mybatis-config.xml这个mybatis的核心配置文件,将里面的所有配置都写进configuration:的子目录下!
补充一点:网上有资料说想要陀罗峰命名生效,还可以给ioc容器注入下面的Bean
不过本人亲测,我是跑不出来的,可能已经被弃用了
package org.lzl.bootmybatis.config;


import org.mybatis.spring.boot.autoconfigure.ConfigurationCustomizer;
import org.springframework.context.annotation.Bean;
import org.springframework.context.annotation.Configuration;

@Configuration
public class MyBatisConfig {


//感觉没什么卵用!!!!!!可能该方法已经失效了
    //加入下面的类目的在于,开启数据库的陀罗峰命名规范(不然属性写成lll_lll  mybatis是拿不到的)
@Bean
public ConfigurationCustomizer mybatisConfigurationCustomizer() {
    return new ConfigurationCustomizer() {
        @Override
        public void customize(org.apache.ibatis.session.Configuration configuration) {
            configuration.setMapUnderscoreToCamelCase(true);
        }
    };
}


}
整合Mybatis-Plus
想将项目换成Mybatis-Plus,只需要用下面的依赖代替掉 mybatis-spring-boot-starter!
        <dependency>
            <groupId>com.baomidou</groupId>
            <artifactId>mybatis-plus-boot-starter</artifactId>
            <version>3.4.1</version>
        </dependency>
下面是mybatis-plus整合的小demo
数据库准备一张user表:

然后写一个实体类:
@AllArgsConstructor
@NoArgsConstructor
@Data
public class User {
    private int id;
    private String username;
    private String password;
}
mapper的书写:
/*不需要写任何东西,只需要继承BaseMapper*/
@Mapper
public interface UserMapper extends BaseMapper<User> {
}
service接口的书写:
/*不需要写任何东西,只需要继承IService*/
public interface UserService extends IService<User> {
}
Service实现类的书写:
/*不需要写任何东西,只需要继承ServiceImpl 和 实现刚刚自己写的service接口*/
@Service
public class UserServiceImpl extends ServiceImpl<UserMapper,User> implements UserService {
}
controller的书写:
@RestController
public class MyController {
    @Autowired
    UserService userService;

    @RequestMapping("getuser")
    public List<User> showStudents(){
        return userService.list();
    }
}
现在开始启动SpringBoot项目,访问:localhost:8888/getuser,结果页面如下:

至此,说明SpringBoot整合MyBatis-Plus成功!
如果想要使用service的page()方法对数据进行分页,那么还需要给容器添加下面的Bean:
import com.baomidou.mybatisplus.extension.plugins.MybatisPlusInterceptor;
import com.baomidou.mybatisplus.extension.plugins.PaginationInterceptor;
import com.baomidou.mybatisplus.extension.plugins.inner.PaginationInnerInterceptor;
import com.baomidou.mybatisplus.extension.plugins.pagination.optimize.JsqlParserCountOptimize;
import org.springframework.context.annotation.Bean;
import org.springframework.context.annotation.Configuration;

@Configuration
public class MyBatisConfig {


    /**
     * MybatisPlusInterceptor
     * @return
     */
    @Bean
    public MybatisPlusInterceptor paginationInterceptor() {
        MybatisPlusInterceptor mybatisPlusInterceptor = new MybatisPlusInterceptor();
        // 设置请求的页面大于最大页后操作, true调回到首页,false 继续请求  默认false
        // paginationInterceptor.setOverflow(false);
        // 设置最大单页限制数量,默认 500 条,-1 不受限制
        // paginationInterceptor.setLimit(500);
        // 开启 count 的 join 优化,只针对部分 left join

        //这是分页拦截器
        PaginationInnerInterceptor paginationInnerInterceptor = new PaginationInnerInterceptor();
        paginationInnerInterceptor.setOverflow(true);
        paginationInnerInterceptor.setMaxLimit(500L);
        mybatisPlusInterceptor.addInnerInterceptor(paginationInnerInterceptor);

        return mybatisPlusInterceptor;
    }
}


 343
343


 被折叠的 条评论
为什么被折叠?
被折叠的 条评论
为什么被折叠?
 到【灌水乐园】发言


