


一、安装Anaconda3
1.1 安装Anaconda 3 的2种方法
1.1.1方法一:homebrew安装
brew search anaconda问题-错误提示:zsh: command not found: brew
解决方法:mac 安装homebrew,
用以下命令安装,序列号选择中科大 [1] 的
/bin/zsh -c "$(curl -fsSL https://gitee.com/cunkai/HomebrewCN/raw/master/Homebrew.sh)"下载并解压安装
按照提示,进行操作即可

将 Homebrew 配置到环境变量
echo 'eval "$(/opt/homebrew/bin/brew shellenv)"' >> ~/.bash_profile
eval "$(/opt/homebrew/bin/brew shellenv)"
source  ~/.bash_profile
如下安装成功 Homebrew

执行 brew search anaconda 命令后,如下:

search 完之后,执行如下命令,进行安装
brew install anaconda --cask问题-安装 Anaconda 3 堆栈溢出
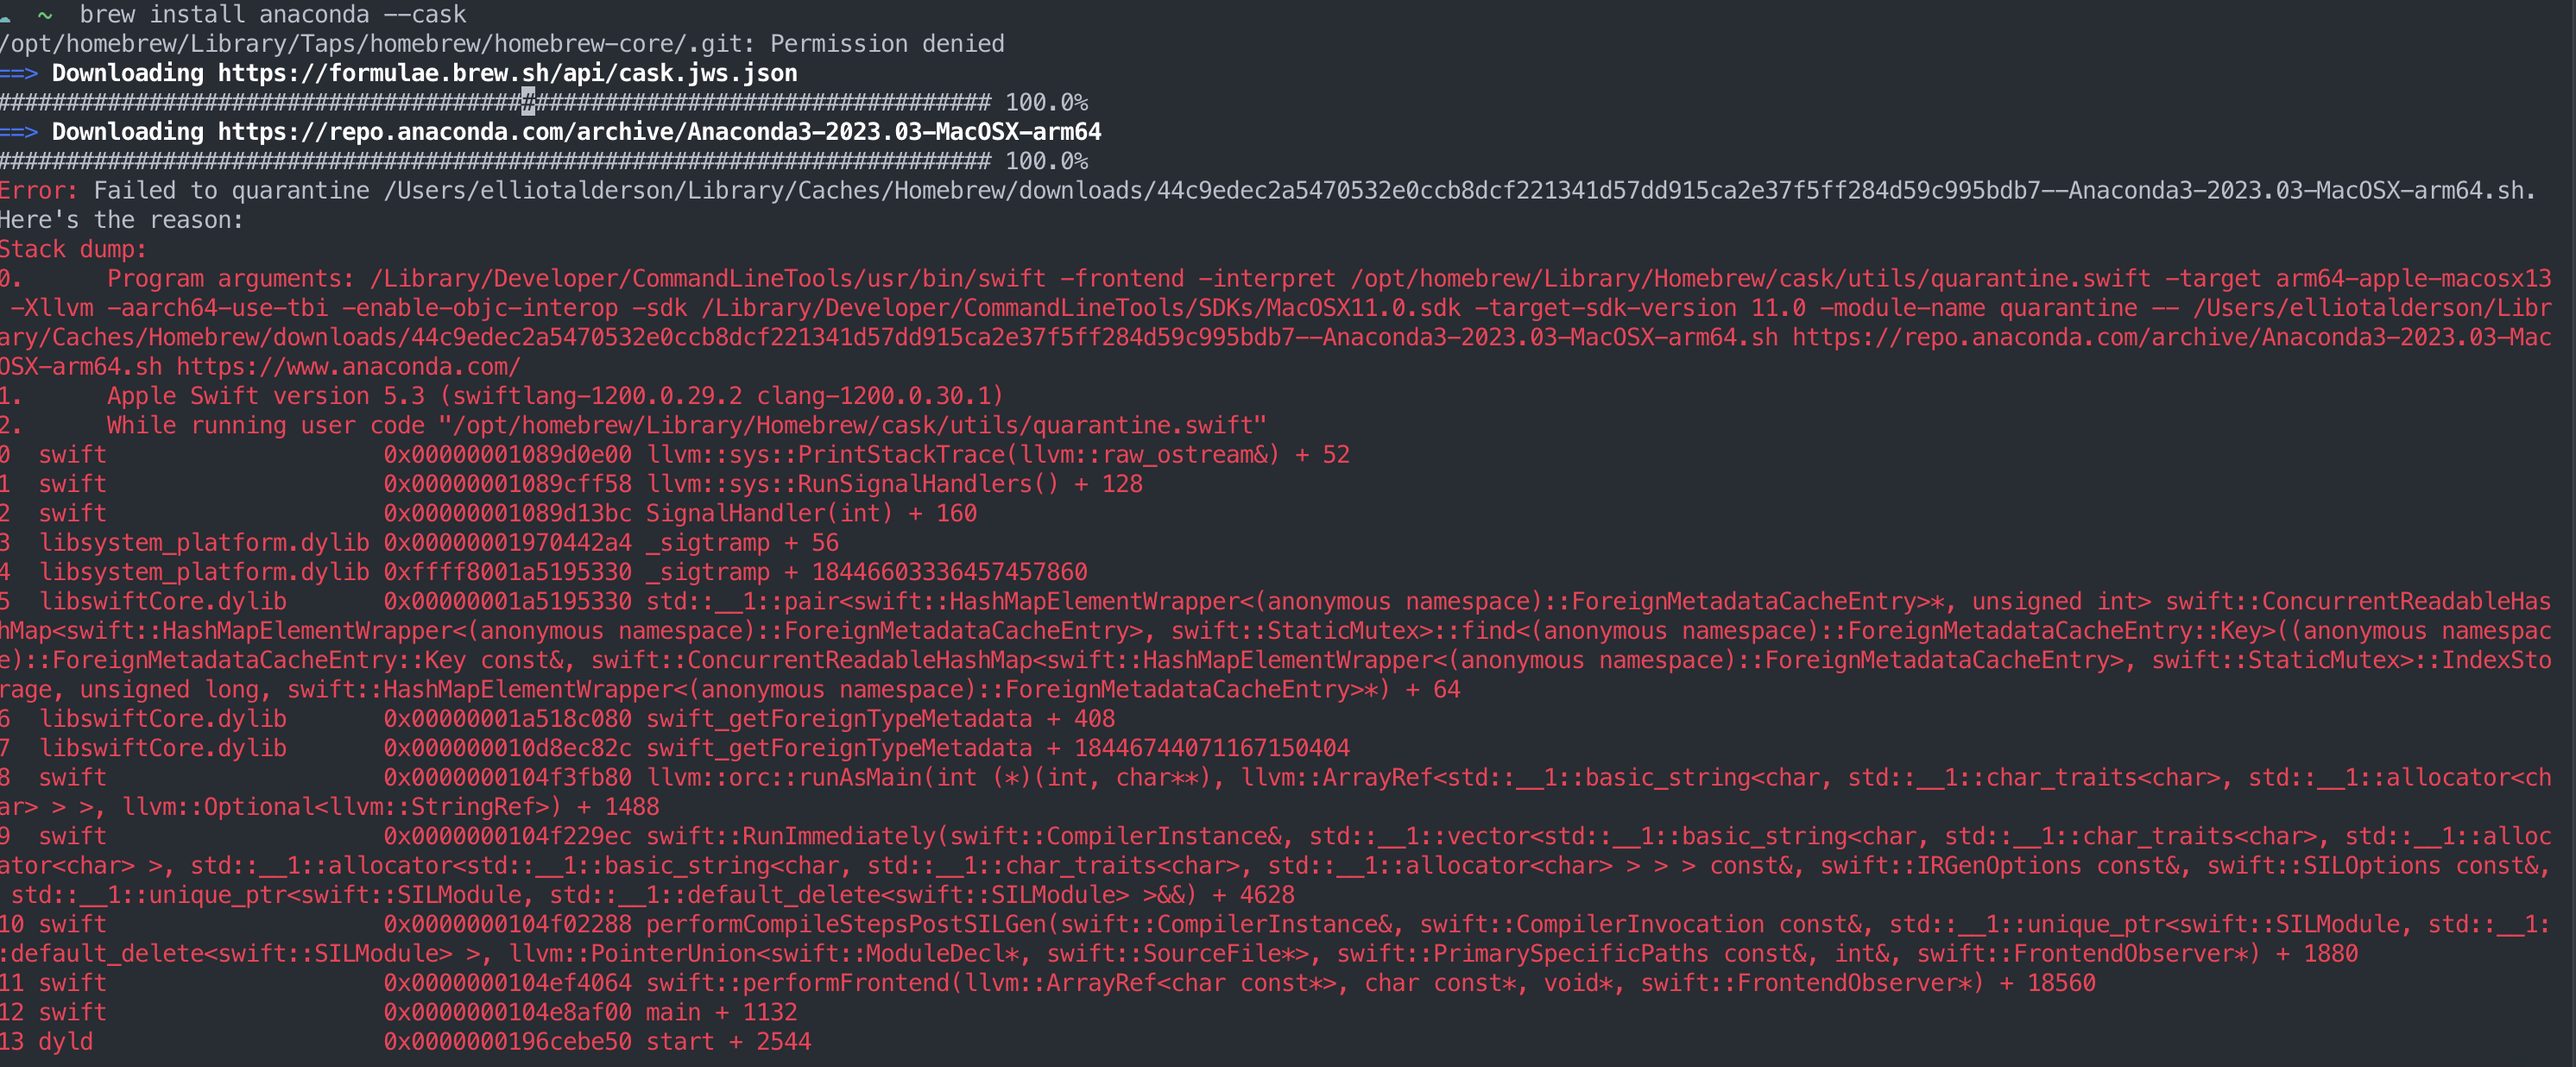
问题描述
Error: Failed to quarantine /Users/elliotalderson/Library/Caches/Homebrew/downloads/44c9edec2a5470532e0ccb8dcf221341d57dd915ca2e37f5ff284d59c995bdb7--Anaconda3-2023.03-MacOSX-arm64.sh. Here's the reason:
Stack dump:
0.	Program arguments: /Library/Developer/CommandLineTools/usr/bin/swift -frontend -interpret /opt/homebrew/Library/Homebrew/cask/utils/quarantine.swift -target arm64-apple-macosx13 -Xllvm -aarch64-use-tbi -enable-objc-interop -sdk /Library/Developer/CommandLineTools/SDKs/MacOSX11.0.sdk -target-sdk-version 11.0 -module-name quarantine -- /Users/elliotalderson/Library/Caches/Homebrew/downloads/44c9edec2a5470532e0ccb8dcf221341d57dd915ca2e37f5ff284d59c995bdb7--Anaconda3-2023.03-MacOSX-arm64.sh https://repo.anaconda.com/archive/Anaconda3-2023.03-MacOSX-arm64.sh https://www.anaconda.com/
1.	Apple Swift version 5.3 (swiftlang-1200.0.29.2 clang-1200.0.30.1)
2.	While running user code "/opt/homebrew/Library/Homebrew/cask/utils/quarantine.swift"
0  swift                    0x00000001089d0e00 llvm::sys::PrintStackTrace(llvm::raw_ostream&) + 52
1  swift                    0x00000001089cff58 llvm::sys::RunSignalHandlers() + 128
2  swift                    0x00000001089d13bc SignalHandler(int) + 160
3  libsystem_platform.dylib 0x00000001970442a4 _sigtramp + 56
4  libsystem_platform.dylib 0xffff8001a5195330 _sigtramp + 18446603336457457860
5  libswiftCore.dylib       0x00000001a5195330 std::__1::pair<swift::HashMapElementWrapper<(anonymous namespace)::ForeignMetadataCacheEntry>*, unsigned int> swift::ConcurrentReadableHashMap<swift::HashMapElementWrapper<(anonymous namespace)::ForeignMetadataCacheEntry>, swift::StaticMutex>::find<(anonymous namespace)::ForeignMetadataCacheEntry::Key>((anonymous namespace)::ForeignMetadataCacheEntry::Key const&, swift::ConcurrentReadableHashMap<swift::HashMapElementWrapper<(anonymous namespace)::ForeignMetadataCacheEntry>, swift::StaticMutex>::IndexStorage, unsigned long, swift::HashMapElementWrapper<(anonymous namespace)::ForeignMetadataCacheEntry>*) + 64
6  libswiftCore.dylib       0x00000001a518c080 swift_getForeignTypeMetadata + 408
7  libswiftCore.dylib       0x000000010d8ec82c swift_getForeignTypeMetadata + 18446744071167150404
8  swift                    0x0000000104f3fb80 llvm::orc::runAsMain(int (*)(int, char**), llvm::ArrayRef<std::__1::basic_string<char, std::__1::char_traits<char>, std::__1::allocator<char> > >, llvm::Optional<llvm::StringRef>) + 1488
9  swift                    0x0000000104f229ec swift::RunImmediately(swift::CompilerInstance&, std::__1::vector<std::__1::basic_string<char, std::__1::char_traits<char>, std::__1::allocator<char> >, std::__1::allocator<std::__1::basic_string<char, std::__1::char_traits<char>, std::__1::allocator<char> > > > const&, swift::IRGenOptions const&, swift::SILOptions const&, std::__1::unique_ptr<swift::SILModule, std::__1::default_delete<swift::SILModule> >&&) + 4628
10 swift                    0x0000000104f02288 performCompileStepsPostSILGen(swift::CompilerInstance&, swift::CompilerInvocation const&, std::__1::unique_ptr<swift::SILModule, std::__1::default_delete<swift::SILModule> >, llvm::PointerUnion<swift::ModuleDecl*, swift::SourceFile*>, swift::PrimarySpecificPaths const&, int&, swift::FrontendObserver*) + 1880
11 swift                    0x0000000104ef4064 swift::performFrontend(llvm::ArrayRef<char const*>, char const*, void*, swift::FrontendObserver*) + 18560
12 swift                    0x0000000104e8af00 main + 1132
13 dyld                     0x0000000196cebe50 start + 2544
第0条提示
0. Program arguments: /Library/Developer/CommandLineTools/usr/bin/swift -frontend -interpret /opt/homebrew/Library/Homebrew/cask/utils/quarantine.swift -target arm64-apple-macosx13 -Xllvm -aarch64-use-tbi -enable-objc-interop -sdk /Library/Developer/CommandLineTools/SDKs/MacOSX11.0.sdk -target-sdk-version 11.0 -module-name quarantine -- /Users/elliotalderson/Library/Caches/Homebrew/downloads/44c9edec2a5470532e0ccb8dcf221341d57dd915ca2e37f5ff284d59c995bdb7--Anaconda3-2023.03-MacOSX-arm64.sh https://repo.anaconda.com/archive/Anaconda3-2023.03-MacOSX-arm64.sh https://www.anaconda.com/
建议我们从官网下载,文章见,1.1.2 的方法二:从官网下载安装包
1.1.2 方法二:从官网下载安装包
在官网中选择点击如下按钮:

根据自己需求,选择版本,由于我是Mac M1 芯片,我选择如下:

文件如下:

先执行如下命令:
sudo chmod +x ./Anaconda3-2023.03-MacOSX-arm64.sh一直 ENTRY ,知道出现“yes or no ", 输入yes,可自选安装路径
再安装 Anaconda3-2023.03-MacOSX-arm64.pkg,按照操作安装,安装完成。

安装 Anaconda 完成后
查看 ~/.bash_profile,在文件中已经新增了代码,如下:
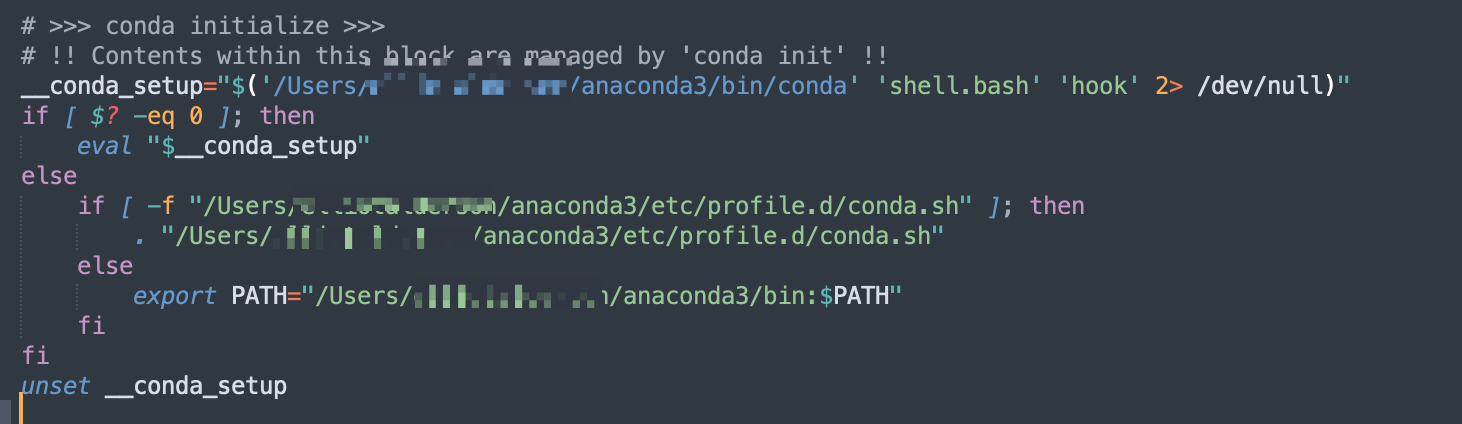
,需要执行如下命令,部署环境变量:
source ~/.bash_profile二、用 Anaconda 安装 Python
根据自己需求安装Python的版本,我安装的是Python 3.11 版本,执行如下命令:
conda create -n pytorch python=3.112.1 conda常用的命令
命令 | 功能 |
conda list | 查看已安装的包 |
conda upgrade --all | 更新所有包 |
conda install [package_name] | 安装包 |
conda remove [package_name] | 删除包 |
conda update [package_name] | 更新包 |
conda search [name] | 查找包 |
conda activate [name] | 切换到的环境name |
conda deactivate [name] | 退出环境name |
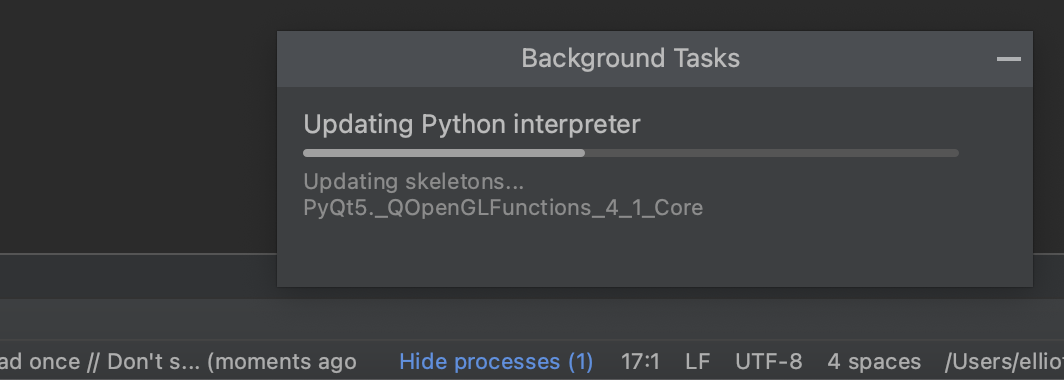
2.2 配置 Python interpreter
两个入口:
1.弹窗提示中

2.setting中
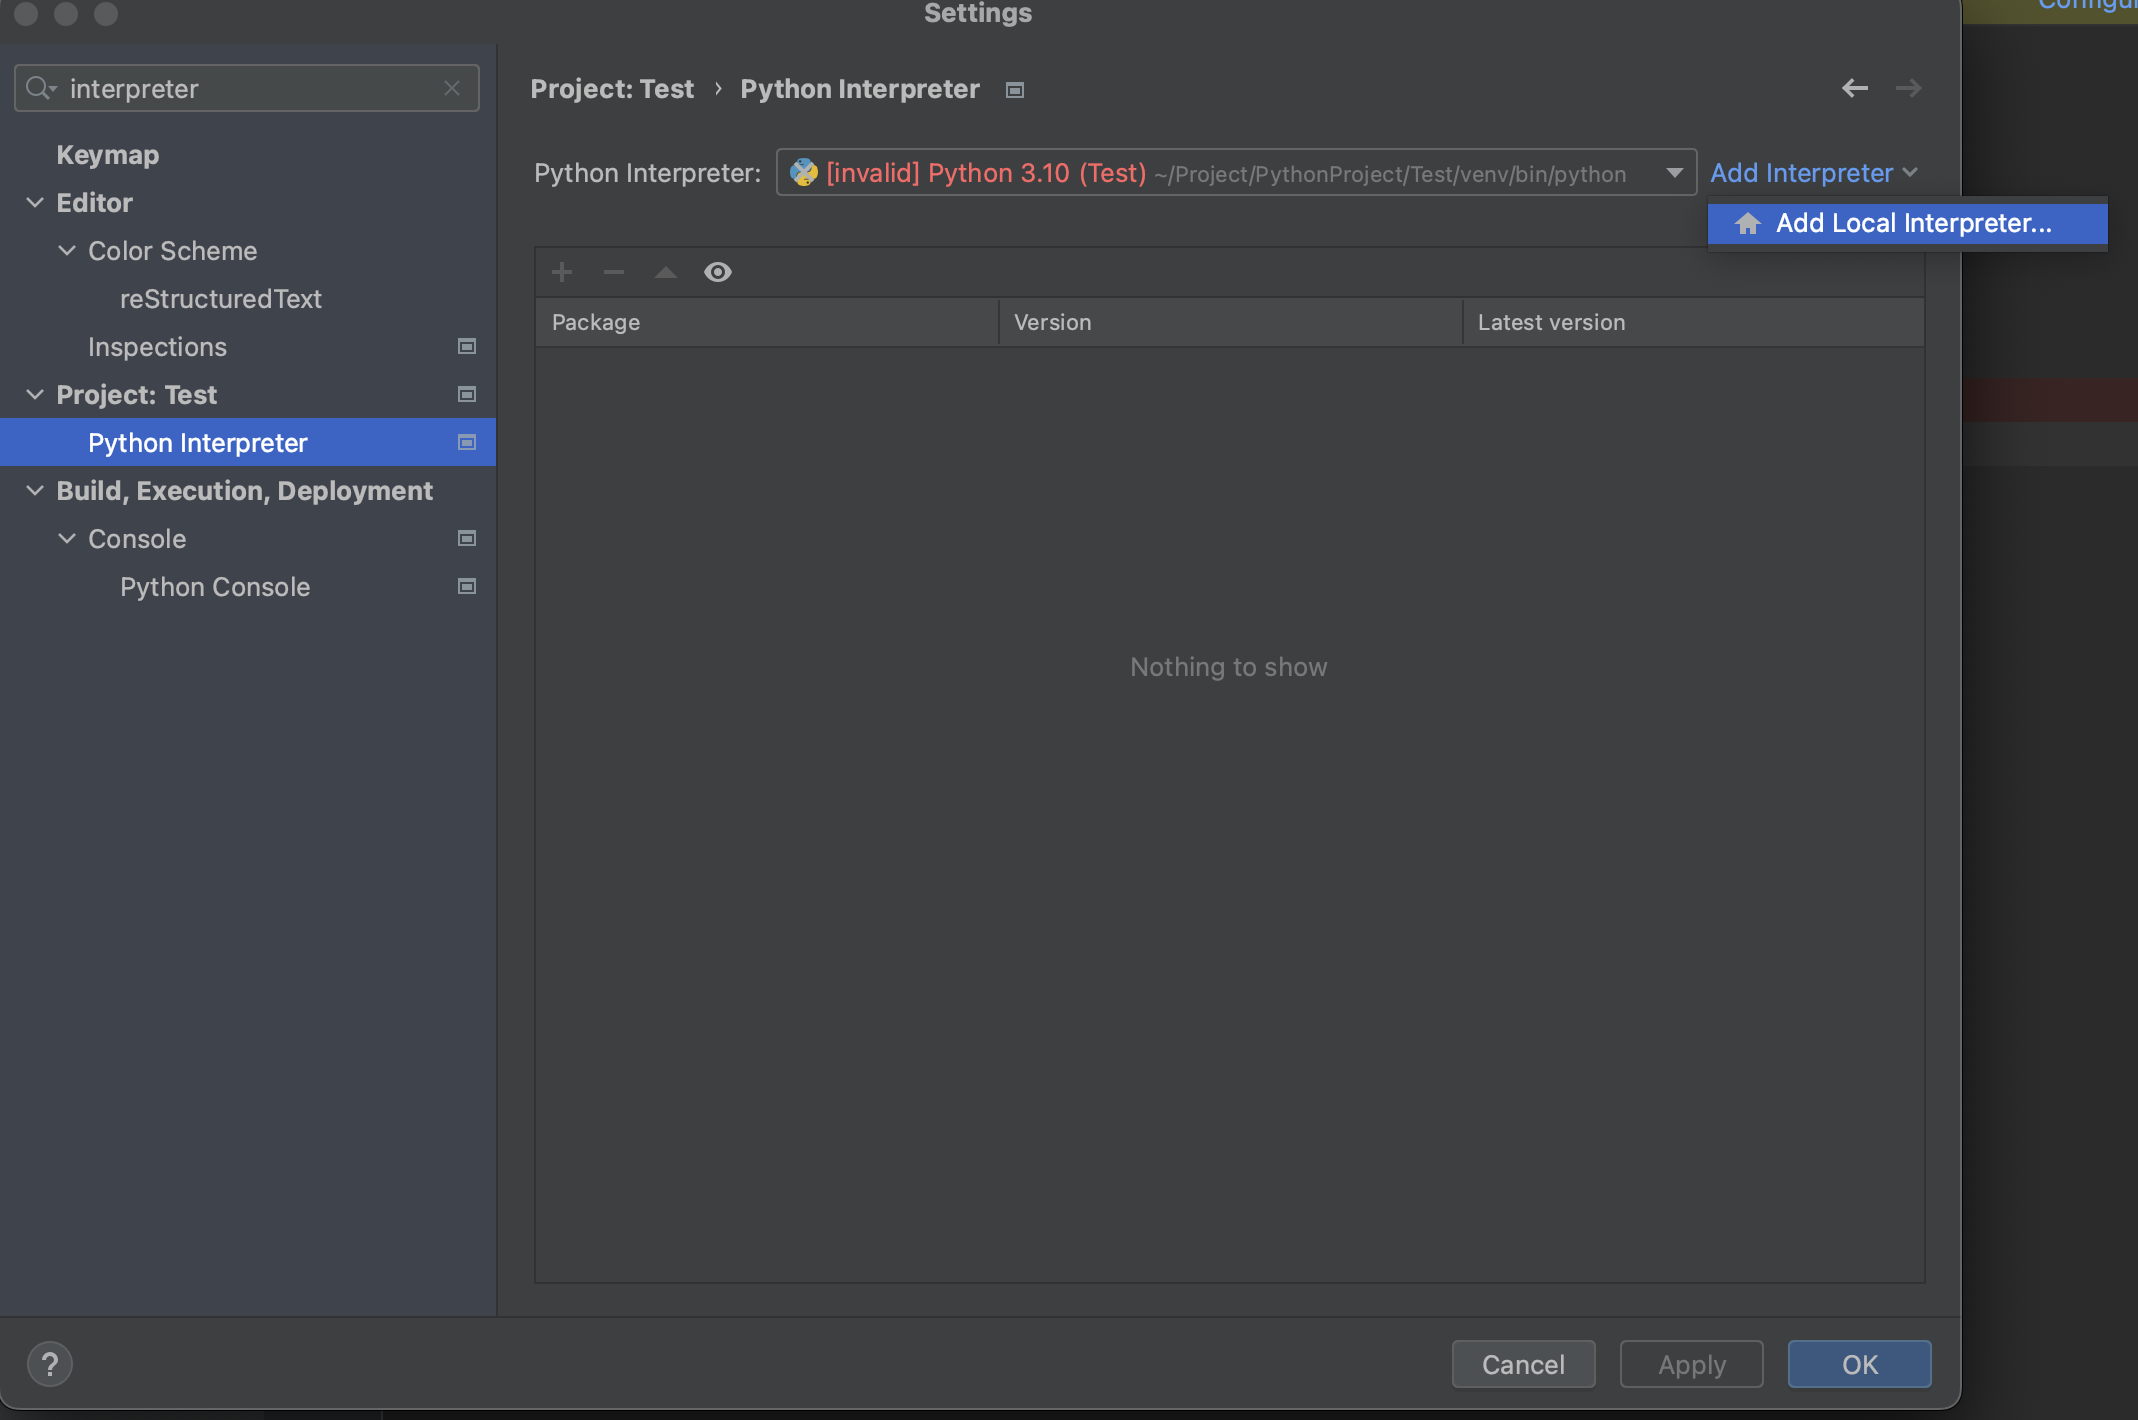
PyCharm 会自动下载 PyQt5
2.2.1 在指定虚拟环境下添加包
切换到 创建好的虚拟环境
conda activate pytorch搜索并安装 pyqt
conda search pytq
conda install pyqt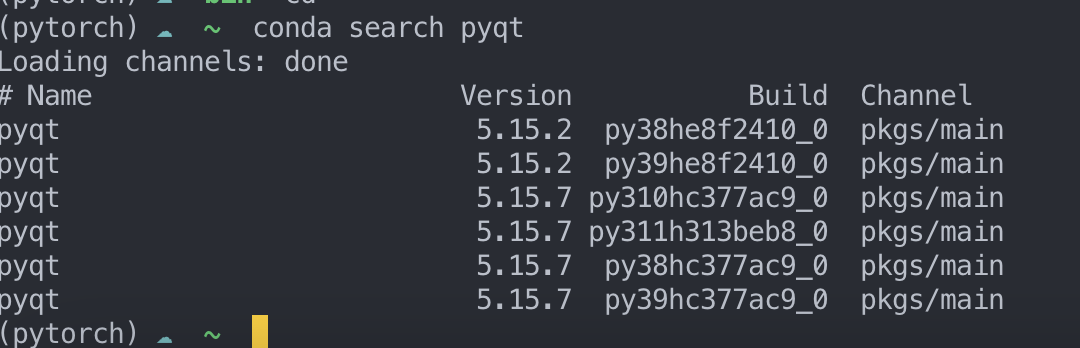
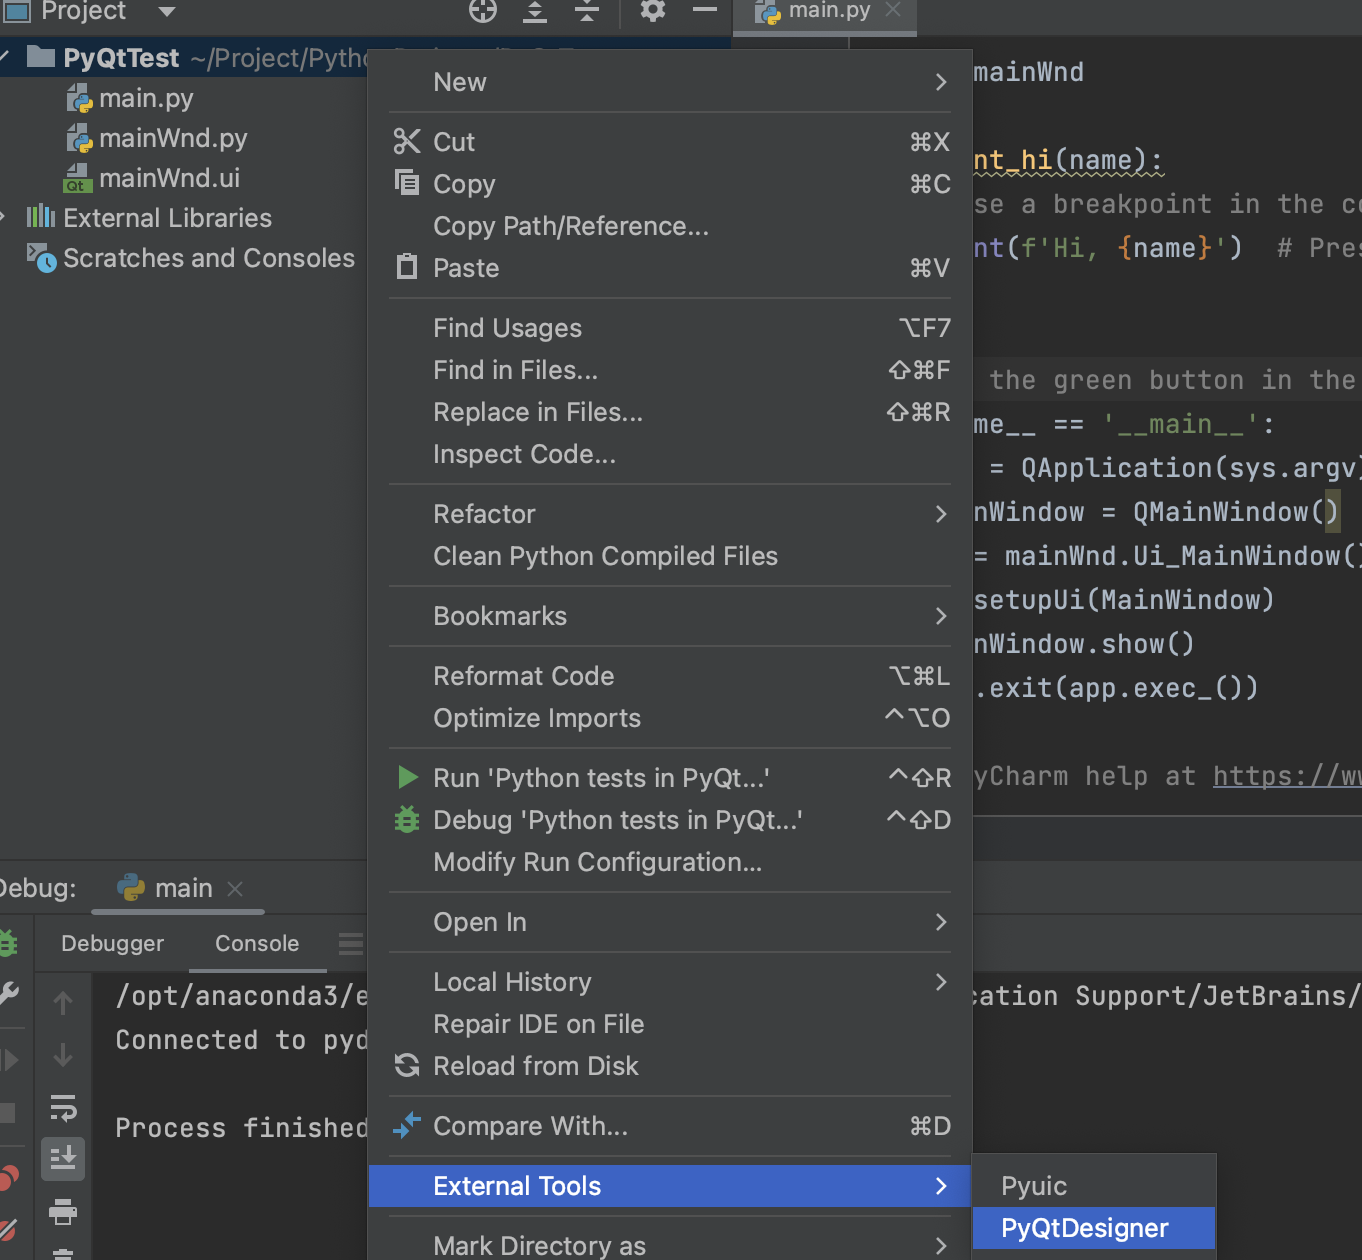
2.2.2 添加额外工具
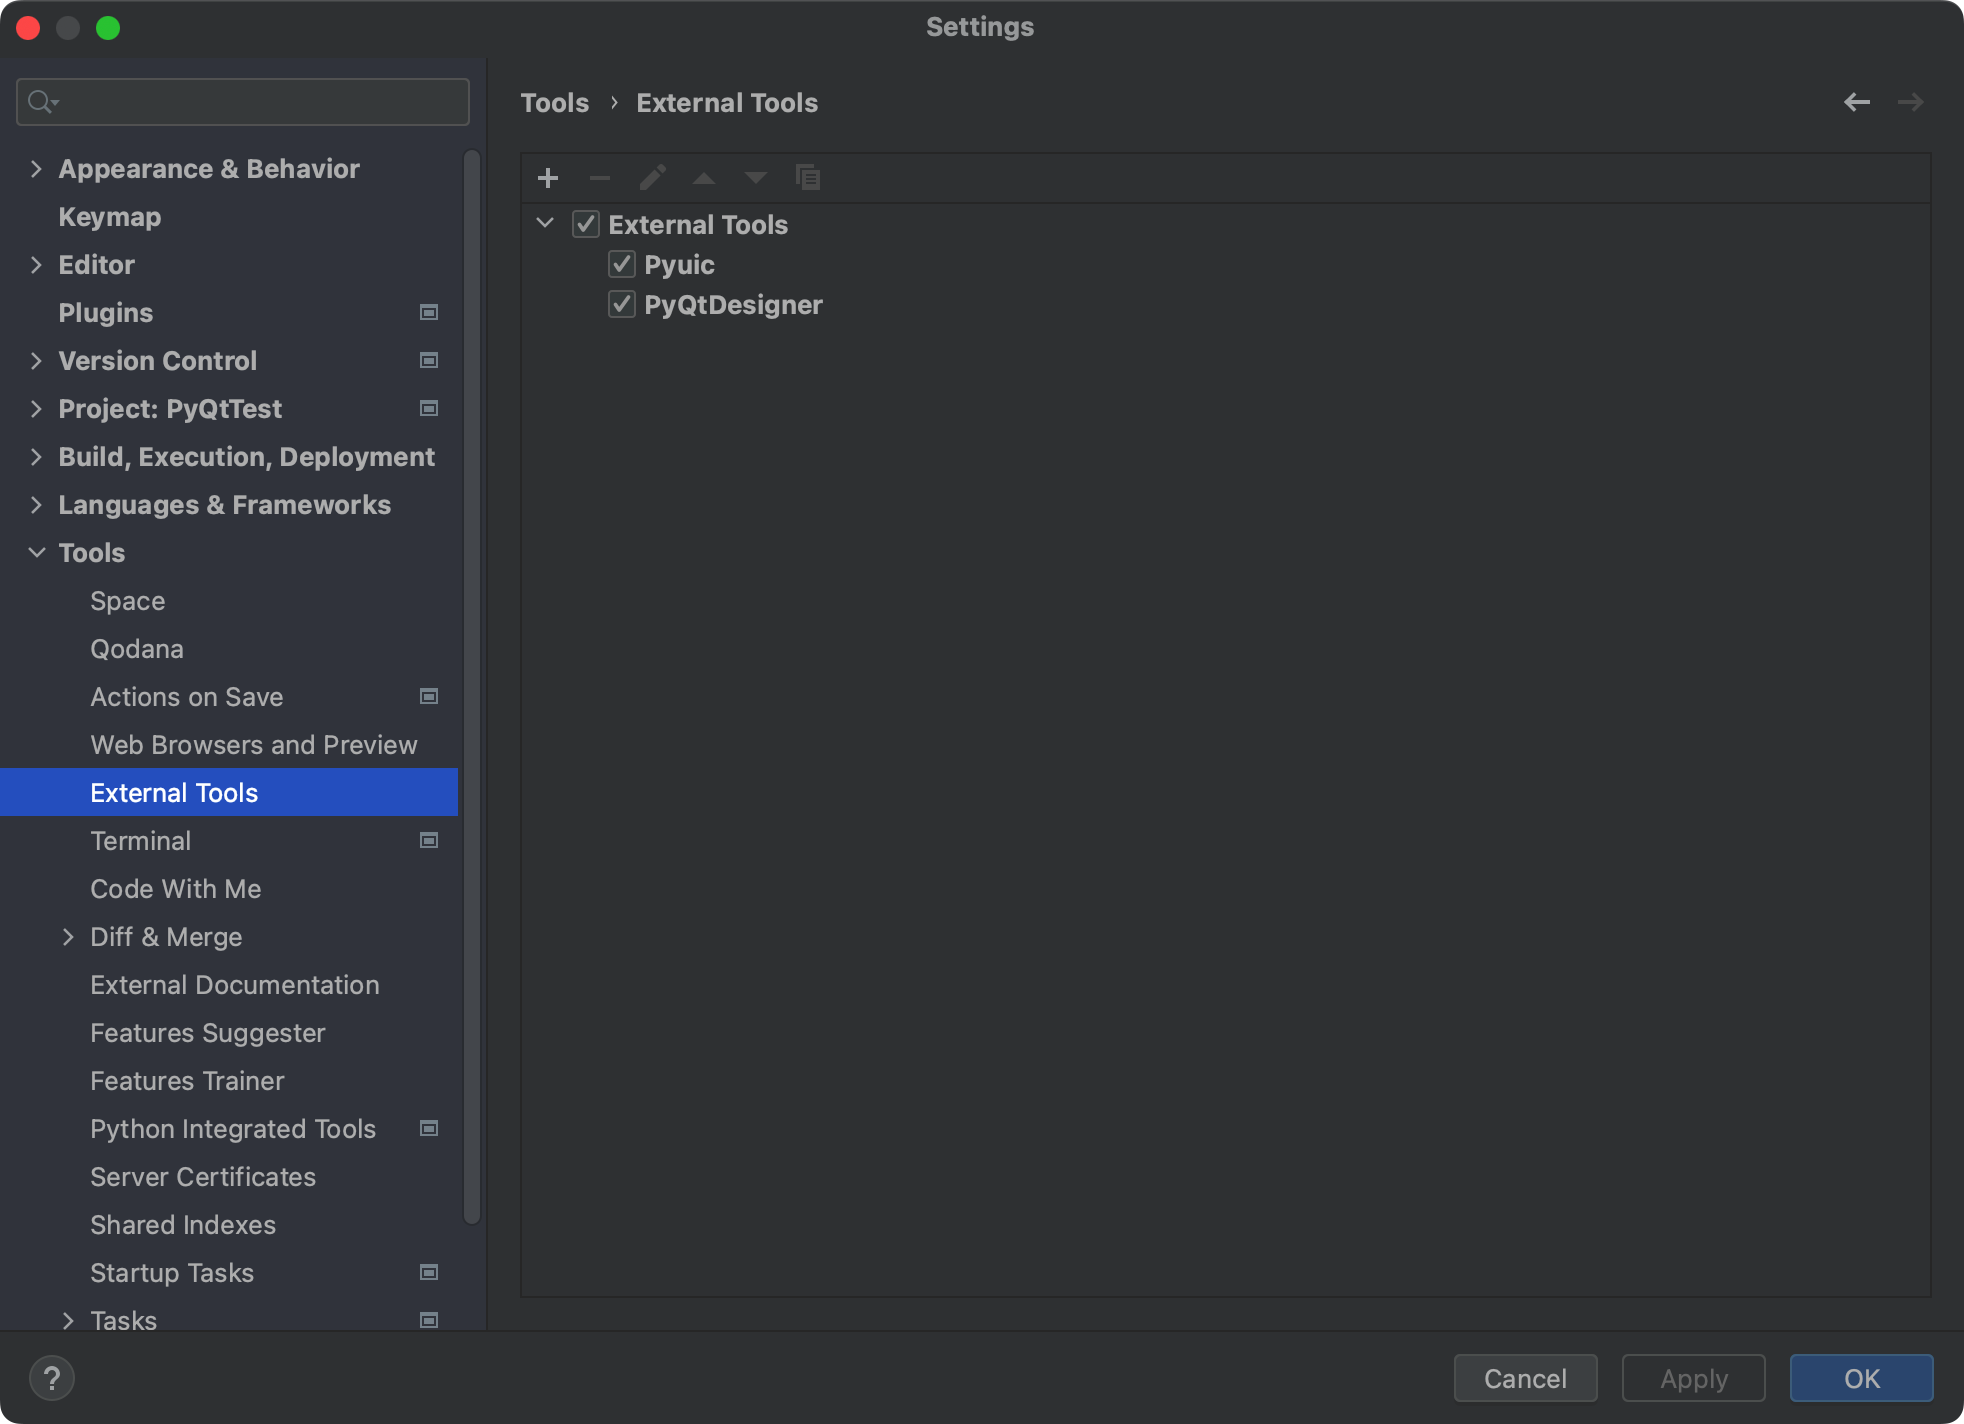
由于Anaconda 3 移除了Designer,需要自行安装Qt
brew install qtPyQtDesigner
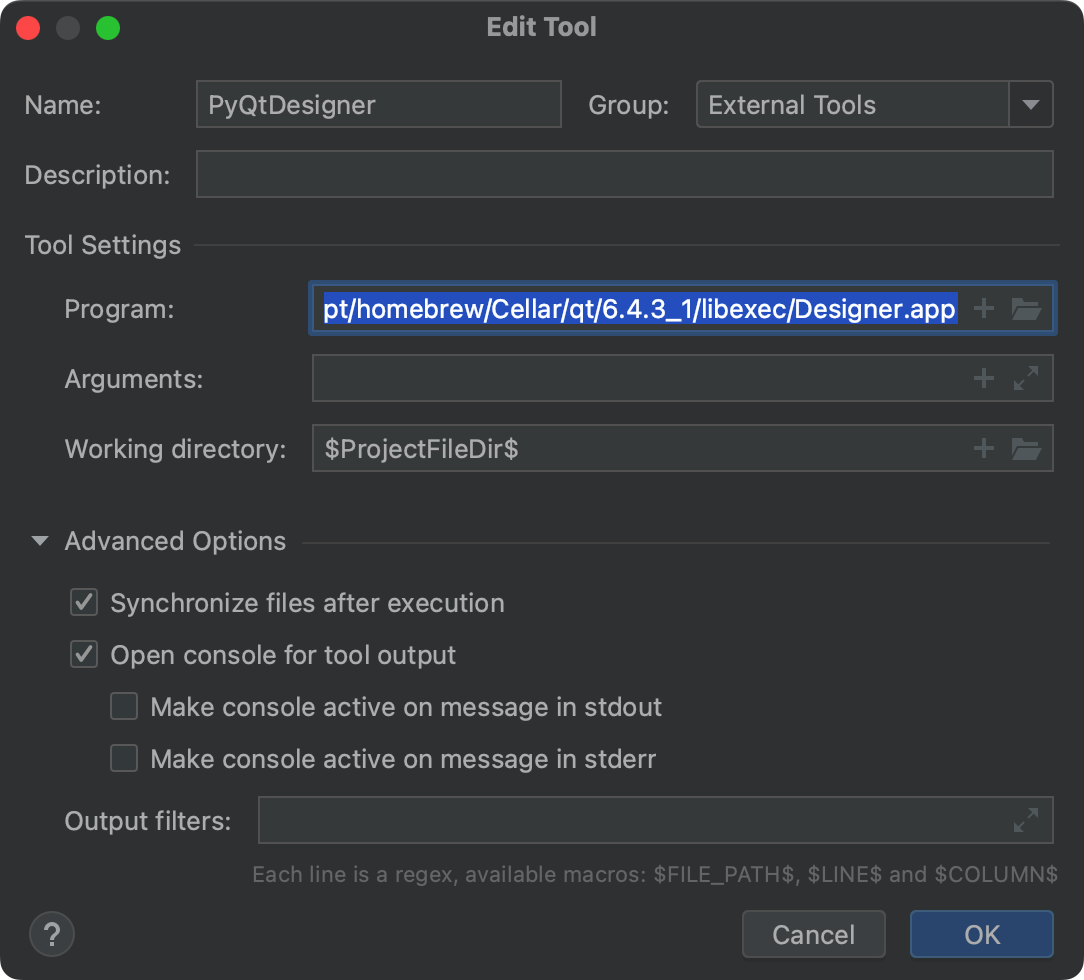
字段 | 内容 | 示例 |
Name: | PyQtDesigner | PyQtDesigner |
Program | 选择Designer的位置,homebrew软件包 qt路径 | /opt/homebrew/Cellar/qt/6.4.3_1/libexec/Designer.app |
Working directory | $ProjectFileDir$ |
Pyuic

字段 | 内容 | 示例 |
Name: | Pyuic | Pyuic |
Program | 选择anaconda3目录下的pyuic5 | /opt/anaconda3/bin/pyuic5 |
Working directory | $FileDir$ |
2.3 验证是否配置成功
2.3.1 创建ui
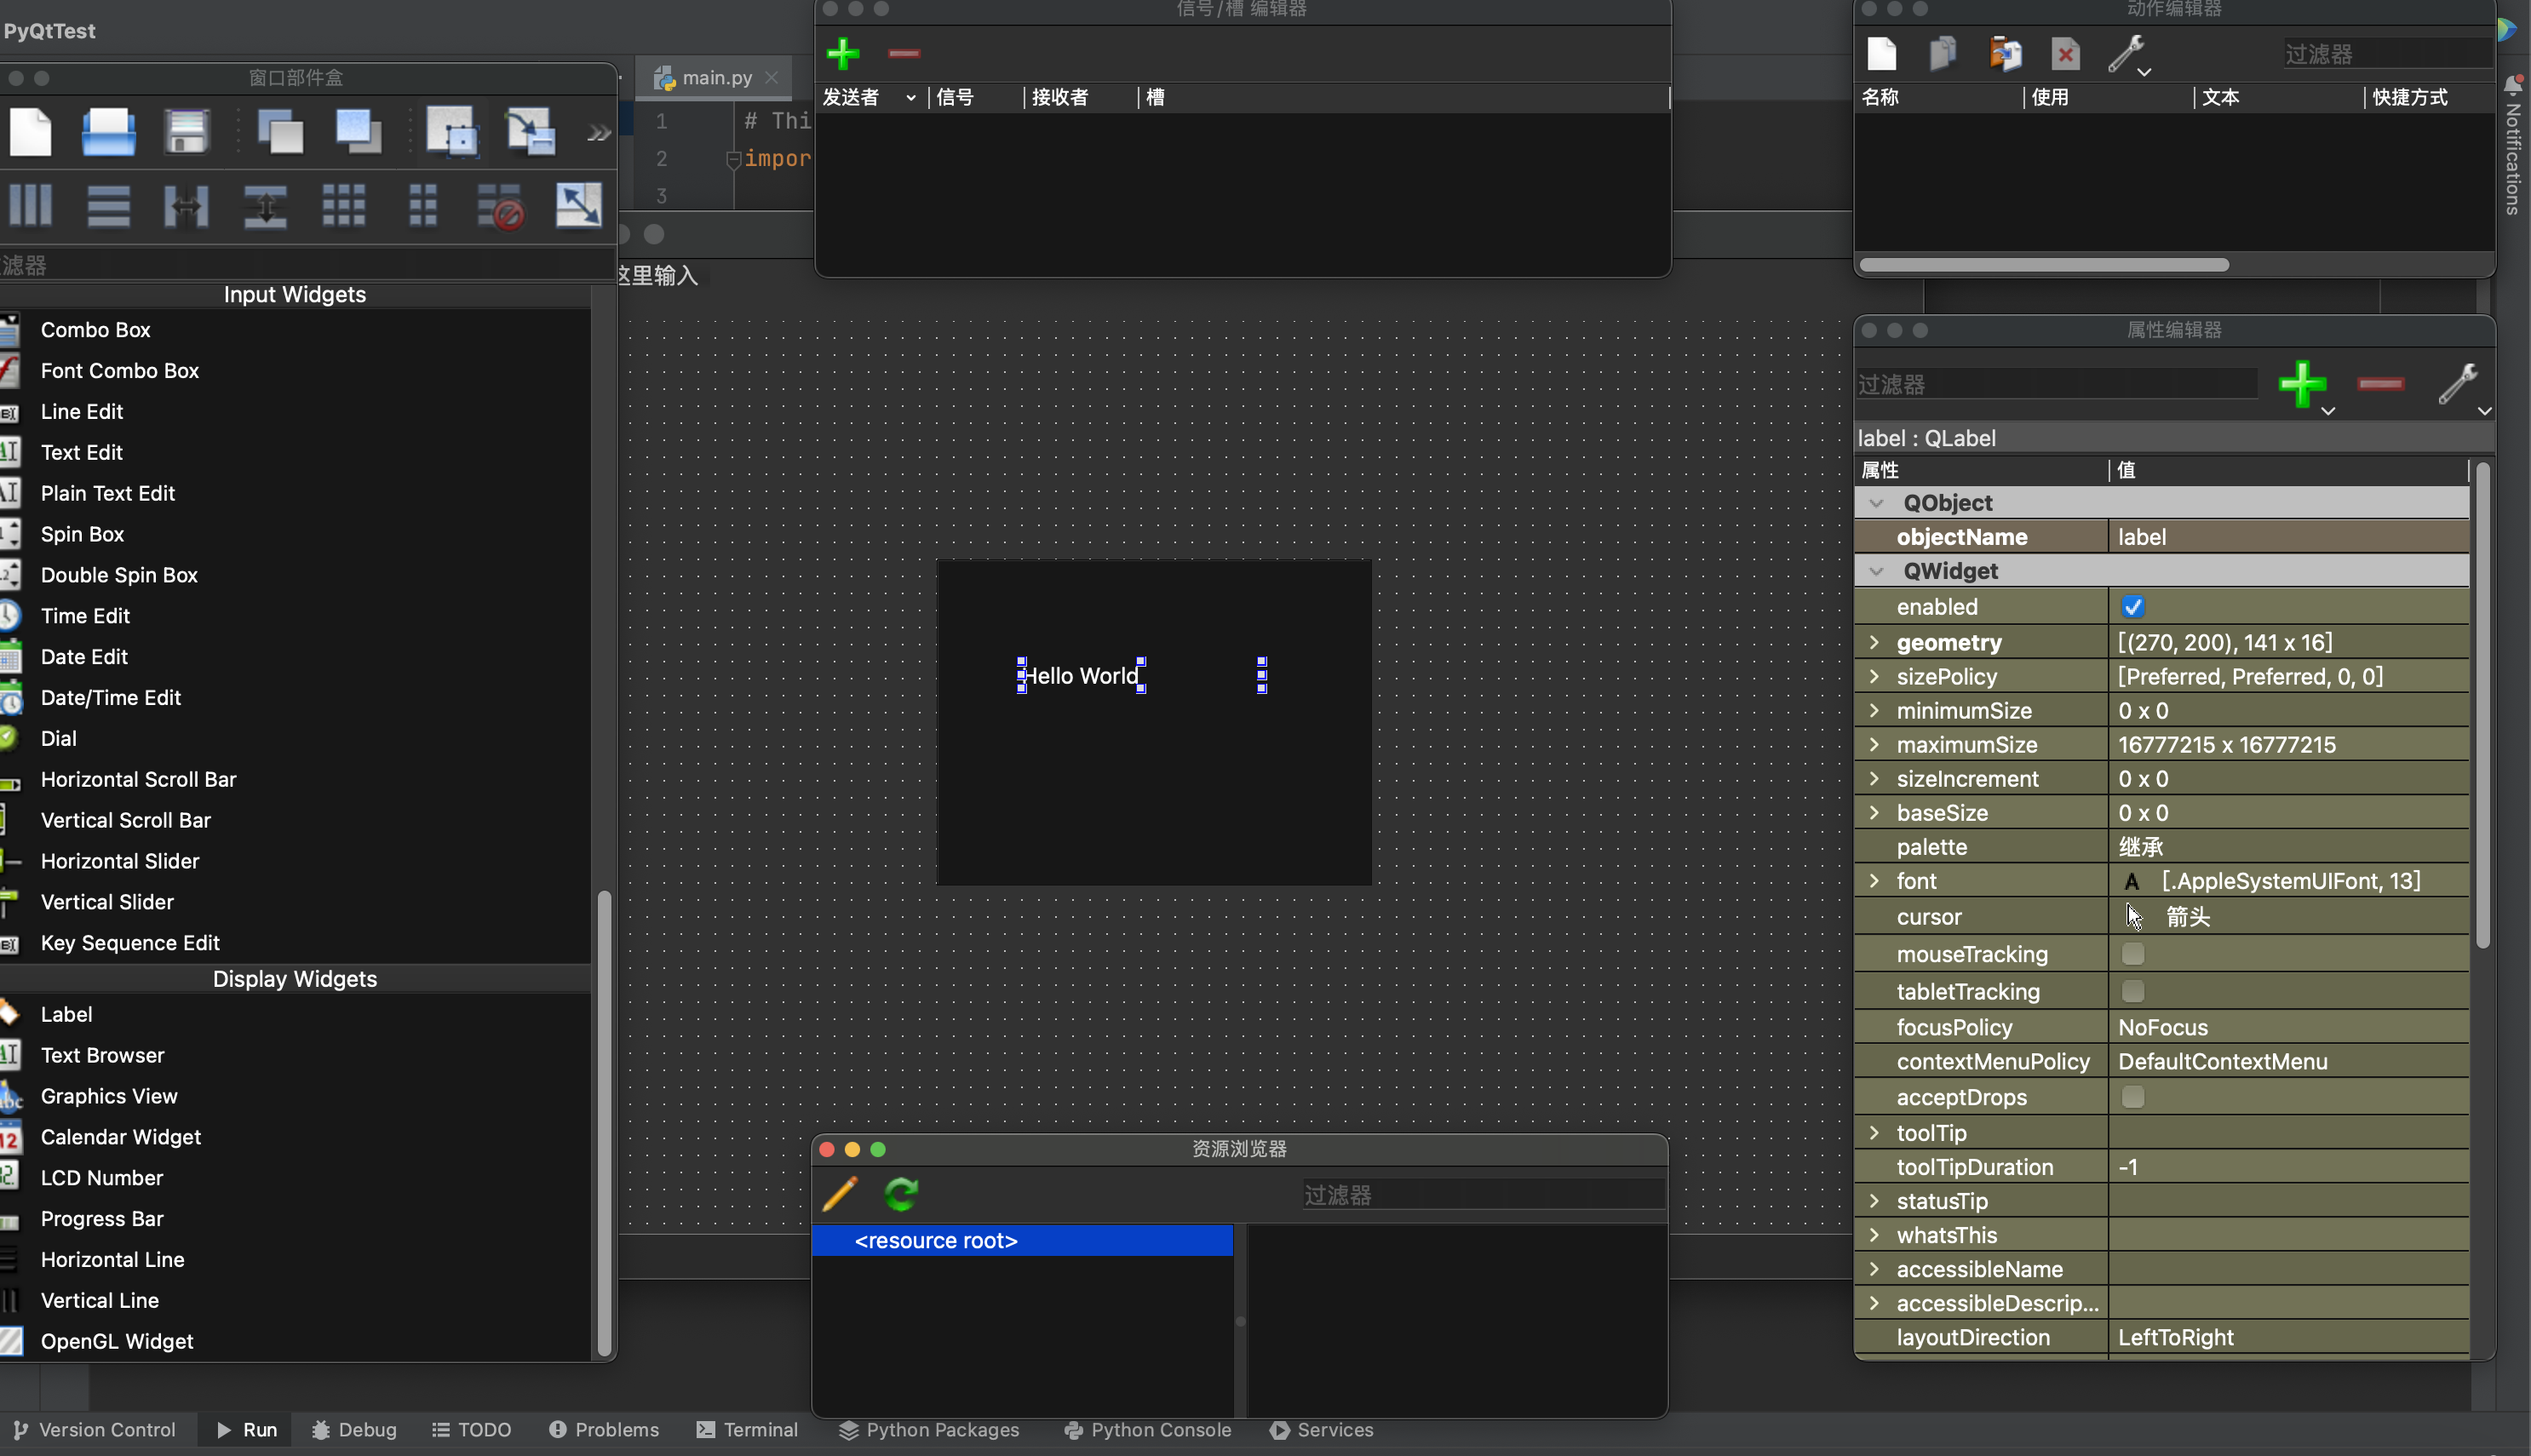
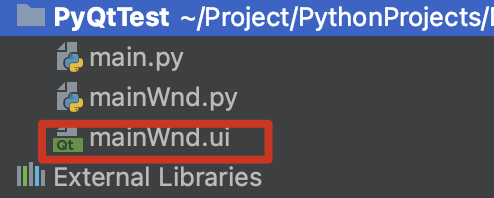
保存文件,到项目目录,我命名为 mainWnd.ui
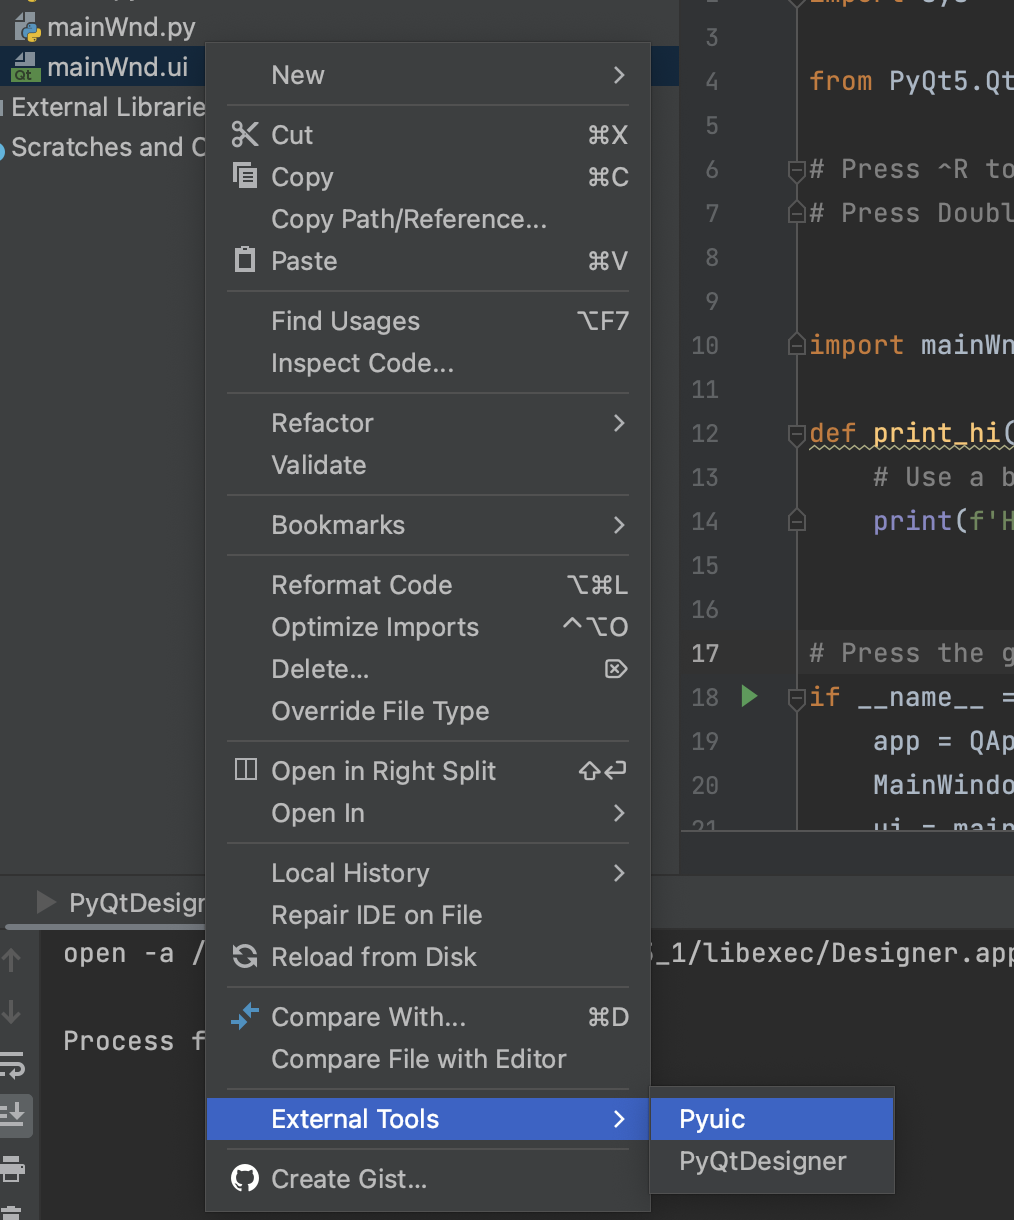
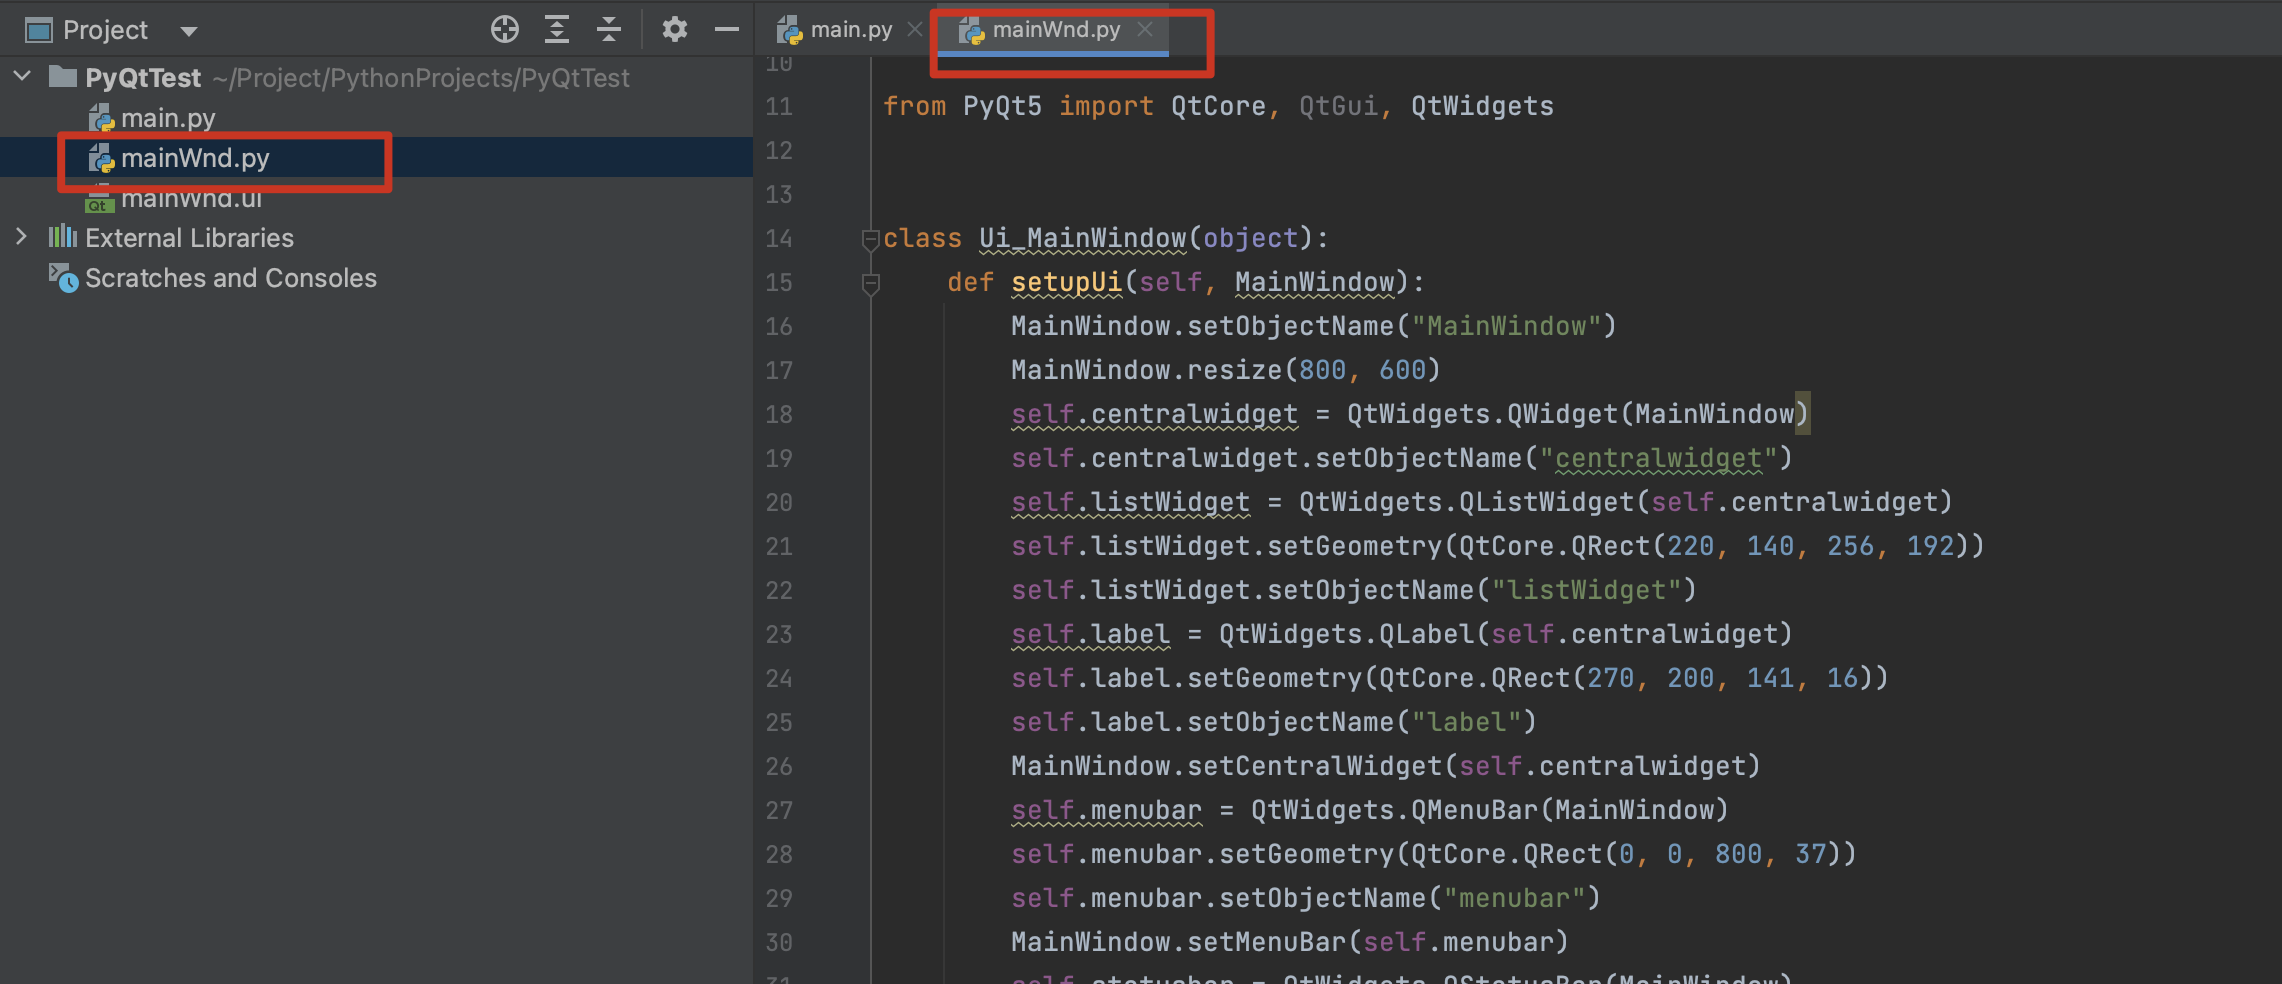
2.3.2 将 .ui 转换成 .py,生成 mainWnd.py 文件
2.3.3 在 main.py 中显示窗口
if __name__ == '__main__':
app = QApplication(sys.argv)
MainWindow = QMainWindow()
ui = mainWnd.Ui_MainWindow()
ui.setupUi(MainWindow)
MainWindow.show()
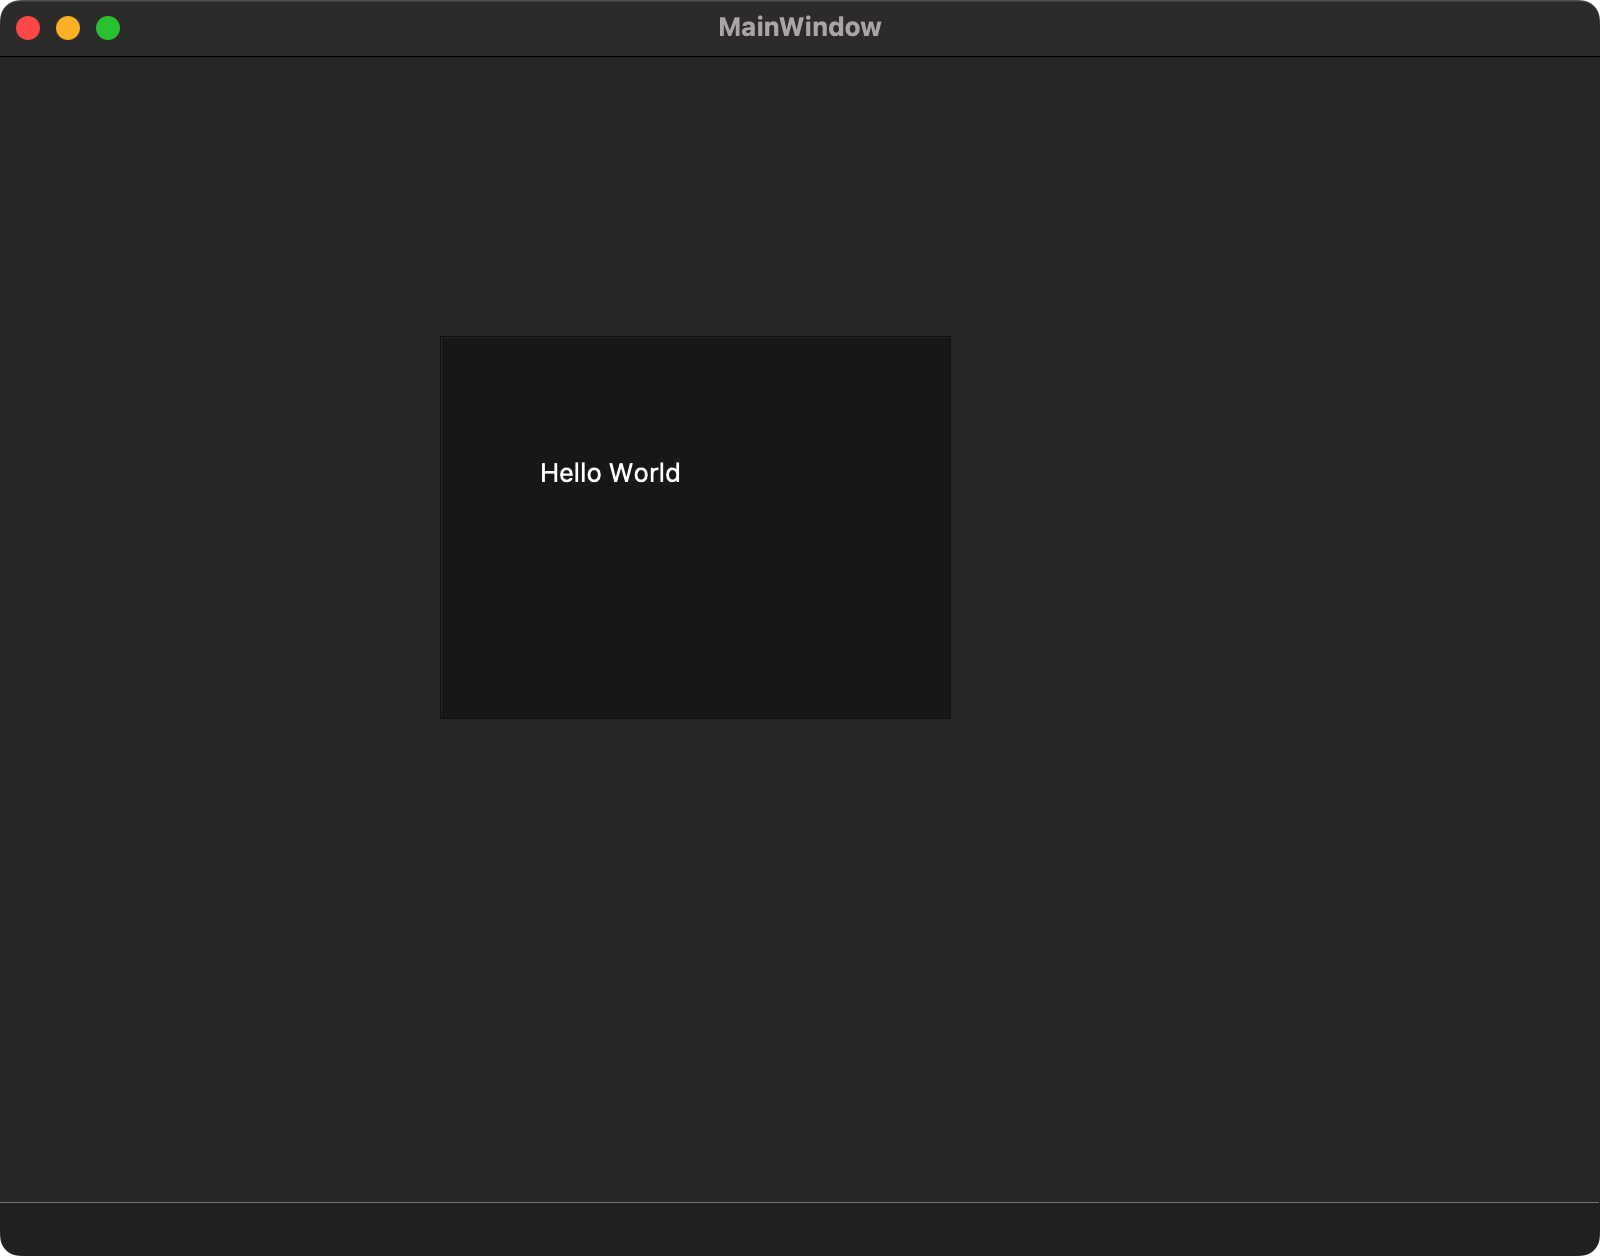
sys.exit(app.exec_())2.3.4 效果图如下:


 1320
1320


 被折叠的 条评论
为什么被折叠?
被折叠的 条评论
为什么被折叠?
 到【灌水乐园】发言


