


一、前言
在UIKit中可以使用UICollectionView实现较复杂的列表,以下是此布局的简单使用,效果如下
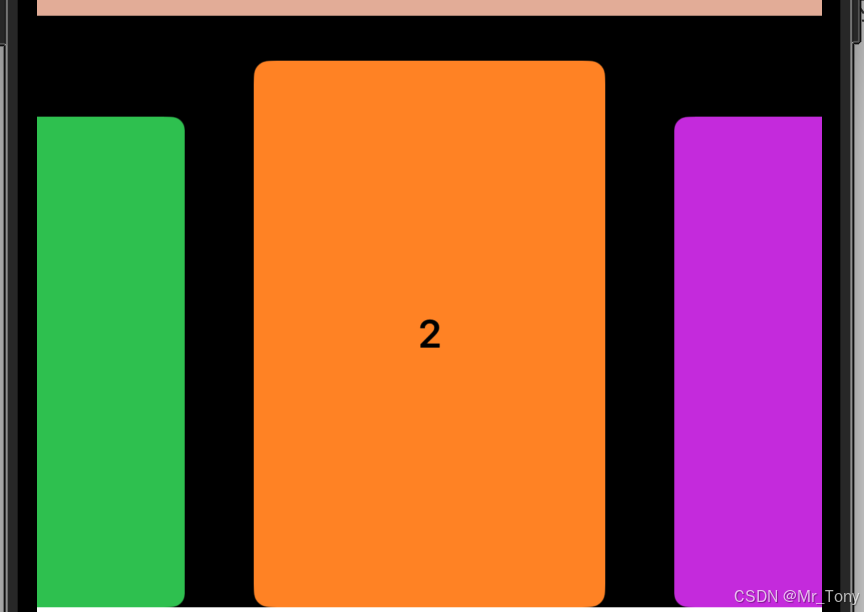
这里面使用自定义UICollectionViewFlowLayout实现了滑动缩放的效果,如果不需要可以使用系统默认效果
二、示例代码
// 定义数据模型,需要遵循 Hashable
struct Item: Hashable, Sendable {
    let id: UUID = UUID()
    let title: String

    func hash(into hasher: inout Hasher) {
        hasher.combine(id)
    }

    static func == (lhs: Item, rhs: Item) -> Bool {
        return lhs.id == rhs.id
    }
}

// 定义单个单元格
class ColorCell: UICollectionViewCell{
    static let identifier = "ColorCell"

    private let label: UILabel = {
        let label = UILabel()
        label.textAlignment = .center
        label.font = .boldSystemFont(ofSize: 20)
//        label.translatesAutoresizingMaskIntoConstraints = false
        return label
    }()

    override init(frame: CGRect) {
        super.init(frame: frame)
        contentView.backgroundColor = .systemBackground
        contentView.addSubview(label)
        contentView.layer.cornerRadius = 8
        contentView.layer.masksToBounds = true

//        NSLayoutConstraint.activate([
//                 label.centerXAnchor.constraint(equalTo: contentView.centerXAnchor),
//                 label.centerYAnchor.constraint(equalTo: contentView.centerYAnchor)
//             ])

    }

    required init?(coder: NSCoder) {
        super.init(coder: coder)
    }

    override func layoutSubviews() {
        super.layoutSubviews()
        label.frame = contentView.bounds
    }

    func configure(with index: Int) {
        label.text = "\(index)"
        // 根据索引设置不同颜色
        let colors: [UIColor] = [.systemBlue, .systemGreen, .systemOrange,
                                 .systemPurple, .systemPink, .systemTeal]
        contentView.backgroundColor = colors[index % colors.count]
    }

}
enum Section: Hashable, Sendable{
    case main
}
class RecommendCollectionView: UIView {

    // 数据源数组 - 存储实际数据
    private var dataSource: [String] = []

    var clickItemCall: ((Int) -> Void)?

    // ✅ 可以自动推断类型,无需手动指定,适合IOS 14以上版本
    let cellRegistration = UICollectionView.CellRegistration<ColorCell, Int> { cell, indexPath, item in
        cell.configure(with: item)
    }

    override init(frame: CGRect) {
        super.init(frame: frame)
        loadData()
        setupCollectionView()
    }

    required init?(coder: NSCoder) {
        super.init(coder: coder)

    }

    override func layoutSubviews() {

    }

    private func setupCollectionView() {
//        let layout = UICollectionViewFlowLayout()
        let layout = CenteredScalingFlowLayout()
        layout.scrollDirection = .horizontal
        layout.minimumLineSpacing = 26
        layout.minimumInteritemSpacing = 10
//        layout.sectionInset = UIEdgeInsets(top: 20, left: 20, bottom: 20, right: 20)

        // 设置每一个item width宽度的大小
        layout.itemSize = CGSize(width: 180, height: 280)

        // 创建collectionView
        let collectionView = UICollectionView(frame: .zero, collectionViewLayout: layout)
        collectionView.translatesAutoresizingMaskIntoConstraints = false
        collectionView.backgroundColor = .clear
        collectionView.autoresizingMask = [.flexibleWidth, .flexibleHeight]
        collectionView.showsHorizontalScrollIndicator = false
        collectionView.decelerationRate = .fast // 加快减速,使吸附效果更明显
        // 注册cell

        collectionView.register(ColorCell.self, forCellWithReuseIdentifier: ColorCell.identifier)

        // 4. 设置代理和数据源
        collectionView.delegate = self
        collectionView.dataSource = self

        addSubview(collectionView)

        NSLayoutConstraint.activate([
               collectionView.topAnchor.constraint(equalTo: topAnchor),
               collectionView.leadingAnchor.constraint(equalTo: leadingAnchor),
               collectionView.trailingAnchor.constraint(equalTo: trailingAnchor),
               collectionView.bottomAnchor.constraint(equalTo: bottomAnchor)
           ])
    }

    private func loadData(){
        for index in 0..<10 {
            dataSource.append("this is item \(index)")
        }
    }

}

// 实现数据,IOS 13 以下的数据管理方式
extension RecommendCollectionView: UICollectionViewDataSource{

    func collectionView(_ collectionView: UICollectionView, numberOfItemsInSection section: Int) -> Int {
        return dataSource.count
    }

    func collectionView(_ collectionView: UICollectionView, cellForItemAt indexPath: IndexPath) -> UICollectionViewCell {
//        let cell: ColorCell = collectionView.dequeueReusableCell(withReuseIdentifier: ColorCell.identifier, for: indexPath) as! ColorCell
//        collectionView.dequeueReusableSupplementaryView(ofKind: <#T##String#>, withReuseIdentifier: <#T##String#>, for: <#T##IndexPath#>)
//        cell.configure(with: indexPath.item)
//        return cell
        return collectionView.dequeueConfiguredReusableCell( // IOS 14以上的方式
            using: cellRegistration,
            for: indexPath,
            item: indexPath.item
        )
    }
}

extension RecommendCollectionView: UICollectionViewDelegate{
    func collectionView(_ collectionView: UICollectionView, didSelectItemAt indexPath: IndexPath) {
        print("选中了第 \(indexPath.item) 个 item")
        clickItemCall?(indexPath.item)
    }
}
自定义CenteredScalingFlowLayout
import UIKit

// MARK: - 自定义Layout
class CenteredScalingFlowLayout: UICollectionViewFlowLayout {

    private let sideItemScale: CGFloat = 0.8
    private let spacing: CGFloat = 26

    override init() {
        super.init()
        scrollDirection = .horizontal
        minimumLineSpacing = spacing
    }

    required init?(coder: NSCoder) {
        fatalError("init(coder:) has not been implemented")
    }

    override func prepare() {
        super.prepare()

        guard let collectionView = collectionView else { return }

        // 设置item大小
        itemSize = CGSize(width: 180, height: 280)

        // 计算左右内边距,使第一个和最后一个item可以居中
//        let inset = (collectionView.bounds.width - itemSize.width) / 2
        // 现在:让首尾item保持在左右两侧位置,始终显示三个item
        let halfWidth = (collectionView.bounds.width - itemSize.width) / 2
        let inset = halfWidth - itemSize.width - spacing

        sectionInset = UIEdgeInsets(top: 0, left: inset, bottom: 0, right: inset)
    }

    // 返回可见区域内的布局属性
    override func layoutAttributesForElements(in rect: CGRect) -> [UICollectionViewLayoutAttributes]? {
        guard let attributes = super.layoutAttributesForElements(in: rect) else { return nil }
        guard let collectionView = collectionView else { return attributes }

        let centerX = collectionView.contentOffset.x + collectionView.bounds.width / 2
        let anchor = itemSize.height / 2
        // 对每个item应用缩放变换
        attributes.forEach { attribute in
            let distance = abs(attribute.center.x - centerX)
            let normalizedDistance = distance / collectionView.bounds.width // 计算出距离和屏幕宽度的比例,这个比例乘 0.2 就是 缩放差,1 - 缩放差就是要缩放的大小。
            // 计算缩放比例:距离中心越近,scale越接近1
            let scale = max(sideItemScale, 1 - normalizedDistance * (1 - sideItemScale))
            attribute.transform =  CGAffineTransform(translationX: 0, y: anchor) // 以底部为锚点进行缩放
                        .scaledBy(x: scale, y: scale)
                        .translatedBy(x: 0, y: -anchor)
        }

        return attributes
    }

    // 当bounds改变时重新计算布局
    override func shouldInvalidateLayout(forBoundsChange newBounds: CGRect) -> Bool {
        return true
    }

    // 实现滑动吸附效果
    override func targetContentOffset(forProposedContentOffset proposedContentOffset: CGPoint, withScrollingVelocity velocity: CGPoint) -> CGPoint {
        guard let collectionView = collectionView else {
            return super.targetContentOffset(forProposedContentOffset: proposedContentOffset)
        }

        let targetRect = CGRect(x: proposedContentOffset.x, y: 0, width: collectionView.bounds.width, height: collectionView.bounds.height)
        guard let layoutAttributes = super.layoutAttributesForElements(in: targetRect) else {
            return proposedContentOffset
        }

        let centerX = proposedContentOffset.x + collectionView.bounds.width / 2

        // 找到距离中心最近的item
        var closestAttribute: UICollectionViewLayoutAttributes?
        var minDistance = CGFloat.greatestFiniteMagnitude

        for attribute in layoutAttributes {
            let distance = abs(attribute.center.x - centerX)
            if distance < minDistance {
                minDistance = distance
                closestAttribute = attribute
            }
        }

        // 计算目标偏移量,使最近的item居中
        if let closestAttribute = closestAttribute {
            var targetX = closestAttribute.center.x - collectionView.bounds.width / 2
            // 限制滚动范围,防止第一个和最后一个item完全居中
            let maxOffset = collectionView.contentSize.width - collectionView.bounds.width
            targetX = max(0, min(targetX, maxOffset))
            return CGPoint(x: targetX, y: proposedContentOffset.y)
        }

        return proposedContentOffset
    }
}


 57
57

 被折叠的 条评论
为什么被折叠?
被折叠的 条评论
为什么被折叠?
 到【灌水乐园】发言


