


1、建立相关的github地址
https://github.com/MRtianyanxiaobai/ssm_curd
建立好相关网址后,配置IDEA 的git环境
一切代码以github上的为准,笔记中可能由于时效性,未进行更新
2、功能点和技术点
功能点
- 分页
- 数据校验
- JQuery前端校验+JSR303后端校验
- ajax
- Rest风格的URI:使用HTTP协议请求方式的动词,来表示对资源的操作GET(查询),POST(新增),PUT(修改),DELETE(删除)
技术点
- 基础框架-ssm(Spring+SpringMVC+MaBatis)
- 数据库-Mysql
- 前端框架-bootstrap快速搭建简洁美观的界面
- 项目的依赖管理-Maven
- 分页-pagehelper
- 逆向工程-MyBatis Generator
3、环境搭建
项目结构
可以使用new package 来快速建立文件目录

导入了bootstrap等前端框架后,可以实现一个 jsp 文件进行一下测试:

pom.xml
导入maven 依赖
<?xml version="1.0" encoding="UTF-8"?>
<project xmlns="http://maven.apache.org/POM/4.0.0" xmlns:xsi="http://www.w3.org/2001/XMLSchema-instance"
xsi:schemaLocation="http://maven.apache.org/POM/4.0.0 http://maven.apache.org/xsd/maven-4.0.0.xsd">
<modelVersion>4.0.0</modelVersion>
<groupId>org.example</groupId>
<artifactId>ssm_crud</artifactId>
<version>1.0-SNAPSHOT</version>
<packaging>war</packaging>
<name>ssm_crud Maven Webapp</name>
<!-- FIXME change it to the project's website -->
<url>http://www.example.com</url>
<properties>
<project.build.sourceEncoding>UTF-8</project.build.sourceEncoding>
<maven.compiler.source>1.7</maven.compiler.source>
<maven.compiler.target>1.7</maven.compiler.target>
</properties>
<dependencies>
<!--引入项目依赖的jar包 -->
<!-- SpringMVC、Spring -->
<!-- https://mvnrepository.com/artifact/org.springframework/spring-webmvc -->
<!--引入pageHelper分页插件 -->
<dependency>
<groupId>com.github.pagehelper</groupId>
<artifactId>pagehelper</artifactId>
<version>5.0.0</version>
</dependency>
<!-- MBG -->
<!-- https://mvnrepository.com/artifact/org.mybatis.generator/mybatis-generator-core -->
<dependency>
<groupId>org.mybatis.generator</groupId>
<artifactId>mybatis-generator-core</artifactId>
<version>1.3.5</version>
</dependency>
<dependency>
<groupId>org.springframework</groupId>
<artifactId>spring-webmvc</artifactId>
<version>4.3.7.RELEASE</version>
</dependency>
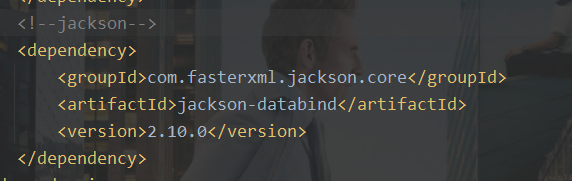
<!-- 返回json字符串的支持 -->
<!-- https://mvnrepository.com/artifact/com.fasterxml.jackson.core/jackson-databind -->
<dependency>
<groupId>com.fasterxml.jackson.core</groupId>
<artifactId>jackson-databind</artifactId>
<version>2.8.8</version>
</dependency>
<!--JSR303数据校验支持;tomcat7及以上的服务器,
tomcat7以下的服务器:el表达式。额外给服务器的lib包中替换新的标准的el
-->
<!-- https://mvnrepository.com/artifact/org.hibernate/hibernate-validator -->
<dependency>
<groupId>org.hibernate</groupId>
<artifactId>hibernate-validator</artifactId>
<version>5.4.1.Final</version>
</dependency>
<!-- Spring-Jdbc -->
<!-- https://mvnrepository.com/artifact/org.springframework/spring-jdbc -->
<dependency>
<groupId>org.springframework</groupId>
<artifactId>spring-jdbc</artifactId>
<version>4.3.7.RELEASE</version>
</dependency>
<!--Spring-test -->
<!-- https://mvnrepository.com/artifact/org.springframework/spring-test -->
<dependency>
<groupId>org.springframework</groupId>
<artifactId>spring-test</artifactId>
<version>4.3.7.RELEASE</version>
</dependency>
<!-- Spring面向切面编程 -->
<!-- https://mvnrepository.com/artifact/org.springframework/spring-aspects -->
<dependency>
<groupId>org.springframework</groupId>
<artifactId>spring-aspects</artifactId>
<version>4.3.7.RELEASE</version>
</dependency>
<!--MyBatis -->
<!-- https://mvnrepository.com/artifact/org.mybatis/mybatis -->
<dependency>
<groupId>org.mybatis</groupId>
<artifactId>mybatis</artifactId>
<version>3.4.2</version>
</dependency>
<!-- MyBatis整合Spring的适配包 -->
<!-- https://mvnrepository.com/artifact/org.mybatis/mybatis-spring -->
<dependency>
<groupId>org.mybatis</groupId>
<artifactId>mybatis-spring</artifactId>
<version>1.3.1</version>
</dependency>
<!-- 数据库连接池、驱动 -->
<!-- https://mvnrepository.com/artifact/c3p0/c3p0 -->
<dependency>
<groupId>c3p0</groupId>
<artifactId>c3p0</artifactId>
<version>0.9.1</version>
</dependency>
<!-- https://mvnrepository.com/artifact/mysql/mysql-connector-java -->
<dependency>
<groupId>mysql</groupId>
<artifactId>mysql-connector-java</artifactId>
<version>5.1.41</version>
</dependency>
<!-- (jstl,servlet-api,junit) -->
<!-- https://mvnrepository.com/artifact/jstl/jstl -->
<dependency>
<groupId>jstl</groupId>
<artifactId>jstl</artifactId>
<version>1.2</version>
</dependency>
<!-- https://mvnrepository.com/artifact/javax.servlet/javax.servlet-api -->
<dependency>
<groupId>javax.servlet</groupId>
<artifactId>javax.servlet-api</artifactId>
<version>3.0.1</version>
<scope>provided</scope>
</dependency>
<!-- junit -->
<!-- https://mvnrepository.com/artifact/junit/junit -->
<dependency>
<groupId>junit</groupId>
<artifactId>junit</artifactId>
<version>4.12</version>
</dependency>
</dependencies>
<build>
<finalName>ssm_crud</finalName>
<pluginManagement><!-- lock down plugins versions to avoid using Maven defaults (may be moved to parent pom) -->
<plugins>
<plugin>
<artifactId>maven-clean-plugin</artifactId>
<version>3.1.0</version>
</plugin>
<!-- see http://maven.apache.org/ref/current/maven-core/default-bindings.html#Plugin_bindings_for_war_packaging -->
<plugin>
<artifactId>maven-resources-plugin</artifactId>
<version>3.0.2</version>
</plugin>
<plugin>
<artifactId>maven-compiler-plugin</artifactId>
<version>3.8.0</version>
</plugin>
<plugin>
<artifactId>maven-surefire-plugin</artifactId>
<version>2.22.1</version>
</plugin>
<plugin>
<artifactId>maven-war-plugin</artifactId>
<version>3.2.2</version>
</plugin>
<plugin>
<artifactId>maven-install-plugin</artifactId>
<version>2.5.2</version>
</plugin>
<plugin>
<artifactId>maven-deploy-plugin</artifactId>
<version>2.8.2</version>
</plugin>
</plugins>
</pluginManagement>
</build>
</project>
web.xml
<!DOCTYPE web-app PUBLIC
 "-//Sun Microsystems, Inc.//DTD Web Application 2.3//EN"
 "http://java.sun.com/dtd/web-app_2_3.dtd" >

<web-app xmlns:xsi="http://www.w3.org/2001/XMLSchema-instance"
         xmlns="http://java.sun.com/xml/ns/javaee"
         xsi:schemaLocation="http://java.sun.com/xml/ns/javaee http://java.sun.com/xml/ns/javaee/web-app_2_5.xsd"
         id="WebApp_ID" version="2.5">
  <display-name>Archetype Created Web Application</display-name>
  <!--加载启动 Spring 的容器-->
  <!-- needed for ContextLoaderListener -->
  <context-param>
    <param-name>contextConfigLocation</param-name>
    <param-value>classpath:applicationContext.xml</param-value>
  </context-param>
  <listener>
    <listener-class>org.springframework.web.context.ContextLoaderListener</listener-class>
  </listener>

  <!--2、 注册中央调度器 ,又叫做前端控制器 -->
  <servlet>
    <servlet-name>dispatcherServlet</servlet-name>
    <servlet-class>org.springframework.web.servlet.DispatcherServlet</servlet-class>
    <load-on-startup>1</load-on-startup>
  </servlet>
  <!-- Map all requests to the DispatcherServlet for handling -->
  <servlet-mapping>
    <servlet-name>dispatcherServlet</servlet-name>
    <url-pattern>/</url-pattern>
  </servlet-mapping>

    <!--3 配置 字符编码过滤器,一定要方法所有过滤器之前-->
    <filter>
      <filter-name>characterEncodingFilter</filter-name>
      <filter-class>org.springframework.web.filter.CharacterEncodingFilter</filter-class>
      <init-param>
        <param-name>encoding</param-name>
        <param-value>utf-8</param-value>
      </init-param>
      <init-param>
        <param-name>forceRequestEncoding</param-name>
        <param-value>true</param-value>
      </init-param>
      <init-param>
        <param-name>forceResponseEncoding</param-name>
        <param-value>true</param-value>
      </init-param>
    </filter>
    <filter-mapping>
      <filter-name>characterEncodingFilter</filter-name>
      <url-pattern>/*</url-pattern>
    </filter-mapping>

    <!-- 4、使用Rest风格的URI,将页面普通的post请求转为指定的delete或者put请求 -->
    <filter>
      <filter-name>hiddenHttpMethodFilter</filter-name>
      <filter-class>org.springframework.web.filter.HiddenHttpMethodFilter</filter-class>
    </filter>
    <filter-mapping>
      <filter-name>hiddenHttpMethodFilter</filter-name>
      <url-pattern>/*</url-pattern>
    </filter-mapping>
    <filter>
      <filter-name>httpPutFormContentFilter</filter-name>
      <filter-class>org.springframework.web.filter.HttpPutFormContentFilter</filter-class>
    </filter>
    <filter-mapping>
      <filter-name>httpPutFormContentFilter</filter-name>
      <url-pattern>/*</url-pattern>
    </filter-mapping>

</web-app>
新建 applicationContext.xml 时,如下
注意:用IDEA 创建spring配置文件后,需要将其与相关关联

- 进入到file-Project Structure-模块中查看
- 点击spring——点击“+”号,全选,然后确定、应用即可
dispatcherServlet-servlet.xml
<?xml version="1.0" encoding="UTF-8"?>
<beans xmlns="http://www.springframework.org/schema/beans"
       xmlns:xsi="http://www.w3.org/2001/XMLSchema-instance"
       xmlns:context="http://www.springframework.org/schema/context"
       xmlns:mvc="http://www.springframework.org/schema/mvc"
       xsi:schemaLocation="http://www.springframework.org/schema/beans http://www.springframework.org/schema/beans/spring-beans.xsd http://www.springframework.org/schema/context http://www.springframework.org/schema/context/spring-context.xsd http://www.springframework.org/schema/mvc http://www.springframework.org/schema/mvc/spring-mvc.xsd">

    <!--  1、SpringMVC 的配置文件,包括网站逻辑的控制和配置 -->
    <!--  配置需要扫描的包  -->
    <!--  use-default-filters="false" 表示禁用默认过滤器,让它根据定义扫描类  -->
    <context:component-scan base-package="com.atguigu" use-default-filters="false">
        <!--    只扫描控制器即可  -->
        <context:include-filter type="annotation" expression="org.springframework.stereotype.Controller"/>
    </context:component-scan>

    <!--2、配置视图解析器    -->
    <bean class="org.springframework.web.servlet.view.InternalResourceViewResolver">
            <property name="prefix" value="/WEB-INF/views/"></property>
            <property name="suffix" value=".jsp"></property>
    </bean>
    <!--两个标准配置  -->
    <!-- 将springmvc不能处理的请求交给tomcat -->
    <mvc:default-servlet-handler/>
    <!-- 能支持springmvc更高级的一些功能,JSR303校验,快捷的ajax...映射动态请求 -->
    <mvc:annotation-driven/>

</beans>
测试:
package com.atguigu.curd.test;

import org.junit.Test;
import org.springframework.stereotype.Controller;
import org.springframework.web.bind.annotation.RequestMapping;
import org.springframework.web.servlet.ModelAndView;

@Controller
public class springMVCTest {
    /**
     * 测试 springMVC
     */
    @RequestMapping(value = "/some.do")
    public ModelAndView doSome(){
        System.out.println("处理 some.do");
        //调用 service 处理请求,返回结构
        ModelAndView mv = new ModelAndView();
        mv.addObject("msg","使用注解的SpringMVC");
        mv.addObject("fun","使用注解的 SpringMVC 的应用");
        mv.setViewName("show");
        return mv;
    }
}

applicationContext.xml
<?xml version="1.0" encoding="UTF-8"?>
<beans xmlns="http://www.springframework.org/schema/beans"
       xmlns:xsi="http://www.w3.org/2001/XMLSchema-instance"
       xmlns:context="http://www.springframework.org/schema/context"
       xmlns:aop="http://www.springframework.org/schema/aop"
       xmlns:tx="http://www.springframework.org/schema/tx"
       xsi:schemaLocation="http://www.springframework.org/schema/aop http://www.springframework.org/schema/aop/spring-aop-4.3.xsd
		http://www.springframework.org/schema/beans http://www.springframework.org/schema/beans/spring-beans-3.2.xsd
		http://www.springframework.org/schema/tx http://www.springframework.org/schema/tx/spring-tx.xsd
		http://www.springframework.org/schema/context http://www.springframework.org/schema/context/spring-context-4.3.xsd">
    <!--spring 的配置文件-->
    <!--  1. 配置文件配置除了 controller 的扫描器-->
    <context:component-scan base-package="com.atguigu">
        <context:exclude-filter type="annotation" expression="org.springframework.stereotype.Controller"/>
    </context:component-scan>

    <!--================================  2、数据源,事务控制,xxx ================================   -->
        <!--读取配置文件    -->
    <context:property-placeholder location="classpath:jdbc.properties"></context:property-placeholder>
        <!--现在整个命名空间中就用刚才加载的配置文件中的变量了-->
    <bean id="poolDataSource" class="com.mchange.v2.c3p0.ComboPooledDataSource">
        <property name="jdbcUrl" value="${jdbc.jdbcUrl}"></property>
        <property name="driverClass" value="${jdbc.driverClass}"></property>
        <property name="user" value="${jdbc.user}"></property>
        <property name="password" value="${jdbc.password}"></property>
    </bean>

    <!-- ================================ 配置spring 和 MyBatis 的整合==============================  -->
    <bean id="sqlSessionFactory" class="org.mybatis.spring.SqlSessionFactoryBean">
        <!--  指定mybatis的全局配置文件的位置      -->
        <property name="configLocation"  value="classpath:mybatis-config.xml"></property>
        <property name="dataSource" ref="poolDataSource"></property>
        <!--      指定mybatis的 mapper 文件所在位置      -->
        <property name="mapperLocations" value="classpath:mapper/*.xml"></property>
    </bean>
    <!-- 配置扫描器,将 mybatis 接口加入到 IOC 容器中   -->
    <bean class="org.mybatis.spring.mapper.MapperScannerConfigurer">
            <!-- 扫描所有的 dao 接口,加入到 IOC 容器中       -->
            <property name="basePackage" value="com.atguigu.curd.dao"></property>
    </bean>
    <!-- 配置一个可以执行批量的sqlSession -->
    <bean id="sqlSession" class="org.mybatis.spring.SqlSessionTemplate">
        <constructor-arg name="sqlSessionFactory" ref="sqlSessionFactory"></constructor-arg>
        <constructor-arg name="executorType" value="BATCH"></constructor-arg>
    </bean>

    <!-- ================================ 配置 事务的控制==============================  -->
    <!--创建事务管理器-->
    <bean id="dataSourceTransactionManager" class="org.springframework.jdbc.datasource.DataSourceTransactionManager">
            <!--控制数据源        -->
        <property name="dataSource" ref="poolDataSource"></property>
    </bean>
    <!--   配置事务增强,事务如何切入,即配置通知,指定哪些方法是事务方法 -->
    <tx:advice id="txAdvice" transaction-manager="dataSourceTransactionManager" >
            <tx:attributes>
                <!-- 配置事务增强,事务的切入方法: 所有方法       -->
                <tx:method name="*"/>
                <!--     以 get 开始的所有方法 都是只读的          -->
                <tx:method name="get*" read-only="true"></tx:method>
            </tx:attributes>

    </tx:advice>

    <!-- 开启xml 声明式事务管理-->
    <aop:config>
        <!--   切入点表达式-->
        <aop:pointcut id="txPoint" expression="execution(* com.atguigu.curd.service..*(..))"/>
        <!-- 利用 JDK 动态代理 配置事务增强        -->
        <aop:advisor advice-ref="txAdvice" pointcut-ref="txPoint"></aop:advisor>
    </aop:config>


    <!--综上: Spring配置文件的核心点(数据源、与mybatis的整合,事务控制) -->

</beans>
mybatis.xml 全局配置文件
可以通过官网快速找到命名空间进行配置:https://mybatis.org/mybatis-3/zh/getting-started.html

3、mybatis 的逆向工程
创建 数据库
CREATE TABLE `tbl_dept` (
	`dept_id` INT (11),
	`dept_name` VARCHAR (765)
);
INSERT INTO `tbl_dept` (`dept_id`, `dept_name`) VALUES('1','学生部');
INSERT INTO `tbl_dept` (`dept_id`, `dept_name`) VALUES('2','信息部');
INSERT INTO `tbl_dept` (`dept_id`, `dept_name`) VALUES('3','记者部');
INSERT INTO `tbl_dept` (`dept_id`, `dept_name`) VALUES('4','实创部');
CREATE TABLE `tbl_emp` (
	`stu_id` INT (11),
	`stu_name` VARCHAR (2295),
	`gender` CHAR (9),
	`email` VARCHAR (2295),
	`d_id` INT (11)
);
INSERT INTO `tbl_stu` (`stu_id`, `stu_name`, `gender`, `email`, `d_id`) VALUES('1','白曜溥','M','yaopu@163.com','3');
INSERT INTO `tbl_stu` (`stu_id`, `stu_name`, `gender`, `email`, `d_id`) VALUES('2','柴高岩','M','gaoyan@163.com','1');
INSERT INTO `tbl_stu` (`stu_id`, `stu_name`, `gender`, `email`, `d_id`) VALUES('3','陈露','M','chenlu@163.com','2');
INSERT INTO `tbl_stu` (`stu_id`, `stu_name`, `gender`, `email`, `d_id`) VALUES('4','褚宸皓','M','chenhao@163.com','1');
INSERT INTO `tbl_stu` (`stu_id`, `stu_name`, `gender`, `email`, `d_id`) VALUES('5','冯金平','M','jinpin@163.com','2');
INSERT INTO `tbl_stu` (`stu_id`, `stu_name`, `gender`, `email`, `d_id`) VALUES('6','高奇泽','M','qize@163.com','3');
INSERT INTO `tbl_stu` (`stu_id`, `stu_name`, `gender`, `email`, `d_id`) VALUES('7','宫敏','M','gongmin@163.com','4');
INSERT INTO `tbl_stu` (`stu_id`, `stu_name`, `gender`, `email`, `d_id`) VALUES('8','郭旭','M','guoxu@163.com','1');
INSERT INTO `tbl_stu` (`stu_id`, `stu_name`, `gender`, `email`, `d_id`) VALUES('9','郝思远','M','siyuan@163.com','2');
INSERT INTO `tbl_stu` (`stu_id`, `stu_name`, `gender`, `email`, `d_id`) VALUES('10','呼晓辉','M','xiaohui@163.com','3');
INSERT INTO `tbl_stu` (`stu_id`, `stu_name`, `gender`, `email`, `d_id`) VALUES('11','家彦明','M','yanming@163.com','4');
INSERT INTO `tbl_stu` (`stu_id`, `stu_name`, `gender`, `email`, `d_id`) VALUES('12','焦晨帆','F','chenfan@163.com','1');
INSERT INTO `tbl_stu` (`stu_id`, `stu_name`, `gender`, `email`, `d_id`) VALUES('13','李兴栋','M','xindong@163.com','2');
INSERT INTO `tbl_stu` (`stu_id`, `stu_name`, `gender`, `email`, `d_id`) VALUES('14','李英','F','liying@163.com','3');
INSERT INTO `tbl_stu` (`stu_id`, `stu_name`, `gender`, `email`, `d_id`) VALUES('15','李源','M','liyuan@163.com','4');
INSERT INTO `tbl_stu` (`stu_id`, `stu_name`, `gender`, `email`, `d_id`) VALUES('16','刘丹','F','liudan@163.com','1');
INSERT INTO `tbl_stu` (`stu_id`, `stu_name`, `gender`, `email`, `d_id`) VALUES('17','牛旭东','M','xudong@163.com','2');
INSERT INTO `tbl_stu` (`stu_id`, `stu_name`, `gender`, `email`, `d_id`) VALUES('18','牛泽鹏','M','zepeng@163.com','3');
INSERT INTO `tbl_stu` (`stu_id`, `stu_name`, `gender`, `email`, `d_id`) VALUES('19','裴怡博','M','yibo@163.com','4');
INSERT INTO `tbl_stu` (`stu_id`, `stu_name`, `gender`, `email`, `d_id`) VALUES('20','秦新宇','M','xinyu@163.com','1');
INSERT INTO `tbl_stu` (`stu_id`, `stu_name`, `gender`, `email`, `d_id`) VALUES('21','师伟','M','shiwei@163.com','2');
INSERT INTO `tbl_stu` (`stu_id`, `stu_name`, `gender`, `email`, `d_id`) VALUES('22','石宇飞','M','yufei@163.com','3');
INSERT INTO `tbl_stu` (`stu_id`, `stu_name`, `gender`, `email`, `d_id`) VALUES('23','孙亚龙','M','yalong@163.com','4');
INSERT INTO `tbl_stu` (`stu_id`, `stu_name`, `gender`, `email`, `d_id`) VALUES('24','王攀榕','F','panrong@163.com','1');
INSERT INTO `tbl_stu` (`stu_id`, `stu_name`, `gender`, `email`, `d_id`) VALUES('25','王洋','M','wangyang@163.com','2');
INSERT INTO `tbl_stu` (`stu_id`, `stu_name`, `gender`, `email`, `d_id`) VALUES('26','王振龙','M','zhenlong@163.com','3');
INSERT INTO `tbl_stu` (`stu_id`, `stu_name`, `gender`, `email`, `d_id`) VALUES('27','魏超群','M','chaoqun@163.com','4');
INSERT INTO `tbl_stu` (`stu_id`, `stu_name`, `gender`, `email`, `d_id`) VALUES('28','闫青','F','yanqing@163.com','1');
INSERT INTO `tbl_stu` (`stu_id`, `stu_name`, `gender`, `email`, `d_id`) VALUES('29','杨华','F','yanghua@163.com','2');
INSERT INTO `tbl_stu` (`stu_id`, `stu_name`, `gender`, `email`, `d_id`) VALUES('30','杨欢','F','yanghuan@163.com','3');
INSERT INTO `tbl_stu` (`stu_id`, `stu_name`, `gender`, `email`, `d_id`) VALUES('31','杨凯','F','yangkai@163.com','4');
INSERT INTO `tbl_stu` (`stu_id`, `stu_name`, `gender`, `email`, `d_id`) VALUES('32','姚丹娜','F','danna@163.com','1');
INSERT INTO `tbl_stu` (`stu_id`, `stu_name`, `gender`, `email`, `d_id`) VALUES('33','由国婧','F','guojing@163.com','2');
INSERT INTO `tbl_stu` (`stu_id`, `stu_name`, `gender`, `email`, `d_id`) VALUES('34','张强文','M','qiangwen@163.com','3');
INSERT INTO `tbl_stu` (`stu_id`, `stu_name`, `gender`, `email`, `d_id`) VALUES('35','张勇','M','zhangyong@163.com','4');
INSERT INTO `tbl_stu` (`stu_id`, `stu_name`, `gender`, `email`, `d_id`) VALUES('41','冯阳阳','M','yangyang@163.com','1');
INSERT INTO `tbl_stu` (`stu_id`, `stu_name`, `gender`, `email`, `d_id`) VALUES('42','王静玲','F','jingling@163.com','2');
编写逆向过程代码
mybatis 的逆向工程:即利用已建立好的数据库表根据我们在主文件中配置的命名方法,反向生成bean文件,dao接口以及 mapper 文件。
具体步骤如下:
-
导入 mabatis-generator 相关 jar 包
<!-- MBG --> <!-- https://mvnrepository.com/artifact/org.mybatis.generator/mybatis-generator-core --> <dependency> <groupId>org.mybatis.generator</groupId> <artifactId>mybatis-generator-core</artifactId> <version>1.3.5</version> </dependency> -
访问官方网站:http://mybatis.org/generator/
-
根据官方文档,创建 MBG.xml 用于 mybatis-generatator 的配置文件
-
MGB.xml 的配置文件如下:
<?xml version="1.0" encoding="UTF-8"?>
<!DOCTYPE generatorConfiguration
        PUBLIC "-//mybatis.org//DTD MyBatis Generator Configuration 1.0//EN"
        "http://mybatis.org/dtd/mybatis-generator-config_1_0.dtd">
<generatorConfiguration>

    <context id="DB2Tables" targetRuntime="MyBatis3">
        <commentGenerator>
            <property name="suppressAllComments" value="true" />
        </commentGenerator>
        <!-- 配置数据库连接 -->
        <jdbcConnection driverClass="com.mysql.jdbc.Driver"
                        connectionURL="jdbc:mysql://localhost:3306/ssm_crud" userId="root"
                        password="admin123">
        </jdbcConnection>

        <javaTypeResolver>
            <property name="forceBigDecimals" value="false" />
        </javaTypeResolver>

        <!-- 指定javaBean生成的位置 -->
        <javaModelGenerator targetPackage="com.atguigu.curd.bean"
                            targetProject=".\src\main\java">
            <property name="enableSubPackages" value="true" />
            <property name="trimStrings" value="true" />
        </javaModelGenerator>

        <!--指定sql映射文件生成的位置 -->
        <sqlMapGenerator targetPackage="mapper" targetProject=".\src\main\resources">
            <property name="enableSubPackages" value="true" />
        </sqlMapGenerator>

        <!-- 指定dao接口生成的位置,mapper接口 -->
        <javaClientGenerator type="XMLMAPPER"
                             targetPackage="com.atguigu.crud.dao" targetProject=".\src\main\java">
            <property name="enableSubPackages" value="true" />
        </javaClientGenerator>


        <!-- table指定每个表的生成策略 -->
        <table tableName="tbl_emp" domainObjectName="Employee"></table>
        <table tableName="tbl_dept" domainObjectName="Department"></table>
    </context>
</generatorConfiguration>
读取配置文件
注意:由于 maven 很多时候会出现
编写测试代码,读取配置文件生成 bean文件,dao文件和mapper文件
package com.atguigu.curd.test;

import org.mybatis.generator.api.MyBatisGenerator;
import org.mybatis.generator.config.Configuration;
import org.mybatis.generator.config.xml.ConfigurationParser;
import org.mybatis.generator.exception.XMLParserException;
import org.mybatis.generator.internal.DefaultShellCallback;

import java.io.File;
import java.io.IOException;
import java.util.ArrayList;
import java.util.List;

public class MGBTest {
    public static void main(String[] args) throws Exception {
        List<String> warnings = new ArrayList<String>();
        boolean overwrite = true;
        File configFile = new File("mbg.xml");
        ConfigurationParser cp = new ConfigurationParser(warnings);
        Configuration config = cp.parseConfiguration(configFile);
        DefaultShellCallback callback = new DefaultShellCallback(overwrite);
        MyBatisGenerator myBatisGenerator = new MyBatisGenerator(config,
                callback, warnings);
        myBatisGenerator.generate(null);

    }
}
注意:
生成完文件后最好查看一下target中生成的直接文件是否与bean生成的文件对应,很多时候maven都不会自动更新。这是可以在 pom.xml 中添加下面内容是 target 同步更新:
</resource>
 <resource>
   <directory>src/main/java</directory>
   <includes>
     <include>**/*.*</include>
   </includes>
 </resource>
 <resource>
   <directory>src/main/resources</directory>
   <includes>
     <include>**/*.*</include>
   </includes>
 </resource>
结果显示
如图所示,我们已经根据数据库表自动生成了我们需要的 bean 文件,Dao 文件以及mapper文件

代码测试
代理类测试
这里使用 SpringTest 进行单元测试
-
首先导入SpringTest模块

-
编写测试代码:
package com.atguigu.curd.test; import com.atguigu.curd.dao.DepartmentMapper; import org.junit.Test; import org.junit.runner.RunWith; import org.springframework.beans.factory.annotation.Autowired; import org.springframework.test.context.ContextConfiguration; import org.springframework.test.context.junit4.SpringJUnit4ClassRunner; @RunWith(SpringJUnit4ClassRunner.class) @ContextConfiguration(locations = {"classpath:applicationContext.xml"}) public class MybatisTest { @Autowired DepartmentMapper departmentMapper; @Test public void TestSpring(){ System.out.println(departmentMapper); } }@ContextConfiguration:指定spring配置文件的位置,如果有多个,就用逗号分隔
@RunWith:指定用什么环境进行单元测试 -
结果如下,我们得到的departmentMapper 是已经被动态代理后的类

查询测试
//测试 mybatis自动生成的dao文件
@Test
public void TestsSelectByExample(){
DepartmentExample departmentExample = new DepartmentExample();
List<Department> departments = departmentMapper.selectByExample(null);
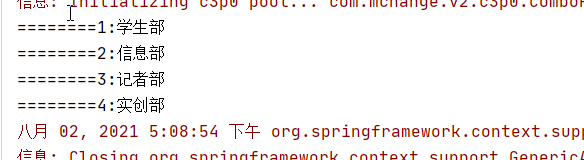
for (Department dep:departments) {
System.out.println("========"+dep.getDeptId()+":"+dep.getDeptName());
}
4、 代码优化:添加级联查询
逆向工程生成的文件没有联表查询,如本案例中职员表中只有部门id字段,但在实际工作中,需要查询到的是部门名称
逆向工程自动生成的职员相关属性跟字段如下:

Step1: 在Employee 中添加 department 变量

Step2: 在 employee 的 dao 层创建了3个新接口方法

Step3:在 employeemapper 中配置文件
注意:所有配置内容,只增加不删除不修改
-
首先在mapper中增加一个新的 reslutmap,该reslutmap中包含了department的返回值
  <!--  添加新的resultMap 使其返回具体的depart值-->
  <resultMap id="WithDepResultMap" type="com.atguigu.curd.bean.Employee">
    <result column="stu_id" jdbcType="INTEGER" property="stuId" />
    <result column="stu_name" jdbcType="VARCHAR" property="stuName" />
    <result column="gender" jdbcType="CHAR" property="gender" />
    <result column="email" jdbcType="VARCHAR" property="email" />
    <result column="d_id" jdbcType="INTEGER" property="dId" />
    <!-- 指定联合查询出的部门字段封装   -->
    <association property="department" javaType="com.atguigu.curd.bean.Department">
          <id column="dept_id" property="deptId"></id>
          <result column="dept_name" property="deptName"></result>
    </association>
  </resultMap>
注意这里不要写成jdbcType
-
同理需要一个新的 list,用于可以方法sql语句中
<sql id="WithDep_Column_List"> e.emp_id, e.emp_name, e.gender, e.email, e.d_id,d.dept_id,d.dept_name </sql> -
编写
selectByPrimaryKey<select id="selectByPrimaryKey" parameterType="java.lang.Integer" resultMap="BaseResultMap"> select <include refid="Base_Column_List"></include> from tbl_emp where emp_id= #{empId,jdbcType=INTEGER} </select> -
编写
selectByExampleWithDept<select id="selectByExampleWithDept" parameterType="com.atguigu.curd.bean.EmployeeExample" resultMap="WithDepResultMap"> select <if test="distinct"> distinct </if> <include refid="WithDep_Column_List" /> from tbl_emp e left join tbl_dept d on e.`d_id`=d.`dept_id` <if test="_parameter != null"> <include refid="Example_Where_Clause" /> </if> <if test="orderByClause != null"> order by ${orderByClause} </if> </select> -
编写
selectByPrimaryKeyWithDept<select id="selectByPrimaryKeyWithDept" parameterType="java.lang.Integer" resultMap="WithDepResultMap"> select <include refid="WithDep_Column_List"></include> from tbl_emp e left join tbl_dept d on e.`d_id`=d.`dept_id` where emp_id= #{empId,jdbcType=INTEGER} </select> -
总结:配置文件如下(以该代码为准,上面代码的中数据库用的stu_id,然而代码中咏鹅emp_id,需要改)
<?xml version="1.0" encoding="UTF-8"?>
<!DOCTYPE mapper PUBLIC "-//mybatis.org//DTD Mapper 3.0//EN" "http://mybatis.org/dtd/mybatis-3-mapper.dtd">
<mapper namespace="com.atguigu.curd.dao.EmployeeMapper">
  <resultMap id="BaseResultMap" type="com.atguigu.curd.bean.Employee">
    <result column="stu_id" jdbcType="INTEGER" property="stuId" />
    <result column="stu_name" jdbcType="VARCHAR" property="stuName" />
    <result column="gender" jdbcType="CHAR" property="gender" />
    <result column="email" jdbcType="VARCHAR" property="email" />
    <result column="d_id" jdbcType="INTEGER" property="dId" />
  </resultMap>
  <!--  添加新的resultMap 使其返回具体的depart值-->
  <resultMap id="WithDepResultMap" type="com.atguigu.curd.bean.Employee">
    <result column="stu_id" jdbcType="INTEGER" property="stuId" />
    <result column="stu_name" jdbcType="VARCHAR" property="stuName" />
    <result column="gender" jdbcType="CHAR" property="gender" />
    <result column="email" jdbcType="VARCHAR" property="email" />
    <result column="d_id" jdbcType="INTEGER" property="dId" />
    <!-- 指定联合查询出的部门字段封装   -->
    <association property="department" javaType="com.atguigu.curd.bean.Department">
          <id column="dept_id" property="deptId"></id>
          <result column="dept_name" property="deptName"></result>
    </association>
  </resultMap>
  <sql id="Example_Where_Clause">
    <where>
      <foreach collection="oredCriteria" item="criteria" separator="or">
        <if test="criteria.valid">
          <trim prefix="(" prefixOverrides="and" suffix=")">
            <foreach collection="criteria.criteria" item="criterion">
              <choose>
                <when test="criterion.noValue">
                  and ${criterion.condition}
                </when>
                <when test="criterion.singleValue">
                  and ${criterion.condition} #{criterion.value}
                </when>
                <when test="criterion.betweenValue">
                  and ${criterion.condition} #{criterion.value} and #{criterion.secondValue}
                </when>
                <when test="criterion.listValue">
                  and ${criterion.condition}
                  <foreach close=")" collection="criterion.value" item="listItem" open="(" separator=",">
                    #{listItem}
                  </foreach>
                </when>
              </choose>
            </foreach>
          </trim>
        </if>
      </foreach>
    </where>
  </sql>
  <sql id="Update_By_Example_Where_Clause">
    <where>
      <foreach collection="example.oredCriteria" item="criteria" separator="or">
        <if test="criteria.valid">
          <trim prefix="(" prefixOverrides="and" suffix=")">
            <foreach collection="criteria.criteria" item="criterion">
              <choose>
                <when test="criterion.noValue">
                  and ${criterion.condition}
                </when>
                <when test="criterion.singleValue">
                  and ${criterion.condition} #{criterion.value}
                </when>
                <when test="criterion.betweenValue">
                  and ${criterion.condition} #{criterion.value} and #{criterion.secondValue}
                </when>
                <when test="criterion.listValue">
                  and ${criterion.condition}
                  <foreach close=")" collection="criterion.value" item="listItem" open="(" separator=",">
                    #{listItem}
                  </foreach>
                </when>
              </choose>
            </foreach>
          </trim>
        </if>
      </foreach>
    </where>
  </sql>
  <sql id="Base_Column_List">
    stu_id, stu_name, gender, email, d_id
  </sql>
  <sql id="WithDep_Column_List">
    e.stu_id, e.stu_name, e.gender, e.email, e.d_id,d.dept_id,d.dept_name
  </sql>
  <!-- 查询员工,带部门信息  -->
  <select id="selectByExampleWithDept" parameterType="com.atguigu.curd.bean.EmployeeExample" resultMap="WithDepResultMap">
    select
    <if test="distinct">
      distinct
    </if>
    <include refid="WithDep_Column_List" />
    from tbl_emp e left join tbl_dept d on e.`d_id`=d.`dept_id`
    <if test="_parameter != null">
      <include refid="Example_Where_Clause" />
    </if>
    <if test="orderByClause != null">
      order by ${orderByClause}
    </if>
  </select>
  <select id="selectByPrimaryKeyWithDept" parameterType="java.lang.Integer" resultMap="WithDepResultMap">
    select
    <include refid="WithDep_Column_List"></include>
    from tbl_emp e
    left join tbl_dept d on e.`d_id`=d.`dept_id`
    where stu_id= #{empId,jdbcType=INTEGER}
  </select>

  <!-- 查询员工不带部门信息的 -->
  <select id="selectByExample" parameterType="com.atguigu.curd.bean.EmployeeExample" resultMap="BaseResultMap">
    select
    <if test="distinct">
      distinct
    </if>
    <include refid="Base_Column_List" />
    from tbl_emp
    <if test="_parameter != null">
      <include refid="Example_Where_Clause" />
    </if>
    <if test="orderByClause != null">
      order by ${orderByClause}
    </if>

  </select>
  <select id="selectByPrimaryKey" parameterType="java.lang.Integer" resultMap="BaseResultMap">
        select
        <include refid="Base_Column_List"></include>
        from tbl_emp
        where stu_id= #{empId,jdbcType=INTEGER}
  </select>
  <delete id="deleteByExample" parameterType="com.atguigu.curd.bean.EmployeeExample">
    delete from tbl_emp
    <if test="_parameter != null">
      <include refid="Example_Where_Clause" />
    </if>
  </delete>
  <insert id="insert" parameterType="com.atguigu.curd.bean.Employee">
    insert into tbl_emp (stu_id, stu_name, gender,
      email, d_id)
    values (#{stuId,jdbcType=INTEGER}, #{stuName,jdbcType=VARCHAR}, #{gender,jdbcType=CHAR},
      #{email,jdbcType=VARCHAR}, #{dId,jdbcType=INTEGER})
  </insert>
  <insert id="insertSelective" parameterType="com.atguigu.curd.bean.Employee">
    insert into tbl_emp
    <trim prefix="(" suffix=")" suffixOverrides=",">
      <if test="stuId != null">
        stu_id,
      </if>
      <if test="stuName != null">
        stu_name,
      </if>
      <if test="gender != null">
        gender,
      </if>
      <if test="email != null">
        email,
      </if>
      <if test="dId != null">
        d_id,
      </if>
    </trim>
    <trim prefix="values (" suffix=")" suffixOverrides=",">
      <if test="stuId != null">
        #{stuId,jdbcType=INTEGER},
      </if>
      <if test="stuName != null">
        #{stuName,jdbcType=VARCHAR},
      </if>
      <if test="gender != null">
        #{gender,jdbcType=CHAR},
      </if>
      <if test="email != null">
        #{email,jdbcType=VARCHAR},
      </if>
      <if test="dId != null">
        #{dId,jdbcType=INTEGER},
      </if>
    </trim>
  </insert>
  <select id="countByExample" parameterType="com.atguigu.curd.bean.EmployeeExample" resultType="java.lang.Long">
    select count(*) from tbl_emp
    <if test="_parameter != null">
      <include refid="Example_Where_Clause" />
    </if>
  </select>
  <update id="updateByExampleSelective" parameterType="map">
    update tbl_emp
    <set>
      <if test="record.stuId != null">
        stu_id = #{record.stuId,jdbcType=INTEGER},
      </if>
      <if test="record.stuName != null">
        stu_name = #{record.stuName,jdbcType=VARCHAR},
      </if>
      <if test="record.gender != null">
        gender = #{record.gender,jdbcType=CHAR},
      </if>
      <if test="record.email != null">
        email = #{record.email,jdbcType=VARCHAR},
      </if>
      <if test="record.dId != null">
        d_id = #{record.dId,jdbcType=INTEGER},
      </if>
    </set>
    <if test="_parameter != null">
      <include refid="Update_By_Example_Where_Clause" />
    </if>
  </update>

</mapper>
Step4: 测试我们自己编写的级联查询
```java
package com.atguigu.curd.test;

import com.atguigu.curd.bean.Department;
import com.atguigu.curd.bean.DepartmentExample;
import com.atguigu.curd.bean.Employee;
import com.atguigu.curd.bean.EmployeeExample;
import com.atguigu.curd.dao.DepartmentMapper;
import com.atguigu.curd.dao.EmployeeMapper;
import org.junit.Test;
import org.junit.runner.RunWith;
import org.springframework.beans.factory.annotation.Autowired;
import org.springframework.test.context.ContextConfiguration;
import org.springframework.test.context.junit4.SpringJUnit4ClassRunner;

import java.util.List;

@RunWith(SpringJUnit4ClassRunner.class)
@ContextConfiguration(locations = {"classpath:applicationContext.xml"})
public class MybatisTest {
    @Autowired
    DepartmentMapper departmentMapper;
    @Autowired
    EmployeeMapper employeeMapper;
    //测试级联查询
    @Test
    public void TestsSelectDept(){
        EmployeeExample employeeExample = new EmployeeExample();
        List<Employee> employees = employeeMapper.selectByExampleWithDept(employeeExample);
        for (Employee emp:employees) {
            System.out.println("========"+emp);
        }
    }
}
```
结果如下:

Step5: 插入测试以及查询
-
测试单挑插入:
    @Test
    public  void TestInsert(){

        System.out.println( employeeMapper.insertSelective(new Employee(null,"yq","M","yq@134.com",3)));
        EmployeeExample employeeExample = new EmployeeExample();
        employeeExample.createCriteria().andStuNameEqualTo("yq");
        System.out.println(employeeMapper.selectByExampleWithDept(employeeExample));
    }
注意: 此时因为用来 employee 构造器,因此需要在 employee 中创建一个与之参数相同的构造器。同时还需要保留无参构造器,否则 employee zhon
结果显示:

-
测试批量插入
//    //测试批量输入
    @Autowired
    SqlSession sqlSession;
    @Test
    public void  TestSessionInset(){
        //利用 sql session 代理 mapper 类
        EmployeeMapper mapper = sqlSession.getMapper(EmployeeMapper.class);
        for(int i=0;i<20;i++){
            String name = "yq_"+i;
            Employee employee = new Employee(null,name,"M",name+"@123.com",3);
            mapper.insertSelective(employee);
        }
    }
    //模糊查询
    @Test
    public  void  TestSelectYq(){
        EmployeeExample employeeExample = new EmployeeExample();
        employeeExample.createCriteria().andStuNameLike("%yq%");
        List<Employee> employees = employeeMapper.selectByExampleWithDept(employeeExample);
        for (Employee emp:employees) {
            System.out.println("========"+emp);

        }
    }
结果如下:

5、列出所有员工
Rest 标准
/emp/{id}: GET请求 查询员工/emp: POST请求 保存员工/emp/{id}: PUT请求 修改员工/emp/{id}: DELETE 删除员工
分页查询测试
    public void TestPageHelper(){
        int pn =1;
        PageHelper.startPage(pn,5);
        List<Employee> employees = employeeMapper.selectByExampleWithDept(null);

        PageInfo pageInfo = new PageInfo(employees,5);
        System.out.println("当前页码:"+pageInfo.getPageNum());
        System.out.println("总页码"+pageInfo.getPages());

        System.out.println("在前端需要显示的连续页码:");
        int num[] = pageInfo.getNavigatepageNums();
        for(int i: num){
            System.out.println(" "+i );
        }
        List<Employee> lists = pageInfo.getList();
        //获取员工数据
        for (Employee e:lists){
            System.out.println(e);
        }


    }
结果如下:

编写 controller 和service
-
service:
package com.atguigu.curd.service; import com.atguigu.curd.bean.Employee; import com.atguigu.curd.dao.EmployeeMapper; import org.springframework.beans.factory.annotation.Autowired; import org.springframework.stereotype.Service; import java.util.List; @Service public class EmployeeService { @Autowired EmployeeMapper employeeMapper; /** * 查询所有员工 */ public List<Employee> getAll(){ return employeeMapper.selectByExampleWithDept(null); } } -
编写 Controller
@Controller
public class EmployeeController {
    @Autowired
    EmployeeService employeeService;
    /**
     * 查询员工数据,分页查询
     */
    @RequestMapping("/emps")
    public String getEmps(@RequestParam(value = "pn",defaultValue ="1") Integer pn, Model model){
        //引入 pageHelper分页插件
        //第一个参数为当前页码,第二个参数页的大小
        PageHelper.startPage(pn,5);
        List<Employee> employees = employeeService.getAll();
        //将查询结果封装到 pageInfo 中
        PageInfo page = new PageInfo(employees,5);
        model.addAttribute("pageInfo",page);
        return  "list";
    }

}
前端代码
-
首先在index页面添加一个转发,让他访问
/emps获取数据<html> <body> <h2>Hello World!</h2> <jsp:forward page="/emps"></jsp:forward> </body> </html> -
创建 list 页面展示结果
在编写过程中,可以查看bootstrap的官方文档,选择需要的合适的组件信息<%@ taglib prefix="c" uri="http://java.sun.com/jsp/jstl/core" %> <%-- Created by IntelliJ IDEA. User: Mr_xiaobai Date: 2021/8/3 Time: 10:04 To change this template use File | Settings | File Templates. --%> <%@ page contentType="text/html;charset=UTF-8" language="java" %> <html> <head> <title>员工列表</title> <%-- 引入 jquer--%> <%-- web路径问题 不以 / 开始的相对路径,找资源,当前资源路径为基准。经常出问题 以 / 开始的相对路径找资源,以服务器的路径为标准: http://localhost:3306/crud: 因此需要加上项目名 --%> <% //设置一个全局变量,即项目名 pageContext.setAttribute("APP_PATH", request.getContextPath()); %> <script type="text/javascript" src="${APP_PATH}/static/js/jquery-1.12.4.min.js"></script> <%-- 引入boostrap--%> <link href="${APP_PATH}/static/bootstrap-3.3.7-dist/css/bootstrap.css" rel="stylesheet"/> <script src="${APP_PATH}/static/bootstrap-3.3.7-dist/js/bootstrap.js"></script> </head> <body> <!--创建显示页面--> <div class="container"> <%-- 标题--%> <div class="row"> <%--大屏幕,该行总共占了12列 --%> <div class="col-md-12"> <h1>SSM-CRUD</h1> </div> </div> <%-- 按钮--%> <div class="row"> <div class="col-md-4 col-md-offset-8"> <button type="button" class="btn btn-primary">新增</button> <button type="button" class="btn btn-danger">删除</button> </div> </div> <%-- 表格数据--%> <div class="row"> <div class="col-md-12"> <table class="table table-hover"> <tr> <th>#</th> <th>empName</th> <th>gender</th> <th>email</th> <th>deptName</th> <th>操作</th> </tr> <c:forEach items="${pageInfo.list}" var="emp"> <tr> <th>${emp.stuId}</th> <th>${emp.stuName}</th> <th>${emp.gender}</th> <th>${emp.email}</th> <th>${emp.department.deptName}</th> <th> <%-- 编辑阐述按钮的图标,可以在官方文档的 组件中进行查找 --%> <button class="btn btn-primary btn-sm"> <span class="glyphicon glyphicon-pencil" aria-hidden="true"></span> 编辑 </button> <button class="btn btn-danger btn-sm"> <span class="glyphicon glyphicon-trash" aria-hidden="true"></span> 删除 </button> </th> </tr> </c:forEach> </table> </div> </div> <%--显示分页信息--%> <div class="row"> <%-- 分页文字信息--%> <div class="col-md-6"> 当前 ${pageInfo.pageNum} 页,总${pageInfo.pages} 页,共 ${pageInfo.total} 条记录</div> <%-- 分页条信息 ,分页条的模板可在官方文档中的组件中找到--%> <div class="col-md-6"> <nav aria-label="Page navigation"> <ul class="pagination"> <li> <a href="#" aria-label="Previous"> <span aria-hidden="true">«</span> </a> </li> <c:forEach items="${pageInfo.navigatepageNums}" var="page_Num"> <c:if test="${page_Num==pageInfo.pageNum}"> <li class="active"><a href="#">${page_Num}</a></li> </c:if> <c:if test="${page_Num != pageInfo.pageNum }"> <li><a href="#">${page_Num }</a></li> </c:if> </c:forEach> <c:if test="${pageInfo.hasNextPage}"> <li><a href="#">首页</a> </li> <li> <a href="#" aria-label="Next"> <span aria-hidden="true">»</span> </a> </li> </c:if> <li><a href="#">末页</a></li> </ul> </nav> </div> </div> </div> </body> </html>
结果显示

6、 代码优化
分页信息:首页,下一页,莫末页,跳转页等
```java
<%--显示分页信息--%>
<div class="row">
<%-- 分页文字信息--%>
<div class="col-md-6"> 当前 ${pageInfo.pageNum} 页,总${pageInfo.pages} 页,共 ${pageInfo.total} 条记录</div>
<%-- 分页条信息 ,分页条的模板可在官方文档中的组件中找到--%>
<div class="col-md-6">
<nav aria-label="Page navigation">
<ul class="pagination">
<c:if test="${pageInfo.hasPreviousPage}">
<li>
<a href="${APP_PATH}/emps?pn=${pageInfo.pageNum-1}" aria-label="Previous">
<span aria-hidden="true">«</span>
</a>
</li>
</c:if>
<c:forEach items="${pageInfo.navigatepageNums}" var="page_Num">
<c:if test="${page_Num==pageInfo.pageNum}">
<li class="active"><a href="#">${page_Num}</a></li>
</c:if>
<c:if test="${page_Num != pageInfo.pageNum }">
<li><a href="${APP_PATH}/emps?pn=${page_Num}">${page_Num }</a></li>
</c:if>
</c:forEach>
<c:if test="${pageInfo.hasNextPage}">
<li><a href="${APP_PATH}/emps?pn=1">首页</a> </li>
<li>
<a href="${APP_PATH}/emps?pn=${pageInfo.pageNum+1}" aria-label="Next">
<span aria-hidden="true">»</span>
</a>
</li>
</c:if>
<li><a href="${APP_PATH}/emps?pn=${pageInfo.pages}">末页</a></li>
</ul>
</nav>
</div>
</div>
```
跨平台性:使用 json传输数据

为了能够更好实现跨平台,这里我们是 json来进行数据的传输。
step1: 导入 Json 依赖
step2: 构造处理信息的返回类(该信息类包含网页状态码,返回的状态信息,以及返回一个hashmap作为属性字典)

step3: 修改 controller,返回json字符串(使用 @ResponseBody 返回对象的 json)
 @RequestMapping("/emps")
 @ResponseBody//返回json对象
 public Msg getEmpsWithJson(@RequestParam(value = "pn",defaultValue ="1") Integer pn){
     //引入 pageHelper分页插件
     //第一个参数为当前页码,第二个参数页的大小
     PageHelper.startPage(pn,5);
     List<Employee> employees = employeeService.getAll();
     //将查询结果封装到 pageInfo 中
     PageInfo page = new PageInfo(employees,5);
     return Msg.sucess().add("pageInfo",page);
 }

step4: 使用 Ajax 對象 来处理从controller返回的 msg对象
此时则不用index转发在获取数据,直接ajax获取数据再回显。因此,新建一个新的index数据,index-2.jsp
-
将list.jsp 中的大部分代码复制到index-2.jsp 中
<!--创建显示页面--> <div class="container"> <%-- 标题--%> <div class="row"> <%--大屏幕,该行总共占了12列 --%> <div class="col-md-12"> <h1>SSM-CRUD</h1> </div> </div> <%-- 按钮--%> <div class="row"> <div class="col-md-4 col-md-offset-8"> <button type="button" class="btn btn-primary" id="emp_add_modal_btn">新增</button> <button type="button" class="btn btn-danger" id="emp_delete_all_btn">>删除</button> </div> </div> <%-- 表格数据--%> <div class="row"> <div class="col-md-12"> <table class="table table-hover" id="emps_table"> <thead> <tr> <th> <input type="checkbox" id="check_all"/> </th> <th>#</th> <th>empName</th> <th>gender</th> <th>email</th> <th>deptName</th> <th>操作</th> </tr> </thead> </table> </div> </div> <%--显示分页信息--%> <div class="row"> <%-- 分页文字信息--%> <div class="col-md-6" id="page_info_area"> </div> <%-- 分页条信息 ,分页条的模板可在官方文档中的组件中找到--%> <div class="col-md-6" id="page_nav_area"> </div> </div> </div> </body> </html> -
添加表格内容
function build_emps_table(res){ //清空table $("#emps_table tbody").empty(); var emps = res.extend.pageInfo.list; $.each(emps,function (index,item) { var charBoxTd=$("<td><input type='checkbox' class='check_item'/></td>"); var empIdTd = $("<td></td>").append(item.stuId); var empstuName = $("<td></td>").append(item.stuName); var empgender = $("<td></td>").append(item.gender=='M'?'男':'女'); var empemail= $("<td></td>").append(item.email); var deptNameTd = $("<td></td>").append(item.department.deptName); //添加编辑和删除按钮 var editBtn = $("<button></button>").addClass("btn btn-primary btn-sm edit_btn").append($("<span></span>").addClass("glyphicon glyphicon-pencil")).append("编辑"); //为编辑按钮添加一个自定义的属性,来表示当前员工id editBtn.attr("edit-id",item.empId); var delBtn = $("<button></button>").addClass("btn btn-danger btn-sm delete_btn").append($("<span></span>").addClass("glyphicon glyphicon-trash")).append("删除"); //为删除按钮添加一个自定义的属性来表示当前删除的员工id delBtn.attr("del-id",item.empId); var btnTd = $("<td></td>").append(editBtn).append(" ").append(delBtn); //利用 append 方法把上面的这些组件连起来 $("<tr></t>").append(charBoxTd) .append(empIdTd) .append(empstuName) .append(empgender) .append(empemail) .append(deptNameTd) .append(btnTd) .appendTo("#emps_table tbody"); }) } -
添加分页信息
//解析显示分页信息 function build_page_info(result){ $("#page_info_area").empty(); $("#page_info_area").append("当前"+result.extend.pageInfo.pageNum+"页,总"+ result.extend.pageInfo.pages+"页,总"+ result.extend.pageInfo.total+"条记录"); totalRecord = result.extend.pageInfo.total; currentPage = result.extend.pageInfo.pageNum; }- 解析显示分页条
//解析显示分页条,点击分页要能去下一页.... function build_page_nav(result){ //page_nav_area $("#page_nav_area").empty(); var ul = $("<ul></ul>").addClass("pagination"); //构建元素 var firstPageLi = $("<li></li>").append($("<a></a>").append("首页").attr("href","#")); var prePageLi = $("<li></li>").append($("<a></a>").append("«")); if(result.extend.pageInfo.hasPreviousPage == false){ firstPageLi.addClass("disabled"); prePageLi.addClass("disabled"); }else{ //为元素添加点击翻页的事件 firstPageLi.click(function(){ to_page(1); }); prePageLi.click(function(){ to_page(result.extend.pageInfo.pageNum -1); }); } var nextPageLi = $("<li></li>").append($("<a></a>").append("»")); var lastPageLi = $("<li></li>").append($("<a></a>").append("末页").attr("href","#")); if(result.extend.pageInfo.hasNextPage == false){ nextPageLi.addClass("disabled"); lastPageLi.addClass("disabled"); }else{ nextPageLi.click(function(){ to_page(result.extend.pageInfo.pageNum +1); }); lastPageLi.click(function(){ to_page(result.extend.pageInfo.pages); }); } //添加首页和前一页 的提示 ul.append(firstPageLi).append(prePageLi); //1,2,3遍历给ul中添加页码提示 $.each(result.extend.pageInfo.navigatepageNums,function(index,item){ var numLi = $("<li></li>").append($("<a></a>").append(item)); if(result.extend.pageInfo.pageNum == item){ numLi.addClass("active"); } numLi.click(function(){ to_page(item); }); ul.append(numLi); }); //添加下一页和末页 的提示 ul.append(nextPageLi).append(lastPageLi); //把ul加入到nav var navEle = $("<nav></nav>").append(ul); navEle.appendTo("#page_nav_area"); } } -
结果如下所示:

7、添加新员工
添加新员工的业务逻辑如下所示:
- 1、在index.jsp页面点击”新增”
- 2、弹出新增对话框
- 3、去数据库查询部门列表,显示在对话框中
- 4、用户输入数据,并进行校验
- jquery前端校验,ajax用户名重复校验,重要数据(后端校验(JSR303),唯一约束);
- 5、完成保存
规定:本项目中url与请求之间的关系
/emp/{id}GET 查询员工/empPOST 保存员工/emp/{id}PUT 修改员工
-/emp/{id}DELETE 删除员工
新增模态框
-
step1:通过bootstrap官方网址可以得到模态框的模板,以及设置手动调用与自动调用的方法。
首页->JavaScript插件->动态模态框

-
修改模板将其变为
用于新增的动态模板:在官网->css->表单 中寻找需要的表单格式。<%--============================================新增按钮的模态框======================================================--%> <!-- Modal --> <div class="modal fade" id="empAddModal" tabindex="-1" role="dialog" > <div class="modal-dialog" role="document"> <div class="modal-content"> <div class="modal-header"> <button type="button" class="close" data-dismiss="modal" aria-label="Close"><span aria-hidden="true">×</span></button> <h4 class="modal-title" id="myModalLabel">员工添加</h4> </div> <div class="modal-body"> <form class="form-horizontal"> <div class="form-group"> <label class="col-sm-2 control-label">empName</label> <div class="col-sm-10"> <input type="text" name="empName" class="form-control" id="empName_add_input" placeholder="empName"> </div> </div> <div class="form-group"> <label class="col-sm-2 control-label">email</label> <div class="col-sm-10"> <input type="text" name="email" class="form-control" id="email_add_input" placeholder="email@atguigu.com"> </div> </div> <div class="form-group"> <label for="inputPassword3" class="col-sm-2 control-label">Password</label> <div class="col-sm-10"> <input type="password" class="form-control" id="inputPassword3" placeholder="Password"> </div> </div> <div class="form-group"> <label class="col-sm-2 control-label">gender</label> <div class="col-sm-10"> <label class="radio-inline"> <input type="radio" name="gender" id="gender1_add_input" value="M" checked="checked"> 男 </label> <label class="radio-inline"> <input type="radio" name="gender" id="gender2_add_input" value="F"> 女 </label> </div> </div> <div class="form-group"> <label class="col-sm-2 control-label">deptName</label> <div class="col-sm-4"> <!-- 部门提交部门id即可 --> <select class="form-control" name="dId"> </select> </div> </div> </form> </div> <div class="modal-footer"> <button type="button" class="btn btn-default" data-dismiss="modal">Close</button> <button type="button" class="btn btn-primary">Save changes</button> </div> </div> </div> </div>
Ajax 显示部门信息
//==============================================================================模态框相关js
    //清空表单样式及内容
    function reset_form(ele){
        $(ele)[0].reset();
        //清空表单样式
        $(ele).find("*").removeClass("has-error has-success");
        $(ele).find(".help-block").text("");
    }
    //清空表单样式及内容
    function reset_form(ele){
        $(ele)[0].reset();
        //清空表单样式
        $(ele).find("*").removeClass("has-error has-success");
        $(ele).find(".help-block").text("");
    }
    //给新增按钮添加模态框
    $("#emp_add_modal_btn").click(function (){
        //清除表单数据(表单完整重置(表单的数据,表单的样式))
        reset_form("#empAddModal form");
        //添加 department的可选框
        getDepts("#empAddModal select");
        //弹出模态框
        $("#empAddModal").modal({
            backdrop:'static'
        });

    });
    //查出所有的部门信息并显示在下拉列表中
    function getDepts(ele){
        //清空之前的下拉列表值
        $(ele).empty();
        //ajax 得到所有的dept
        $.ajax({
            url: "${APP_PATH}/depts",
            type: "GET",
            success: function (res) {
                $.each(res.extend.depts,function (i,item) {
                    var opt = $("<option></option>").append(this.deptName).attr("value",this.deptId);
                    opt.appendTo(ele);

                })

            }
        })
    }

员工添加
-
sevice:包括保存和用户名唯一性检验两个方法
/** * 验证当前用户名是否可用 */ public boolean checkUser(String empName){ EmployeeExample employeeExample = new EmployeeExample(); employeeExample.createCriteria().andStuNameEqualTo(empName); long count = employeeMapper.countByExample(employeeExample); return count==0; } /** * 添加员工 */ public void saveEmployee(Employee employee){ employeeMapper.insertSelective(employee); } -
controller:

-
ajax 访问回显
//动态框的保存按钮
$("#emp_save_btn").click(function () {

    //利用 ajax 保存信息,并且回显
    $.ajax({
        url:"${APP_PATH}/emp",
        type:"POST",
        data: $("#empAddModal form").serialize(),
        success:function (res) {
            if (res.code==100){
                //1、关闭模态框
                $("#empAddModal").modal('hide');
                //回显
                //添加数据会在最后一页
                to_page(totalRecord);

            }else{
                //显示失败信息
                console.log(res);
            }

        }
    })

格式检验
后端Ajax进行用户名校验
在上面的添加员工功能上,增加添加员工的格式检验
-
service
/** * 验证当前用户名是否可用 */ public boolean checkUser(String empName){ EmployeeExample employeeExample = new EmployeeExample(); employeeExample.createCriteria().andStuNameEqualTo(empName); long count = employeeMapper.countByExample(employeeExample); return count==0; } -
controller:
/** * 检验用(户名是否可用 */ @RequestMapping("/checkUser") @ResponseBody public Msg checkUser(@RequestParam("stuName") String stuName){ String regx="[\\u4e00-\\u9fa5_a-zA-Z0-9]{4,12}"; //先检测用户名是否合法 if(!stuName.matches(regx)){ return Msg.fail().add("va_msg", "用户名必须是6-16位数字和字母的组合或者2-5位中文"); } //检查用户名是否重复 boolean b = employeeService.checkUser(stuName); if (b){ return Msg.sucess(); }else{ return Msg.fail().add("va_msg","用户名不可用"); } } -
jsp:创建展示信息的函数,即显示校验结果
//显示校验结果:用于下面 的 $("#empName_add_input").change(function () 函数 function show_validate_msg(ele,status,msg){ //清除当前元素状态 //也就是去除之前的校验提示 $(ele).parent().removeClass("has-success has-error"); $(ele).next("span").text(""); if ("success"==status){ $(ele).parent().addClass("has-success"); $(ele).next("span").text(msg); }else if("error" == status){ $(ele).parent().addClass("has-error"); $(ele).next("span").text(msg); } } -
JSP:利用ajax校验用户名
   // 校验用户名是否可用
    $("#empName_add_input").change(function () {
       //发送 ajax 请求校验是否可用
       var stuName = this.value;
       $.ajax({
           url:"${APP_PATH}/checkUser",
           data:"stuName="+stuName,
           type:"POST",
           success:function (res) {
               if (res.code==100){
                   //回显,表示用户名可用
                   show_validate_msg("#empName_add_input","success","用户名可用");
                   //用于前端的验证,在validate_add_form函数中应用
                   $("#emp_save_btn").attr("ajax-va","success");

               }
               else{
                   //回显表示用户名不可用
                   show_validate_msg("#empName_add_input","error",res.extend.va_msg);
                   //用于前端的验证,在validate_add_form函数中应用
                   $("#emp_save_btn").attr("ajax-va","error");

               }
           }
       })
    });
前端校验用户名与email格式
-
添加验证表单函数
//添加时校验其他属性 function validate_add_form(){ //1、拿到要校验的数据,使用正则表达进行校验 var empName = $("#empName_add_input").val(); var regName = /(^[a-zA-Z0-9_-]{6,16}$)|(^[\u2E80-\u9FFF]{2,5})/; if(!regName.test(empName)){ //alert("用户名可以是2-5位中文或者6-16位英文和数字的组合"); show_validate_msg("#empName_add_input", "error", "用户名可以是2-5位中文或者6-16位英文和数字的组合"); return false; }else{ show_validate_msg("#empName_add_input", "success", ""); }; //2、校验邮箱信息 var email = $("#email_add_input").val(); var regEmail = /^([a-z0-9_\.-]+)@([\da-z\.-]+)\.([a-z\.]{2,6})$/; if(!regEmail.test(email)){ //alert("邮箱格式不正确"); //应该清空这个元素之前的样式 show_validate_msg("#email_add_input", "error", "邮箱格式不正确"); /* $("#email_add_input").parent().addClass("has-error"); $("#email_add_input").next("span").text("邮箱格式不正确"); */ return false; }else{ show_validate_msg("#email_add_input", "success", ""); } return true; } -
在保存新用户前进行验证
//动态框的保存按钮
$("#emp_save_btn").click(function () {
    //1、模态框中填写的表单数据提交给服务器进行保存
    //1、先对要提交给服务器的数据进行校验
    if(!validate_add_form()){
        return false;
    };
    //2、判断之前的 ajax 用户名校验是否成功
    if($(this).attr("ajax-va")=="error"){
        return false;
    }
    //利用 ajax 保存信息,并且回显
    $.ajax({
        url:"${APP_PATH}/emp",
        type:"POST",
        data: $("#empAddModal form").serialize(),
        success:function (res) {
            if (res.code==100){

                //1、关闭模态框
                $("#empAddModal").modal('hide');
                //回显
                //添加数据会在最后一页
                to_page(totalRecord);

            }else{
                //显示失败信息
                console.log(res);
            }

        }
    })
})


 481
481


 被折叠的 条评论
为什么被折叠?
被折叠的 条评论
为什么被折叠?
 到【灌水乐园】发言


