


目录
2.4、在 Controller 类上添加注解 @CrossOrigin
1、项目路由
1.1、项目入口文件如何调用路由
在 src\main.js 中,先引入路由模块,再挂载路由
......
import router from './router' //引入路由模块
......
new Vue({
  el: '#app',
  router, //挂载路由
  store,
  render: h => h(App)
})
可以看到路由模块在 src\router\index.js 中设置,通过 component 设置展示的内容
{
    path: '/example',
    component: Layout,  // Layout表示第一级标签
    redirect: '/example/table',
    name: 'Example',
    meta: { title: 'Example', icon: 'example' },
    children: [  // 子标签
      {
        path: 'table',
        name: 'Table',
        component: () => import('@/views/table/index'), // 引入页面
        meta: { title: 'Table', icon: 'table' }
      },
      {
        path: 'tree',
        name: 'Tree',
        component: () => import('@/views/tree/index'), // 引入页面
        meta: { title: 'Tree', icon: 'tree' }
      }
    ]
  }
查看 src\views\table\index.vue,发现它引入了 src\api\table.js 文件,并调用里面的方法获取表格数据
2、讲师列表前端实现
2.1、添加路由
在 src\router\index.js 中添加路由
  {
    path: '/teacher',
    component: Layout,
    redirect: '/teacher/table',
    name: '讲师管理',
    meta: { title: '讲师管理', icon: 'example' },
    children: [  // 子标签
      {
        path: 'table',
        name: '讲师列表',
        component: () => import('@/views/edu/teacher/list'), // 引入页面
        meta: { title: '讲师列表', icon: 'table' }
      },
      {
        path: 'save',
        name: '添加讲师',
        component: () => import('@/views/edu/teacher/save'), // 引入页面
        meta: { title: '添加讲师', icon: 'tree' }
      }
    ]
  },
2.2、创建路由对应的页面

可以先随意添加一些内容进行测试,注意 template 标签
<template>
    <div class="app-container">
        讲师列表
    </div>
</template>
2.3、创建 JS 文件并定义方法
创建 src\api\edu\teacher.js 文件,在里面定义 条件分页获取讲师列表 的方法
import request from '@/utils/request'

export default {

    /**
     * 获取讲师列表(条件查询分页)
     * @param {*} current 当前页码
     * @param {*} limit 每页记录数
     * @param {*} teacherQuery 查询对象
     * @returns
     */
    getTeacherListPage(current, limit, teacherQuery) {
        return request({
            // 注意url使用 着重号 `
            url: `/eduservice/teacher/pageTeacherCondition/${current}/${limit}`,
            method: 'post',
            // data表示将对象转换为JSON传递,后端可以用@RequestBody接收
            data: teacherQuery
        })
    }

}
2.4、在 Controller 类上添加注解 @CrossOrigin
在 EduTeacherController 上添加注解,解决跨域问题
@Api(description = "讲师管理")
@RestController
@RequestMapping("/eduservice/teacher")
@CrossOrigin
public class EduTeacherController{}
2.5、编写页面条件分页讲师数据
修改 src\views\edu\teacher\list.vue
<template>
    <div class="app-container">
        <!-- 表格 -->
        <el-table
        :data="list"
        border
        fit
        highlight-current-row>
        <el-table-column
            label="序号"
            width="70"
            align="center">
            <template slot-scope="scope">
            {{ (page - 1) * limit + scope.$index + 1 }}
            </template>
        </el-table-column>

        <el-table-column prop="name" label="名称" width="80" />

        <el-table-column label="头衔" width="80">
            <template slot-scope="scope">
                <!-- scope.row就是本行的teacher对象 -->
                <!--
                    == 两个等号仅判断值,例如 1 == '1' 成立
                    === 三个等号不仅判断值,还判断类型,上述等式不成立
                 -->
                {{ scope.row.level===1?'高级讲师':'首席讲师' }}
            </template>
        </el-table-column>

        <el-table-column prop="intro" label="资历" />

        <el-table-column prop="gmtCreate" label="添加时间" width="160"/>

        <el-table-column prop="sort" label="排序" width="60" />

        <el-table-column label="操作" width="200" align="center">
            <template slot-scope="scope">
            <router-link :to="'/edu/teacher/edit/'+scope.row.id">
                <el-button type="primary" size="mini" icon="el-icon-edit">修改</el-button>
            </router-link>
            <el-button type="danger" size="mini" icon="el-icon-delete" @click="removeDataById(scope.row.id)">删除</el-button>
            </template>
        </el-table-column>
        </el-table>
    </div>
</template>

<script>
    import teacher from '@/api/edu/teacher.js';

    export default {
        // new Vue 在 main.js 已经做了封装
        // 写代码核心位置
        data() {
            return {
                list: null, // 查询后接口返回集合
                page: 1,   // 当前页
                limit: 10,  // 每页记录数
                total: 0,   // 总记录数
                teacherQuery: {}    // 条件封装对象
            }
        },
        created() {
            this.getList();
        },
        methods: {
            getList(){
                teacher.getTeacherListPage(this.page,this.limit,this.teacherQuery)
                    .then(response => {
                        // console.log(response);
                        this.list = response.data.records;
                        this.total = response.data.total;
                        // console.log(this.list);
                        // console.log(this.total);
                    })
                    .catch(error => {
                        console.log(error);
                    })
            }
        }
    }
</script>
3、讲师删除
3.1、在 JS 中定义方法
在 src\api\edu\teacher.js 定义删除讲师的方法
    /**
     * 根据id删除讲师
     * @param {*} id 要删除的讲师的id
     */
    deleteTeacherById(id){
        return request({
            // 注意url使用 着重号 `
            url: `/eduservice/teacher/${id}`,
            method: 'DELETE',
        })
    }
3.2、页面调用方法
在 src\views\edu\teacher\list.vue 中调用方法
            /**
             * 删除讲师
             */
            removeDataById(id) {
                this.$confirm('此操作将永久删除该讲师记录, 是否继续?', '提示', {
                    confirmButtonText: '确定',
                    cancelButtonText: '取消',
                    type: 'warning'
                })
                // 确认删除
                .then(() => {
                    teacher.deleteTeacherById(id)
                        // 删除成功
                        .then(response => {
                            // 提示信息
                            this.$message({
                                type: 'success',
                                message: '删除成功!'
                            });
                            // 重新加载列表
                            if (this.list.length == 1){
                                this.page = this.page - 1;
                            }
                            this.getList(this.page);
                        })
                })
                // 取消删除
                .catch(() => {
                    this.$message({
                        type: 'info',
                        message: '已取消删除'
                    });
                });
4、讲师添加
4.1、在 JS 文件添加方法
在 src\api\edu\teacher.js 中添加方法
    /**
     * 添加讲师
     * @param {*} teacher 要添加的讲师
     * @returns
     */
    addTeacher(teacher) {
        return request({
            url: `/eduservice/teacher/addTeacher`,
            method: 'POST',
            data: teacher
        })
    }
4.1、讲师添加页面
为了方便,可以在获取讲师列表的方法添加按创建事件降序的条件
src\views\edu\teacher\save.vue 作为讲师添加的页面,后面修改会复用这个页面
<template>
    <div class="app-container">
        <!-- 加上rules属性即开启表单验证规则,:rules动态绑定了一个对象,该对象在data里面定义,对象里面包含的是校验规则 -->
        <!-- :ref相当于唯一标识表单 -->
        <!-- 注意el-form使用:model来绑定,el-form-item使用v-model来绑定 -->
        <el-form :model="teacher" :rules="rules" label-width="120px" ref="loginForm">
            <el-form-item label="讲师名称" prop="name">
                <el-input v-model="teacher.name" />
            </el-form-item>
            <el-form-item label="讲师排序">
                <el-input-number v-model="teacher.sort" controls-position="right" :min="0" />
            </el-form-item>
            <el-form-item label="讲师头衔" prop="level">
                <el-select v-model="teacher.level" clearable placeholder="请选择讲师头衔">
                    <!--
                    数据类型一定要和取出的json中的一致,否则没法回填
                    因此,这里value使用动态绑定的值,保证其数据类型是number
                  -->
                    <el-option :value="1" label="高级讲师" />
                    <el-option :value="2" label="首席讲师" />
                </el-select>
            </el-form-item>
            <el-form-item label="讲师资历" prop="career">
                <el-input v-model="teacher.career" />
            </el-form-item>
            <el-form-item label="讲师简介" prop="intro">
                <el-input v-model="teacher.intro" :rows="10" type="textarea" />
            </el-form-item>

            <!-- 讲师头像:TODO -->

            <el-form-item>
                <el-button :disabled="saveBtnDisabled" type="primary" @click="saveOrUpdate">保存</el-button>
            </el-form-item>
        </el-form>
    </div>
</template>

<script>
    import teacherApi from '@/api/edu/teacher'

    export default {
        data() {
            return {
                teacher: {
                    name: '',
                    sort: 0,
                    level: null,
                    career: '',
                    intro: '',
                    avatar: ''
                },
                saveBtnDisabled: false,  // 添加按钮是否禁用

                rules: {
                    name: [
                        { required: true, message: '请输入讲师名称', trigger: 'blur' },
                        { min: 2, max: 15, message: '长度在 2 到 15 个字符', trigger: 'blur' }
                    ],
                    level: [
                        { required: true, message: '请选择讲师头衔', trigger: 'blur' }
                    ],
                    career: [
                        { required: true, message: '请输入讲师资历', trigger: 'blur' }
                    ],
                    intro: [
                        { required: true, message: '请填写讲师简介', trigger: 'blur' }
                    ]
                }
            }
        },
        created() {
            this.init();
        },
        methods: {
            saveOrUpdate() {
                // 根据teacher对象是否有id值区分添加还是修改
                if (this.teacher.id) {
                    this.updateTeacherInfo();
                } else {
                    this.saveTeacher();
                }
            },

            saveTeacher() {
                // 这里的 'loginForm' 与要提交的表单的 :ref 对应
                //
                this.$refs['loginForm'].validate((valid) => {
                    if (valid) {
                        teacherApi.addTeacher(this.teacher)
                            .then(response => {
                                // 提示信息
                                this.$message({
                                    type: 'success',
                                    message: '添加成功!'
                                });

                                // 回到列表页面 路由跳转
                                this.$router.push({ path: '/teacher/table' });
                        });
                    } else {
                        return false;
                    }
                });

            },

            /**
             * 根据id获取讲师信息
             */
            getInfo(id) {
                teacherApi.getTeacherInfo(id)
                    .then(response => {
                        this.teacher = response.data.teacher;
                        console.log(this.teacher);
                    });
            },

            /**
             * 修改讲师信息
             */
            updateTeacherInfo() {
                teacherApi.updateTeacher(this.teacher)
                    .then(response => {
                        // 提示信息
                        this.$message({
                            type: 'success',
                            message: '修改成功!'
                        });

                        // 回到列表页面 路由跳转
                        this.$router.push({ path: '/teacher/table' });
                    })
            }

        }
    }
</script>
关于表单验证的问题
首先是输入了值却一直提示要输入值。这个问题与格式有关。
el-form 中要用 :model 绑定表单要提交的数据的对象,用 :rules 绑定 data 中的校验规则
el-form-item 中要用 v-model 绑定这个对象的属性,并且 prop 为该属性名


然后是报错 TypeError: Cannot read properties of undefined (reading ‘validate‘),这个问题是由于表单提交时没有与表单绑定
如下两图,在 el-form 中设置 ref 来唯一标识该表单,然后在提交方法中通过改值来校验要提交的表单(如下图红线处)


5、讲师修改
5.1、添加路由
在 src\router\index.js 中添加
      {
        path: '/teacher/edit/:id',   // :id相当于Java中的占位符
        name: 'EduTeacherEdit',
        component: () => import('@/views/edu/teacher/save'),
        meta: { title: '编辑讲师', noCache: true },
        hidden: true  // 路由标签不显示
      }
5.2、数据回显
① 在 src\api\edu\teacher.js 中定义根据 id 获取讲师信息的方法
    /**
     * 根据id获取讲师信息
     * @param {} id 要获取的讲师的id
     * @returns
     */
    getTeacherInfo(id) {
        return request({
            url: `/eduservice/teacher/getTeacher/${id}`,
            method: 'GET',
        })
    }
②调用定义的方法
在 src\views\edu\teacher\save.vue 的 method 中添加方法
            /**
             * 根据id获取讲师信息
             */
            getInfo(id) {
                teacherApi.getTeacherInfo(id)
                    .then(response => {
                        this.teacher = response.data.teacher;
                        console.log(this.teacher);
                    });
            }
然后在 created 中使用
        created() {
            // 根据路径是否有id值区分添加还是修改
            if (this.$route.params && this.$route.params.id) {
                const id = this.$route.params.id;
                this.getInfo(id);
            } else {
                this.teacher = {};
            }
        },
5.3、实现修改
① 在 src\api\edu\teacher.js 中添加修改讲师的方法
    /**
     * 修改讲师
     * @param {*} teacher
     * @returns
     */
    updateTeacher(teacher) {
        return request({
            url: `/eduservice/teacher/updateTeacher`,
            method: 'POST',
            data: teacher
        })
    }
② 调用定义的方法
在 src\views\edu\teacher\save.vue 的 methods 中添加修改讲师的方法
            /**
             * 修改讲师信息
             */
            updateTeacherInfo() {
                teacherApi.updateTeacher(this.teacher)
                    .then(response => {
                        // 提示信息
                        this.$message({
                            type: 'success',
                            message: '修改成功!'
                        });

                        // 回到列表页面 路由跳转
                        this.$router.push({ path: '/teacher/table' });
                    })
            }
修改 saveOrUpdate 方法为根据修改还是添加讲师调用对应的方法
            saveOrUpdate() {
                // 根据teacher对象是否有id值区分添加还是修改
                if (this.teacher.id) {
                    this.updateTeacherInfo();
                } else {
                    this.saveTeacher();
                }
            },
5.4、问题:路由问题
问题:多次跳转到同一个路由,create 只执行一次,在目前这里没有遇到,但在 nginx 代理后会出现
vue-router导航切换 时,如果两个路由都渲染同个组件,组件会重(chong)用,
组件的生命周期钩子(created)不会再被调用, 使得组件的一些数据无法根据 path的改变得到更新
因此:
1、我们可以在 watch 中监听路由的变化,当路由变化时,重新调用 created 中的内容
2、在 init 方法中我们判断路由的变化,如果是修改路由,则从api获取表单数据,如果是新增路由,则重新初始化表单数据
        watch: {
            // 路由发生变化就会执行
            $route(to, from) {
                this.init();
            }
        },
        created() {
            this.init();
        },
        methods: {
            ...

            init(){
                // 根据路径是否有id值区分添加还是修改
                if (this.$route.params && this.$route.params.id) {
                    const id = this.$route.params.id;
                    this.getInfo(id);
                } else {
                    this.teacher = {};
                }
            },

            ...
        }
6、阿里云对象存储 OSS
为了解决海量数据存储与弹性扩容,项目中我们采用云存储的解决方案 阿里云OSS。
这里需要先注册和开通阿里云对象存储 OSS。
官方文档(Java):前言
6.1、创建 Bucket
按照提示输入或选择即可。
地域默认是当前地区的服务器,确认后不可更改。
存储类型由于这里是用作头像且为个人项目,这里选择低频访问存储。
读写权限选择公共读。
6.2、上传文件
进入创建的 Bucket,在文件管理中上传文件
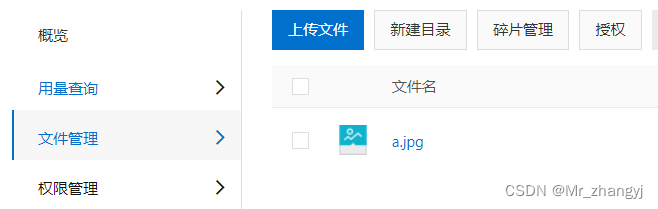
上传后点击文件可以查看 URL 等信息
6.3、创建许可证(Access Key)
这里选择使用子用户 AccessKey,创建用户后再授予权限

7、后端集成 OSS
7.1、新建云存储微服务模块
7.1.1、创建 service_oss 模块并引入依赖
在 service 模块下创建 Maven 模块 service_oss,并创建启动类
引入依赖(由于我启动时报错 MetaObjectHandler.class 找不到,所以加了 mybatisplus 的依赖)
    <dependencies>
        <!-- 阿里云OSS -->
        <dependency>
            <groupId>com.aliyun.oss</groupId>
            <artifactId>aliyun-sdk-oss</artifactId>
            <version>3.15.0</version>
        </dependency>

        <!-- 日期工具栏依赖 -->
        <dependency>
            <groupId>joda-time</groupId>
            <artifactId>joda-time</artifactId>
        </dependency>

        <dependency>
            <groupId>com.baomidou</groupId>
            <artifactId>mybatis-plus-boot-starter</artifactId>
        </dependency>
    </dependencies>
7.1.2、配置 application.yml
server:
  port: 8002  #服务端口

spring:
  application:
    name: service-oss   # 服务名
  profiles:
    active: dev   #环境设置:dev、test、prod

#阿里云OSS
aliyun:
  oss:
    file:
      endpoint: https://oss-cn-hangzhou.aliyuncs.com   #Bucket所在地域对应的Endpoint,地址不同,这里是华东1(杭州)
      keyid: your accessKeyId
      keysecret: your accessKeySecret
      bucketname: zyj-guli  #bucket可以在控制台创建,也可以使用java代码创建
7.1.3、问题:启动失败,没有配置数据库连接
解决方法:
方案一:在 application.yml 配置数据源
方案二:设置启动类注解
@SpringBootApplication(exclude = DataSourceAutoConfiguration.class)7.2、实现文件上传
官方文档(Java):前言
7.2.1、创建常量类读取配置文件内容
@Component
public class ConstantPropertiesUtils {

    @Value("${aliyun.oss.file.endpoint}")
    private String endpoint;

    @Value("${aliyun.oss.file.keyid}")
    private String keyId;

    @Value("${aliyun.oss.file.keysecret}")
    private String keySecret;

    @Value("${aliyun.oss.file.bucketname}")
    private String bucketName;

}
7.2.2、controller、service 代码
参考:简单上传 中的上传文件流
① OssService
public interface OssService {

    /**
     * 上传头像到OSS
     * @param file 上传的文件
     * @return
     */
    String uploadFileAvatar(MultipartFile file);

}
② OssServiceImpl
@Service
public class OssServiceImpl implements OssService {

    /**
     * 上传头像到OSS
     * @param file 上传的文件
     * @return
     */
    @Override
    public String uploadFileAvatar(MultipartFile file) {
        // 通过常量类获取值
        String endpoint = ConstantPropertiesUtils.END_POINT;
        String accessKeyId = ConstantPropertiesUtils.ACCESS_KEY_ID;
        String accessKeySecret = ConstantPropertiesUtils.ACCESS_KEY_SECRET;
        String bucketName = ConstantPropertiesUtils.BUCKET_NAME;

        // 获取文件名称:生成随机值,按照日期分类
        String uuid = UUID.randomUUID().toString().replaceAll("-", "");
        String datePath = new DateTime().toString("yyyy/MM/dd");
        String objectName = datePath + uuid + file.getOriginalFilename();

        // 创建OSSClient实例。
        OSS ossClient = new OSSClientBuilder().build(endpoint, accessKeyId, accessKeySecret);

        try {
            // 获取上传文件输入流
            InputStream inputStream = file.getInputStream();

            // 创建PutObject请求。
            ossClient.putObject(bucketName, objectName, inputStream);

        } catch (Exception e) {
            e.printStackTrace();
            return null;
        } finally {
            // 关闭OSSClient
            if (ossClient != null) {
                ossClient.shutdown();
            }
        }

        // 拼接文件url
        // https://zyj-guli.oss-cn-hangzhou.aliyuncs.com/a.jpg
        // endpoint 前面有https://
        String url = "https://" + bucketName + "." + endpoint.substring(8) + "/" + objectName;
        return url;
    }

}
③ OssController
@RestController
@RequestMapping("/eduoss/fileoss")
@CrossOrigin
public class OssController {

    @Autowired
    private OssService ossService;

    /**
     * 上传头像到OSS
     * @param file 上传的文件
     * @return
     */
    @PostMapping("")
    public R uploadOssFile(
            @ApiParam(name = "file", value = "文件", required = true) MultipartFile file
    ){
        // 返回上传到OSS的路径
        String url = ossService.uploadFileAvatar(file);
        return R.ok().data("url", url);
    }

}
7.3、配置 nginx 反向代理
7.3.1、配置 nginx.conf
① 设置监听的端口,这里设为 81
server {
        listen       81;
        ……
}
② 配置 nginx 转发规则
	server {
		listen 9001;
		server_name localhost;

		# 当请求路径包含 /eduservice/ 时,转发到8001接口
		# ~ 标识正则,没有~标识完全匹配
		location ~ /eduservice/ {
			proxy_pass http://localhost:8001;
		}

		location ~ /eduoss/ {
			proxy_pass http://localhost:8002;
		}
	}
7.3.2、修改前端的 BASE_API
修改前端 config\dev.env.js 的 BASE_API 为 nginx 监听的 9001 端口
module.exports = merge(prodEnv, {
  NODE_ENV: '"development"',
  // BASE_API: '"https://easy-mock.com/mock/5950a2419adc231f356a6636/vue-admin"',
  BASE_API: '"http://localhost:9001"',
})
7.3.3、重启 nginx 并测试
重启后,打开 8001 和 8002 两个服务,打开前端项目,可以正常使用
7.4、上传讲师头像
7.4.1、复制所需的组件
从 vue-element-admin-master.zip 中的 src\components 复制下面两个组件到 src\components 中

7.4.2、页面添加上传组件
① 页面引入并声明刚添加的上传组件
    // 引入上传组件模块
    import ImageCropper from '@/components/ImageCropper'
    import PanThumb from '@/components/PanThumb'

    export default {
        // 声明组件
        components: {ImageCropper, PanThumb},

        ……
    }
② 页面加入头像上传组件
            <!-- 讲师头像 -->
            <el-form-item label="讲师头像">
                <!-- 头像缩略图 -->
                <pan-thumb :image="teacher.avatar" />

                <!-- 文件上传按钮 -->
                <el-button type="primary" icon="el-icon-upload" @click="imagecropperShow=true">更换头像</el-button>

                <!--
                    v-show:是否显示上传组件
                    :key:类似于id,如果一个页面多个图片上传控件,可以做区分
                    :url:后台上传的url地址
                    field:前端的field必须等于后端MultipartFile的名字
                    @close:点击上传弹框右上角的叉,关闭上传组件的方法
                    @crop-upload-success:点击上传弹框保存按钮调用的方法,上传成功后的回调
                -->
                <image-cropper v-show="imagecropperShow" :width="300" :height="300" :key="imagecropperKey"
                    :url="BASE_API+'/eduoss/fileoss/upload'" field="file" @close="close" @crop-upload-success="cropSuccess" />
            </el-form-item>
③ 在 data() 中添加上传头像所需的值,顺便设置默认头像
                teacher: {
                    name: '',
                    sort: 0,
                    level: null,
                    career: '',
                    intro: '',
                    avatar: 'https://zyj-guli.oss-cn-hangzhou.aliyuncs.com/a.jpg'   /* 默认头像 */
                },

                imagecropperShow: false, // 上传弹框是否显示
                imagecropperKey: 0,      // 上传组件key值
                BASE_API: process.env.BASE_API,  // 获取config\dev.env.js中的BASE_API的值
注意在 init() 方法中也设置以下默认头像
④ 在 methods 中添加上传所需的方法
            /**
             * 关闭上传弹框
             */
            close() {
                // 关闭上传弹框
                this.imagecropperShow = false;

                // 将图片上传后的url赋值给teacher.avatar:上传之后的接口会返回图片的url
                this.teacher.avatar = data.url;
                console.log();

                // 上传组件初始化
                this.imagecropperKey = this.imagecropperKey + 1;
            },

            /**
             * 上传成功方法
             * @param {*} data 请求返回的data
             */
            cropSuccess(data) {
                this.imagecropperShow = false;
                this.teacher.avatar = data.url;
                // 上传成功后,重新打开上传组件时初始化组件,否则显示上一次的上传结果
                this.imagecropperKey = this.imagecropperKey + 1;
            }


 594
594


 被折叠的 条评论
为什么被折叠?
被折叠的 条评论
为什么被折叠?
 到【灌水乐园】发言


