


Elasticsearch
Centos01安装elasticsearch(elk盘)
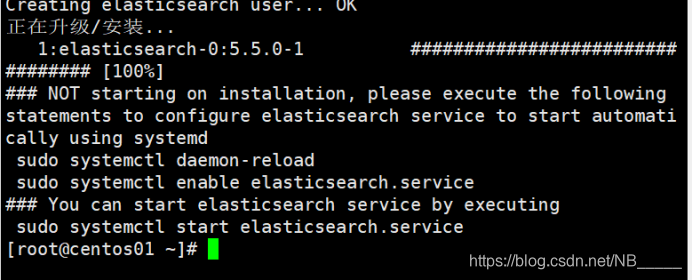
[root@centos01 ~]# rpm -ivh /mnt/elasticsearch-5.5.0.rpm
修改配置文件
[root@centos01 ~]# vim /etc/elasticsearch/elasticsearch.yml
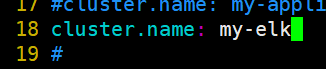
18 cluster.name: my-elk
25 node.name: centos01
46 bootstrap.memory_lock: false
59 network.host: 192.168.100.10
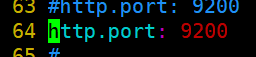
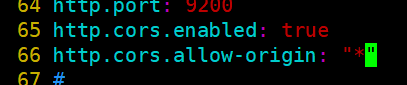
64 http.port: 9200
74 discovery.zen.ping.unicast.hosts: [“centos01”, “centos02”]


启动服务设置开机自动启动
[root@centos01 ~]# systemctl daemon-reload
[root@centos01 ~]# systemctl start elasticsearch.service
[root@centos01 ~]# systemctl enable elasticsearch.service
[root@centos01 ~]# netstat -anptu | grep 9200

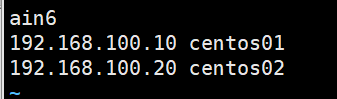
[root@centos01 ~]# vim /etc/hosts

安装依赖node
[root@centos01 ~]# tar zxvf /mnt/node-v8.2.1.tar.gz -C /usr/src/
[root@centos01 ~]# mv /usr/src/node-v8.2.1/ /usr/local/node
[root@centos01 ~]# cd /usr/local/node/
[root@centos01 node]# ./configure && make && make install
安装phantomjs
[root@centos01 ~]# tar jxvf /mnt/phantomjs-2.1.1-linux-x86_64.tar.bz2 -C /usr/src/
[root@centos01 ~]# cd /usr/src/phantomjs-2.1.1-linux-x86_64/bin/
[root@centos01 bin]# cp phantomjs /usr/local/bin/
[root@centos01 bin]# chmod +x /usr/local/bin/phantomjs
移动elasticsearch-head
[root@centos01 ~]# tar zxvf /mnt/elasticsearch-head.tar.gz -C /usr/src/
[root@centos01 ~]# mv /usr/src/elasticsearch-head/ /usr/local/
[root@centos01 ~]# cd /usr/local/elasticsearch-head/
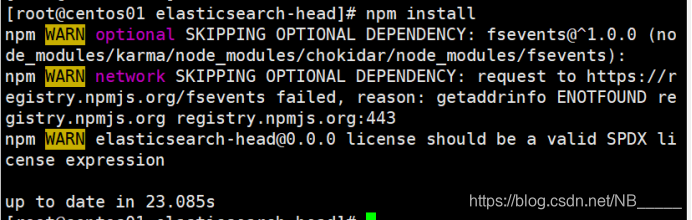
[root@centos01 elasticsearch-head]# npm install
修改elasticsearch跨域访问
[root@centos01 ~]# vim /etc/elasticsearch/elasticsearch.yml
65 http.cors.enabled: true
66 http.cors.allow-origin: “*”
[root@centos01 ~]# /etc/init.d/elasticsearch restart

修改elasticsearch-head配置文件监听9200
[root@centos01 ~]# vim /usr/local/elasticsearch-head/_site/app.js
4329 this.base_uri = this.config.base_uri || this.prefs.get(“app-base_uri”) || “http://192.168.100.10:9200”;

修改修改elasticsearch-head配置文件监听9100端口
[root@centos01 ~]# vim /usr/local/elasticsearch-head/Gruntfile.js
93 hostname:‘192.168.100.10’,
94 port: 9100,

启动服务
[root@centos01 ~]# cd /usr/local/elasticsearch-head/
[root@centos01 elasticsearch-head]# npm run start&
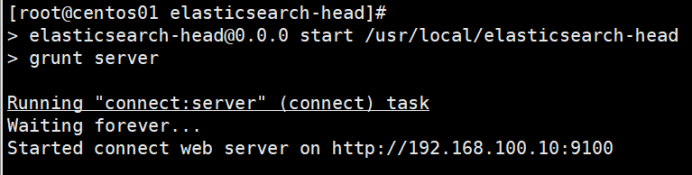
监听9100端口
[root@centos01 elasticsearch-head]# netstat -anptu | grep 9100

Centos02安装elasticsearch(elk盘)
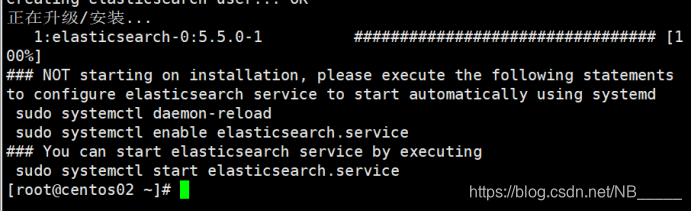
[root@centos02 ~]# rpm -ivh /mnt/elasticsearch-5.5.0.rpm
修改配置文件
[root@centos02 ~]# vim /etc/elasticsearch/elasticsearch.yml
18 cluster.name: my-elk
25 node.name: centos01
46 bootstrap.memory_lock: false
59 network.host: 192.168.100.10
64 http.port: 9200
74 discovery.zen.ping.unicast.hosts: [“centos01”, “centos02”]


启动服务设置开机自动启动
[root@centos02 ~]# systemctl daemon-reload
[root@centos02 ~]# systemctl start elasticsearch.service
[root@centos02 ~]# systemctl enable elasticsearch.service
[root@centos02 ~]# netstat -anptu | grep 9200

[root@centos02 ~]# vim /etc/hosts
elasticsearch-head
安装依赖node
[root@centos02 ~]# tar zxvf /mnt/node-v8.2.1.tar.gz -C /usr/src/
[root@centos02 ~]# mv /usr/src/node-v8.2.1/ /usr/local/node
[root@centos02 ~]# cd /usr/local/node/
[root@centos02 node]# ./configure && make && make install
安装phantomjs
[root@centos02 ~]# tar jxvf /mnt/phantomjs-2.1.1-linux-x86_64.tar.bz2 -C /usr/src/
[root@centos02 ~]# cd /usr/src/phantomjs-2.1.1-linux-x86_64/bin/
[root@centos02 bin]# cp phantomjs /usr/local/bin/
[root@centos02 bin]# chmod +x /usr/local/bin/phantomjs
移动elasticsearch-head
[root@centos02 ~]# tar zxvf /mnt/elasticsearch-head.tar.gz -C /usr/src/
[root@centos02 ~]# mv /usr/src/elasticsearch-head/ /usr/local/
[root@centos02 ~]# cd /usr/local/elasticsearch-head/
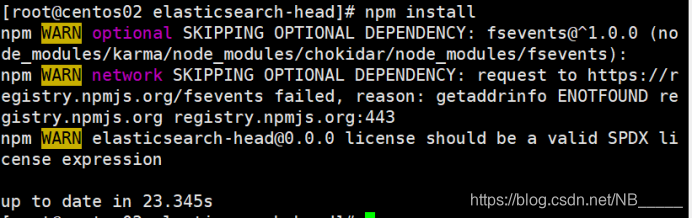
[root@centos02 elasticsearch-head]# npm install
修改elasticsearch跨域访问
[root@centos01 ~]# vim /etc/elasticsearch/elasticsearch.yml
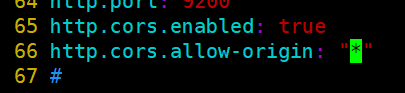
65 http.cors.enabled: true
66 http.cors.allow-origin: “*”
[root@centos02 ~]# /etc/init.d/elasticsearch restart

[root@centos02 ~]# vim /usr/local/elasticsearch-head/Gruntfile.js

[root@centos02 ~]# vim /usr/local/elasticsearch-head/_site/app.js

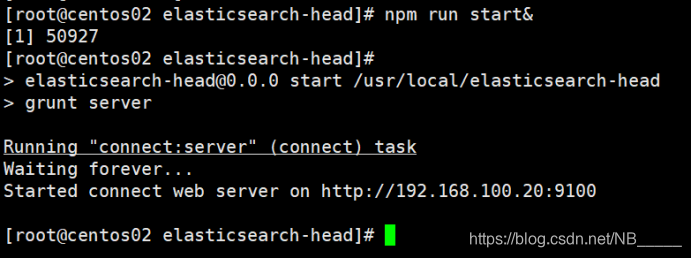
[root@centos02 elasticsearch-head]# npm run start&
监听9100端口
[root@centos02 ~]# netstat -anptu | grep 9100


Centos03安装httpd
[root@centos03 ~]# yum -y install httpd
[root@centos03 ~]# echo “www.benet.com” > /var/www/html/index.html
[root@centos03 ~]# systemctl start httpd
[root@centos03 ~]# systemctl enable httpd
[root@centos03 ~]# netstat -anptu | grep httpd

优化
[root@centos03 ~]# ln -s /usr/share/logstash/bin/logstash /usr/local/bin/
安装
[root@centos02 ~]# scp /mnt/logstash-5.5.1.rpm root@192.168.100.30:/root/
[root@centos03 ~]# rpm -ivh logstash-5.5.1.rpm
启服务
[root@centos03 ~]# systemctl start logstash
[root@centos03 ~]# systemctl enable logstash
[root@centos03 ~]# logstash -e ‘input { stdin{}} output { stdout{}}’
2021-06-03T03:17:45.915Z centos03
www.benet.com
2021-06-03T03:18:14.882Z centos03 www.benet.com
www.accp.com
2021-06-03T03:18:26.946Z centos03 www.accp.com
www.xsh.com
[root@centos03 ~]# logstash -e ‘input { stdin{}} output { stdout{ codec=>rubydebug}}’
www.benet.com
www.accp.com
www.xsh.com
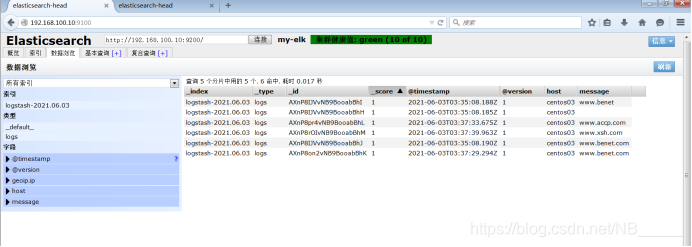
[root@centos03 ~]# logstash -e ‘input { stdin{}} output { elasticsearch{hosts => [“192.168.100.10:9200”]}}’
www.benet.com
www.accp.com
www.xsh.com
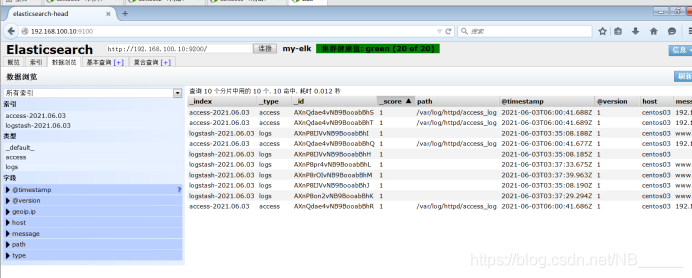
浏览器点击连接–数据浏览
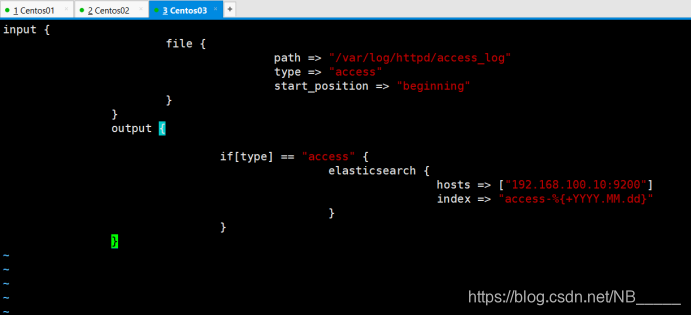
采集apache成功日志
设置允许日志读取
[root@centos03 ~]# chmod o+r /var/log/httpd/access_log
创建采集日志文件
[root@centos03 ~]# touch /etc/logstash/conf.d/apache.conf
[root@centos03 ~]# chmod +x /etc/logstash/conf.d/apache.conf
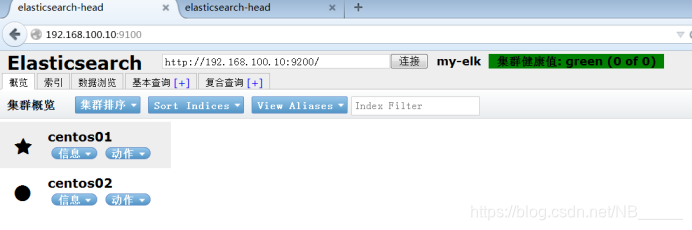
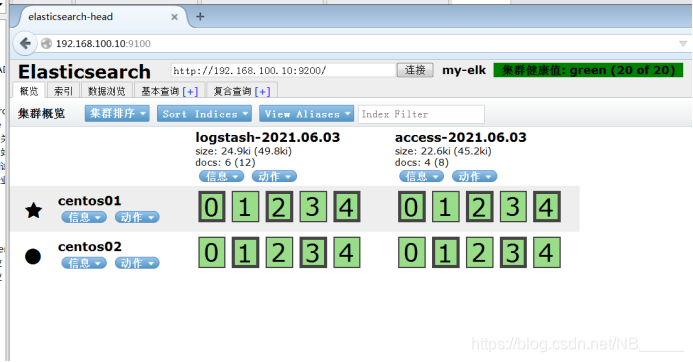
再次使用火狐浏览器访问http://192.168.100.10:9100
安装配置kibana
安装
[root@centos01 ~]# rpm -ivh /mnt/kibana-5.5.1-x86_64.rpm


启动服务
[root@centos01 ~]# systemctl start kibana
[root@centos01 ~]# systemctl enable kibana
[root@centos01 ~]#netstat -anptu | grep 5601

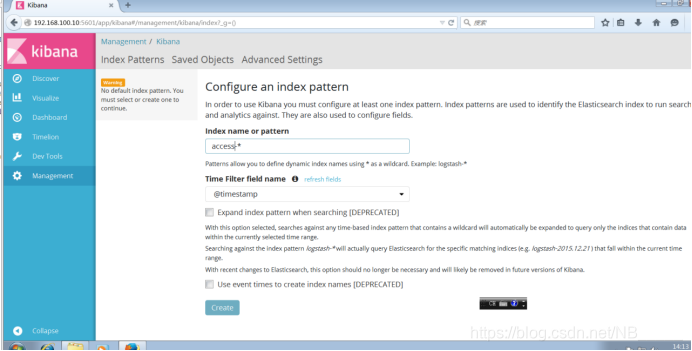
使用火狐浏览器访问192.168.100.10:5601
修改名字

、


 被折叠的 条评论
为什么被折叠?
被折叠的 条评论
为什么被折叠?
 到【灌水乐园】发言


