


**第三篇**
接下来我们在之前创立好的gson包下建立6个实体类分别为:AQI,Basic,Forecast,Now,Suggestion,Weather如下:
为了解析GSON返回来的数据

AQI代码为:
public class AQI {
    public AQICity city;
    public class AQICity
    {
        public String aqi;//空气质量指数
        public String pm25;//pm25指数
    }
}
Basic代码为:
//JSON格式中的一些字段不太适合直接作为JAVA字段来命名,
//所以使用@SerializedName注解让JSON字段和java字段之间建立映射关系
public class Basic {
    @SerializedName("city")
    public String cityName;//城市名称

    @SerializedName("id")
    public String weatherId;//城市ID
    public Update update;
    public class Update{
        @SerializedName("loc")
        public String updateTime;//更新时的时间
    }
}
Forecast代码为:
public class Forecast {
    public String date;

    @SerializedName("tmp")
    public Temperature temperature;
    @SerializedName("cond")
    public More more;
    public class Temperature
    {
        public String max;
        public String min;
    }
    public class More
    {
        @SerializedName("txt_d")
        public String info;
    }
}
Now代码为:
public class Now {
    @SerializedName("tmp")
    public String temperature;//温度

    @SerializedName("cond")
    public More more;

    public class More
    {
        @SerializedName("txt")
        public String info;//温度的内容
    }
}
Suggestion代码为:
public class Suggestion {
    @SerializedName("comf")
    public Comfort comfort;
    @SerializedName("cw")
    public CarWash carWash;
    public Sport sport;
    public class Comfort
    {
        @SerializedName("txt")
        public String info;
    }
    public class CarWash
    {
        @SerializedName("txt")
        public String info;

    }
    public class Sport
    {
        @SerializedName("txt")
        public String info;
    }
}
Weather代码为:
public class Weather {
    public String status;
    public Basic basic;
    public AQI aqi;
    public Now now;
    public Suggestion suggestion;
    @SerializedName("daily_forecast")
    //由于daily_forecast中包含的是一个数组,索引这里引用了List集合来引用Forecast类
    public List<Forecast> forecastList;
}
实体类创建完成了,接下来我们建立一个WeatherActivity活动
由于要将所有的内容都在此界面显示,所有布局文件里的内容会很多而且复杂,所有我们采用分段形式,然后在activity_weather_activity.xml布局文件内统一添加进来
首先我们先建立一个标题栏title.xml布局文件
代码如下:
其中Button的背景图是我们事先下载好的
<RelativeLayout
    xmlns:android="http://schemas.android.com/apk/res/android"
    android:layout_width="match_parent"
    android:layout_height="?attr/actionBarSize">

    <Button
        android:id="@+id/nav_button"
        android:layout_width="30dp"
        android:layout_height="30dp"
        android:layout_marginLeft="10dp"
        android:layout_alignParentLeft="true"
        android:layout_centerVertical="true"
        android:background="@drawable/home" />
    <TextView
        android:id="@+id/title_city"
        android:layout_width="wrap_content"
        android:layout_height="wrap_content"
        android:layout_centerInParent="true"
        android:textColor="#fff"
        android:textSize="20sp"/>
    <TextView
        android:id="@+id/title_update_time"
        android:layout_width="wrap_content"
        android:layout_height="wrap_content"
        android:layout_marginRight="10dp"
        android:layout_alignParentRight="true"
        android:layout_centerVertical="true"
        android:layout_marginEnd="10dp"
        android:layout_alignParentEnd="true"
        android:textColor="#fff"
        android:textSize="16sp"/>
</RelativeLayout>
然后在新建一个now.xml布局文件
用于显示温度和天气信息
代码如下:
<LinearLayout xmlns:android="http://schemas.android.com/apk/res/android"
    android:orientation="vertical"
    android:layout_width="match_parent"
    android:layout_height="wrap_content"
    android:layout_margin="15dp">

    <TextView
        android:id="@+id/degree_text"
        android:layout_width="wrap_content"
        android:layout_height="wrap_content"
        android:layout_gravity="end"
        android:textColor="#fff"
        android:textSize="60sp"  />

    <TextView
        android:id="@+id/weather_info_text"
        android:layout_width="wrap_content"
        android:layout_height="wrap_content"
        android:layout_gravity="end"
        android:textColor="#fff"
        android:textSize="20sp" />
</LinearLayout>
建立一个forecast.xml布局文件
用来显示未来几天的天气情况
代码如下:
<LinearLayout xmlns:android="http://schemas.android.com/apk/res/android"
    android:orientation="vertical" android:layout_width="match_parent"
    android:layout_height="wrap_content"
    android:layout_margin="15dp"
    android:background="#8000">
    <TextView
        android:layout_width="wrap_content"
        android:layout_height="wrap_content"
        android:layout_marginLeft="15dp"
        android:layout_marginTop="15dp"
        android:text="预报"
        android:textColor="#fff"
        android:textSize="20sp"/>
    <LinearLayout
        android:id="@+id/forecast_layout"
        android:orientation="vertical"
        android:layout_width="match_parent"
        android:layout_height="wrap_content">
    </LinearLayout>
</LinearLayout>
建立一个forecast_item.xml布局文件
用来显示未来几天的天气情况的子布局文件
未来几天气信息的子项布局:
天气预报日期
天气概况
当天最高温度
当天最低温度
代码如下:
<LinearLayout xmlns:android="http://schemas.android.com/apk/res/android"
    android:layout_width="match_parent"
    android:layout_height="wrap_content"
    android:layout_margin="15dp">

    <TextView
        android:id="@+id/date_text"
        android:layout_width="0dp"
        android:layout_height="wrap_content"
        android:layout_gravity="center_vertical"
        android:layout_weight="2"
        android:textColor="#fff"/>

    <TextView
        android:id="@+id/info_text"
        android:layout_width="0dp"
        android:layout_height="wrap_content"
        android:layout_gravity="center_vertical"
        android:layout_weight="1"
        android:gravity="center"
        android:textColor="#fff"/>
    <TextView
        android:id="@+id/max_text"
        android:layout_width="0dp"
        android:layout_height="wrap_content"
        android:layout_gravity="center"
        android:layout_weight="1"
        android:gravity="end"
        android:textColor="#fff"/>
    <TextView
        android:id="@+id/min_text"
        android:layout_width="0dp"
        android:layout_height="wrap_content"
        android:layout_gravity="center"
        android:layout_weight="1"
        android:gravity="end"
        android:textColor="#fff"/>
</LinearLayout>
建立一个aqi.xml布局文件
用于显示空气质量指数
代码如下:
<LinearLayout xmlns:android="http://schemas.android.com/apk/res/android"
    android:orientation="vertical" android:layout_width="match_parent"
    android:layout_height="wrap_content"
    android:layout_margin="15dp"
    android:background="#8000">
    <TextView
        android:layout_width="wrap_content"
        android:layout_height="wrap_content"
        android:layout_marginLeft="15dp"
        android:layout_marginTop="15dp"
        android:layout_marginStart="15dp"
        android:text="空气质量"
        android:textColor="#fff"
        android:textSize="20sp"/>
    <LinearLayout
        android:layout_width="match_parent"
        android:layout_height="wrap_content"
        android:layout_margin="15dp"
        android:baselineAligned="false">
        <RelativeLayout
            android:layout_width="0dp"
            android:layout_height="match_parent"
            android:layout_weight="1">
            <LinearLayout
                android:orientation="vertical"
                android:layout_width="match_parent"
                android:layout_height="wrap_content"
                android:layout_centerInParent="true">
                <TextView
                    android:id="@+id/aqi_text"
                    android:layout_width="wrap_content"
                    android:layout_height="wrap_content"
                    android:layout_gravity="center"
                    android:textColor="#fff"
                    android:textSize="40sp" />
                <TextView
                    android:layout_width="wrap_content"
                    android:layout_height="wrap_content"
                    android:layout_gravity="center"
                    android:text="AQI指数"
                    android:textColor="#fff"/>
            </LinearLayout>
        </RelativeLayout>
        <RelativeLayout
            android:layout_width="0dp"
            android:layout_height="match_parent"
            android:layout_weight="1">
            <LinearLayout
                android:orientation="vertical"
                android:layout_width="match_parent"
                android:layout_height="wrap_content"
                android:layout_centerInParent="true">
                <TextView
                    android:id="@+id/pm25_text"
                    android:layout_width="wrap_content"
                    android:layout_height="wrap_content"
                    android:layout_gravity="center"
                    android:textColor="#fff"
                    android:textSize="40sp"/>
                <TextView
                    android:layout_width="wrap_content"
                    android:layout_height="wrap_content"
                    android:layout_gravity="center"
                    android:text="PM2.5指数"
                    android:textColor="#fff"/>
            </LinearLayout>
        </RelativeLayout>
    </LinearLayout>
</LinearLayout>
建立一个suggestion.xml布局文件
用于显示官方建议,例如洗车,运动等
代码如下:
<LinearLayout xmlns:android="http://schemas.android.com/apk/res/android"
    android:orientation="vertical"
    android:layout_width="match_parent"
    android:layout_height="wrap_content"
    android:layout_margin="15dp"
    android:background="#8000">

    <TextView
        android:layout_width="wrap_content"
        android:layout_height="wrap_content"
        android:layout_marginLeft="15dp"
        android:layout_marginTop="15dp"
        android:text="生活建议"
        android:textColor="#fff"
        android:textSize="20sp"/>

    <TextView
        android:id="@+id/comfort_text"
        android:layout_width="wrap_content"
        android:layout_height="wrap_content"
        android:layout_margin="15dp"
        android:textColor="#fff"/>

    <TextView
        android:id="@+id/car_wash_text"
        android:layout_width="wrap_content"
        android:layout_height="wrap_content"
        android:layout_margin="15dp"
        android:textColor="#ffff"/>

    <TextView
        android:id="@+id/sport_text"
        android:layout_width="wrap_content"
        android:layout_height="wrap_content"
        android:layout_margin="15dp"
        android:textColor="#fff"/>

</LinearLayout>
然后呢我们在activity_weather_activity.xml布局文件中将他们添加进来
DrawerLayout 滑动菜单
SwipeRefreshLayout 下拉刷新
android:fitsSystemWindows=“true” 为系统状态留出空间,不然会和自己的APP头部挤在一起
代码如下:
<FrameLayout
    xmlns:android="http://schemas.android.com/apk/res/android"
    android:layout_width="match_parent"
    android:layout_height="match_parent"
    android:background="@color/colorPrimary">
    <ImageView
        android:id="@+id/bing_pic_img"
        android:layout_width="match_parent"
        android:layout_height="match_parent"
        android:scaleType="centerCrop" />
    <androidx.drawerlayout.widget.DrawerLayout
        android:id="@+id/drawer_layout"
        android:layout_width="match_parent"
        android:layout_height="match_parent">
        <androidx.swiperefreshlayout.widget.SwipeRefreshLayout
            android:id="@+id/swipe_refresh"
            android:layout_width="match_parent"
            android:layout_height="match_parent">
            <ScrollView
                android:id="@+id/weather_layout"
                android:layout_width="match_parent"
                android:layout_height="match_parent"
                android:scrollbars="none"
                android:overScrollMode="never">
                <LinearLayout
                    android:orientation="vertical"
                    android:layout_width="match_parent"
                    android:layout_height="wrap_content"
                    android:fitsSystemWindows="true">
                    <!--引入布局-->
                    <include layout="@layout/title"/>
                    <include layout="@layout/now"/>
                    <include layout="@layout/forecast"/>
                    <include layout="@layout/aqi"/>
                    <include layout="@layout/suggestion"/>
                </LinearLayout>
            </ScrollView>
        </androidx.swiperefreshlayout.widget.SwipeRefreshLayout>
        <fragment
            android:id="@+id/choose_area_fragment"
            android:name="com.example.weather2.ChooseAreaFragment"
            android:layout_width="match_parent"
            android:layout_height="match_parent"
            android:layout_gravity="start"/>
    </androidx.drawerlayout.widget.DrawerLayout>
</FrameLayout>
然后我们util包下建立一个名为Utility的类,用于解析GSON数据
代码如下:
public class Utility {
    /**
     * 解析和处理服务器返回的省级数据
     */
    public static boolean handleProvinceResponse(String response)
    {
        if(!TextUtils.isEmpty(response))
        {
            try
            {
                JSONArray allProvinces = new JSONArray(response);
                for (int i = 0; i < allProvinces.length(); i++)
                {
                    JSONObject provinceObject = allProvinces.getJSONObject(i);
                    Province province = new Province();
                    province.setProvinceName(provinceObject.getString("name"));
                    province.setProvinceCode(provinceObject.getInt("id"));
                    //调用save()方法将数据存储到数据库中
                    province.save();
                }
                return true;
            }catch (JSONException e)
            {
                e.printStackTrace();
            }
        }
        return false;
    }
    /**
     * 解析和处理服务器返回的市级数据
     */
    public static boolean handleCityResponse(String response, int provinceId)
    {
        if(!TextUtils.isEmpty(response))
        {
            try {
                JSONArray allCities = new JSONArray(response);
                for (int i = 0; i < allCities.length(); i++)
                {
                    JSONObject cityObject = allCities.getJSONObject(i);
                    City city = new City();
                    city.setCityName(cityObject.getString("name"));
                    city.setCityCode(cityObject.getInt("id"));
                    city.setProvinceId(provinceId);
                    //调用save()方法将数据存储到数据库中
                    city.save();
                }
                return true;
            }catch (JSONException e)
            {
                e.printStackTrace();
            }

        }
        return false;
    }
    /**
     * 解析和处理服务器返回的县级数据
     */
    public static boolean handleCountyResponse(String response, int cityId)
    {
        if(!TextUtils.isEmpty(response))
        {
            try {
                JSONArray allCounties = new JSONArray(response);
                for (int i = 0; i < allCounties.length(); i++)
                {
                    JSONObject countyObject = allCounties.getJSONObject(i);
                    County county = new County();
                    county.setCountyName(countyObject.getString("name"));
                    county.setWeatherId(countyObject.getString("weather_id"));
                    county.setCityId(cityId);
                    //调用save()方法将数据存储到数据库中
                    county.save();
                }
                return true;
            }catch (JSONException e)
            {
                e.printStackTrace();
            }

        }
        return false;
    }

    /**
     * 将返回的JSON数据解析成Weather实体类
     */
    public static Weather handleWeatherResponse(String response)
    {
        try {
            JSONObject jsonObject = new JSONObject(response);
            JSONArray jsonArray = jsonObject.getJSONArray("HeWeather");
            String weatherContent = jsonArray.getJSONObject(0).toString();
            return new Gson().fromJson(weatherContent,Weather.class);
        }catch (Exception e)
        {
            e.printStackTrace();
        }
        return null;
    }
}
然后我们编写WeatherActivity里的代码,把信息显示出来
代码如下:
public class WeatherActivity extends AppCompatActivity {
    public DrawerLayout drawerLayout;
    private Button navButton;

    public SwipeRefreshLayout swipeRefresh;
    private String mWeatherId;

    private ScrollView weatherLayout;
    private TextView titleCity;
    private TextView titleUpdateTime;
    private TextView degreeText;
    private TextView weatherInfoText;
    private LinearLayout forecastLayout;
    private TextView aqiText;
    private TextView pm25Text;
    private TextView comfortText;
    private TextView carWashText;
    private TextView sportText;

    private ImageView bingPicImg;

    @Override
    protected void onCreate(Bundle savedInstanceState) {
        super.onCreate(savedInstanceState);
        setContentView(R.layout.activity_weather_activty);

        //实现背景图和手机状态栏融合在一起,这个功能在Android5.0及以上的系统才支持,所以我们要做一个版本号的判断
        if(Build.VERSION.SDK_INT >= 21)
        {
            //拿到当前活动的DecorView
            View decorView = getWindow().getDecorView();
            //调用它的setSystemUiVisibility()方法来改变系统UI的显示。
            //这里传入View.SYSTEM_UI_FLAG_LAYOUT_FULLSCREEN和View.SYSTEM_UI_FLAG_LAYOUT_STABLE就表示活动的布局会显示在状态栏上
            decorView.setSystemUiVisibility(View.SYSTEM_UI_FLAG_LAYOUT_FULLSCREEN | View.SYSTEM_UI_FLAG_LAYOUT_STABLE);
            //调用setStatusBarColor()方法将状态栏设置为透明色。
            getWindow().setStatusBarColor(Color.TRANSPARENT);
        }

        //初始化各控件
        bingPicImg = (ImageView)findViewById(R.id.bing_pic_img);
        weatherLayout = (ScrollView)findViewById(R.id.weather_layout);
        titleCity = (TextView)findViewById(R.id.title_city);
        titleUpdateTime = (TextView)findViewById(R.id.title_update_time);
        degreeText = (TextView)findViewById(R.id.degree_text);
        weatherInfoText = (TextView)findViewById(R.id.weather_info_text);
        forecastLayout = (LinearLayout) findViewById(R.id.forecast_layout);
        aqiText = (TextView)findViewById(R.id.aqi_text);
        pm25Text = (TextView)findViewById(R.id.pm25_text);
        comfortText = (TextView)findViewById(R.id.comfort_text);
        carWashText = (TextView)findViewById(R.id.car_wash_text);
        sportText = (TextView)findViewById(R.id.sport_text);

        swipeRefresh = (SwipeRefreshLayout)findViewById(R.id.swipe_refresh);
        swipeRefresh.setColorSchemeResources(R.color.colorPrimary);

        //滑动菜单功能
        drawerLayout = (DrawerLayout)findViewById(R.id.drawer_layout);
        navButton = (Button)findViewById(R.id.nav_button);

        SharedPreferences prefs = PreferenceManager.getDefaultSharedPreferences(this);
        String weatherString = prefs.getString("weather",null);
        if(weatherString != null)
        {
            //有缓存时直接解析天气数据
            Weather weather = Utility.handleWeatherResponse(weatherString);
            showWeatherInfo(weather);
            mWeatherId = weather.basic.weatherId;
        }else
        {
            //无缓存时去服务器查询天气
            mWeatherId = getIntent().getStringExtra("weather_id");
            // String weatherId = getIntent().getStringExtra("weather_id");
            weatherLayout.setVisibility(View.INVISIBLE);
            //requestWeather(weatherId);
            requestWeather(mWeatherId);
        }
        //下拉刷新
        swipeRefresh.setOnRefreshListener(new SwipeRefreshLayout.OnRefreshListener()
        {
            @Override
            public void onRefresh()
            {
                requestWeather(mWeatherId);
            }
        });
        //按钮点击事件滑动菜单
        navButton.setOnClickListener(new View.OnClickListener() {
            @Override
            public void onClick(View view) {
                //打开滑动菜单
                drawerLayout.openDrawer(GravityCompat.START);
            }
        });
       String bingPic = prefs.getString("bing_pic",null);
        if(bingPic != null)
        {
            Glide.with(this).load(bingPic).into(bingPicImg);
        }
        else
        {
            loadBingPic();
        }
    }
    /**
     * 根据天气id请求城市天气信息
     */
    public void requestWeather(final String weatherId)
    {
        String weatherUrl = "http://guolin.tech/api/weather?cityid=" + weatherId + "&key=6f6b5169b08547f483d662d4e8c5d591";
        HttpUtil.sendOkHttpRequest(weatherUrl, new Callback() {
            @Override
            public void onFailure(@NotNull Call call, @NotNull IOException e) {
                e.printStackTrace();
                runOnUiThread(new Runnable() {
                    @Override
                    public void run() {
                        Toast.makeText(WeatherActivity.this,"获取天气信息失败hahaha",Toast.LENGTH_SHORT).show();
                        swipeRefresh.setRefreshing(false);
                    }
                });
            }
            @Override
            public void onResponse(@NotNull Call call, @NotNull Response response) throws IOException {
                final String responseText = response.body().string();
                final Weather weather = Utility.handleWeatherResponse(responseText);
                runOnUiThread(new Runnable() {
                    @Override
                    public void run() {
                        if(weather != null && "ok".equals(weather.status))
                        {
                            SharedPreferences.Editor editor = PreferenceManager.getDefaultSharedPreferences(WeatherActivity.this).edit();
                            editor.putString("weather",responseText);
                            editor.apply();
                            mWeatherId = weather.basic.weatherId;
                            showWeatherInfo(weather);
                        }
                        else
                        {
                            Toast.makeText(WeatherActivity.this,"获取天气信息失败nonono",Toast.LENGTH_SHORT).show();
                        }
                        swipeRefresh.setRefreshing(false);
                    }
                });
            }
        });
        loadBingPic();
    }
    /**
     * 加载必应每日一图
     */
    private void loadBingPic()
    {
        String requestBingPic = "http://guolin.tech/api/bing_pic";
        HttpUtil.sendOkHttpRequest(requestBingPic, new Callback() {
            @Override
            public void onFailure(@NotNull Call call, @NotNull IOException e) {
                e.printStackTrace();
            }

            @Override
            public void onResponse(@NotNull Call call, @NotNull Response response) throws IOException {
                final String bingPic = response.body().string();
                SharedPreferences.Editor editor = PreferenceManager.getDefaultSharedPreferences(WeatherActivity.this).edit();
                editor.putString("bing_pic",bingPic);
                editor.apply();
                runOnUiThread(new Runnable() {
                    @Override
                    public void run() {
                        Glide.with(WeatherActivity.this).load(bingPic).into(bingPicImg);
                    }
                });
            }
        });
    }


    /**
     * 处理并展示Weather实体类的数据
     */
    private void showWeatherInfo(Weather weather)
    {
        String cityName = weather.basic.cityName;
        String updateTime = weather.basic.update.updateTime.split(" ")[1];
        String degree = weather.now.temperature + "℃";
        String weatherInfo = weather.now.more.info;
        titleCity.setText(cityName);
        titleUpdateTime.setText(updateTime);
        degreeText.setText(degree);
        weatherInfoText.setText(weatherInfo);
        forecastLayout.removeAllViews();

        for (Forecast forecast : weather.forecastList)
        {
            View view = LayoutInflater.from(this).inflate(R.layout.forecast_item,forecastLayout,false);
            TextView dateText = (TextView)view.findViewById(R.id.date_text);
            TextView infoText = (TextView)view.findViewById(R.id.info_text);
            TextView maxText = (TextView)view.findViewById(R.id.max_text);
            TextView minText = (TextView)view.findViewById(R.id.min_text);

            dateText.setText(forecast.date);
            infoText.setText(forecast.more.info);
            maxText.setText(forecast.temperature.max);
            minText.setText(forecast.temperature.min);
            forecastLayout.addView(view);
        }
        if(weather.aqi != null)
        {
            aqiText.setText(weather.aqi.city.aqi);
            pm25Text.setText(weather.aqi.city.pm25);
        }
        String comfort = "舒适度:" + weather.suggestion.comfort.info;
        String carWash = "洗车指数:" + weather.suggestion.carWash.info;
        String sport = "运动建议:" + weather.suggestion.sport.info;
        comfortText.setText(comfort);
        carWashText.setText(carWash);
        sportText.setText(sport);
        weatherLayout.setVisibility(View.VISIBLE);
        Intent intent = new Intent(this, AutoUpdateService.class);
        startService(intent);
    }
}
最后我们在MainActivity里加入一个判断缓存数据
代码如下:
public class MainActivity extends AppCompatActivity {

    @Override
    protected void onCreate(Bundle savedInstanceState) {
        super.onCreate(savedInstanceState);
        setContentView(R.layout.activity_main);

        SharedPreferences prefs = PreferenceManager.getDefaultSharedPreferences(this);
        if(prefs.getString("weather",null) != null)
        {
            Intent intent = new Intent(this, WeatherActivity.class);
            startActivity(intent);
            finish();
        }
    }
}
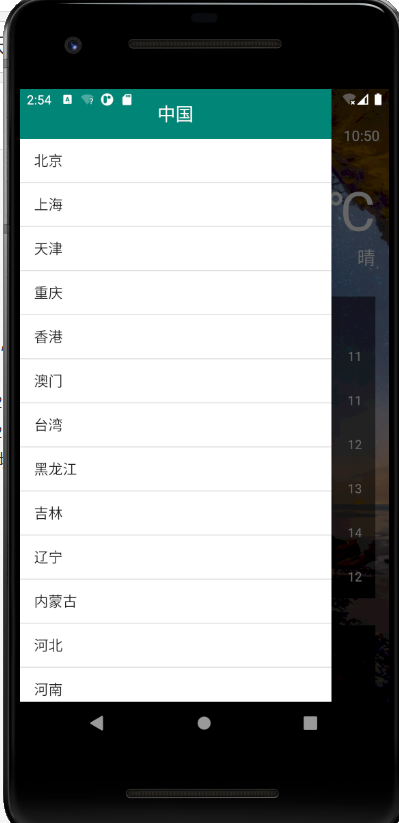
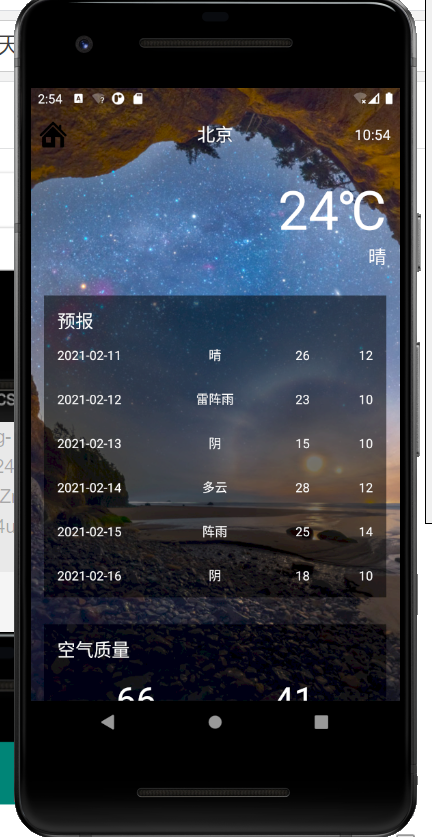
到这里天气预报就算你告一段落了,下面我们看一下效果:
选定城市后就可以看见界面了
背景图采用必应的接口,所有每天会有不同的背景


点击左上角的小房子图标可以切换城市


 1302
1302

 被折叠的 条评论
为什么被折叠?
被折叠的 条评论
为什么被折叠?
 到【灌水乐园】发言


