Android VR Player(全景视频播放器) [4]:侧滑菜单的实现
Navigation Drawer介绍
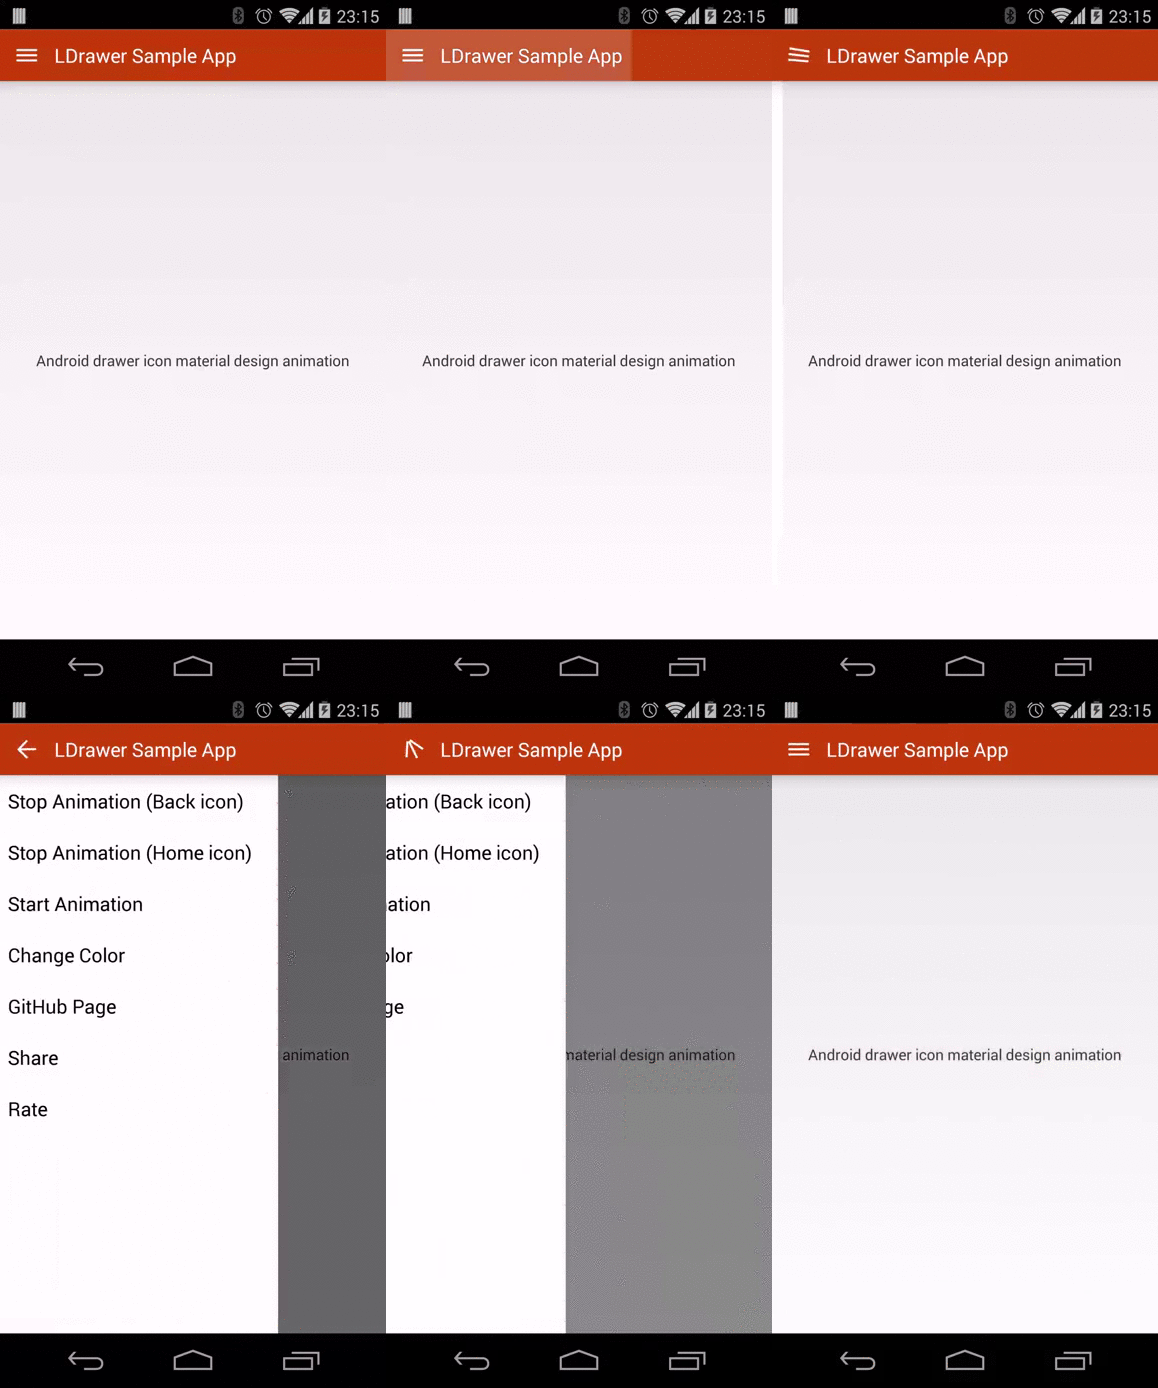
本次要分享的仍然是Material Design规范中的一个控件,Navigation Drawer,很多的APP都用到这个控件,效果如下:

(图片来源:http://www.jcodecraeer.com/a/anzhuokaifa/androidkaifa/2015/0303/2522.html)
使用这个控件来完成菜单栏设计一方面可以提高界面空间的利用率(因为侧滑菜单不使用时不会占用界面),另外一方面,它也可以提升交互体验。
本片博客主要参考:使用Toolbar + DrawerLayout快速实现高大上菜单侧滑
侧滑菜单的实现
要实现上面图中侧滑菜单效果,需要Toolbar和DrawerLayout,这两个控件均需要appcompat-v7的支持,不过这在Android Studio中已经默认添加了。不过还是最好检查一下,在app的build.gradle的 dependencies{}闭包(看到很多教程和Android书中都这样写,其实就是指dependencies的花括号包含的范围)中,是否有:
compile 'com.android.support:appcompat-v7:25.3.1'没有的话,添加该依赖,或者升级你的Android Studio版本。
添加toolbar布局
toolbar就是界面上方的工具栏,当我们点击“三”这个地方时,就会弹出菜单。
<?xml version="1.0" encoding="utf-8"?>
<android.support.v7.widget.Toolbar xmlns:android="http://schemas.android.com/apk/res/android"
    xmlns:app="http://schemas.android.com/apk/res-auto"
    android:id="@+id/tl_custom"
    android:layout_width="match_parent"
    android:layout_height="wrap_content"
    android:background="?attr/colorPrimary"
    android:minHeight="?attr/actionBarSize"
    android:popupTheme="@style/ThemeOverlay.AppCompat.Light"
    app:theme="@style/ThemeOverlay.AppCompat.ActionBar">
</android.support.v7.widget.Toolbar>
(custom_toolbar.xml代码片段)
为了提高代码的重用性,我们为toolbar单独创建了布局文件,之后在使用include在主布局文件中去引用它,也可以直接把它添加到主布局文件中。
添加DrawerLayout布局
接着我们添加DrawerLayout的布局,需要注意的是,DrawerLayout必须作为根布局。DrawerLayout有两个孩子,一个是我们的主页面(也就是当菜单隐藏时需要展示的那个页面)。需要注意的是,主页面布局必须为DrawerLayout的第一个孩子,不难理解,因为侧滑菜单必须在主界面的上方,按照XML的加载顺序,我们的布局必须这样写。还有一点需要注意的是, navigation drawer的 LinearLayout必须指定layout_gravity,为了能有从左到右这样的滑动菜单效果,我们将layout gravity的值指定为“start”。
<?xml version="1.0" encoding="utf-8"?>
<android.support.v4.widget.DrawerLayout xmlns:android="http://schemas.android.com/apk/res/android"
    android:id="@+id/dl_left"
    android:layout_width="match_parent"
    android:layout_height="match_parent">

    <!-- add your main content view here-->
  <FrameLayout
        android:id="@+id/content_frame"
        android:layout_width="match_parent"
        android:layout_height="match_parent" />
    <!-- The navigation drawer -->
    <LinearLayout
        android:layout_width="match_parent"
        android:layout_height="match_parent"
        android:background="#fff"
        android:layout_gravity="start">
        <ListView
            android:id="@+id/lv_left_menu"
            android:layout_width="match_parent"
            android:layout_height="match_parent"
            android:divider="@null"
            android:text="DrawerLayout" />
    </LinearLayout>
</android.support.v4.widget.DrawerLayout>
(custom_drawerlayout.xml代码片段)
修改主布局
将上面的两个布局custom toolbar和custom drawerlayout添加到主布局中
<LinearLayout xmlns:android="http://schemas.android.com/apk/res/android"
        xmlns:tools="http://schemas.android.com/tools"
        android:layout_width="match_parent"
        android:layout_height="match_parent"
        android:orientation="vertical"
        tools:context="com.example.renkangchen.testdrawerlayout.MainActivity">
        <!--Toolbar-->
        <include layout="@layout/custom_toolbar" />
        <!--DrawerLayout-->
        <include layout="@layout/custom_drawerlayout" />
</LinearLayout>
include layout标签来引入相应的布局文件,这里还需注意一点是,默认的项目是有actionBar的,所以我们需要在res/values/styles中进行修改,将主题改为NoActionBar样式。
<style name="AppTheme" parent="Theme.AppCompat.Light.NoActionBar">
完成布局,下一步就可以在Activity中完成相关的处理了。
Activity中的处理
代码很简单,这里只列出核心代码:
setSupportActionBar(toolbar);
getSupportActionBar().setHomeButtonEnabled(true);
getSupportActionBar().setDisplayHomeAsUpEnabled(true);
mDrawerLayout.setDrawerShadow(R.drawable.drawer_shadow, GravityCompat.START);
mDrawerToggle = new ActionBarDrawerToggle(this, mDrawerLayout, toolbar, R.string.open, R.string.close) {
            @Override
            public void onDrawerOpened(View drawerView) {
                super.onDrawerOpened(drawerView);
            }
            @Override
            public void onDrawerClosed(View drawerView) {
                super.onDrawerClosed(drawerView);
            }
        };
mDrawerToggle.syncState();
mDrawerLayout.addDrawerListener(mDrawerToggle);
toolbar,drawerlayout的使用,就像一般的控件一样,先声明,再绑定。setDrawerShadow用来给侧滑菜单添加侧边阴影。需要注意的是这里的mDrawerToggle,它用来做切换,就是用来实现“三”和“<-”这个纽扣的切换效果的。ActionBarDrawerToggle构造方法中,R.string.open指定滑动菜单展示时toolbar的标题,R.string.close同理,需要在res/values/strings中添加相应的值,比如:
<resources>
    <string name="app_name">TestDrawerLayout</string>
    <string name="open">TestDrawerLayout</string>
    <string name="close">TestDrawerLayout</string>
</resources>
最后需要注意的是setDrawerListener方法已近废弃,需要使用addDrawerListener来代替。到这里,还不算一个完整的侧滑菜单,因为还未添加菜单的监听,不过,实际上,可以将侧滑菜单理解为一个侧滑的页面,我们在其中添加的一个Listview来放菜单,也可以用NavigationView来实现菜单,然后再加上相应的菜单项监听即可。
如果你用Listview来完成菜单,那么你的监听类可以参考:
private class DrawerItemClickListener implements ListView.OnItemClickListener {
    @Override
    public void onItemClick(AdapterView<?> parent, View view, int position, long id) {
        selectItem(position);
    }
}

/** Swaps fragments in the main content view */
private void selectItem(int position) {
    // Create a new fragment and specify the planet to show based on position
    Fragment fragment = new PlanetFragment();
    Bundle args = new Bundle();
    args.putInt(PlanetFragment.ARG_PLANET_NUMBER, position);
    fragment.setArguments(args);

    // Insert the fragment by replacing any existing fragment
    FragmentManager fragmentManager = getFragmentManager();
    fragmentManager.beginTransaction()
                   .replace(R.id.content_frame, fragment)
                   .commit();

    // Highlight the selected item, update the title, and close the drawer
    mDrawerList.setItemChecked(position, true);
    setTitle(mPlanetTitles[position]);
    mDrawerLayout.closeDrawer(mDrawerList);
}
(来自https://developer.android.com/training/implementing-navigation/nav-drawer.html的代码片段)
如果你用NavigationView来实现菜单,你可以参考下面的代码来实现菜单项的选中监听:
 mNavigationview.setNavigationItemSelectedListener(new NavigationView.OnNavigationItemSelectedListener() {
            @Override
            public boolean onNavigationItemSelected(MenuItem item) {
                //deal your navigation menu item affairs here
                switch(item.getItemId()){
                    case R.id.A:{
                    }break;
                    case R.id.B:{
                    }break;
                    case R.id.C:{
                    }break;
                    default:
                        break;
                }
                return true;
            }
        });
调试与结果
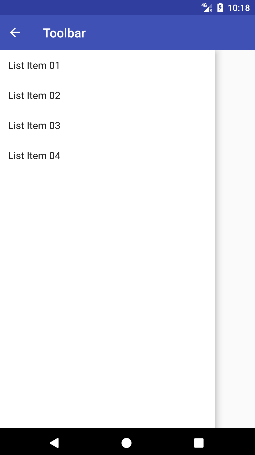
最后调试运行,结果如下
工程源码
链接: https://pan.baidu.com/s/1i5BnxHF 密码: rknh
Reference
Creating a Navigation Drawer
使用Toolbar + DrawerLayout快速实现高大上菜单侧滑


 本文详细介绍了如何在Android应用中实现侧滑菜单功能,通过使用Toolbar和DrawerLayout控件,并结合ActionBarDrawerToggle组件,实现了菜单的开合动画效果及菜单项的点击事件。


 1705
1705

 被折叠的 条评论
为什么被折叠?


