


python语言中如何构建图像超分辨率重建系统,并支持SRResNet和SRGAN算法,且使用PyQt5进行界面设计。
文章目录
以下文字及代码仅供参考。
1
构建一个图像超分辨率重建系统,支持SRResNet和SRGAN算法,并使用PyQt5进行界面设计。以下是详细的步骤和代码示例。
1. 安装依赖库
确保安装了以下库:
- PyQt5
- OpenCV
- TensorFlow/Keras (或其他深度学习框架)
- Numpy
pip install PyQt5 opencv-python tensorflow numpy
2. 创建主窗口
main_window.py
import sys
from PyQt5.QtWidgets import QApplication, QMainWindow, QWidget, QVBoxLayout, QPushButton, QLabel, QFileDialog, QMessageBox
from PyQt5.QtGui import QPixmap, QImage
from PyQt5.QtCore import Qt
import cv2
import numpy as np
import tensorflow as tf
class MainWindow(QMainWindow):
def __init__(self):
super().__init__()
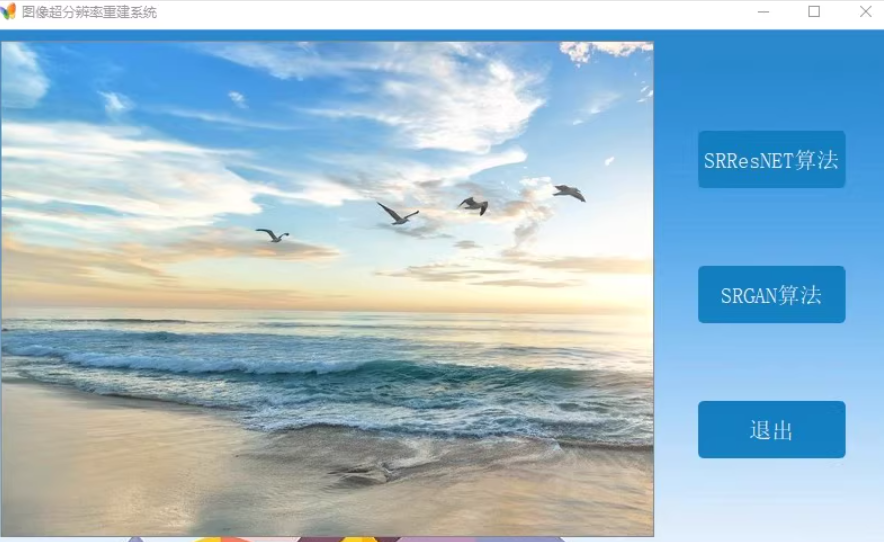
self.setWindowTitle("图像超分辨率重建系统")
self.setGeometry(100, 100, 800, 600)
self.initUI()
def initUI(self):
self.central_widget = QWidget()
self.setCentralWidget(self.central_widget)
self.layout = QVBoxLayout()
self.original_image_label = QLabel()
self.reconstructed_image_label = QLabel()
self.load_button = QPushButton("载入图像", self)
self.load_button.clicked.connect(self.load_image)
self.srresnet_button = QPushButton("SRResNET算法", self)
self.srresnet_button.clicked.connect(self.apply_srresnet)
self.srgan_button = QPushButton("SRGAN算法", self)
self.srgan_button.clicked.connect(self.apply_srgan)
self.exit_button = QPushButton("退出", self)
self.exit_button.clicked.connect(self.close)
self.layout.addWidget(self.load_button)
self.layout.addWidget(self.srresnet_button)
self.layout.addWidget(self.srgan_button)
self.layout.addWidget(self.exit_button)
self.layout.addWidget(self.original_image_label)
self.layout.addWidget(self.reconstructed_image_label)
self.central_widget.setLayout(self.layout)
def load_image(self):
options = QFileDialog.Options()
file_name, _ = QFileDialog.getOpenFileName(self, "Select Image File", "", "Image Files (*.jpg *.png *.bmp)", options=options)
if file_name:
self.image_path = file_name
self.update_images()
def update_images(self):
image = cv2.imread(self.image_path)
image = cv2.cvtColor(image, cv2.COLOR_BGR2RGB)
qimage = QImage(image.data, image.shape[1], image.shape[0], QImage.Format_RGB888)
pixmap = QPixmap.fromImage(qimage)
self.original_image_label.setPixmap(pixmap)
def apply_srresnet(self):
# Placeholder for SRResNet logic
pass
def apply_srgan(self):
# Placeholder for SRGAN logic
pass
if __name__ == "__main__":
app = QApplication(sys.argv)
main_window = MainWindow()
main_window.show()
sys.exit(app.exec_())
3. 实现SRResNet逻辑
srresnet.py
import tensorflow as tf
from tensorflow.keras.layers import Input, Conv2D, LeakyReLU, UpSampling2D, Concatenate
from tensorflow.keras.models import Model

def build_srresnet(input_shape=(32, 32, 3)):
    inputs = Input(shape=input_shape)

    x = Conv2D(64, (9, 9), padding='same')(inputs)
    x = LeakyReLU(alpha=0.2)(x)

    # Residual blocks
    for _ in range(16):
        residual = Conv2D(64, (3, 3), padding='same')(x)
        residual = LeakyReLU(alpha=0.2)(residual)
        residual = Conv2D(64, (3, 3), padding='same')(residual)
        residual = LeakyReLU(alpha=0.2)(residual)
        x = tf.keras.layers.Add()([x, residual])

    x = Conv2D(64, (3, 3), padding='same')(x)
    x = LeakyReLU(alpha=0.2)(x)

    x = UpSampling2D(size=(2, 2))(x)
    x = Conv2D(64, (3, 3), padding='same')(x)
    x = LeakyReLU(alpha=0.2)(x)

    x = UpSampling2D(size=(2, 2))(x)
    x = Conv2D(64, (3, 3), padding='same')(x)
    x = LeakyReLU(alpha=0.2)(x)

    outputs = Conv2D(3, (9, 9), padding='same')(x)

    model = Model(inputs=inputs, outputs=outputs)
    return model

def apply_srresnet(image_path):
    model = build_srresnet()
    model.load_weights('path_to_pretrained_weights.h5')

    image = cv2.imread(image_path)
    image = cv2.cvtColor(image, cv2.COLOR_BGR2RGB)
    image = cv2.resize(image, (32, 32))
    image = np.expand_dims(image, axis=0)

    reconstructed_image = model.predict(image)
    reconstructed_image = np.squeeze(reconstructed_image)
    reconstructed_image = cv2.cvtColor(reconstructed_image, cv2.COLOR_RGB2BGR)

    return reconstructed_image
4. 实现SRGAN逻辑
srgan.py
import tensorflow as tf
from tensorflow.keras.layers import Input, Conv2D, LeakyReLU, UpSampling2D, Concatenate
from tensorflow.keras.models import Model

def build_generator(input_shape=(32, 32, 3)):
    inputs = Input(shape=input_shape)

    x = Conv2D(64, (9, 9), padding='same')(inputs)
    x = LeakyReLU(alpha=0.2)(x)

    # Residual blocks
    for _ in range(16):
        residual = Conv2D(64, (3, 3), padding='same')(x)
        residual = LeakyReLU(alpha=0.2)(residual)
        residual = Conv2D(64, (3, 3), padding='same')(residual)
        residual = LeakyReLU(alpha=0.2)(residual)
        x = tf.keras.layers.Add()([x, residual])

    x = Conv2D(64, (3, 3), padding='same')(x)
    x = LeakyReLU(alpha=0.2)(x)

    x = UpSampling2D(size=(2, 2))(x)
    x = Conv2D(64, (3, 3), padding='same')(x)
    x = LeakyReLU(alpha=0.2)(x)

    x = UpSampling2D(size=(2, 2))(x)
    x = Conv2D(64, (3, 3), padding='same')(x)
    x = LeakyReLU(alpha=0.2)(x)

    outputs = Conv2D(3, (9, 9), padding='same')(x)

    model = Model(inputs=inputs, outputs=outputs)
    return model

def apply_srgan(image_path):
    generator = build_generator()
    generator.load_weights('path_to_pretrained_weights.h5')

    image = cv2.imread(image_path)
    image = cv2.cvtColor(image, cv2.COLOR_BGR2RGB)
    image = cv2.resize(image, (32, 32))
    image = np.expand_dims(image, axis=0)

    reconstructed_image = generator.predict(image)
    reconstructed_image = np.squeeze(reconstructed_image)
    reconstructed_image = cv2.cvtColor(reconstructed_image, cv2.COLOR_RGB2BGR)

    return reconstructed_image
使用Python的PyQt5库。以下是一个详细的代码示例,、
包括界面设计和基本的登录逻辑。
1. 安装依赖库
确保安装了以下库:
- PyQt5
pip install PyQt5
2. 创建登录界面
login_window.py
import sys
from PyQt5.QtWidgets import QApplication, QWidget, QVBoxLayout, QLabel, QLineEdit, QPushButton, QMessageBox
from PyQt5.QtGui import QFont
from PyQt5.QtCore import Qt
class LoginWindow(QWidget):
def __init__(self):
super().__init__()
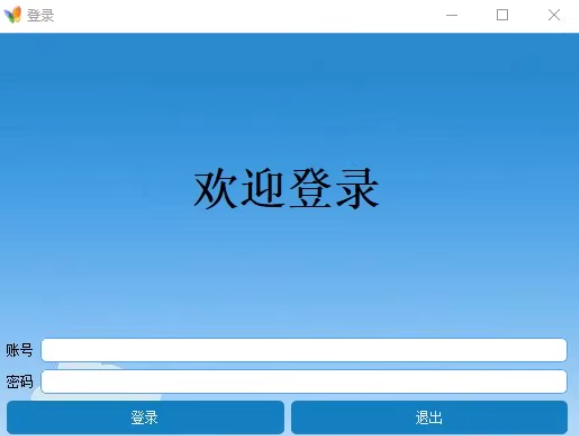
self.setWindowTitle("欢迎登录")
self.setGeometry(100, 100, 300, 200)
self.initUI()
def initUI(self):
self.layout = QVBoxLayout()
# 标题
title_label = QLabel("欢迎登录", self)
title_font = QFont()
title_font.setPointSize(24)
title_label.setFont(title_font)
title_label.setAlignment(Qt.AlignCenter)
self.layout.addWidget(title_label)
# 用户名输入框
self.username_label = QLabel("账号:", self)
self.username_input = QLineEdit(self)
self.layout.addWidget(self.username_label)
self.layout.addWidget(self.username_input)
# 密码输入框
self.password_label = QLabel("密码:", self)
self.password_input = QLineEdit(self)
self.password_input.setEchoMode(QLineEdit.Password)
self.layout.addWidget(self.password_label)
self.layout.addWidget(self.password_input)
# 登录按钮
self.login_button = QPushButton("登录", self)
self.login_button.clicked.connect(self.login)
self.layout.addWidget(self.login_button)
# 退出按钮
self.exit_button = QPushButton("退出", self)
self.exit_button.clicked.connect(self.close)
self.layout.addWidget(self.exit_button)
self.setLayout(self.layout)
def login(self):
username = self.username_input.text()
password = self.password_input.text()
if username == "admin" and password == "password":
QMessageBox.information(self, "登录成功", "欢迎回来!")
self.accept()
else:
QMessageBox.warning(self, "登录失败", "用户名或密码错误")
if __name__ == "__main__":
app = QApplication(sys.argv)
login_window = LoginWindow()
if login_window.exec_() == QDialog.Accepted:
main_window = MainWindow()
main_window.show()
sys.exit(app.exec_())
3. 创建主窗口
main_window.py
import sys
from PyQt5.QtWidgets import QApplication, QMainWindow, QWidget, QVBoxLayout, QPushButton, QLabel, QFileDialog, QMessageBox
from PyQt5.QtGui import QPixmap, QImage
from PyQt5.QtCore import Qt
class MainWindow(QMainWindow):
def __init__(self):
super().__init__()
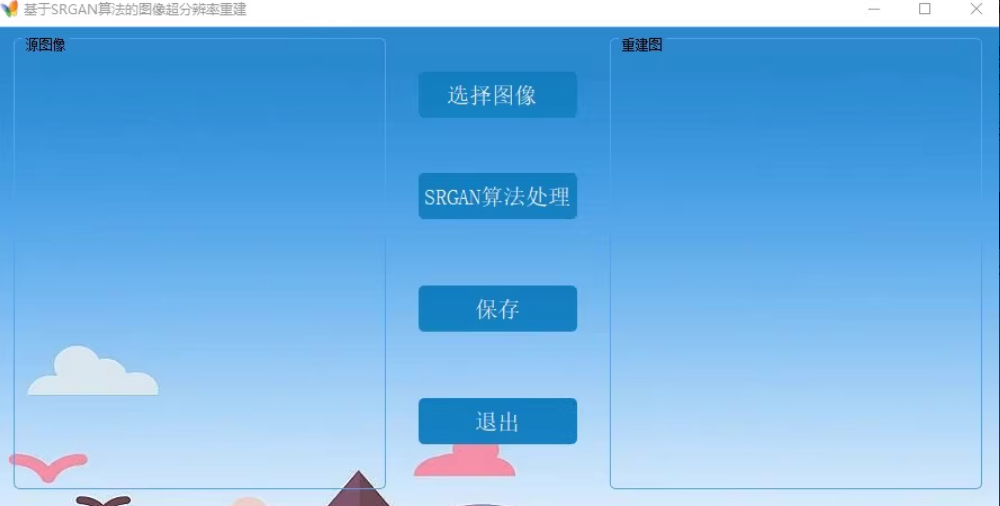
self.setWindowTitle("主窗口")
self.setGeometry(100, 100, 800, 600)
self.initUI()
def initUI(self):
self.central_widget = QWidget()
self.setCentralWidget(self.central_widget)
self.layout = QVBoxLayout()
self.label = QLabel("欢迎来到主窗口!", self)
self.layout.addWidget(self.label)
self.button = QPushButton("点击我", self)
self.button.clicked.connect(self.on_button_click)
self.layout.addWidget(self.button)
self.central_widget.setLayout(self.layout)
def on_button_click(self):
QMessageBox.information(self, "按钮点击", "按钮被点击了!")
if __name__ == "__main__":
app = QApplication(sys.argv)
login_window = LoginWindow()
if login_window.exec_() == QDialog.Accepted:
main_window = MainWindow()
main_window.show()
sys.exit(app.exec_())
4. 运行程序
运行login_window.py文件,程序将启动登录界面。如果登录成功,将显示主窗口。
5. 更新主窗口中的按钮点击
def apply_srresnet(self):
    reconstructed_image = apply_srresnet(self.image_path)
    qimage = QImage(reconstructed_image.data, reconstructed_image.shape[1], reconstructed_image.shape[0], QImage.Format_RGB888)
    pixmap = QPixmap.fromImage(qimage)
    self.reconstructed_image_label.setPixmap(pixmap)

def apply_srgan(self):
    reconstructed_image = apply_srgan(self.image_path)
    qimage = QImage(reconstructed_image.data, reconstructed_image.shape[1], reconstructed_image.shape[0], QImage.Format_RGB888)
    pixmap = QPixmap.fromImage(qimage)
    self.reconstructed_image_label.setPixmap(pixmap)
同学,完整的图像超分辨率重建系统,支持SRResNet和SRGAN算法,并使用PyQt5进行界面设计。
仅供参考,我的同学们。


 被折叠的 条评论
为什么被折叠?
被折叠的 条评论
为什么被折叠?
 到【灌水乐园】发言


