


一、前言
开发一个 WebGIS 系统不可避免要涉及一些简单的地图操作,如:拉框放大,拉框缩小,平移,全图显示等相关操作。除了这些基本操作,Esri也提供了一些小部件非常实用,如鹰眼,书签,比例尺等。本篇文章主要介绍地图的基本操作和几个常用小部件。
在 ArcGIS API 中给我们提供了一个类叫做 Navigation,通过这个类可以实现对地图的基本操作,Navigation 类的用法可分为以下几步:(1)创建 Navigation 对象;(2)激活 Navigation 的相应状态;(3)地图操作;
二、基本操作代码实现
1、创建基本操作按钮
<button>拉框放大</button>
<button>拉框缩小</button>
<button>平移</button>
<button>全图</button>
2、给按钮添加绑定事件
query("button").on("click",function(event){
					//获得按钮的文本信息
					var value= this.innerHTML;
					switch(value){
						case "平移":
							navToolbar.activate(Navigation.PAN);
							break;
						case "拉框缩小":
							navToolbar.activate(Navigation.ZOOM_OUT);
							break;
						case "拉框放大":
							navToolbar.activate(Navigation.ZOOM_IN);
							break;
						case "全图":
							navToolbar.zoomToFullExtent();
							break;
					}
				})
3、完整代码
<!DOCTYPE html>
<html xmlns="http://www.w3.org/1999/xhtml">
<head>
<meta http-equiv="Content-Type" content="text/html; charset=utf-8"/>
    <title>Geometric _Network</title>
    <link  rel="stylesheet"  type="text/css" href="http://localhost:8080/arcgis_js_api/library/3.17/3.17/dijit/themes/tundra/tundra.css"/>
    <link  rel="stylesheet"  type="text/css" href="http://localhost:8080/arcgis_js_api/library/3.17/3.17/esri/css/esri.css" />
    <script  type="text/Javascript" src="http://localhost:8080/arcgis_js_api/library/3.17/3.17/init.js"></script>
    <style type="text/css">
        .MapClass{
            width:100%;
            height:600px;
            border:1px solid #000;
        }
    </style>
    <script type="text/javascript">

        require(["esri/map",
            "dojo/on",
			"dojo/dom",
            "esri/layers/ArcGISDynamicMapServiceLayer",
			"dojo/query","esri/toolbars/navigation",
            "dojo/domReady!"],
            function (Map,on,dom,
                ArcGISDynamicMapServiceLayer,query,Navigation
                ) {
                var map = new Map("mapDiv",{
					logo: false
				});
                var layer = new ArcGISDynamicMapServiceLayer
                ("http://localhost:6080/arcgis/rest/services/Test/广州市城市总体规划/MapServer");
                map.addLayer(layer)
				//创建地图操作对象
				var navToolbar = new Navigation(map);
				//给按钮添加绑定事件
				query("button").on("click",function(event){
					//获得按钮的文本信息
					var value= this.innerHTML;
					switch(value){
						case "平移":
							navToolbar.activate(Navigation.PAN);
							break;
						case "拉框缩小":
							navToolbar.activate(Navigation.ZOOM_OUT);
							break;
						case "拉框放大":
							navToolbar.activate(Navigation.ZOOM_IN);
							break;
						case "全图":
							navToolbar.zoomToFullExtent();
							break;
					}
				})
            });

    </script>
</head>
<body class="tundra">
    <div id="mapDiv" class="MapClass"></div>
    <button>拉框放大</button>
    <button>拉框缩小</button>
    <button>平移</button>
    <button>全图</button>
</body>
</html>
4、运行结果
以拉框缩小为例:

三、API中的小部件(以鹰眼为例)
关于API中提供的小部件有两种实用方式:(1)将小部件绑定在一个DOM元素上面;(2)将小部件绑定在地图的上面;
1、将小部件绑定在 DOM 元素上
(1)创建一个 DOM 元素用于存放鹰眼控件:
<div id="view"></div> (2)创建小部件(并指定小部件绑定在哪一个 DOM 元素上面)
 var overviewMapDijit = new OverviewMap({
         map: map,
         visible: true,
},dom.byId("view"));//指定将小部件绑定在哪个DOM元素上面
(3)启用小部件
//2.启用小部件
overviewMapDijit.startup();
(4)全部代码(绑定在 DOM 上)
<!DOCTYPE html>
<html>
<head>
<meta http-equiv="Content-Type" content="text/html; charset=utf-8">
<!--The viewport meta tag is used to improve the presentation and behavior of the samples
on iOS devices-->
<meta name="viewport" content="initial-scale=1, maximum-scale=1,user-scalable=no">
<title>Overview Map</title>
<link rel="stylesheet" type="text/css" href="http://localhost/arcgis_js_api/library/3.17/3.17/dijit/themes/tundra/tundra.css"/>
<link rel="stylesheet" type="text/css" href="http://localhost/arcgis_js_api/library/3.17/3.17/esri/css/esri.css" />
<script type="text/Javascript" src="http://localhost/arcgis_js_api/library/3.17/3.17/init.js"></script>
<style>
.MapClass{
width:600px;
height:400px;
border:1px solid #000;
}
#view {
height: 100px;
width: 100px;
border:1px solid red;
border-right-color:blue;
position:relative;
left:800px;
top:-200px;
}
</style>
<script>
require(["esri/map","dojo/dom","esri/dijit/OverviewMap","dojo/domReady!"], function (
Map,dom, OverviewMap){
var map = new Map("mapDiv",
{
basemap: "topo"
});
//1.创建小部件对象
var overviewMapDijit = new OverviewMap({
map: map,
visible: true,
},dom.byId("view"));//指定将小部件绑定在哪个DOM元素上面
//2.启用小部件
overviewMapDijit.startup();
});
</script>
</head>
<body>
<div id="mapDiv" class="MapClass"></div>
<div id="view"></div>
</body>
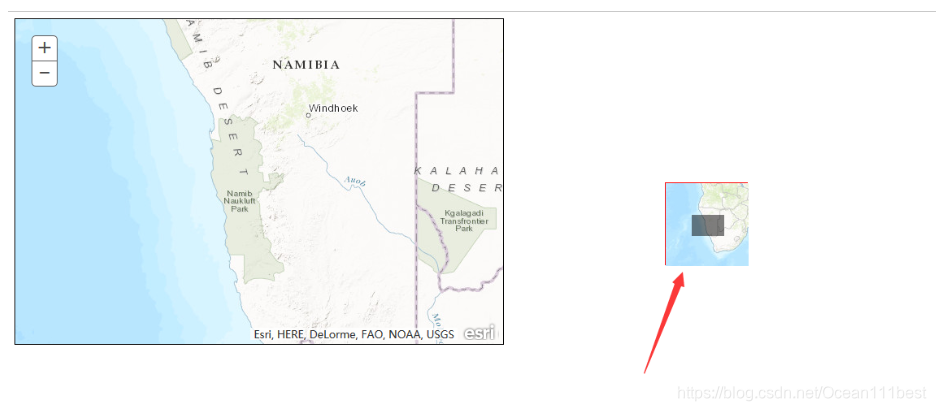
</html>(5)代码运行结果(绑定在DOM)
(6)补充(将小部件绑定在地图上)
只需要创建小部件时,修改一个属性即可
var overviewMapDijit = new OverviewMap({
//指定将小部件绑定在地图的哪一个位置:可以填写top-right,bottom-right,bottom-left 和top-left.
		attachTo: "top-right",
        map: map,
        visible: true,
 });
(7)全部代码(绑定在地图)
<!DOCTYPE html>
<html>
  <head>
    <meta http-equiv="Content-Type" content="text/html; charset=utf-8">
    <!--The viewport meta tag is used to improve the presentation and behavior of the samples
      on iOS devices-->
    <meta name="viewport" content="initial-scale=1, maximum-scale=1,user-scalable=no">
    <title>Overview Map</title>
    <link  rel="stylesheet"  type="text/css" href="http://localhost/arcgis_js_api/library/3.17/3.17/dijit/themes/tundra/tundra.css"/>
    <link  rel="stylesheet"  type="text/css" href="http://localhost/arcgis_js_api/library/3.17/3.17/esri/css/esri.css" />
    <script  type="text/Javascript" src="http://localhost/arcgis_js_api/library/3.17/3.17/init.js"></script>
    <style>
		.MapClass{
            width:100%;
            height:600;
        }
    </style>
    <script>

        require(["esri/map","dojo/dom","esri/dijit/OverviewMap","dojo/domReady!"], function (
          Map,dom, OverviewMap){
            var map = new Map("mapDiv",
            {
				basemap: "topo"
            });
			//1.创建小部件对象
            var overviewMapDijit = new OverviewMap({
				//指定将小部件绑定在地图的哪一个位置:可以填写top-right,bottom-right,bottom-left 和top-left.
				attachTo: "top-right",
                map: map,
                visible: true,
            });
			//2.启用小部件
            overviewMapDijit.startup();
        });
    </script>
  </head>

  <body>
      <div id="mapDiv" class="MapClass"></div>
  </body>
</html>
(8)运行结果(绑定在地图上)


 2263
2263


 被折叠的 条评论
为什么被折叠?
被折叠的 条评论
为什么被折叠?
 到【灌水乐园】发言


