


之前写过JMS的相关文章进行介绍和实现,实现是采用最简单的ActiveMQ。如果业务和服务架构较为简单,ActiveMQ已经足够了,但随着业务量的增长和服务架构越来越复杂,采用了分布式架构,那么ActiveMQ就会显得不够稳定和灵活了。那么就必须要寻求更加灵活的消息中间件了。RabbitMQ是不二的选择。
一.RabbitMQ的简单介绍
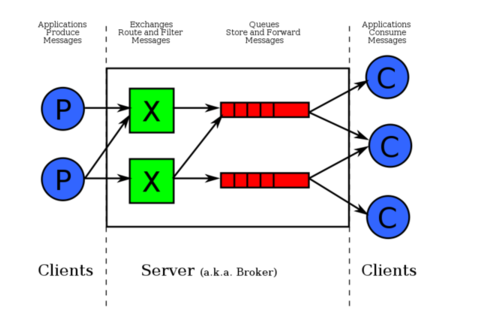
跟ActiveMQ类似,RabbitMQ也是消息中间件的一种,其他的还有kafka等。相对ActiveMQ来说,RabbitMQ在实现上更为复杂。更加适合于大型复杂类型的分布式系统,据网上的说法,RabbitMQ更为稳定,性能更好....,而我选择使用的原因,在于它更加灵活,不再只有1对多,多对多的模式。RabbitMQ多增加了一层是【交换机】,可以自定义生产者把消息分发到消费者的策略,从而实现多种需求。
RabbitMQ大致的工作流程:在消息生产者这边,必须先制定队列与交换机的绑定策略key,在发送消息时,指定消息入队的交换机和匹配的策略key。在消息消费者这边,只需要指定队列名称进行监听即可【决定该队列是否能监听到消息的是:该队列与交换机绑定时的Bindingkey与消息入队时,指定的交换器和路由键key是否能够匹配上】
交换机有4种类型:Direct,topic,headers,Fanout。RabbitMQ的工作流程图如下:
二.SpringBoot集成RabbitMQ
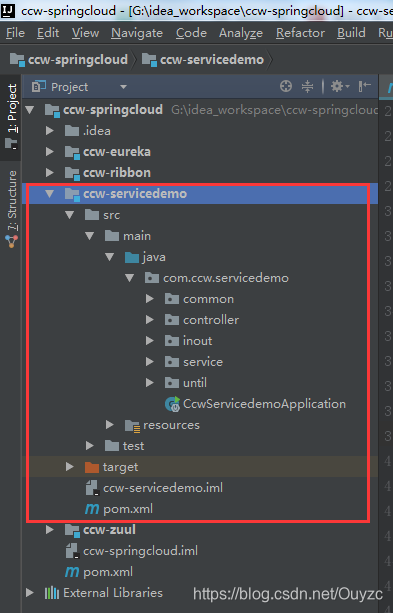
安装和配置RabbitMQ的过程这里就略过了,各位自行百度。创建一个SpringBoot工程(这里我直接拿之前做springcCloud的demo来做演示了,懒...)。
1.配置pom.xml,加上对RabbitMQ的依赖,springBoot使用了AMQP(高级消息队列协议,即面向消息的中间件的设计),对RabbitMQ的API进行操作(无比简单):
<dependency>
    <groupId>org.springframework.boot</groupId>
    <artifactId>spring-boot-starter-amqp</artifactId>
</dependency>
2.在配置文件[application.properties]上,配置对RabbitMQ的连接信息:
spring.rabbitmq.host=127.0.0.1
spring.rabbitmq.port=5672
spring.rabbitmq.username=guest
spring.rabbitmq.password=guest
这样就完成springBoot和RabbitMQ的集成了。
①交换机【Direct】模式的实现
Direct模式是RabbitMQ的默认交换机的形式,相当于ActiveMQ的1对1的形式。在生产者这边,只需要定义队列的名称,默认使用的交换器是RabbitMQ的Direct模式交换机,绑定Bindingkey规则则是队列的名称。消息发送时,指定路由键key跟队列名称一致,消费者那边只需要监听跟队列名称一致的队列即可。
1.在启动工程时,创建一个队列,指定队列的名称为queue.ccwQueue:
package com.ccw.servicedemo.common;


import org.springframework.amqp.core.*;
import org.springframework.context.annotation.Bean;
import org.springframework.context.annotation.Configuration;

@Configuration
public class RabbitMQConfig {
    /**
     * 定义队列
     * @return
     */
    @Bean
    public Queue testQueue(){
        return new Queue("queue.ccwQueue");
    }
}
2.消息生产时,指定路由键key和发送内容(利用定时器来测试发送):
package com.ccw.servicedemo.controller;

import org.springframework.amqp.core.AmqpTemplate;
import org.springframework.beans.factory.annotation.Autowired;
import org.springframework.scheduling.annotation.Scheduled;
import org.springframework.stereotype.Service;

@Service
public class HelloSender1 {

    @Autowired
    private AmqpTemplate template;

    @Scheduled(fixedRate = 5000)
    public void send(){
        System.out.println("发送rabbitMQ普通默认的Direct模式交换机");
        template.convertAndSend("queue.ccwQueue","Direct---");
    }
}
3.消息消费时,指定监听的队列名称:
package com.ccw.servicedemo.controller;

import org.springframework.amqp.rabbit.annotation.RabbitListener;
import org.springframework.stereotype.Service;

@Service
public class HelloReceiver1{

    @RabbitListener(queues="queue.ccwQueue")    //监听器监听指定的Queue
    public void process(String str) {
        System.out.println("Receive:"+str);
    }
}
4.测试结果如下:
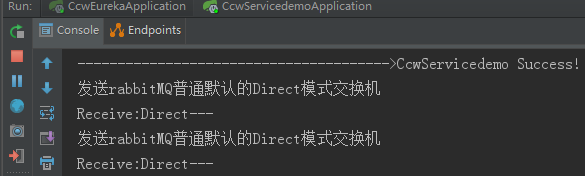
当然,传输的值类型不仅仅是字符串,还可以是实体类的形式进行传输,只需要对实体进行序列化操作即可
5.添加一个实体类:
package com.ccw.servicedemo.inout.vo;

import java.io.Serializable;

public class UserVo implements Serializable {

    private String accountId;

    private String password;

    private String name;

    public String getAccountId() {
        return accountId;
    }

    public void setAccountId(String accountId) {
        this.accountId = accountId;
    }

    public String getPassword() {
        return password;
    }

    public void setPassword(String password) {
        this.password = password;
    }

    public String getName() {
        return name;
    }

    public void setName(String name) {
        this.name = name;
    }
}
6.改造一下,消息生产时的代码:
package com.ccw.servicedemo.controller;
import com.ccw.servicedemo.inout.vo.UserVo;
import org.springframework.amqp.core.AmqpTemplate;
import org.springframework.beans.factory.annotation.Autowired;
import org.springframework.scheduling.annotation.Scheduled;
import org.springframework.stereotype.Service;

@Service
public class HelloSender1 {

    @Autowired
    private AmqpTemplate template;

    @Scheduled(fixedRate = 5000)
    public void send(){
        System.out.println("发送rabbitMQ普通默认的Direct模式交换机");
        UserVo user=new UserVo();
        user.setName("ccw");
        user.setAccountId("xxxxxxxxx@qq.com");
        user.setPassword("123456");
        template.convertAndSend("queue.ccwQueue",user);
    }
}
7.改造一下,消息消费的代码:
package com.ccw.servicedemo.controller;
import com.ccw.servicedemo.inout.vo.UserVo;
import org.springframework.amqp.rabbit.annotation.RabbitListener;
import org.springframework.stereotype.Service;
@Service
public class HelloReceiver1{
@RabbitListener(queues="queue.ccwQueue") //监听器监听指定的Queue
public void process(UserVo user) {
System.out.println("Receive:"+user.getAccountId());
}
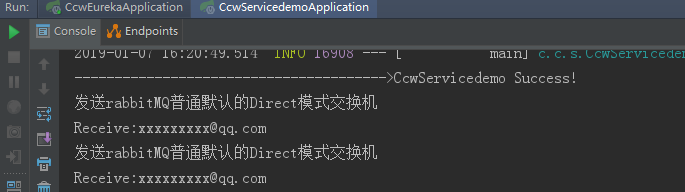
}8.测试结果如下:
②交换机【Topic】模式的实现
Topic模式是RabbitMQ较为灵活的交换器形式,类似于ActiveMQ的1对多的形式,但又更为灵活。在生产者这边,需要创建队列,创建交换机,定义队列与交换器的绑定关系并指定BingingKey(通配符+字符串)。在生产消息时,指定交换机和路由键key。在消费消息时,只需指定队列名称即可。消息在入队时,先根据指定的交换机,把消息发送到交换机里,再根据指定的路由键key去查找与之匹配的BingingKey,然后把消息发送到与该BingingKey有绑定的队列中。
1.在启动工程时,创建队列、交换器、以及绑定关系的策略BingingKey:
package com.ccw.servicedemo.common;

import org.springframework.amqp.core.*;
import org.springframework.context.annotation.Bean;
import org.springframework.context.annotation.Configuration;

@Configuration
public class RabbitMQConfig {


    /**
     * 定义队列
     * @return
     */
    @Bean
    public Queue testQueue1(){
        return new Queue("queue.ccwQueue1");
    }
    /**
     * 定义队列
     * @return
     */
    @Bean
    public Queue testQueue2(){
        return new Queue("queue.ccwQueue2");
    }

    /**
     * 定义交换器topic
     * @return
     */
    @Bean
    public TopicExchange testTopicExchange(){
        return new TopicExchange("testTopicExchange");
    }

    /**
     * 定义绑定关系
     * @return
     */
    @Bean
    public Binding testBinding1(Queue testQueue1,TopicExchange testTopicExchange){
        return BindingBuilder.bind(testQueue1).to(testTopicExchange).with("queue.ccwQueue1");
    }

    /**
     * 定义绑定关系
     * @return
     */
    @Bean
    public Binding testBinding2(Queue testQueue2,TopicExchange testTopicExchange){
        return BindingBuilder.bind(testQueue2).to(testTopicExchange).with("queue.#");
    }
}
2.消息生产时,指定交换器和路由键key和发送内容(利用定时器来测试发送):
package com.ccw.servicedemo.controller;
import com.ccw.servicedemo.inout.vo.UserVo;
import org.springframework.amqp.core.AmqpTemplate;
import org.springframework.beans.factory.annotation.Autowired;
import org.springframework.scheduling.annotation.Scheduled;
import org.springframework.stereotype.Service;

@Service
public class HelloSender1 {

    @Autowired
    private AmqpTemplate template;

    @Scheduled(fixedRate = 5000)
    public void send2(){
        System.out.println("发送rabbitMQ的自定义topic模式的交换机");

        UserVo user=new UserVo();
        user.setName("ccw");
        user.setAccountId("xxxxxxxxx@qq.com");
        user.setPassword("123456");
        template.convertAndSend("testTopicExchange","queue.ccwQueue1",user);
    }
}
3.消息消费时,指定监听的队列名称:
package com.ccw.servicedemo.controller;

import com.ccw.servicedemo.inout.vo.UserVo;
import org.springframework.amqp.rabbit.annotation.RabbitListener;
import org.springframework.stereotype.Service;

@Service
public class HelloReceiver1{

    @RabbitListener(queues="queue.ccwQueue1")    //监听器监听指定的Queue
    public void process1(UserVo user) {
        System.out.println("Receive1:"+user.getAccountId());
    }

    @RabbitListener(queues="queue.ccwQueue2")    //监听器监听指定的Queue
    public void process2(UserVo user) {
        System.out.println("Receive2:"+user.getAccountId());
    }
}
4.测试结果如下:
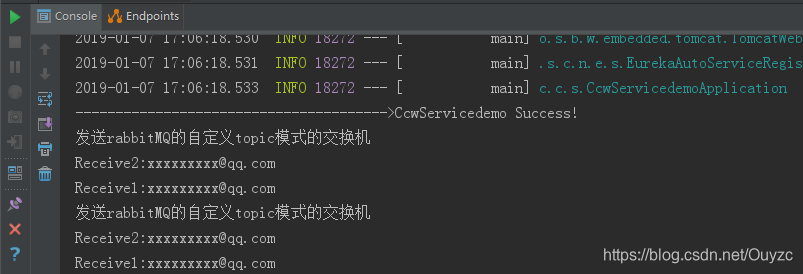
根据打印的信息可知,2个队列都监听到消息了,原因是:
消息生产时,指定的路由键是:queue.ccwQueue1
队列1:queue.ccwQueue1,对应绑定的BingingKey是queue.ccwQueue1
队列2:queue.ccwQueue1,对应绑定的BingingKey是queue.#
路由键[queue.ccwQueue1]既能匹配上队列1的BingingKey[queue.ccwQueue1],又能匹配上队列2的BingingKey[queue.#]
因此,2个队列都可以监听到!
5.测试另外一种情况,改造一下消息生产者的代码:
package com.ccw.servicedemo.controller;

import com.ccw.servicedemo.inout.vo.UserVo;
import org.springframework.amqp.core.AmqpTemplate;
import org.springframework.beans.factory.annotation.Autowired;
import org.springframework.scheduling.annotation.Scheduled;
import org.springframework.stereotype.Service;

@Service
public class HelloSender1 {

    @Autowired
    private AmqpTemplate template;

    @Scheduled(fixedRate = 5000)
    public void send2(){
        System.out.println("发送rabbitMQ的自定义topic模式的交换机");

        UserVo user=new UserVo();
        user.setName("ccw");
        user.setAccountId("xxxxxxxxx@qq.com");
        user.setPassword("123456");
        template.convertAndSend("testTopicExchange","queue.test",user); //指定另一个路由键
    }
}
6.其他代码无需改变,测试结果如下:

根据打印的信息可知,只又1个队列都监听到消息了,原因是:
消息生产时,指定的路由键是:queue.test
队列1:queue.ccwQueue1,对应绑定的BingingKey是queue.ccwQueue1
队列2:queue.ccwQueue1,对应绑定的BingingKey是queue.#
路由键[queue.test]只能匹配上队列2的BingingKey[queue.#]
因此,只有队列2可以监听到消息!
③交换机【Fanout】模式的实现
Fanout模式是RabbitMQ的广播形式,BingingKey和路由键在该模式下,是不起作用的,只要队列对Fanout模式下的交换器有绑定关系,都能接收到消息。
1.在启动工程时,创建队列、交换器、以及绑定关系:
package com.ccw.servicedemo.common;

import org.springframework.amqp.core.*;
import org.springframework.context.annotation.Bean;
import org.springframework.context.annotation.Configuration;

@Configuration
public class RabbitMQConfig {

    /**
     * 定义队列
     * @return
     */
    @Bean
    public Queue testQueue3(){
        return new Queue("queue.ccwQueue3");
    }

    /**
     * 定义队列
     * @return
     */
    @Bean
    public Queue testQueue4(){
        return new Queue("queue.ccwQueue4");
    }

    /**
     * 定义交换器fanout
     * @return
     */
    @Bean
    public FanoutExchange testFanoutExchange(){
        return new FanoutExchange("testFanoutExchange");
    }

    /**
     * 定义绑定关系
     * @return
     */
    @Bean
    public Binding testBinding3(Queue testQueue3,FanoutExchange testFanoutExchange){
        return BindingBuilder.bind(testQueue3).to(testFanoutExchange);
    }

    /**
     * 定义绑定关系
     * @return
     */
    @Bean
    public Binding testBinding4(Queue testQueue4,FanoutExchange testFanoutExchange){
        return BindingBuilder.bind(testQueue4).to(testFanoutExchange);
    }
}
2.消息生产时,指定交换器和路由键key[将会被忽略]和发送内容(利用定时器来测试发送):
package com.ccw.servicedemo.controller;
import com.ccw.servicedemo.inout.vo.UserVo;
import org.springframework.amqp.core.AmqpTemplate;
import org.springframework.beans.factory.annotation.Autowired;
import org.springframework.scheduling.annotation.Scheduled;
import org.springframework.stereotype.Service;

@Service
public class HelloSender1 {

    @Autowired
    private AmqpTemplate template;

    @Scheduled(fixedRate = 5000)
    public void send3(){
        System.out.println("发送rabbitMQ的自定义Fanout模式的交换机");

        UserVo user=new UserVo();
        user.setName("ccw");
        user.setAccountId("xxxxxxxxx@qq.com");
        user.setPassword("123456");
        template.convertAndSend("testFanoutExchange","abccba",user);
    }
}
3.消息消费时,指定监听的队列名称:
package com.ccw.servicedemo.controller;

import com.ccw.servicedemo.inout.vo.UserVo;
import org.springframework.amqp.rabbit.annotation.RabbitListener;
import org.springframework.stereotype.Service;

@Service
public class HelloReceiver1{

    @RabbitListener(queues="queue.ccwQueue3")    //监听器监听指定的Queue
    public void process3(UserVo user) {
        System.out.println("Receive3:"+user.getAccountId());
    }

    @RabbitListener(queues="queue.ccwQueue4")    //监听器监听指定的Queue
    public void process4(UserVo user) {
        System.out.println("Receive4:"+user.getAccountId());
    }
}
4.测试结果如下:
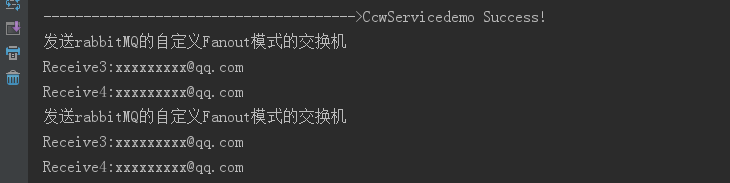
根据打印结果可知,2个队列都收到消息了,因此只要是跟广播模式的交换器有绑定关系的队列,都将会监听到消息。
如有错漏,请各位指出!


 3777
3777


 被折叠的 条评论
为什么被折叠?
被折叠的 条评论
为什么被折叠?
 到【灌水乐园】发言


