


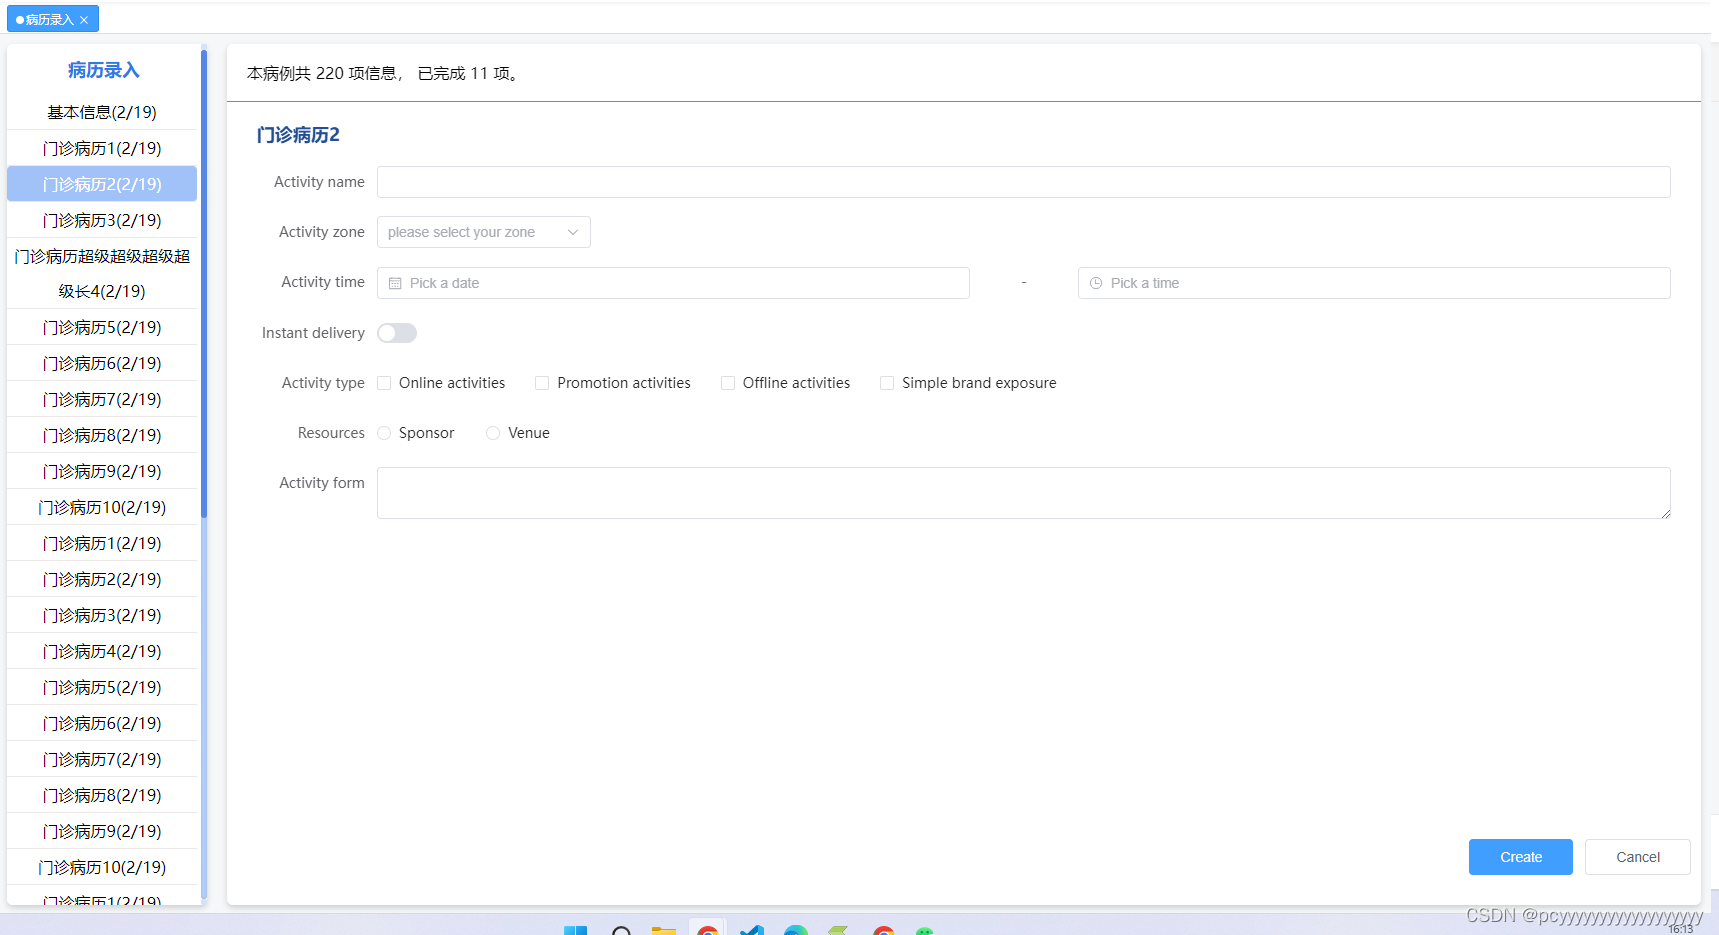
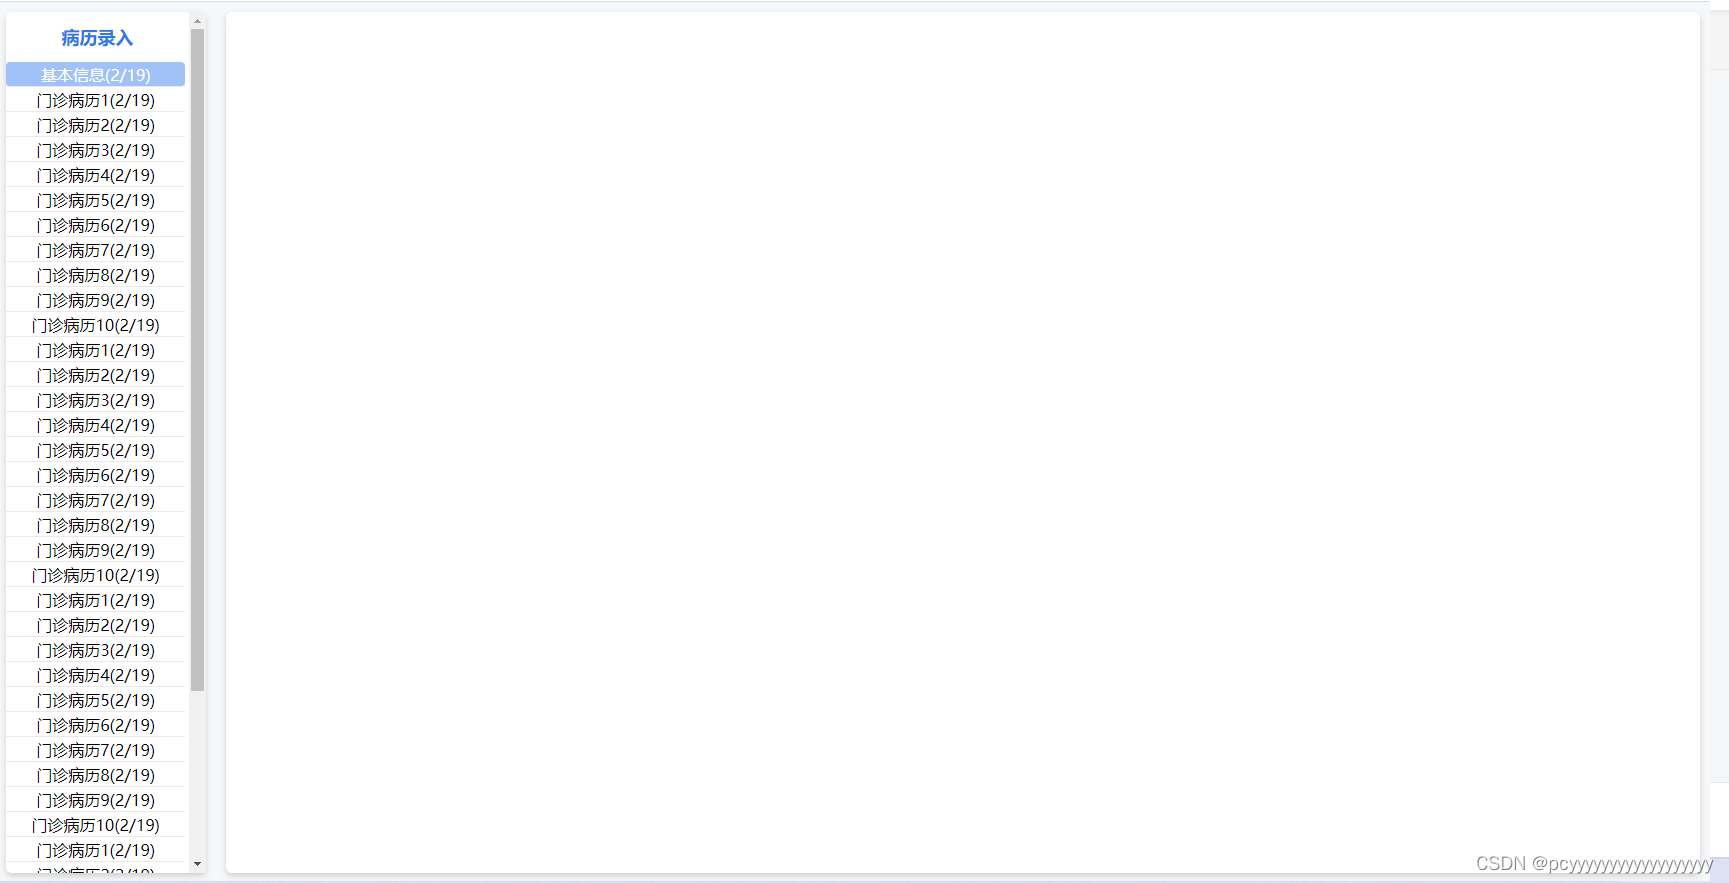
实现的效果大概如此:
由于没有后端,我现在都是用静态数据写的样式,后面再加js逻辑处理数据。
目录
1.页面结构
首先要实现上面的结构,template大概如此:
<template>
<div>
<div class="left-tab">
<!-- 病历导航 -->
<div class="tab-title">病历录入</div>
<div style="min-height: calc(100vh - 100px)">
<div v-for="(item, index) in list" :key="index">
<div class="one-tab" :class="item.select ? 'is-active' : ''" @click="toSkip(item)">
{{ item.tableShowName }}(2/19)
<!--这里(2/19)是记录表单填写的进度,后面有了数据可以改成动态获取的-->
</div>
</div>
</div>
</div>
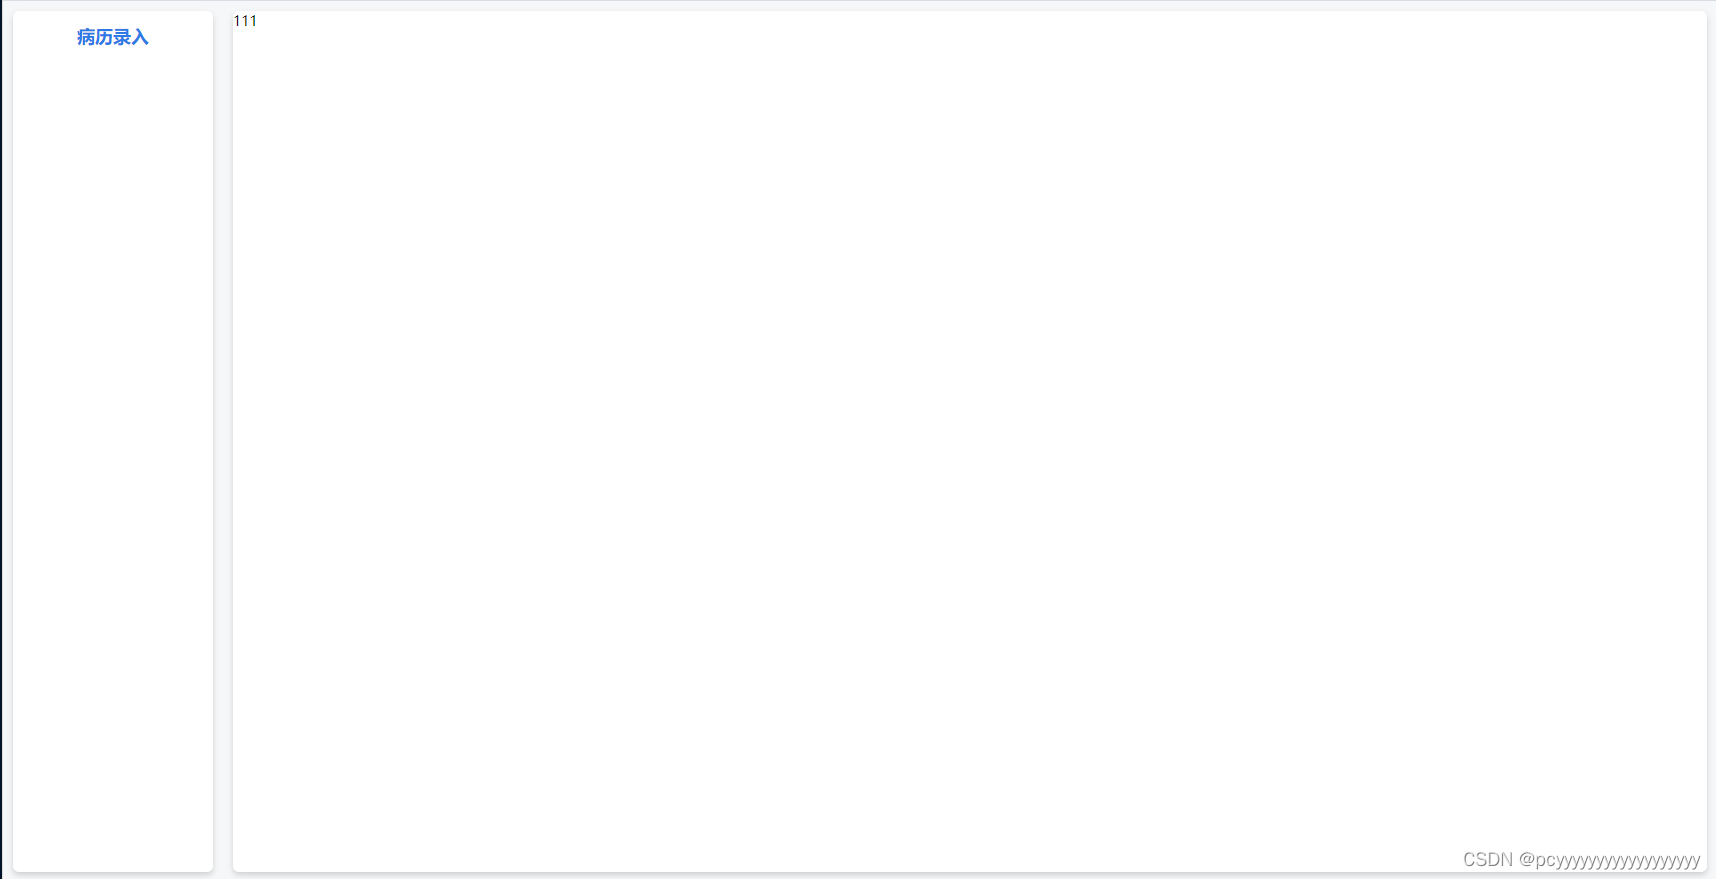
<div class="right-content">
111
</div>
</div>
</template>样式如下:
<style lang="scss" scoped>
.left-tab {
  width: 200px;
  height: calc(100vh - 100px);
  float: left;
  background: #ffffff;
  box-shadow: 0px 3px 6px rgba(0, 0, 0, 0.16);
  border-radius: 6px;
  // overflow-y: auto;
  .tab-title {
    width: 100%;
    height: 50px;
    line-height: 50px;
    text-align: center;
    color: rgb(46, 122, 229);
    font-size: 18px;
    font-weight: 600;
  }
  .one-tab {
    width: 98%;
    height: 25px;
    line-height: 25px;
    text-align: center;
    color: black;
    font-size: 16px;

    border-bottom: 1px solid #ece8e8;
    cursor: pointer;
  }
  .is-active {
    color: #ffffff;
    background: #a0c2f8;
    border-radius: 4px;
  }
}
.right-content {
  width: calc(100% - 220px);
  min-height: calc(100vh - 100px);
  float: right;
  background: #ffffff;
  box-shadow: 0px 3px 6px rgba(0, 0, 0, 0.16);
  border-radius: 6px;
}
</style>
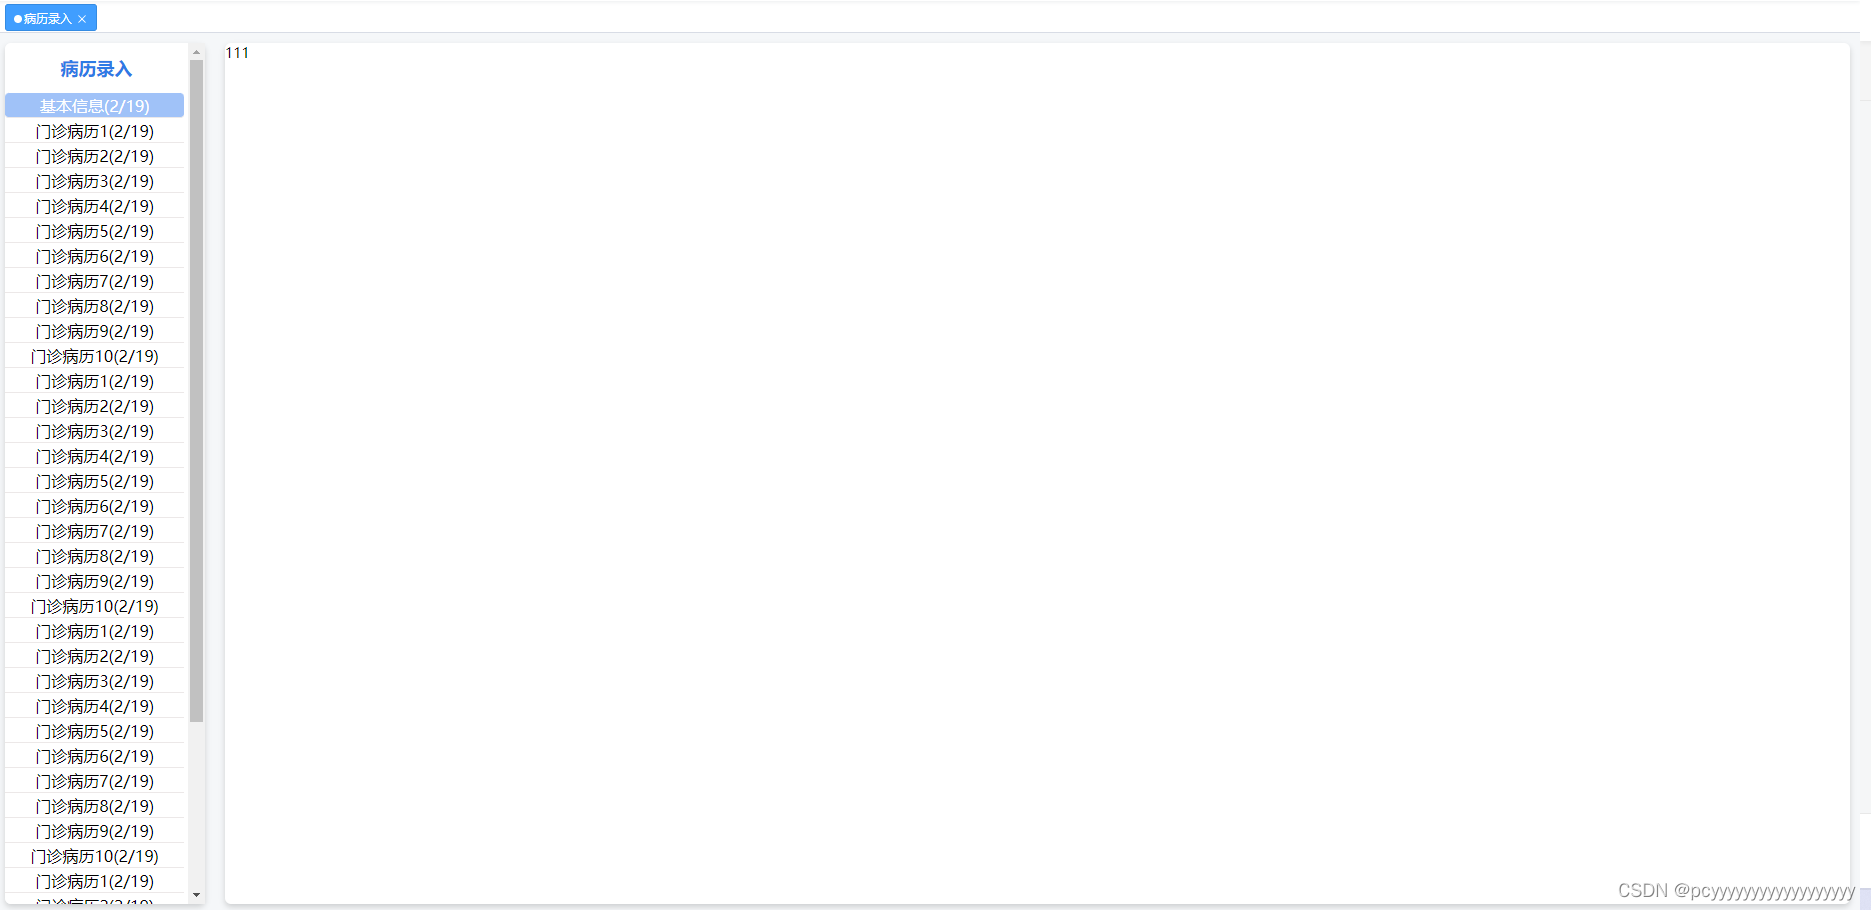
2.左侧导航栏
要渲染左侧导航栏,需要一个表结构,这里我是以这种表结构渲染的:
 list: [
      {
        select: true,
        tableId: 'patient_index',
        tableName: '住院病案首页基本信息表',
        tableShow: 'Y',
        tableShowName: '基本信息',//展示的名称

      },
      {
        select: false,
        tableId: 'liver_disease_information1',
        tableName: '相关肝脏疾病资料',
        tableShow: 'Y',
        tableShowName: '门诊病历1',

      },
      {
        select: false,
        tableId: 'liver_disease_information2',
        tableName: '相关肝脏疾病资料',
        tableShow: 'Y',
        tableShowName: '门诊病历2',

      },
      {
        select: false,
        tableId: 'liver_disease_information3',
        tableName: '相关肝脏疾病资料',
        tableShow: 'Y',
        tableShowName: '门诊病历3',

      },
      {
        select: false,
        tableId: 'liver_disease_information4',
        tableName: '相关肝脏疾病资料',
        tableShow: 'Y',
        tableShowName: '门诊病历4',

      },
]
我写了很多个,是为了方便调滑动条和页面宽度。
如果需要有滑动条,那么就要把.left-tab样式的overflow-y: auto;的注释取消掉。
实现效果如下:
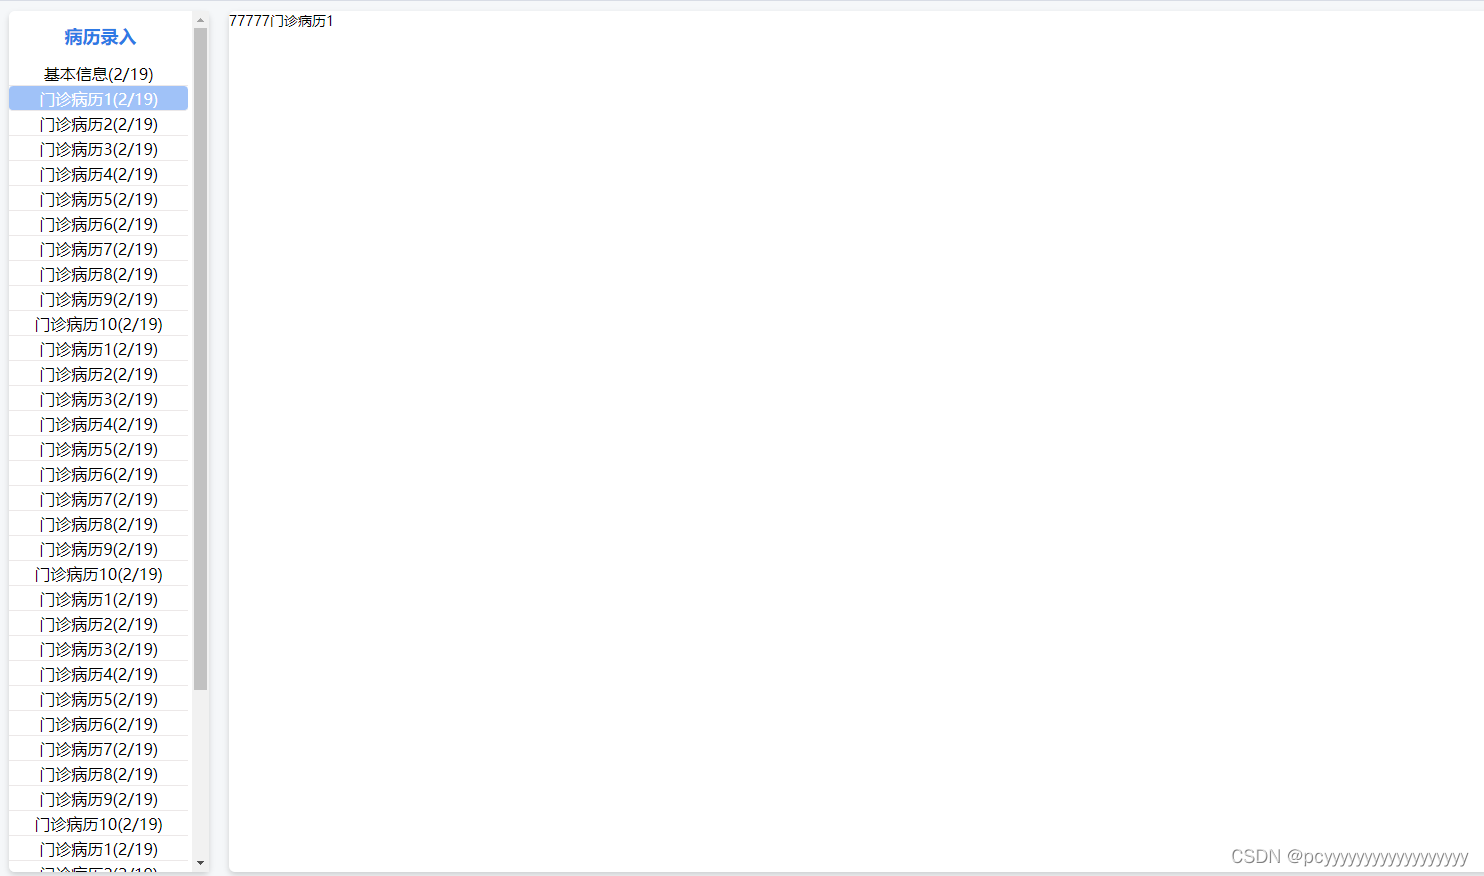
3.导航跳转方法
toSkip()
 data: () => ({
    list: [
      {
        select: true,
        tableId: 'patient_index',
        tableName: '基本信息表',
        tableShow: 'Y',
        tableShowName: '基本信息'

      },
      {
        select: false,
        tableId: 'liver_disease_information1',
        tableName: '肝脏疾病资料',
        tableShow: 'Y',
        tableShowName: '门诊病历1'

      },
      {
        select: false,
        tableId: 'liver_disease_information2',
        tableName: '肝脏疾病资料',
        tableShow: 'Y',
        tableShowName: '门诊病历2'

      },
      {
        select: false,
        tableId: 'liver_disease_information3',
        tableName: '肝脏疾病资料',
        tableShow: 'Y',
        tableShowName: '门诊病历3'

      }
    ],
    tableId: '',
    tableShowName: ''
  }),
  methods: {
    toSkip(item) {
      this.tableId = null
      this.tableShowName = null
      this.list.forEach((ele, index) => {
        ele.select = false
      })
      item.select = true
      this.tableId = item.tableId
      this.tableShowName = item.tableShowName
    }
  }
这样点击就会有active的效果,如图:
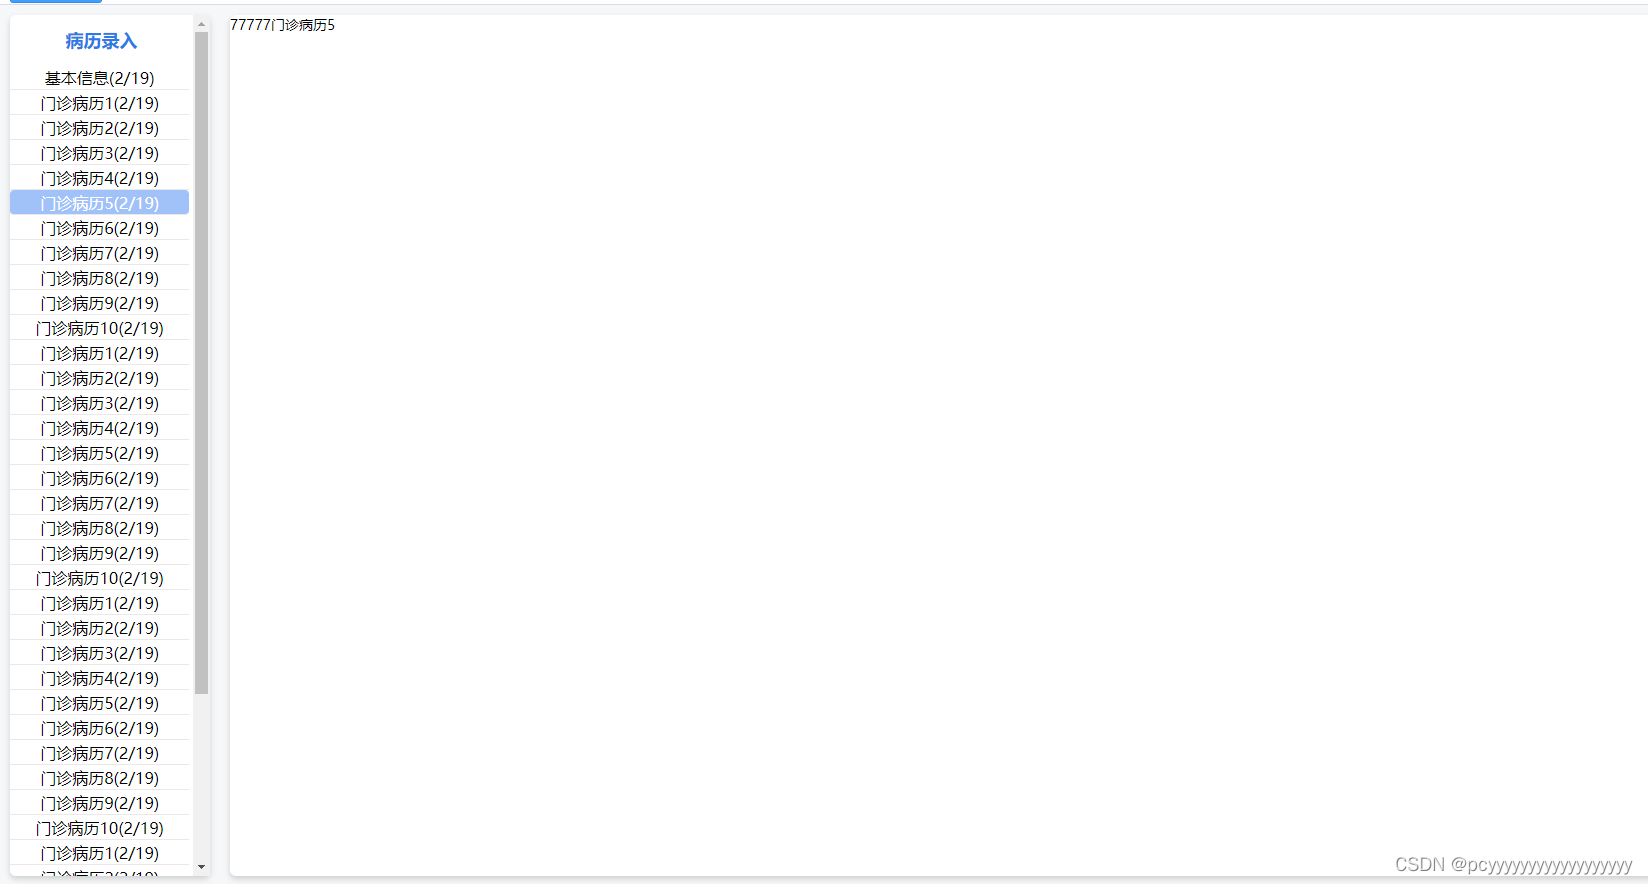
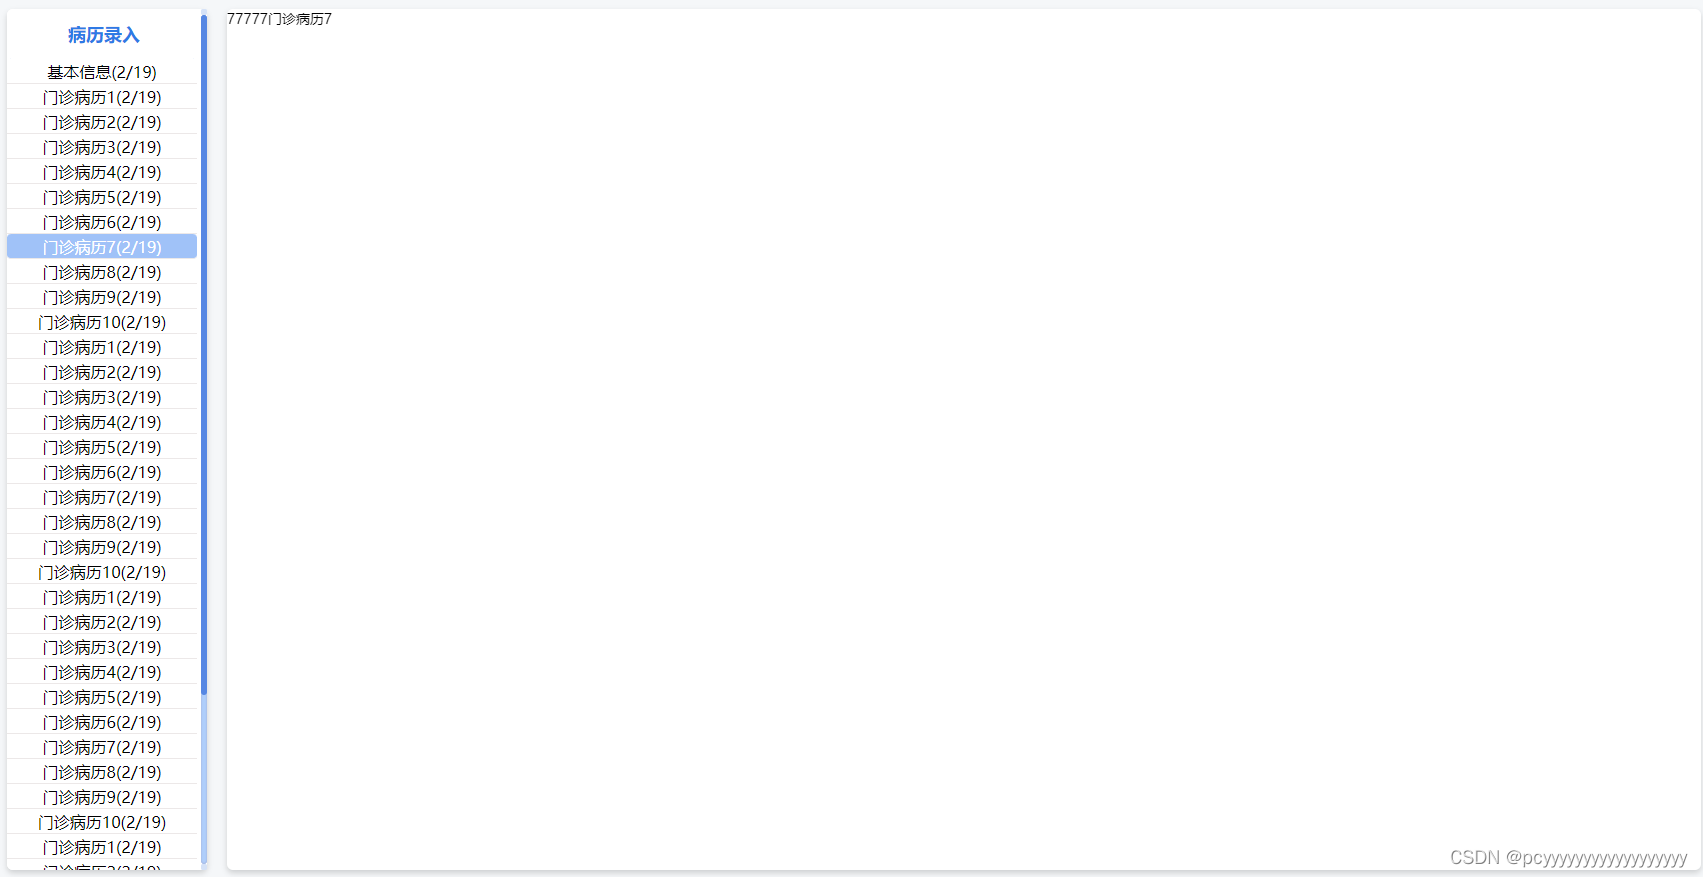
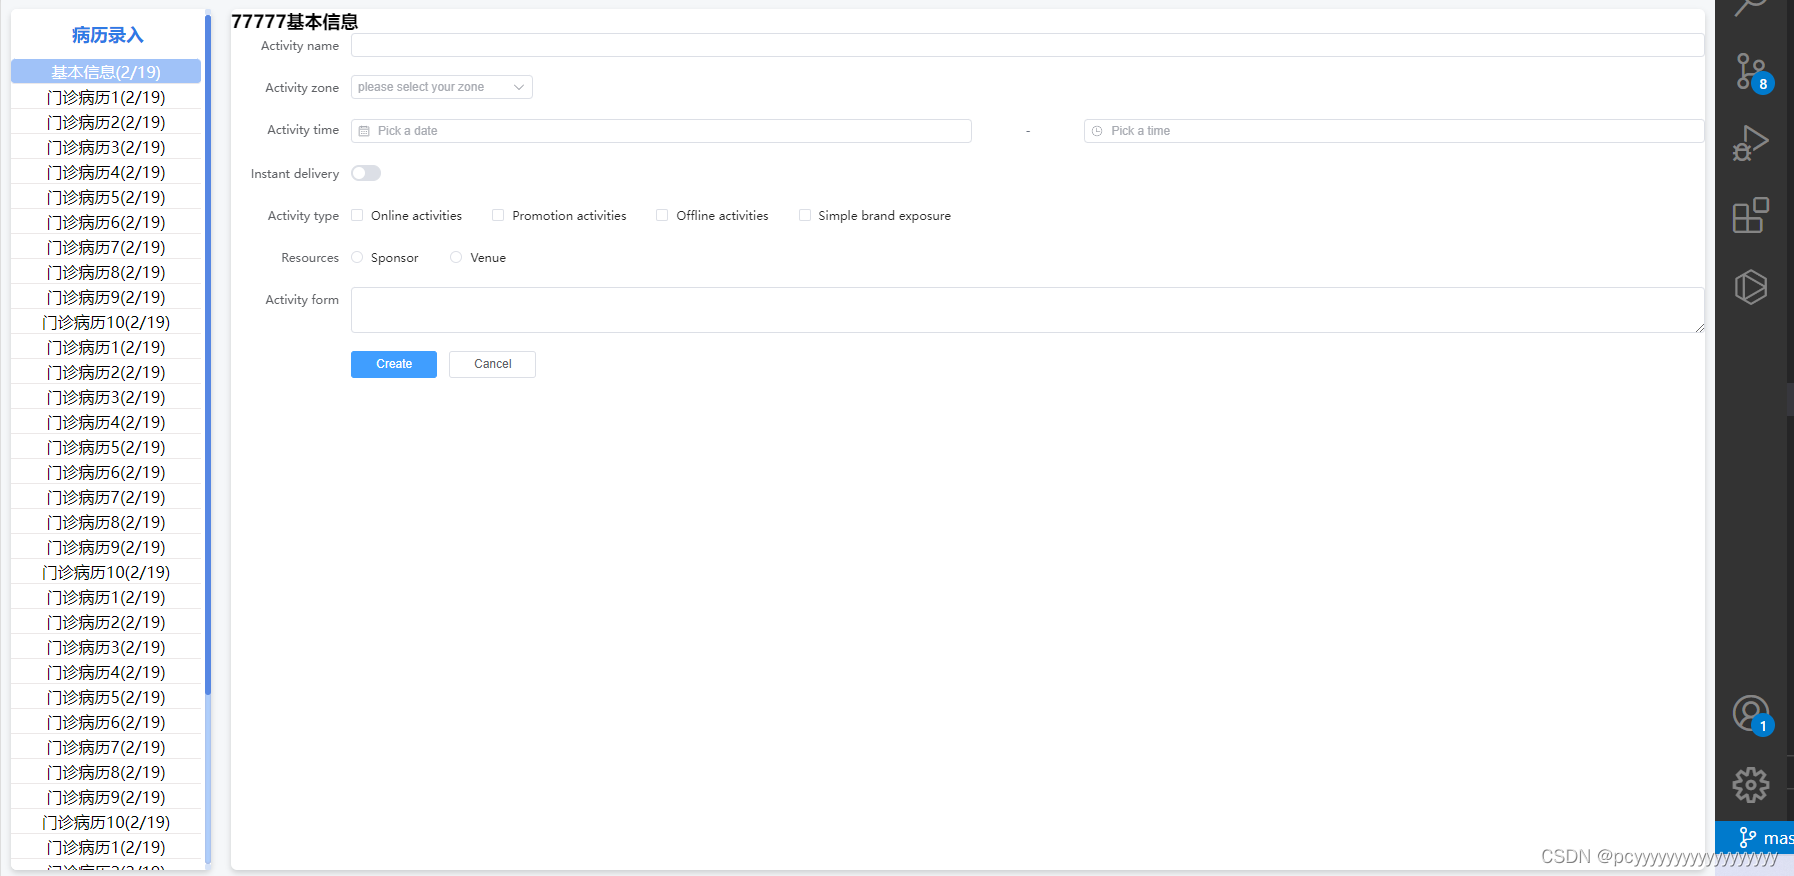
4.点击切换内容
切换内容,需要渲染数据,那么这里的”111“就要变成对应数据。
这里我新建了listItem文件,然后引入,如下:

右侧展示内容的部分变成了这样,我们现在只需要,展示表的名字,传递表的id
 <div class="right-content">
      <listItem v-if="tableId" :table-id="tableId" :table-show-name="tableShowName" />
    </div>
listItem.vue里的内容,先简单大概如此:
<template>
  <div>77777{{ tableShowName }}</div>
</template>

<script>
export default {
  props: {
    tableId: {
      type: String,
      default: ''
    },
    tableShowName: {
      type: String,
      default: ''
    }
  }
}
</script>

<style></style>
这时,点击左侧导航,右侧的内容就会切换啦,如图:
5.优化完善
需要完善的还有很多,我列出下面几个:
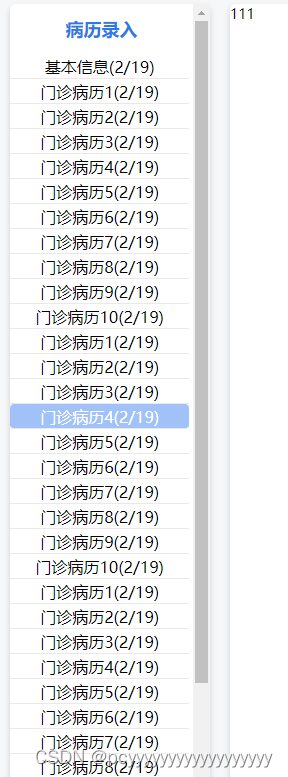
(1)滑动条样式
修改滑动条样式的话,可以看这篇文章,写的好详细!
我这里增加了这样几个样式:
//滚动条整体部分,可以设置宽度等
.left-tab::-webkit-scrollbar {
  width: 6px;
  height: 10px;
}
//滚动条里面的滑块
.left-tab::-webkit-scrollbar-thumb {
  border-radius: 5px;
  background: rgb(86, 135, 227);
}
//滚动条轨道两端的按钮,允许通过点击以微调滑块的位置
.left-tab::-webkit-scrollbar-button {
  width: 6px;
  height: 6px;
  border-radius: 30%;
  background: rgb(213, 226, 247);
}
//滚动条的轨道(里面装有thumb)
.left-tab::-webkit-scrollbar-track {
  box-shadow: inset 0 0 2px rgb(160, 170, 209);
  border-radius: 5px;
  background: #afcefb;
}
实现效果如下:
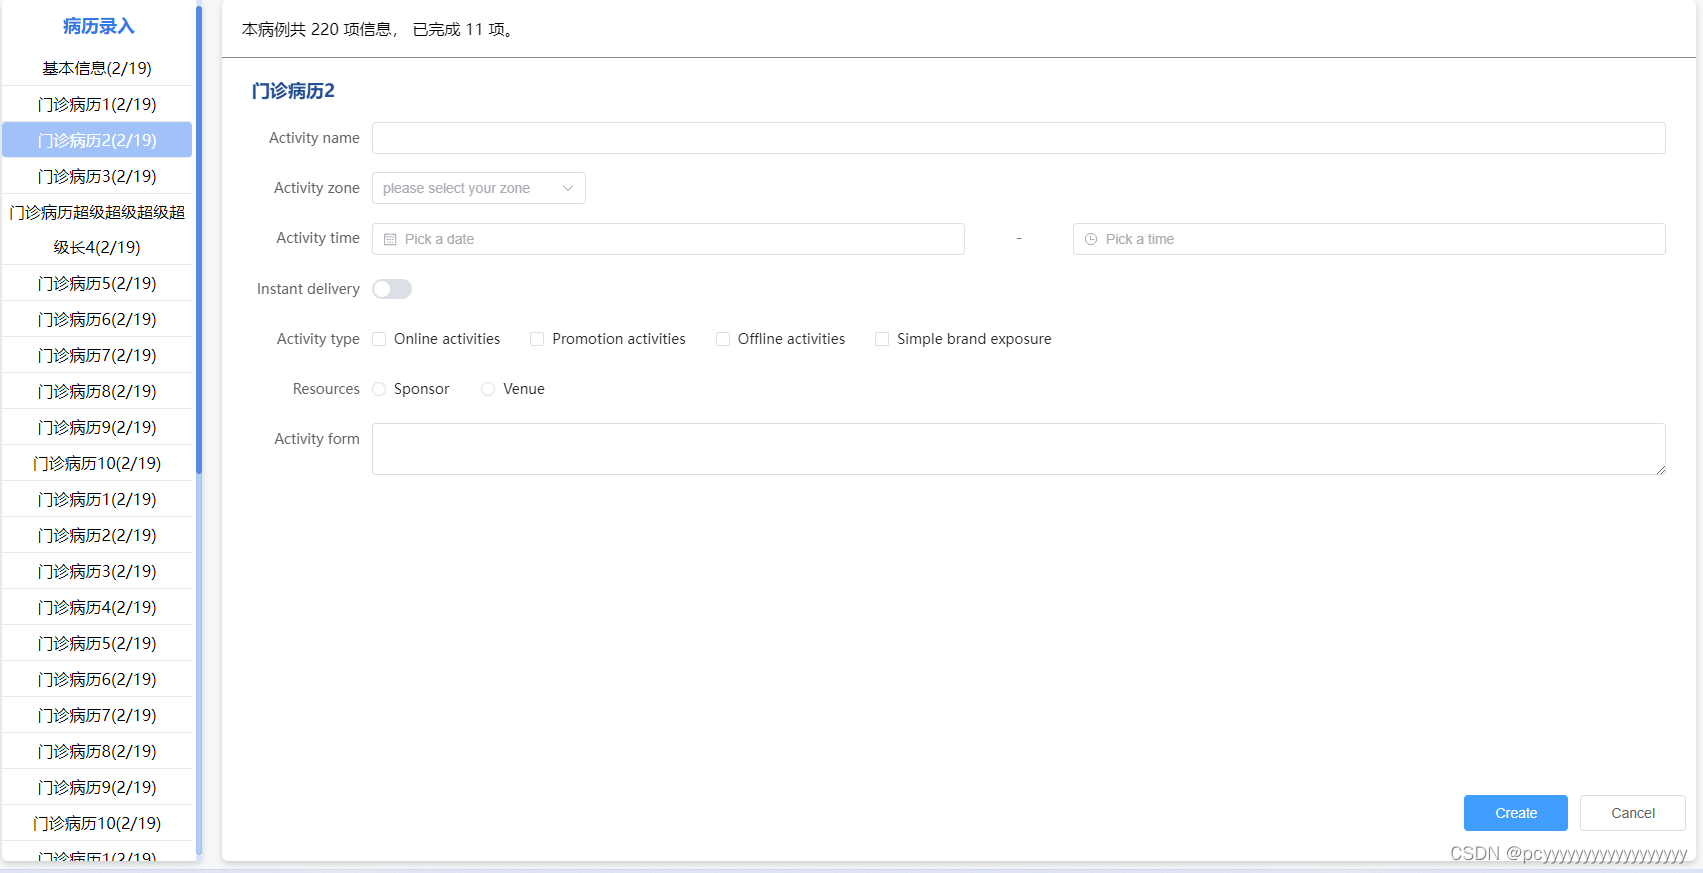
(2)右侧展示内容结构与样式
这里我打算先放点表单,调一些静态样式。
大概如此的结构,标题+form表单+按钮
调整样式,这里需要按钮浮动在右下角,表单的标题等样式调整。
listItem.vue
<el-form-item style="position: absolute; bottom: 20px; right: 20px">
          <el-button type="primary" @click="onSubmit">Create</el-button>
          <el-button>Cancel</el-button>
        </el-form-item>
.item-title {
font-size: 18px;
font-weight: 700;
padding: 20px 30px;
color: #234e93;
}
.form-content {
height: calc(90vh - 200px);
width: 100%;
padding: 0 30px;
}调整导航栏的文字间距和高度,以及文字过长换行。
.one-tab {
    width: 98%;
    line-height: 35px;
    text-align: center;
    color: black;
    font-size: 16px;
    //文字换行
    word-wrap: break-word;
    word-break: break-all;
    overflow: hidden;
    border-bottom: 1px solid #ece8e8;
    cursor: pointer;
  }
(3)上方提示信息等
我写提示,可以随时看到填写进度,只是写的静态样式。
这里增加一个样式:
    <div class="right-content">
      <!-- 上方记录信息 -->
      <div class="top-content">本病例共 220 项信息, 已完成 11 项。</div>
      <listItem v-if="tableId" :table-id="tableId" :table-show-name="tableShowName" />
    </div>
.top-content {
height: 6vh;
width: 100%;
display: flex;
align-items: center;
font-size: 16px;
border-block-end: #86898e solid 1px;
padding: 0 20px;
}最后实现效果如图:
以上就是我现在实现的效果,后面有了数据,处理数据估计会麻烦一些,等有了数据就会继续完善这个功能。
未完~


 被折叠的 条评论
为什么被折叠?
被折叠的 条评论
为什么被折叠?
 到【灌水乐园】发言


