第一步 新建一个maven工程
第二步 导入依赖
<dependencies>
    <dependency>
      <groupId>javax.servlet</groupId>
      <artifactId>javax.servlet-api</artifactId>
      <version>3.1.0</version>
      <scope>provided</scope>
    </dependency>
    <dependency>
      <groupId>org.springframework</groupId>
      <artifactId>spring-webmvc</artifactId>
      <version>5.2.10.RELEASE</version>
    </dependency>
    <!--json坐标-->
    <dependency>
      <groupId>com.fasterxml.jackson.core</groupId>
      <artifactId>jackson-databind</artifactId>
      <version>2.9.0</version>
    </dependency>
  </dependencies>
  <build>
    <plugins>
      <plugin>
        <groupId>org.apache.tomcat.maven</groupId>
        <artifactId>tomcat7-maven-plugin</artifactId>
        <version>2.2</version>
        <configuration>
          <path>/</path>
          <port>80</port>
        </configuration>
      </plugin>
    </plugins>
  </build>
第三步 根据功能建好不同的包
config/controller/domain
config包下有
package com.config;

import org.springframework.context.annotation.ComponentScan;
import org.springframework.context.annotation.Configuration;
import org.springframework.web.servlet.config.annotation.EnableWebMvc;

@Configuration
@ComponentScan("com.controller")
@EnableWebMvc
public class SpringMvcConfig {
}
package com.config;


import org.springframework.web.filter.CharacterEncodingFilter;
import org.springframework.web.servlet.support.AbstractAnnotationConfigDispatcherServletInitializer;

import javax.servlet.Filter;


public class ServletContainerInitConfig extends AbstractAnnotationConfigDispatcherServletInitializer {

    protected Class<?>[] getRootConfigClasses() {
        return new Class[0];
    }

    protected Class<?>[] getServletConfigClasses() {
        return new Class[]{SpringMvcConfig.class};
    }

    protected String[] getServletMappings() {
        return new String[]{"/"};
    }
    //乱码处理,处理post请求发过来的中文

    @Override
    protected Filter[] getServletFilters() {
        CharacterEncodingFilter filter=new CharacterEncodingFilter();
        filter.setEncoding("UTF-8");
        return new Filter[]{filter};
    }
}
controller包下有BookController
package com.controller;

import com.domain.Book;
import org.springframework.web.bind.annotation.GetMapping;
import org.springframework.web.bind.annotation.PostMapping;
import org.springframework.web.bind.annotation.RequestMapping;
import org.springframework.web.bind.annotation.RestController;

import java.util.ArrayList;
import java.util.List;

@RestController
@RequestMapping("/books")
public class BookController {
    //保存功能,从前端获取数据
    @PostMapping
    public String save(@RequestBodyBook book){
        System.out.println("Book save-->"+book);
        return "{'module':'book save success'";
    }
    //查询全部的功能(这里用的是模拟数据)
    @GetMapping
    public List<Book> getAll(){
        List<Book> bookList=new ArrayList<Book>();
        Book book1=new Book();
        book1.setId(1);
        book1.setName("Spring实战");
        book1.setType("计算机");
        book1.setDescription("java基础");

        bookList.add(book1);

        Book book2=new Book();
        book1.setId(2);
        book1.setName("maven实战");
        book1.setType("计算机");
        book1.setDescription("maven基础");
        bookList.add(book2);
        return bookList;
    }
}
domain包下有我们的Book类
package com.domain;

import java.io.PrintWriter;

public class Book {
    private Integer id;
    private String name;
    private String type;
    private  String description;

    public Integer getId() {
        return id;
    }

    public void setId(Integer id) {
        this.id = id;
    }

    public String getName() {
        return name;
    }

    public void setName(String name) {
        this.name = name;
    }

    public String getType() {
        return type;
    }

    public void setType(String type) {
        this.type = type;
    }

    public String getDescription() {
        return description;
    }

    public void setDescription(String description) {
        this.description = description;
    }

    @Override
    public String toString() {
        return "Book{" +
                "id=" + id +
                ", name='" + name + '\'' +
                ", type='" + type + '\'' +
                ", description='" + description + '\'' +
                '}';
    }
}
第四步 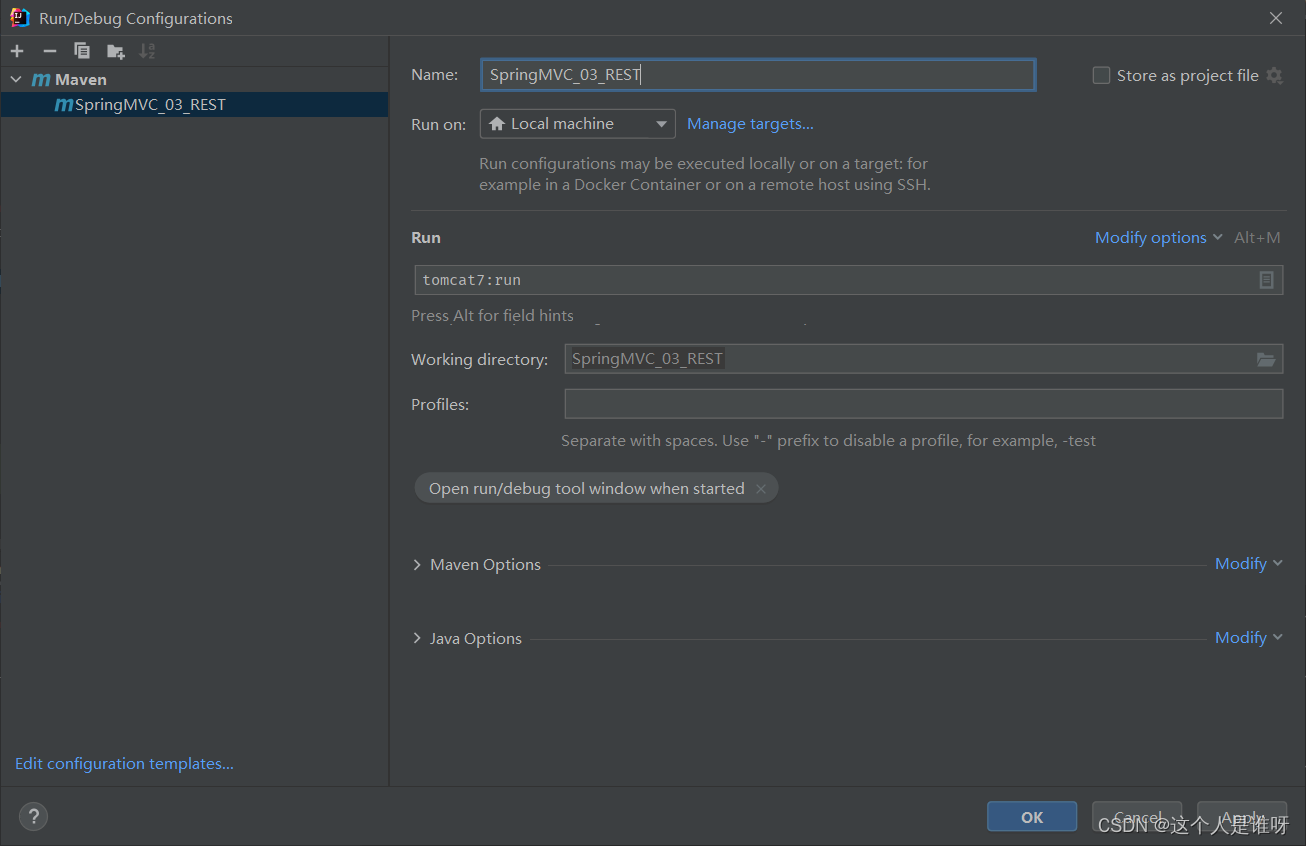
第五步
试试save功能
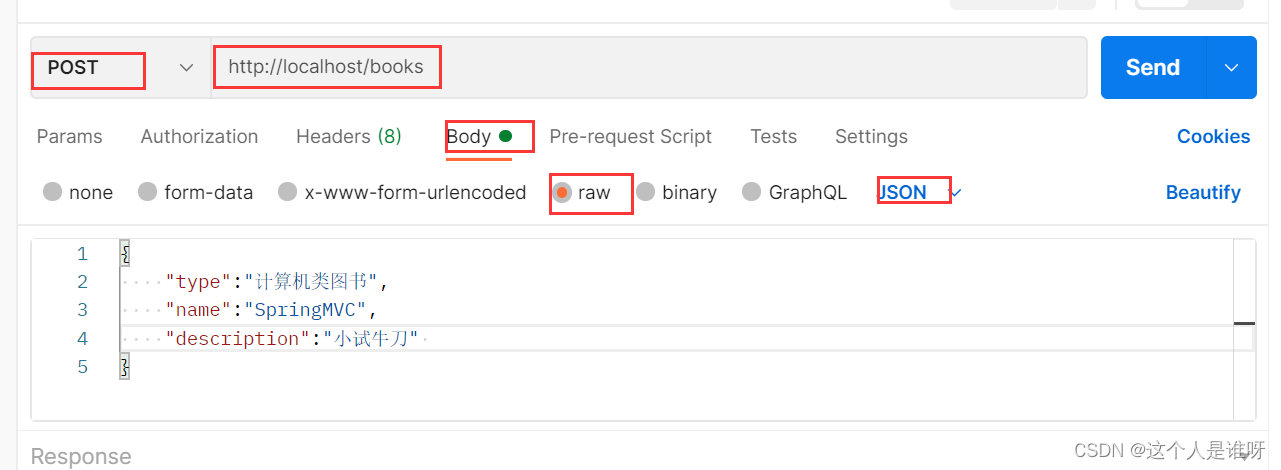
 使用RESTful API实现Java Maven工程的数据交互


 这篇博客介绍了如何基于RESTful风格在Java Maven工程中进行页面数据交互。首先新建了一个Maven工程,接着导入了相关依赖。然后按照功能创建了config、controller和domain三个包,config包包含配置,controller包包含BookController,domain包包含了Book类。最后,通过save功能展示了数据交互的实际操作。


 1122
1122

 被折叠的 条评论
为什么被折叠?
被折叠的 条评论
为什么被折叠?
 到【灌水乐园】发言


