


iOS 练习项目 Landmarks (一):主界面、Model、数据源协议
iOS 练习项目 Landmarks (一):主界面、Model、数据源协议
示例效果
landmarks
主界面设计
分隔线 Divider View 由高度为1、背景色为 lightGray 的 UIView 实现。其他都是系统自带的组件。
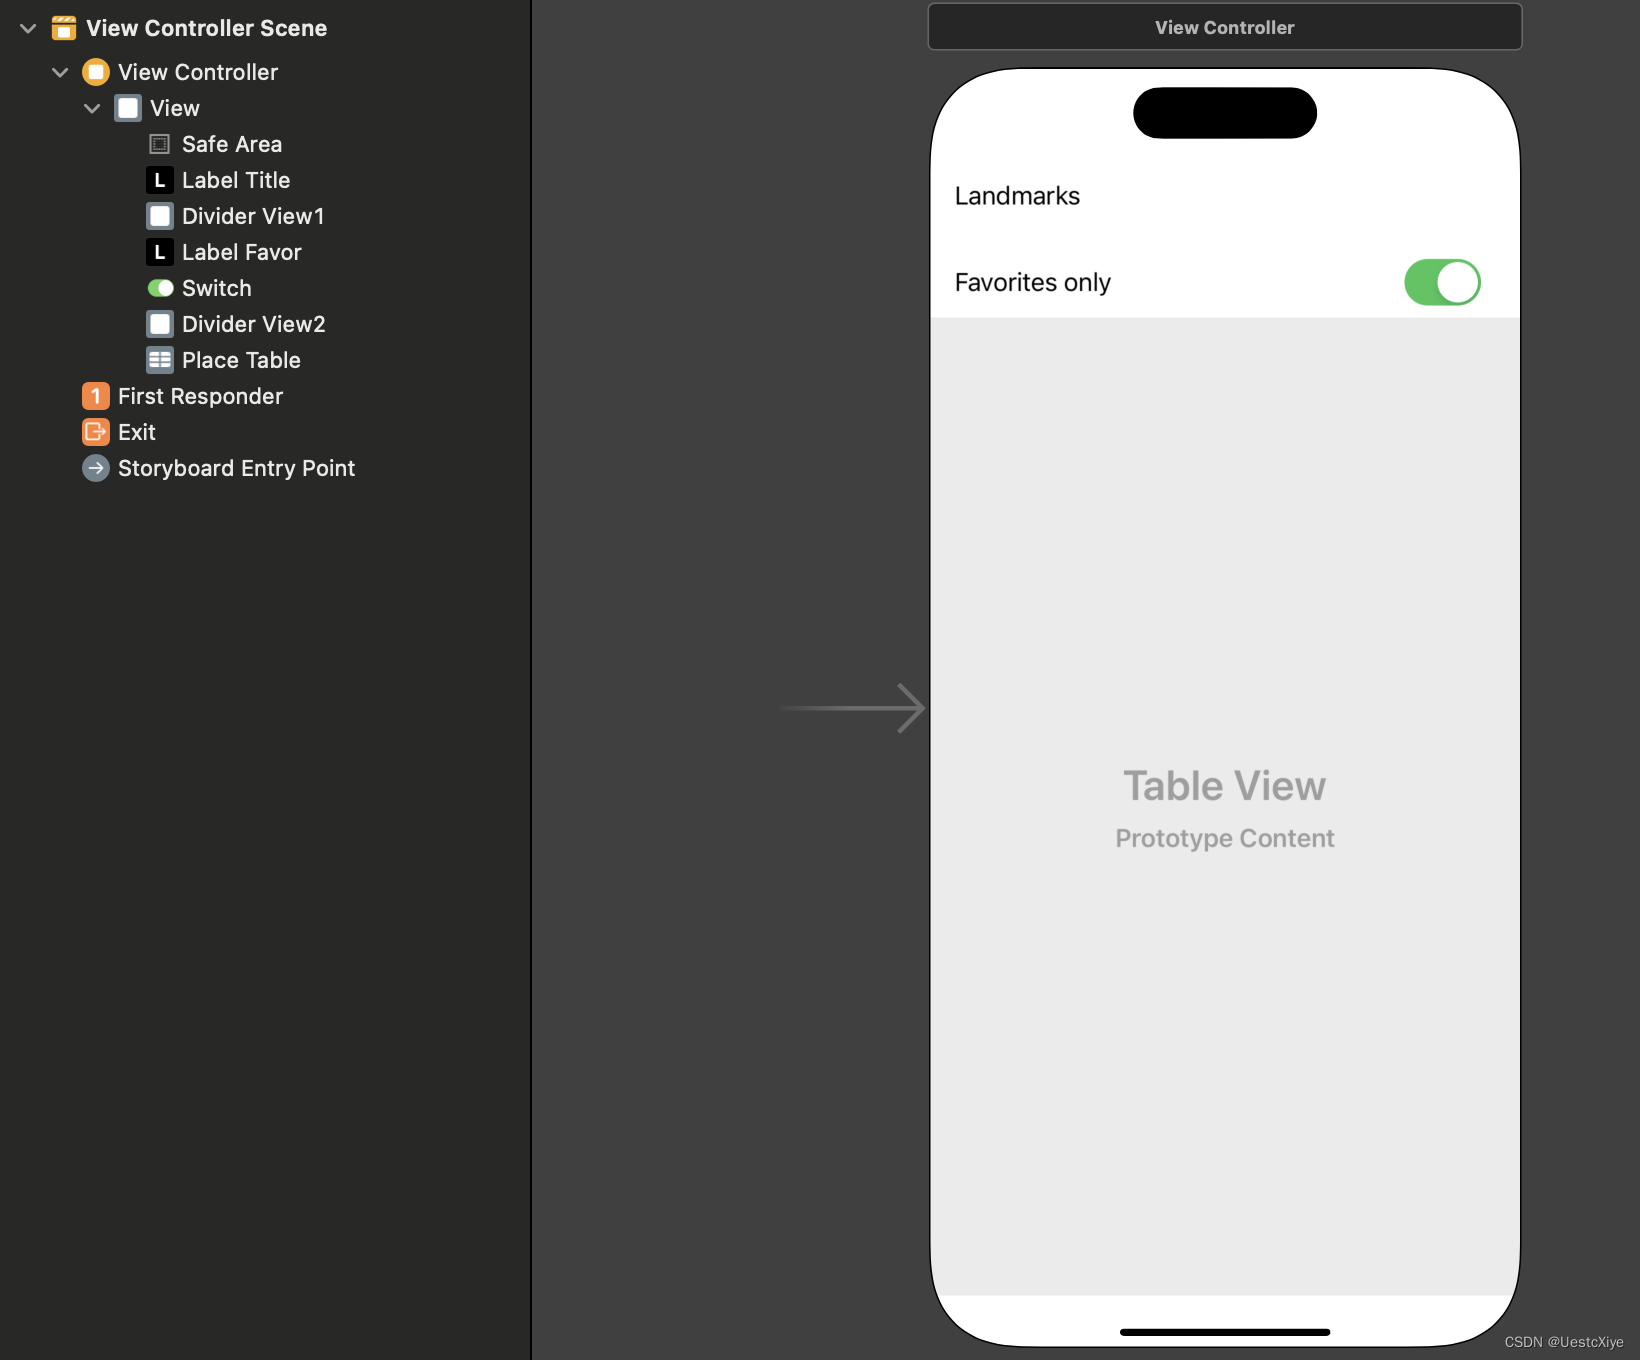
ViewContorller 绑定这些组件:
#import <UIKit/UIKit.h>

@interface ViewController : UIViewController
    <UITableViewDelegate, UITableViewDataSource>
{
    IBOutlet UILabel *labelTitle;
    IBOutlet UIView *dividerView1;
    IBOutlet UILabel *labelFavor;
    IBOutlet UIView *dividerView2;
    IBOutlet UITableView *placeTable;
}
@end
在 viewDidLoad 方法里,把这些组件设置好:
// ViewController.m
...
- (void)viewDidLoad {
    [super viewDidLoad];
    // Do any additional setup after loading the view.
    // 设置应用标题的字体
    UIFont *labelTitleFont = [UIFont fontWithName:@"Helvetica-Bold" size:35];
    [labelTitle setFont:labelTitleFont];
    // 设置分隔线
    [dividerView1 setBackgroundColor:UIColor.lightGrayColor];
    // 设置标签的字体
    UIFont *labelFavorFont = [UIFont systemFontOfSize:18];
    [labelFavor setFont:labelFavorFont];
    // 设置分隔线
    [dividerView2 setBackgroundColor:UIColor.lightGrayColor];
    // 设置 TableView
    [placeTable setRowHeight:60];
    // [placeTable setSeparatorInset:UIEdgeInsetsMake(0, 10, 0, 0)];
    // [placeTable setLayoutMargins:UIEdgeInsetsMake(10, 10, 10, 10)];
    [placeTable setSeparatorStyle:UITableViewCellSeparatorStyleSingleLine];
    [placeTable setSeparatorColor:UIColor.lightGrayColor];
    ...
}
模型(Model)设计
一个景点由 6 个属性构成:景点、景区、所在州(省)、照片、是否收藏(和 UITableViewCell 里的五角星图案相关)、经纬度(用于设置详情页里的背景地图)。
// Place.h
#import <Foundation/Foundation.h>
#import <MapKit/MapKit.h>

NS_ASSUME_NONNULL_BEGIN

@interface Place : NSObject

@property (nonatomic) NSString *sight; // 景点
@property (nonatomic) NSString *scenicArea; // 景区
@property (nonatomic) NSString *state; // 所在州
@property (nonatomic) UIImage *picture; // 照片
@property (nonatomic) BOOL favorite; // 收藏
@property (nonatomic) CLLocation* location; // 经纬度

- (instancetype)initWithPSight:(NSString *)s
                    scenicArea:(NSString *)sa
                    state:(NSString *)st
                    picture:(UIImage *)pic
                    favorite:(BOOL)f
                    location:(CLLocation *)loc;

@end

NS_ASSUME_NONNULL_END

// Place.m
#import "Place.h"

@implementation Place

- (instancetype)initWithPSight:(NSString *)s
                    scenicArea:(NSString *)sa
                    state:(NSString *)st
                    picture:(UIImage *)pic
                    favorite:(BOOL)f
                    location:(CLLocation *)loc
{
    self = [super init];
    if (self)
    {
        _sight = [s copy];
        _scenicArea = [sa copy];
        _state = [st copy];
        _picture = [pic copy];
        _favorite = f;
        _location = [loc copy];
    }
    return self;
}

@end
使用 CLLocation 的前提是导入 MapKit 开发组件。
数据源协议和初始化
数据都是死的,places 数组存储一个个 Place 对象,initPlaces 负责初始化 places 数组。
#import <UIKit/UIKit.h>

@interface ViewController : UIViewController
    <UITableViewDelegate, UITableViewDataSource>
{
    ...
}
@property (nonatomic) NSMutableArray *places;

- (void)initPlaces;

@end
// ViewController.m
...
- (void)viewDidLoad {
    [super viewDidLoad];
    // Do any additional setup after loading the view.
    ...
    // 将当前对象设置为 UITableView 对象的 dataSource
    [placeTable setDataSource:self];
    placeTable.delegate = self;
    // 需要创建新的单元格时,告诉 UITableView 对象要实例化哪个类
    [placeTable registerClass:[UITableViewCell class] forCellReuseIdentifier:@"Cell"];

    [self initPlaces];
}

#pragma mark - 初始化 places 数组

- (void)initPlaces
{
    // 创建数组
    self.places = [NSMutableArray array];
    // 添加数据
    Place *p1 = [[Place alloc] init];
    [p1 setSight:@"九龙瀑"];
    [p1 setScenicArea:@"黄山"];
    [p1 setState:@"安徽省黄山市"];
    [p1 setPicture:[UIImage imageNamed:@"Image_HuangShan"]];
    [p1 setFavorite:false];
    [p1 setLocation:[[CLLocation alloc] initWithLatitude:30.13 longitude:118.09]];
    [self.places addObject:p1];

    Place *p2 = [[Place alloc] initWithPSight:@"祈年殿" scenicArea:@"天坛" state:@"北京市" picture:[UIImage imageNamed:@"Image_TianTan"] favorite:true location:[[CLLocation alloc] initWithLatitude:39.91 longitude:116.43]];
    [self.places addObject:p2];
}

#pragma mark - 管理表格视图

// 根据指定的表格段索引给出相应表格段所包含的行数
- (NSInteger)tableView:(UITableView *)tableView numberOfRowsInSection:(NSInteger)section
{
    // 只有一个表格段,所以直接返回任务数组的对象个数
    return [self.places count];
}
// 根据指定的表格段索引和行索引给出相应的 UITableViewCell 对象
- (UITableViewCell *)tableView:(UITableView *)tableView cellForRowAtIndexPath:(NSIndexPath *)indexPath
{
    // 创建新的 UITableViewCell 对象
    UITableViewCell *cell = [[UITableViewCell alloc] initWithStyle:UITableViewCellStyleDefault reuseIdentifier:nil];
    // NSLog(@"image width: %f, image height: %f",cell.imageView.frame.size.width, cell.imageView.frame.size.height);
    // NSLog(@"cell width: %f, cell height: %f",cell.contentView.frame.size.width, cell.contentView.frame.size.height);

    // 根据模型对象(places 数组)重新设置 UITableViewCell 对象
    Place *item = [self.places objectAtIndex:indexPath.row];
    cell.imageView.image = [item picture];
    // NSLog(@"image width: %f, image height: %f",cell.image.size.width, cell.image.size.height);
    cell.textLabel.text = [item sight]; // 中间文字
    cell.accessoryType = UITableViewCellAccessoryDisclosureIndicator; // 辅助指示视图为箭头
    // 返回设置后的 UITableViewCell 对象
    return cell;
}
运行效果
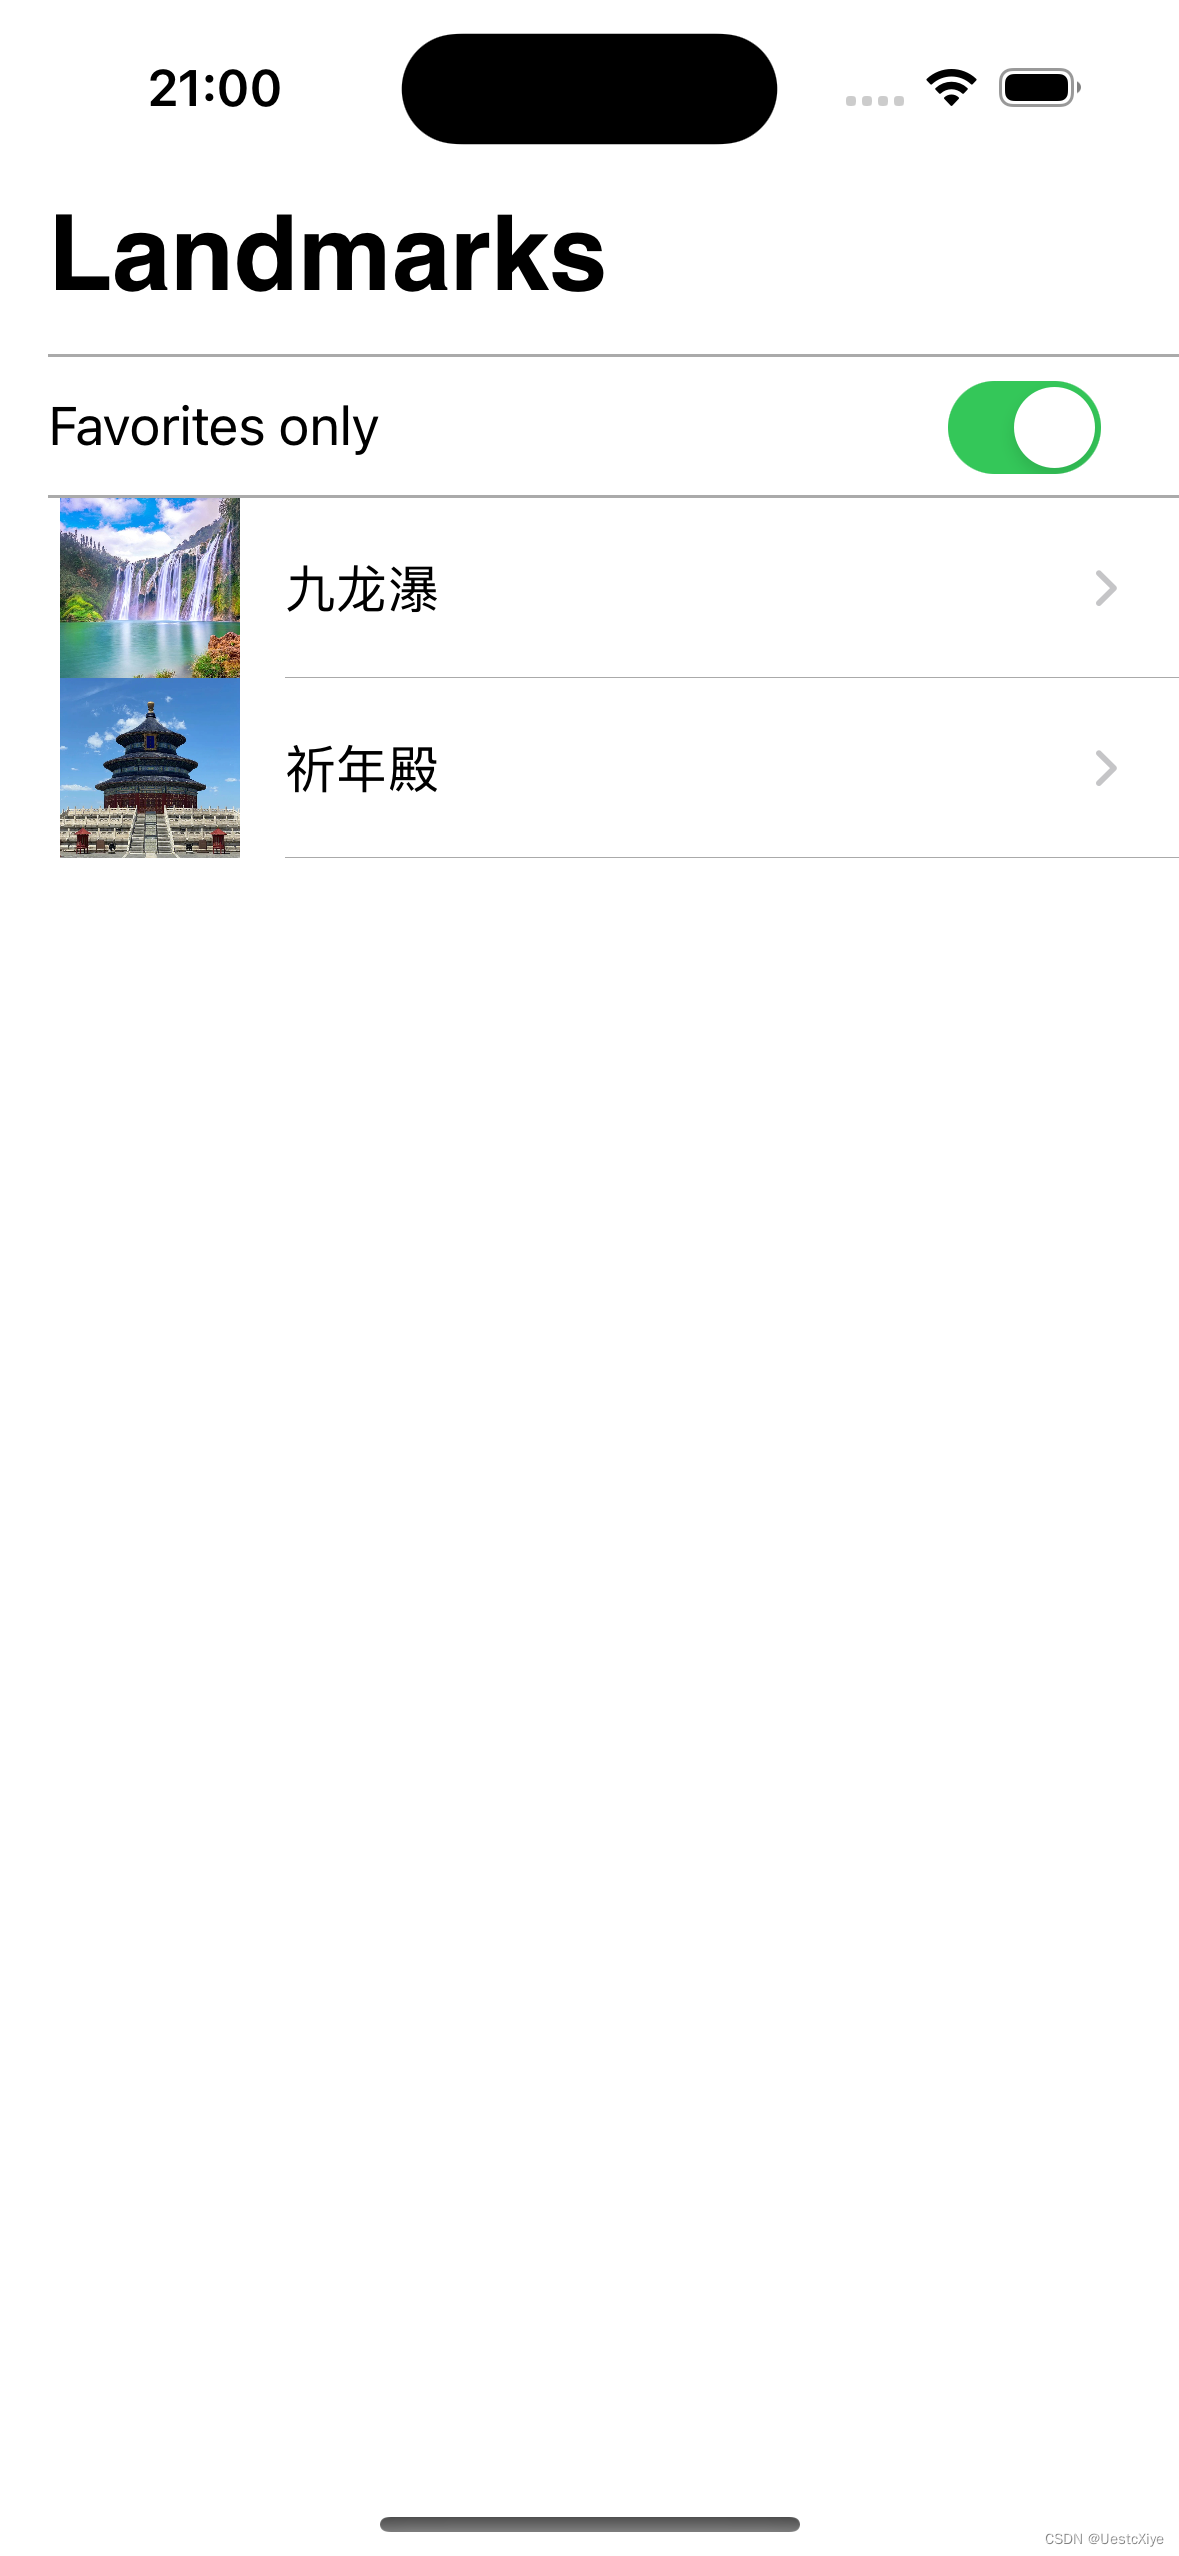
这里只添加了两个 Place 对象,后面搞明白 plist,用那个能批量设置数据,再写 initPlaces 就很方便。


 被折叠的 条评论
为什么被折叠?
被折叠的 条评论
为什么被折叠?
 到【灌水乐园】发言


