


由于项目的定制化,需要canvas绘制机器人及机器人轨道。
1、初始化页面
提前npm安装paper.js,并引入页面中
import paper from 'paper'
<template>
	<div>
		<canvas id="myCanvas" :width="canvasW" height="canvasH" ref="myCanvas"></canvas>
	</div>
</template>
调用方法
this.myPaper = new paper.PaperScope()
this.myPaper.setup(this.$refs.myCanvas);
2、绘制元素
举例,绘制一个需要处理的提示和方框
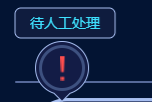
感叹号和其圆圈是直接引入的ui给的图片,人工处理和边框是通过自己绘制的,并且点击文字可以出现一个表格。
//绘制提示框
        drawError(data, index) {
            let that = this
            //绘制提示图标
            let errorBox = new this.myPaper.Raster({//注意用初始化的PaperScope
                source: require("../images/errorBox.png"),
            })
            errorBox.bounds.x = data.x
            errorBox.bounds.y = data.y - 40


            if (data.isError) {
                //人工处理边框
                var rectangle = new this.myPaper.Rectangle({ x: data.x - 20, y: data.y - 73 }, new paper.Size(100, 30));
                var cornerSize = new this.myPaper.Size(6, 6);
                var errorBorder = new this.myPaper.Path.Rectangle(rectangle, cornerSize);
                errorBorder.strokeWidth = 1;
                errorBorder.strokeColor = '#A8BFF1';
                errorBorder.fillColor = '#0F1C3E';
                console.log(errorBorder, 'errorBorder')
                errorBorder.onMouseUp = function () {
                    that.robotData[index].isShow = !that.robotData[index].isShow
                }

                //感叹号
                new this.myPaper.Raster({
                    source: require("../images/error.png"),
                    position: { x: data.x + 28, y: data.y - 13 }
                })

                // 人工处理描述文字
                var stateNameTxt = new this.myPaper.PointText(data.x - 5, data.y - 53);
                stateNameTxt.content = '待人工处理';
                stateNameTxt.fillColor = '#3EE1FF'
                stateNameTxt.fontSize = '14px'
                stateNameTxt.onMouseUp = function () {//点击事件,可以自行编写
                    that.robotData[index].isShow = !that.robotData[index].isShow
                }
            }
        },
其他简单的元素很多都是一样的,甚至都用UI小姐姐给的图片绘制上去。
3、动画
其中有一个元素需要进行移动。由于业务性比较强,所以下面代码不完善展示了,只是讲思路。
想要让一个整体进行移动,于是采用了创建一个Group,将元素都添加到Group中,给Group设置动画onFrame 即可,让动画停止return。
drawTrain() {
     this.trainData.forEach(item => {
                let group = new this.myPaper.Group()
                let tarinFirst = new this.myPaper.Raster({
                    source: require('../images/train-h.png'),
                    position: { x: item.x, y: item.y + 25 }
                });
                group.addChild(tarinFirst)//添加元素
                let destination = 1//移动速度

                group.onFrame = (event) => {//移动的动画   向左或者向右平移所以只改动了bounds.x
                    if (item.direction == 'left' && group.bounds.x > 80) {//向左移动的
                        group.bounds.x -= destination
                        return
                    } else if (item.direction == 'right' && group.bounds.x < (1200 - 180 * 2 - item.children.length * 150 - 104)) {//向右移动的
                        group.bounds.x += destination
                        return
                    }
                }
            })
        },
4、需要注意的
1. view.center和bounds的定位区别
view.center是以中心为基准点,bounds是以左上角为基准
2. 关于层级问题
由于本次项目中涉及到某元素要置于另外一个元素的上方,
解决方案:
①创建一个总的this.paper.Layer(),使用insertChild(index,item)将元素插入特定索引处的组或层中,索引大的在上面
②创建元素的顺序,后创建的会在先创建的上面。
由于元素其实不是特别多,个人使用的是方法②。


 686
686


 被折叠的 条评论
为什么被折叠?
被折叠的 条评论
为什么被折叠?
 到【灌水乐园】发言


