Android Contacts之二根据4.4实现的联系人列表特效

Contacts系列文章

Android Contacts之一联系人列表特效
Android Contacts之二根据4.4实现的联系人列表特效
Android Contacts之三自定义的联系人列表特效


简介

Android 4.4的原生Contacts源码的研究,写了一个仿原生的联系人列表并加了比较酷炫的字母索引表,实现效果如下图:
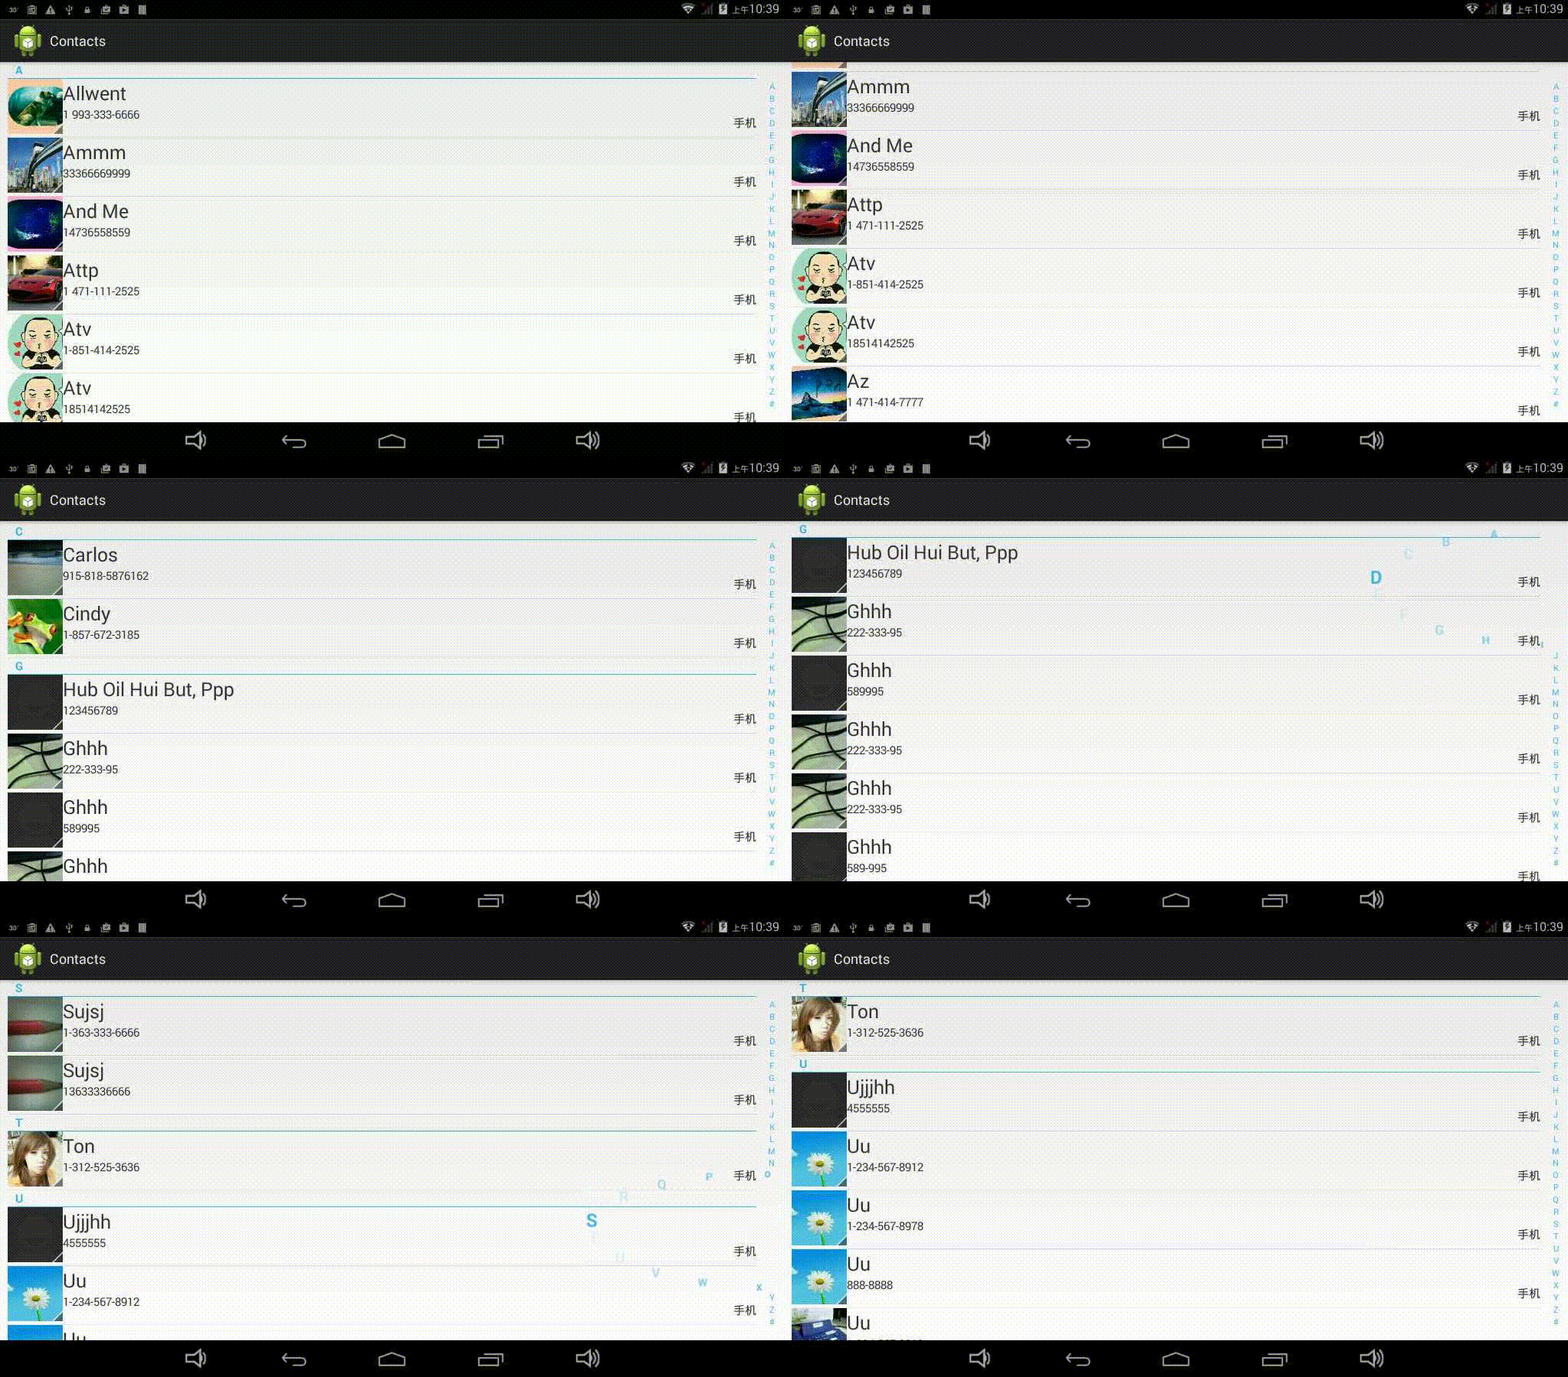
联系人列表
接下来介绍下实现这个联系人需要的关键部分的代码


重要知识点

  • 查询系统联系人电话号码,名字,头像等
String[] projection = { 
            Phone._ID, 
            Phone.DISPLAY_NAME, 
            Phone.NUMBER,
            Phone.SORT_KEY_PRIMARY, 
            Phone.CONTACT_ID, 
            Phone.PHOTO_ID,
            Phone.LOOKUP_KEY };
//按sort_key升序查询
queryHandler.startQuery(0, null, Phone.CONTENT_URI, projection, null,
                null, "sort_key COLLATE LOCALIZED asc");

//所需权限
<uses-permission android:name="android.permission.READ_CONTACTS" />
  • 获取系统联系人头像
//获取系统联系人的photoid和contactid,如果photoid不为0就可以得到其头像图片
Uri uri = ContentUris.withAppendedId(ContactsContract.Contacts.CONTENT_URI, contactid);
InputStream input = ContactsContract.Contacts.openContactPhotoInputStream(context.getContentResolver(), uri);
Bitmap contactPhoto = BitmapFactory.decodeStream(input);
  • 获取索引
//原生的4.4系统就是使用下面这个uri获取联系人数据的
public static final Uri CONTENT_CALLABLES_URI = Uri.withAppendedPath(ContactsContract.Data.CONTENT_URI, "callables").buildUpon()
                .appendQueryParameter(ContactsContract.DIRECTORY_PARAM_KEY, "0")
                .appendQueryParameter("address_book_index_extras", "true")
                .appendQueryParameter("remove_duplicate_entries", "true")
                .build();

//cursor来自于CONTENT_CALLABLES_URI请求后获取到的cursor,由于这个是原生的方法,所以在第三方固件可能不适用,需要自己做相应的处理
Bundle bundle = cursor.getExtras();
if (bundle.containsKey("address_book_index_titles")) {
    String sections[] = bundle.getStringArray("address_book_index_titles");
    int counts[] = bundle.getIntArray("address_book_index_counts");
    sectionIndexer = new ContactsSectionIndexer(sections, counts);
}

ContactsSectionIndexer.java这个类从原生的Contacts中提取出来的做了部分修改。

public class ContactsSectionIndexer implements SectionIndexer {

    private String[] mSections;
    private int[] mPositions;
    private int mCount;
    private static final String BLANK_HEADER_STRING = " ";

    /**
     * Constructor.
     *
     * @param sections a non-null array
     * @param counts a non-null array of the same size as <code>sections</code>
     */
    public ContactsSectionIndexer(String[] sections, int[] counts) {
        if (sections == null || counts == null) {
            throw new NullPointerException();
        }

        if (sections.length != counts.length) {
            throw new IllegalArgumentException(
                    "The sections and counts arrays must have the same length");
        }


        this.mSections = sections;
        mPositions = new int[counts.length];
        int position = 0;
        for (int i = 0; i < counts.length; i++) {
            if (TextUtils.isEmpty(mSections[i])) {
                mSections[i] = BLANK_HEADER_STRING;
            } else if (!mSections[i].equals(BLANK_HEADER_STRING)) {
                mSections[i] = mSections[i].trim();
            }

            mPositions[i] = position;
            position += counts[i];
        }
        mCount = position;
    }

    public Object[] getSections() {
        return mSections;
    }

    public int getPositionForSection(int section) {
        if (section < 0 || section >= mSections.length) {
            return -1;
        }

        return mPositions[section];
    }

    public int getSectionForPosition(int position) {
        if (position < 0 || position >= mCount) {
            return -1;
        }

        int index = Arrays.binarySearch(mPositions, position);

        /*
         * Consider this example: section positions are 0, 3, 5; the supplied
         * position is 4. The section corresponding to position 4 starts at
         * position 3, so the expected return value is 1. Binary search will not
         * find 4 in the array and thus will return -insertPosition-1, i.e. -3.
         * To get from that number to the expected value of 1 we need to negate
         * and subtract 2.
         */
        return index >= 0 ? index : -index - 2;
    }

    public int getPositionForSections(String s) {
        int position = -1;
        for (int i = 0; i < mSections.length; i++) {
            if (mSections[i].equals(s)) {
                position = getPositionForSection(i);
                break;
            }
        }

        return position;
    }
}
  • 字母索引的特效

Sidebar这个就不多说了,直接看源码就好了。


总结

重要的知识点就是上面这几个了,如果对于联系人特效感兴趣可以看这篇文章Android Contacts之一联系人列表特效,这里介绍了一些博主写的特效可供参考。
当然,本文给的获取联系人的数据是4.4原生的方式,好像对于中文索引这一块也不支持,所以在国内使用的话,还要做中文转拼音的操作,再做一个字母索引,而不是使用系统的方式获取索引。

源码下载

  • 0
    点赞
  • 0
    收藏
    觉得还不错? 一键收藏
  • 0
    评论
以下是一个简单的 Android 实现 QQ 联系人列表的源码示例: 1. 在布局文件中定义一个 ListView 控件,用于展示联系人列表: ```xml <ListView android:id="@+id/listView" android:layout_width="match_parent" android:layout_height="match_parent" /> ``` 2. 创建一个 Contact 类,用于表示每个联系人的信息: ```java public class Contact { private String name; private String avatarUrl; // 其他联系人信息的字段 public Contact(String name, String avatarUrl) { this.name = name; this.avatarUrl = avatarUrl; } // getter 和 setter 方法 } ``` 3. 创建一个 ContactAdapter 类,继承自 BaseAdapter,用于在 ListView 中展示联系人列表: ```java public class ContactAdapter extends BaseAdapter { private List<Contact> contacts; private Context context; public ContactAdapter(Context context, List<Contact> contacts) { this.context = context; this.contacts = contacts; } @Override public int getCount() { return contacts.size(); } @Override public Object getItem(int position) { return contacts.get(position); } @Override public long getItemId(int position) { return position; } @Override public View getView(int position, View convertView, ViewGroup parent) { if (convertView == null) { convertView = LayoutInflater.from(context).inflate(R.layout.item_contact, parent, false); } Contact contact = contacts.get(position); ImageView avatarImageView = convertView.findViewById(R.id.avatarImageView); TextView nameTextView = convertView.findViewById(R.id.nameTextView); // 设置联系人头像和姓名 Glide.with(context).load(contact.getAvatarUrl()).into(avatarImageView); nameTextView.setText(contact.getName()); return convertView; } } ``` 4. 创建一个 item_contact.xml 布局文件,用于展示每个联系人的头像和姓名: ```xml <RelativeLayout xmlns:android="http://schemas.android.com/apk/res/android" android:layout_width="match_parent" android:layout_height="80dp" android:padding="16dp"> <ImageView android:id="@+id/avatarImageView" android:layout_width="50dp" android:layout_height="50dp" android:src="@drawable/avatar_placeholder" android:scaleType="centerCrop" /> <TextView android:id="@+id/nameTextView" android:layout_width="wrap_content" android:layout_height="wrap_content" android:layout_alignTop="@id/avatarImageView" android:layout_marginStart="16dp" android:textSize="18sp" android:textColor="@android:color/black" android:text="联系人姓名" /> </RelativeLayout> ``` 5. 在 MainActivity 中获取联系人列表数据,将其展示在 ListView 中: ```java public class MainActivity extends AppCompatActivity { private ListView listView; @Override protected void onCreate(Bundle savedInstanceState) { super.onCreate(savedInstanceState); setContentView(R.layout.activity_main); listView = findViewById(R.id.listView); // 模拟获取联系人列表数据 List<Contact> contacts = new ArrayList<>(); contacts.add(new Contact("张三", "https://xxx.com/avatar1.jpg")); contacts.add(new Contact("李四", "https://xxx.com/avatar2.jpg")); contacts.add(new Contact("王五", "https://xxx.com/avatar3.jpg")); // 创建联系人列表适配器 ContactAdapter adapter = new ContactAdapter(this, contacts); // 设置联系人列表适配器 listView.setAdapter(adapter); } } ``` 这样就实现了一个简单的 QQ 联系人列表。请注意,这只是一个简单的示例,实际开发中可能需要更复杂的逻辑和界面设计。

“相关推荐”对你有帮助么?

  • 非常没帮助
  • 没帮助
  • 一般
  • 有帮助
  • 非常有帮助
提交
评论
添加红包

请填写红包祝福语或标题

红包个数最小为10个

红包金额最低5元

当前余额3.43前往充值 >
需支付:10.00
成就一亿技术人!
领取后你会自动成为博主和红包主的粉丝 规则
hope_wisdom
发出的红包
实付
使用余额支付
点击重新获取
扫码支付
钱包余额 0

抵扣说明:

1.余额是钱包充值的虚拟货币,按照1:1的比例进行支付金额的抵扣。
2.余额无法直接购买下载,可以购买VIP、付费专栏及课程。

余额充值